There are plenty of data recovery programs available on the internet. However, not all of them come with good functionality. But if you ask many netizens, TestDisk is one highly recommended open-source data recovery program.
A standout feature of TestDisk is that it's open-source, unlike other data recovery software on the internet, which means you don't have to spend cash to use it. So, let's see how you can recover your missing files using TestDisk on a Windows PC.
How to Download and Install TestDisk
Downloading TestDisk is a relatively simple affair. However, you will need archiving software to unpack the contents of the TestDisk package. To make things easier, look at the best tools you can use to open RAR files.
- First, download and install WinRAR. You can skip this step if you already have an archiving program on your computer.
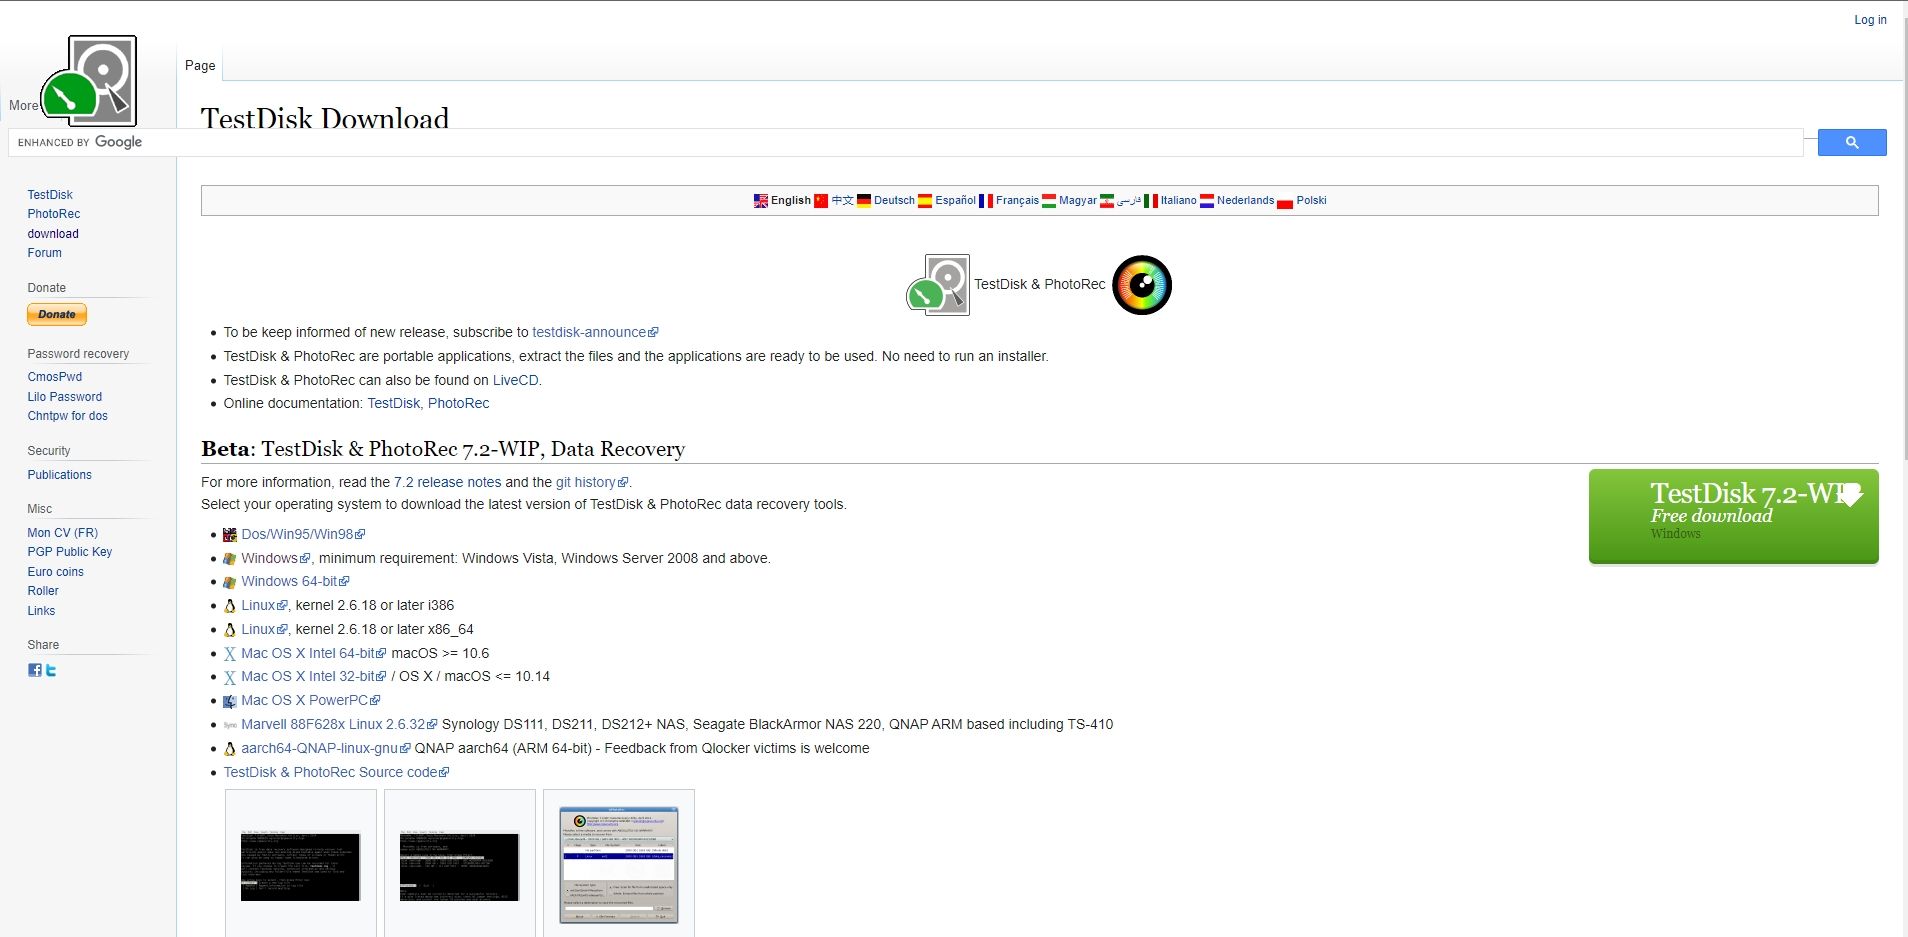
- Now, go to the TestDisk download page, and click on the Windows link. You can also click on the green download button on the right side of the webpage.
- The download will begin automatically.
- Once the download is complete, open the RAR file using your preferred archiving app.
- Use the Extract button to unpack the contents to a directory of your choice.
There is no installation wizard that users need to go through. After unpacking the contents of the downloaded file, you are ready to go.
Additionally, the latest version of TestDisk is usually in its beta stage and therefore may not work on some computers. If you're facing any issue with the recovery app, visit the TestDisk download page, scroll down, and download the latest stable release of TestDisk. The installation process will still remain exactly the same.
Recover Files From a USB Drive
Since TestDisk does not have a GUI, the data recovery process may seem complicated at first. But, it becomes easier with every subsequent attempt. Also, TestDisk has extensive documentation that can prove useful if you run into any hiccups during data recovery.
Using TestDisk, you can recover data from storage devices such as USBs, hard drives, and even storage area networks (SANs)—one of the major types of network storage solutions.
However, remember not to write new data to the hard drive or storage device that suffered data loss before recovery. Doing so can permanently overwrite the previous data, making a recovery impossible.
Data recovery from a USB drive, using TestDisk, will look like this:
- Open TestDisk using the testdisk_win.exe file located in the TestDisk directory. Ensure that you run the program as administrator.
- In the console window, you'll be prompted to create, append, or not create a log file. Choose whatever option you desire using the arrow keys. Press Enter to select an option.
- You'll be asked to select the storage media on the next screen.
- Use the arrow keys to navigate, and select the USB drive. It should have Generic Flash Disk written next to it.
- You'll now be prompted to choose a partition table type. Pick whatever option is highlighted by default, i.e., simply press Enter.
- Use the arrow keys to highlight Advanced and press Enter.
- Again, use the left and right arrow keys to highlight the Undelete option at the bottom of the screen.
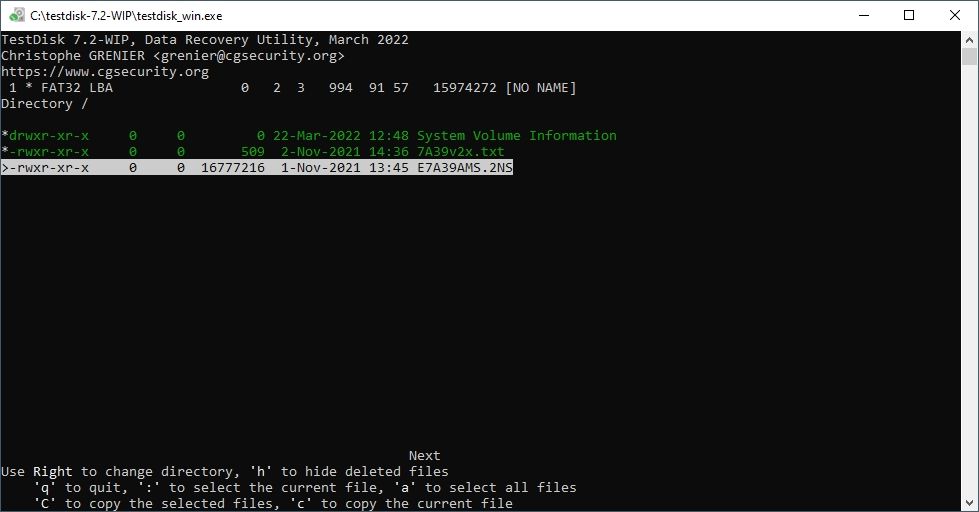
- TestDisk will display a list of all recoverable, deleted files.
- Use the arrow keys to navigate the files and press the ':' key to select the highlighted files. Alternatively, you can press the a button (case-sensitive) to select all the files.
- After selecting the files, press C (upper-case) to copy the selected files.
- TestDisk will now ask you to select a recovery folder, where the app will copy the deleted files.
- Use the left arrow key to go to the parent directory. Press Enter to select a folder.
- When you've navigated to the desired folder, press C (upper-case) to recover the deleted files to that location.
Recover Deleted Data From a Hard Disk Drive
The data recovery procedure in a hard drive, using TestDisk, will be quite similar to the process used in the case of a USB drive. Just keep in mind not to copy the deleted files to the same partition that was affected by data loss.
- Open TestDisk using the testdisk_win.exe file located in the TestDisk folder. You need to have administrative privileges for the program to run correctly.
- In the console window, you'll be asked to create, append, or not create a log file. Choose the option you desire using the arrow keys. Press Enter to select an option.
- You'll be asked to select the storage media on the next screen.
- Use the arrow keys to navigate, and select the hard disk drive. Usually, TestDisk will list the exact model name of the hard drive and the storage size to make the selection easier.
- You'll now be prompted to choose a partition table type. Pick whatever option is highlighted by default, i.e., simply press Enter.
- Use the arrow keys to highlight Advanced and press Enter.
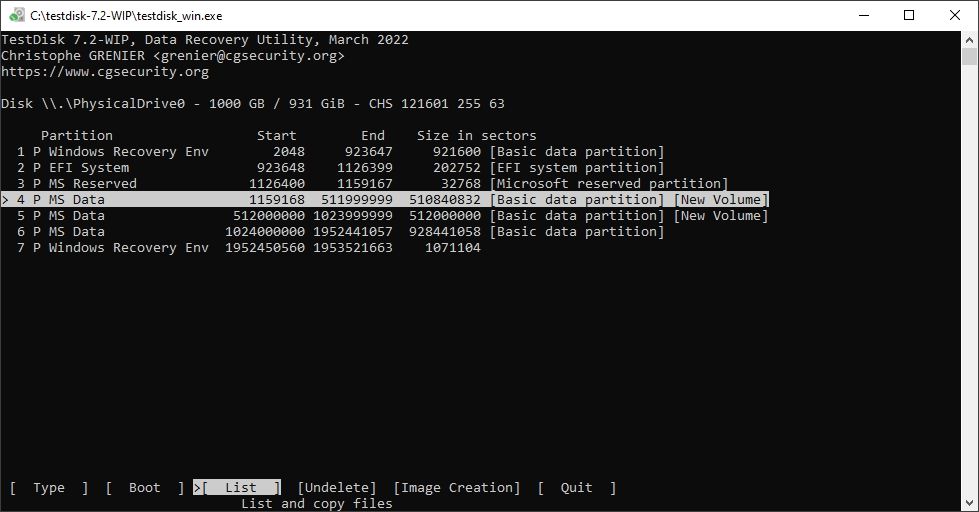
- TestDisk will present a list of all the partitions on your PC. You will be able to find the partition's name in square brackets [].
- Use the up and down arrow keys to highlight the partition you want to recover data from. Then, using the left and right arrow keys, go to Undelete and press Enter.
- Use the arrow keys to navigate through the files and press the ':' key to select the highlighted files. Alternatively, you can press the a button (case-sensitive) to select all the files.
- After selecting the files, press C (upper-case) to copy the selected files.
- TestDisk will now ask you to select a recovery folder, where the recovery app will copy the deleted files.
- Use the left arrow key to go to the parent directory. Press Enter to select a folder.
- When you've navigated to the desired folder, press C (upper-case) to recover the deleted files to that location.
While data loss can happen to anyone, you can help prevent it by choosing the most reliable hard drives you can buy. These
Data Recovered
TestDisk is a capable data recovery program that can recover your data for free. However, a significant shortcoming of the program is its lack of a GUI, which deters novice PC users from downloading it. Nevertheless, it's a powerful tool to help you retrieve the information you lost.
Nevertheless, to avoid the trouble of having to retrieve data (or potentially losing it forever), you must have an effective data backup schedule in place.


