Suffering data loss on Mac is one of those things that everyone thinks will never happen to them… until it does. Don't worry, though, because there are many ways through which you can recover your erased data.
Examples of recovery methods include using data recovery apps and restoring from a Time Machine backup. Which method you decide to use depends on how many files you want to restore, whether you have a backup available or not, and how much time has passed since the files were erased.
Can You Recover Your Mac Data?
There are many ways in which data can be deleted on Mac. In most cases, you'll have no problem recovering it. The data recovery method you should use depends on how your data was erased.
For example, if you've accidentally erased your drive using Disk Utility on Mac, you can still recover it if you used one of the quicker and less thorough security options (like Fastest or Fast). To recover your data in this circumstance, open Disk Utility and, in the sidebar, select the volume where you want the erased data to be saved. Click Restore and select Time Machine Backup.
There are many other ways through which your data could be erased. For example, if you manually deleted a file, you can restore it from Trash or by using the undo command. If you lost your data because your drive became corrupted, you might be able to restore via a backup. If none of these methods work, you can use data recovery software or even contact a data recovery specialist.
We'll go through each data recovery method in turn and you can choose which is suitable for your circumstance; you might need to use a combination of methods.
1. Use the Undo Command
With the undo command, you'll be able to restore your file immediately. This is the easiest way to recover a file you accidentally deleted (you can also use it for recovering multiple files), but it has to be done fast. It won't work if you perform another action after deleting the file or exit Finder.
To do this, press Command + Z (in fact, this shortcut works in many programs, not just Finder). Alternatively, in Finder, click Edit in the menu bar and select Undo from the dropdown menu.
2. Check Your Trash on Mac
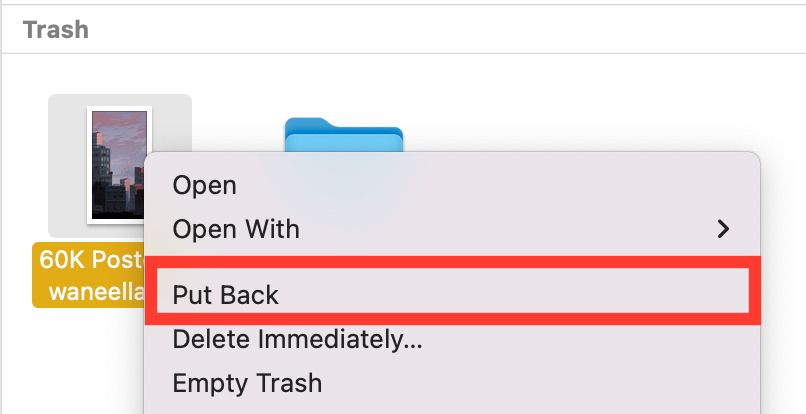
If you accidentally deleted some files, check your Trash. This method works best if you don’t empty your Trash regularly. You don’t need any backup, and it doesn’t matter how much time has passed since the files were deleted. The files you accidentally deleted will still be in Trash and you can restore them easily.
Open Trash and right-click the file you want to restore. Click Put Back and the file will be moved back to its original location. If, however, your Trash is empty, then you’ll have to use other methods.
3. Use Time Machine to Recover Erased Data
Time Machine is a built-in backup tool on Mac that can help you recover erased data from a backup. Once you’ve set it up, it can back up data automatically on an hourly, daily, and weekly basis. You have to use Time Machine to create a backup first in order to restore data from it. Without a backup, Time Machine can’t recover any erased data.
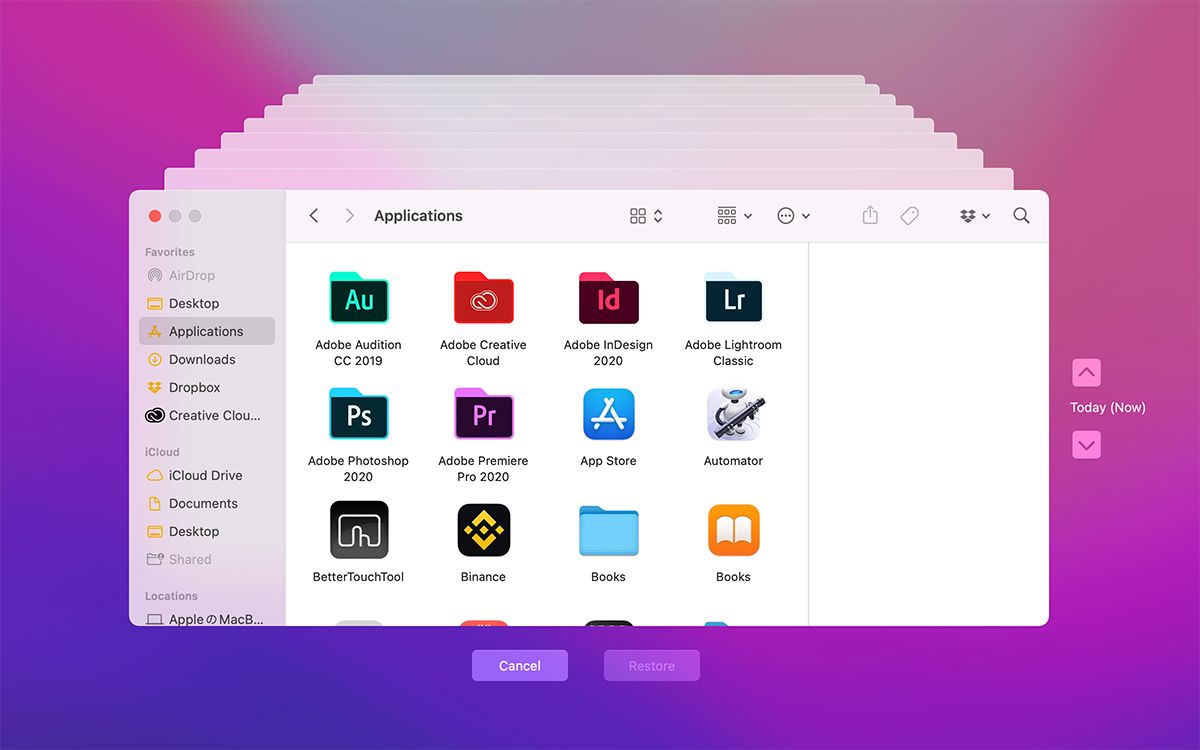
There are various methods to restore data with Time Machine. You can restore specific files and folders with Time Machine and even preview them before you recover them. With the app open, click the Time Machine symbol in the menu bar and select Enter Time Machine. Browse through the different backup versions and restore the files you want to recover.
If you want to recover your entire startup disk, you have to restart your Mac and restore from Time Machine in the macOS Recovery system. Booting your Mac in the macOS Recovery system will prevent your system from overwriting the deleted files, so it’s best if you do this right after your data has accidentally been erased.
To go into macOS Recovery system on an M1 Mac, press the power button on your Mac and hold it until the Apple logo appears on the screen.
To go into Recovery mode on an Intel Mac, press and hold the Command + R keys simultaneously until you see the Apple logo. From there, go to the macOS Utilities screen and click Restore from Time Machine.
Choose the disk where you want the files to be restored and wait for the process to finish.
4. Use Data Recovery Software
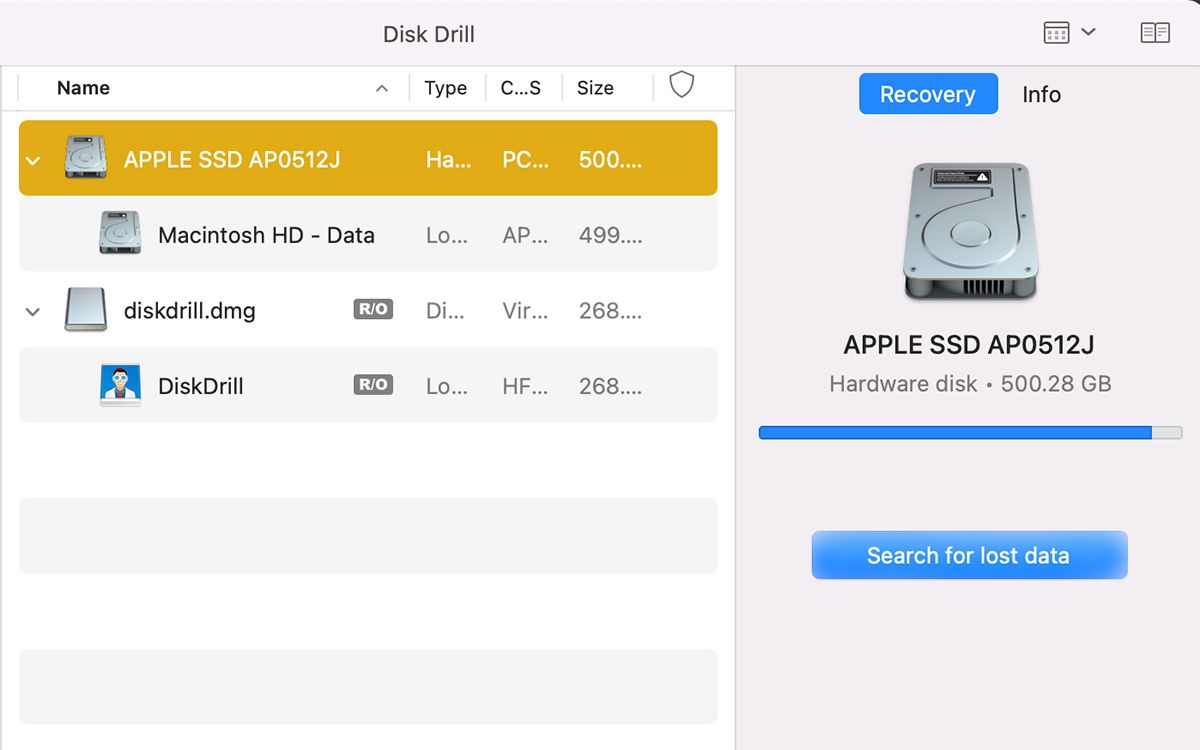
Disk Drill is one of the best data recovery apps. It can help recover data that you thought was long-lost, though it's important to act as quickly as possible; if you wait for too long after the files have been deleted, they’ll be overwritten by new data.
After installing Disk Drill, click Search for lost data to scan the drive that contained the erased data. You can either perform a Quick Scan or a Deep Scan.
A Quick Scan will take a few minutes, but it might not be able to recover all deleted files. It will, however, fetch the metadata of the files it recovers, so you’ll be able to see their actual names when they show up after the scan.
If you can’t find the file you want to recover, you’ll have to perform a Deep Scan. It won’t restore the metadata and the files will be named according to their types, but you’ll be able to preview them. Deep Scan also allows you to recover files that were deleted weeks ago. In most cases, Quick Scan will work just fine, and you won’t have to use Deep Scan.
When Disk Drill finishes scanning, select the files you want to restore and click Recover. If you want to recover all the files, press Command + A at the same time. You’ll be asked to choose a location for them. Make sure you save them in a different place, so you don’t end up overwriting any new files. If your storage drive is failing, it's paramount that you recover to a new drive.
Unfortunately, the free version of Disk Drill has limited features. It only lets you preview files that can be recovered. To actually recover them, you have to buy the pro version which costs $89. If you're not happy about spending money on Disk Drill, you could try recovering deleted files with PhotoRec, a free data recovery software for Mac.
5. Contact a Data Recovery Specialist
Finally, if nothing works, and you're having trouble navigating your way around backup tools and data recovery apps, you can get in touch with a professional data recovery specialist. A data recovery specialist is a certified professional who can recover data from corrupted or partially destroyed drives.
A data recovery specialist is especially useful when your storage device is physically damaged. For example, if you need to recover from a hard disk drive (HDD), a reputable recovery specialist will have a certified clean room in which it's safe to open the drive without the delicate interior being damaged by dust particles.
Always Create a Backup of Your Data
Don’t fret if you’ve lost all your data because there are plenty of ways to get it back. However, don't rely on recovery techniques. Be proactive—creating backups of your files and entire system is a good precaution to take.
Time Machine, Apple’s built-in backup tool, creates backups automatically regularly after you set it up. Having a good backup system in place means you’ll never lose your data, and it should always be your first line of defense against any accidental erasure.


