Have you ever accidentally deleted a file on your Linux machine? Or maybe some program removed an important folder stored on your system storage. In such situations, data recovery software is the only fix to this issue.
TestDisk is one such recovery tool developed for the Linux command line. In this article, we will discuss TestDisk and how to install it, along with a detailed guide on recovering deleted files and folders on your Linux system.
What Is TestDisk?
TestDisk is a reliable and powerful command-line data recovery tool. It is written in the C programming language by Christophe Granier. Apart from Linux, TestDisk is available on almost every other operating system including Microsoft Windows, macOS, and OpenBSD.
TestDisk has functions to:
- Recover a deleted data partition
- Recover a corrupt partition or file
- Restore files from Windows filesystems
- Rebuild boot sectors using data backups
- Recover corrupt FAT32 tables
Since TestDisk can easily recover deleted data partitions, we can use this utility to restore removed files.
However, there's an exception. If someone removed files from your Linux system using the shred utility, then TestDisk won't be able to recover those files. Shred is a command-line utility used to securely delete files which in turn, makes them hard to recover.
How to Install TestDisk
Most Linux distributions don't have TestDisk installed by default. Instead, you will have to manually download and install the package using your system's package manager.
On Debian-based distributions, first enable the universe repository.
sudo add-apt-repository "deb http://archive.ubuntu.com/ubuntu $(lsb_release -sc) universe"
Then, install the testdisk package with apt:
sudo apt install testdisk
Installing TestDisk on Fedora is easy.
sudo dnf install testdisk
To install on Arch-based distros:
sudo pacman -S testdisk
You can use yum to install TestDisk on RHEL and CentOS systems. But first, you need to download a package named epel-release. The epel-release package contains GPG (GNU Privacy Guard) keys for signing packages and package information.
Type any of the following commands to install the package:
        yum install epel-release
yum install https://dl.fedoraproject.org/pub/epel/epel-release-latest-8.noarch.rpm
Now, install TestDisk:
        yum update
yum install testdisk
You can verify the installation by typing the following command in the terminal.
testdisk --version
The output will display version information associated with the testdisk package.
Recover Deleted Files on Linux With TestDisk
The first step to recovering deleted files is creating a log file. A TestDisk log file is important as it'll store essential information related to data recovery and partitions. Even in general, users should prioritize system logging to get insights on activities that happen on their computer.
Step 1: Create a Log File
Launch TestDisk using the following command:
testdisk
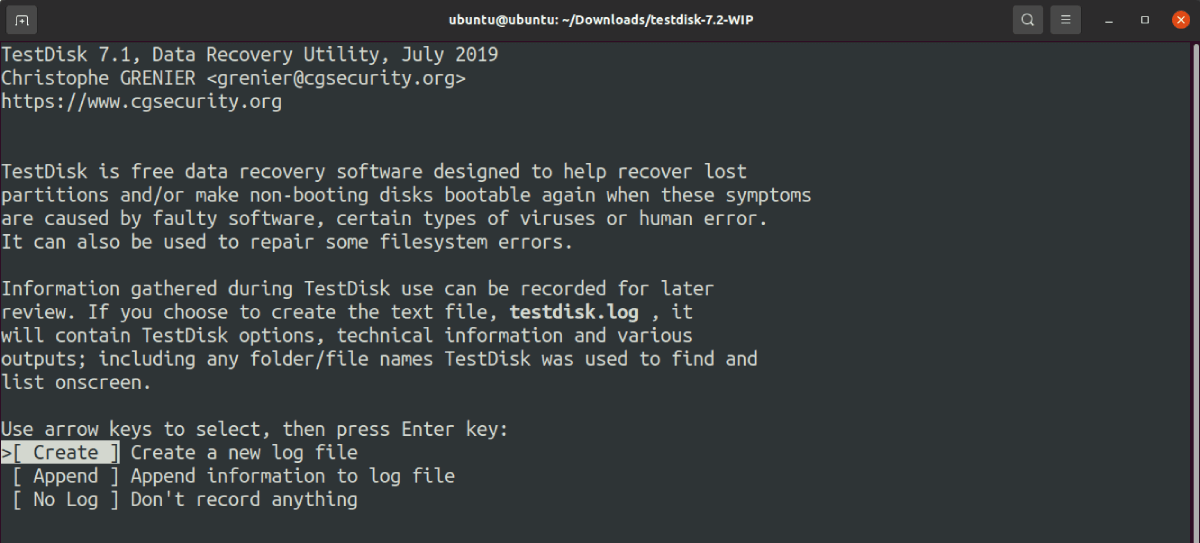
The system will display output as follows. Since TestDisk is an interactive utility, it'll provide you with options on every screen to choose from. Notice in the output below, you have three options: Create, Append, and No Log.
- Create: Creates a new log file for TestDisk
- Append: Used to add additional information to an already existing log file
- No Log: Commands TestDisk not to use a log file for the recovery process
Highlight the Create option using cursor keys and press Enter. Type the superuser password if asked. If you do not have superuser permissions on your account, you can ask the system administrator to add you to the sudoers list.
Step 2: Choose the Recovery Drive
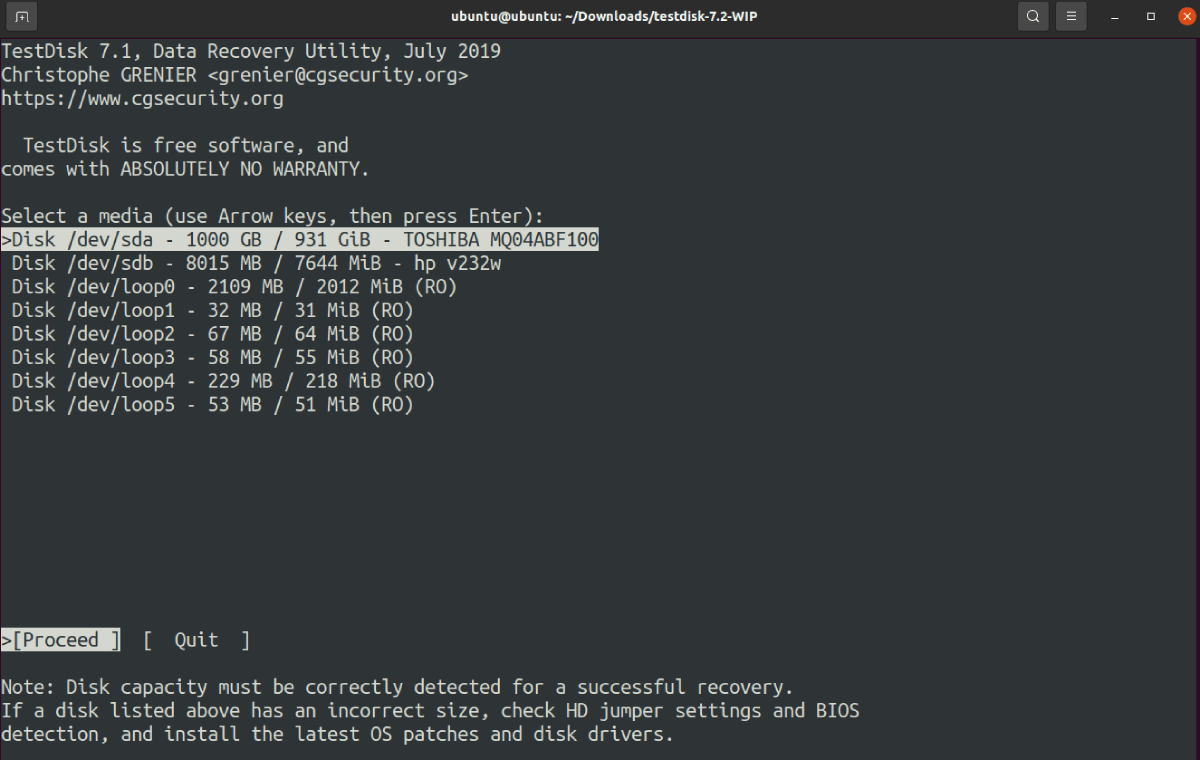
After creating a log file, you need to choose which disk drive you want to recover the data from. The screen will display information associated with each drive on your system, including the drive name and size.
Select the drive of your choice and press Enter.
If you can't find a specific drive, try to launch TestDisk using the sudo testdisk command.
Step 3: Choose the Partition Type
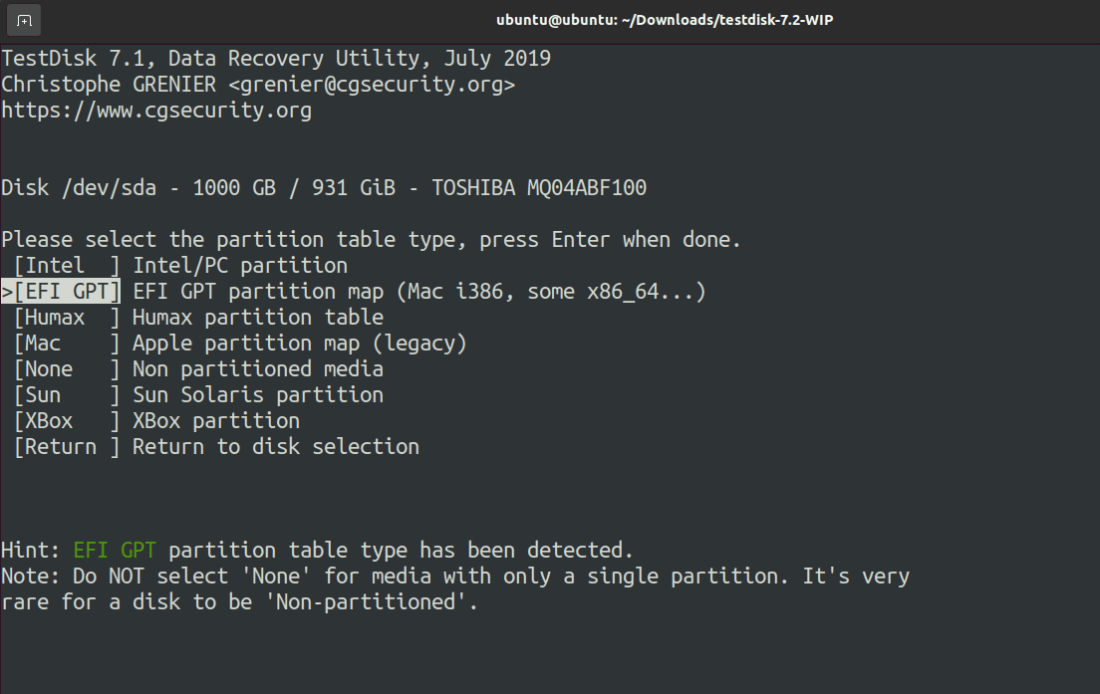
The next step is to select the type of partition you want to recover. If you can't figure out which partition is the right one, simply proceed with the one that TestDisk has highlighted for you.
Users can choose from the following seven partition types.
- Intel
- EFI GPT
- Humax
- Mac
- None
- Sun
- Xbox
Select the most appropriate choice and hit Enter.
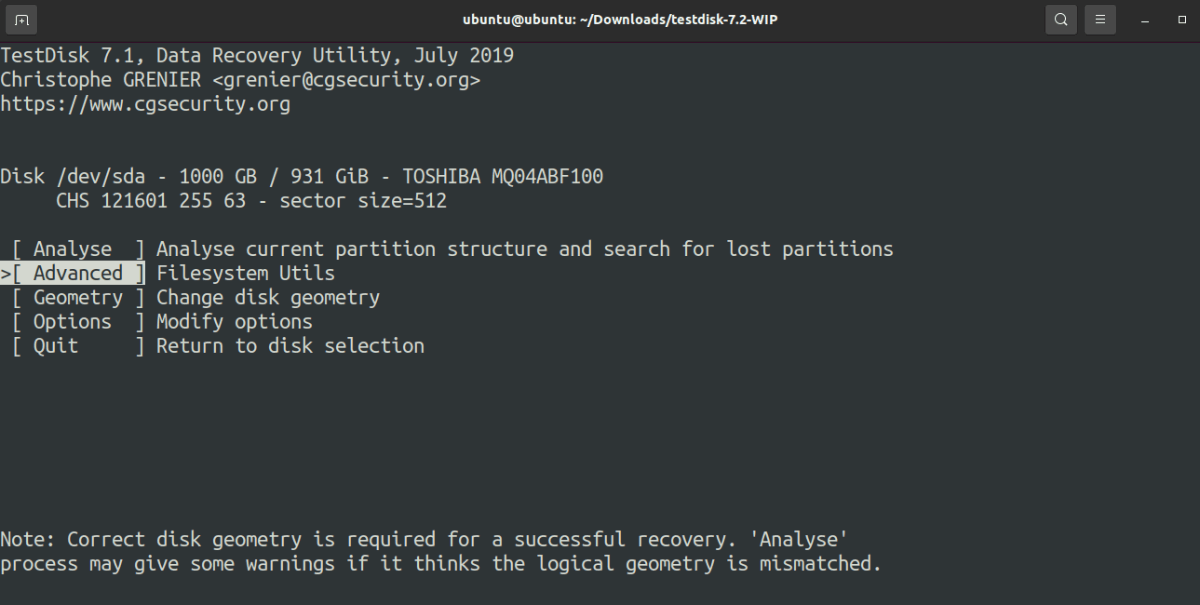
Now, choose recovery options from the list. Although you're free to select any option that suits you best, if you want to restore deleted files, choose Advanced.
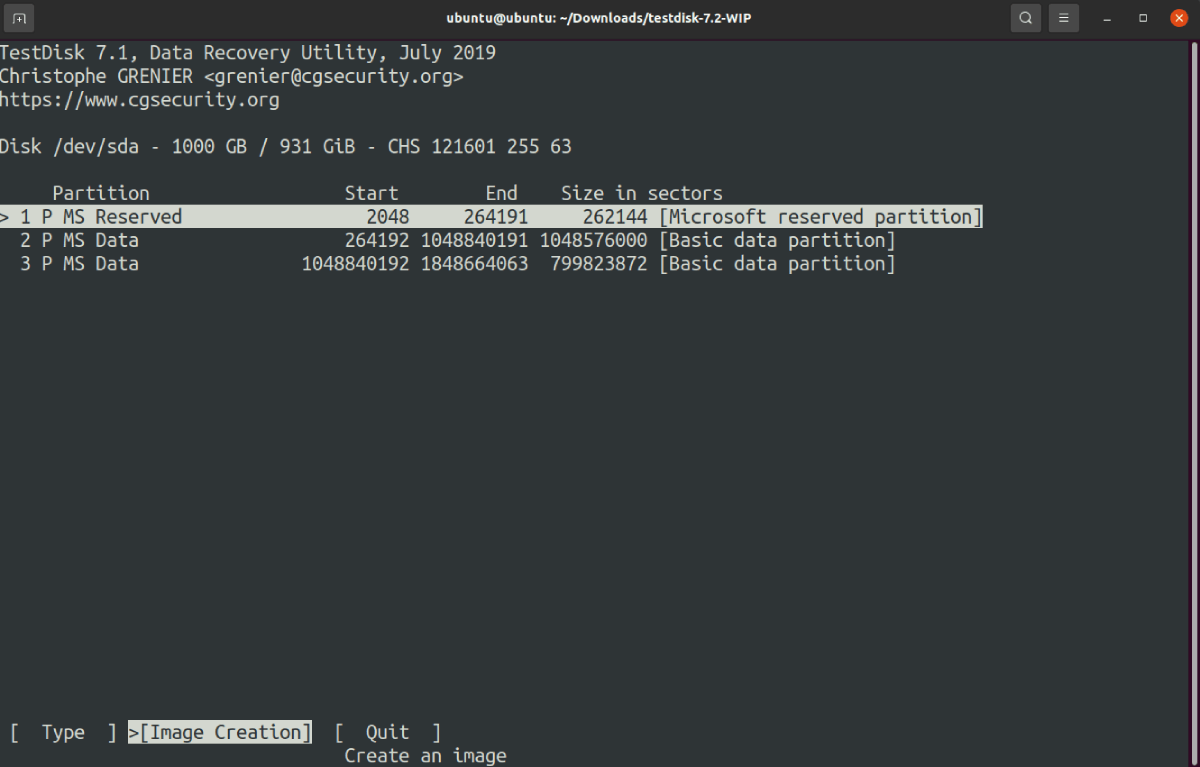
The system will list all the available partitions in the selected disk. Highlight your choice and press Enter.
If you're using an HDD, chances are that the system will display multiple partitions. On the other hand, if it's a removable media drive, TestDisk will only display a single partition.
TestDisk will ask you to choose a directory for storing the image file of the partition. Choose an appropriate location and select Proceed.
Step 4: Navigate to the Deleted File Directory
TestDisk will now display all the files and folders stored in the selected partition. Head over to the directory which contains the deleted file. For example, if the /Desktop directory contains the file, navigate to that folder.
Deleted files will have a red font color. If you can't find any deleted file entry, then sadly your files can't be recovered.
On the other hand, if you did find file entries with red font, you can't simply "restore" those files using TestDisk. What you'll have to do is copy the deleted files and paste them to another directory.
To copy a deleted file, highlight that specific file and press C on the keyboard. Now, navigate to the directory where you want to paste the file and press C again to paste.
If the system copied the file successfully, you will get a notification stating Copy done! 1 ok, 0 failed in bright green color.
Exit the application by selecting the Quit option on the screen. The system will take you back to the previous screen. Again, keep selecting Quit to go back to the previous screen. It'll take you a few rounds of highlighting and pressing Enter to close TestDisk completely.
Undo Accidental Deletions on a Linux System
While navigating through your Linux storage, you're only one "key-combination" away from permanently deleting important files. Luckily, the TestDisk utility is available to stop you from regretting your actions. TestDisk can recover deleted partitions, restore corrupted disks, and rebuild boot sectors using a backup file.
It takes one incident to know the importance of creating backups of your storage. Although you can clone your hard drive on Linux, it's not always the best choice. The most appropriate option would be to backup your data on a remote server using Rsync.

