GarageBand is a great, free digital audio workstation that offers a surprising amount of features. If you're looking to record your keyboard, you can do this in GarageBand in a few different ways, with varying levels of ease and customizability.
Whether you're completely new to this or are looking for different ways to record your keyboard on GarageBand, we'll explain a few different methods then show you how to get recording.
Three Ways You Can Record Your Keyboard on GarageBand
There are three ways you can record your keyboard on GarageBand: you can record the sound through the speakers via a microphone, you can record via an audio interface using a line output, or you could use your keyboard as a MIDI controller and record it directly into your Mac.
Where the outputs will be on your keyboard will vary from model to model. But don't worry, just look on the front, back, or sometimes on the underside of your keyboard for these various outputs pictured below.
Though this could be a bit detailed, it's best that you know which method is the right one for you. Also, understanding each method will make it very quick and easy for you to follow the guide coming up.
Recording Your Keyboard With a Microphone
You can record your keyboard through simply using a microphone to record the audio via your keyboard's speakers.
You won't need knowledge of the various outputs on your keyboard and setting things up is relatively easy: simply position your microphone near your keyboard's speakers and record.
Though this might sound like an obvious and easy option, it may not be the best. As you're not recording the genuine vibrations of a piano or other sounds, just replications through your speaker, your audio quality won't sound mind-blowing, no matter what microphone you may have.
Recording Your Keyboard Using a Line Output
Another way to record your keyboard is through using a line output. To do this, you're going to need a few things.
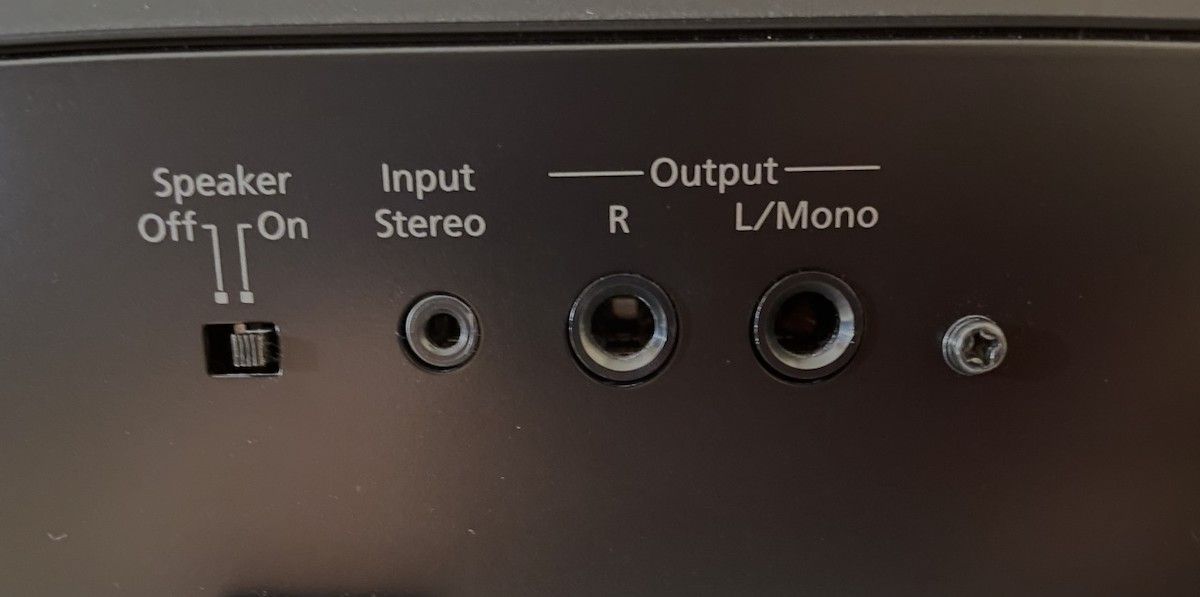
Firstly, check that your keyboard facilitates a line output. Usually, on the back of your keyboard, you should see some ports labelled Output(R, L/Mono) like so:
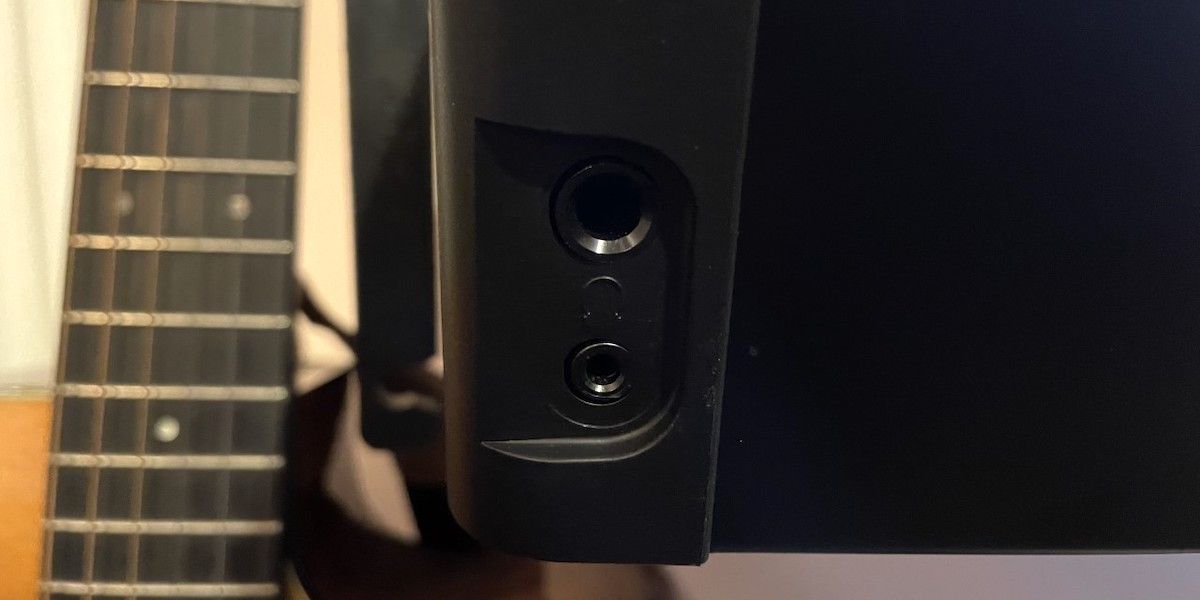
You can also use your headphones port on your keyboard as a line output as well. The location of your headphones port can vary: it could either be on the front, back or underside of your keyboard. Look for either a port (or ports) labelled Headphones or the headphones icon like this:
You're also going to need an audio interface and either a 1/4-inch cable or a 1/8 to 1/4-inch cable depending on which output you'd want to connect to.
If you're new to audio interfaces, Focusrite's Scarlett range provides a variety of high-quality and portable interfaces which will accommodate a line output.
Recording Using Your Keyboard as a MIDI Controller
The third way you can record your keyboard on GarageBand is using it as a MIDI controller.
What this means is that your audio will not get recorded. Instead, everything else will, such as what key you press, the strength at which you press it, for how long, if you're using a pedal e.t.c. All of this information will then generate a sound using a virtual instrument (also called a VST or AU instrument).
This is the best way to ensure your sound quality is professional and your track can easily be edited or tweaked, though you could lose some of the "natural" feel of your playing as every sound is being digitally reproduced.
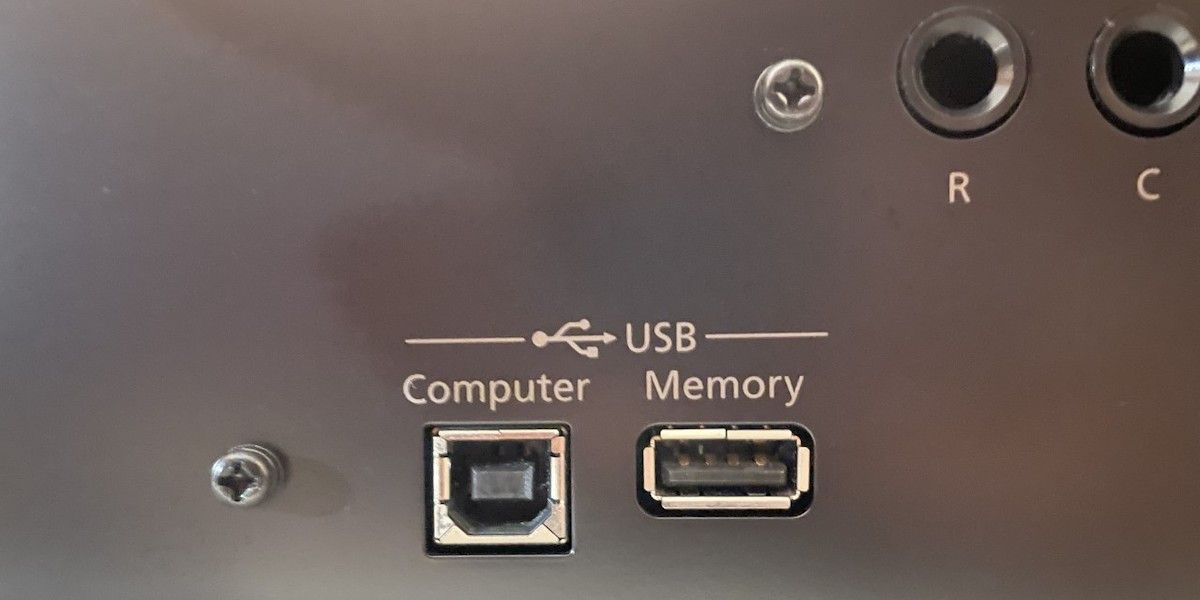
To use your keyboard as a MIDI controller, you can plug it straight into your Mac. Simply check first that your keyboard has a USB type B output, usually under USB (Computer). If it does, then you can use either a USB-B to USB-A cable or USB-B to USB-C cable depending on what inputs your Mac has.
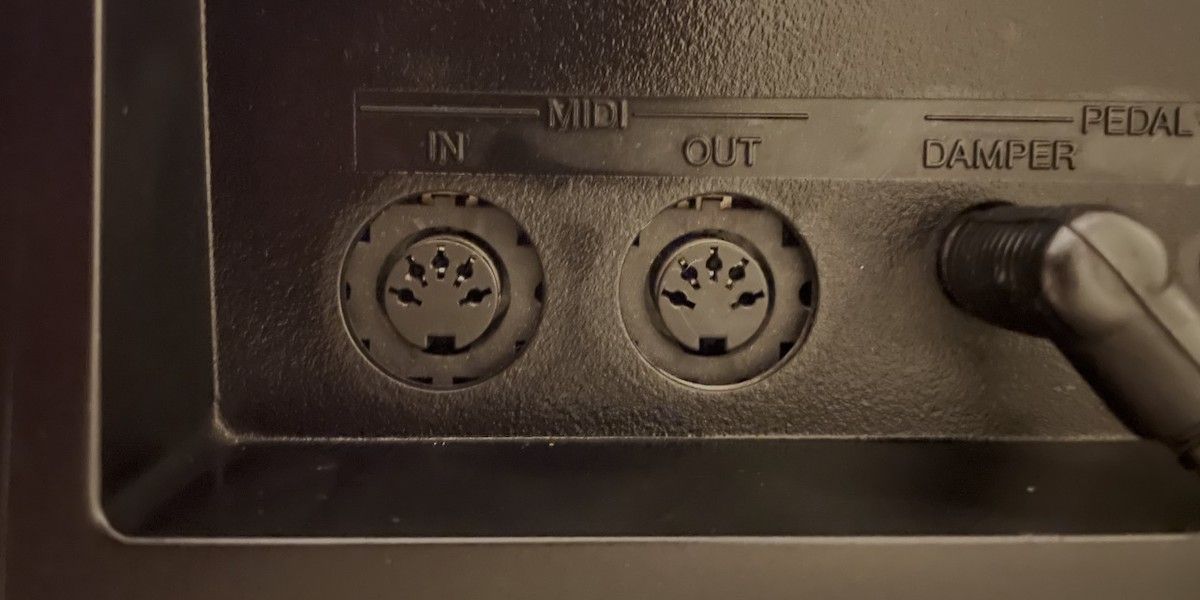
If your keyboard doesn't have this, don't worry. You can also connect your keyboard as a MIDI controller using its 5-pin MIDI output which should look like this:
Instead of a USB-B cable, you'll be using a 5-pin MIDI to USB cable instead to connect your keyboard to your Mac.
Recording Your Keyboard on GarageBand
Now let's get down to it. Though there was a lot to take in the previous section, the good news is that it should make this process very quick and easy for you to follow.
Depending on which of the three methods you're doing, you'll be following sightly different instructions:
- If you're recording using a microphone, follow section A.
- If you're recording using a line output, follow section B.
- If you're recording using your keyboard as a MIDI controller, follow section C.
Step 1: Setting Up Your Equipment
A: Make sure your mic is set up a few inches from your speaker and connected to your Mac (if you're using a USB mic) or your audio interface (if you're using an XLR mic), which you then connect to your Mac. Connect a pair of headphones to your audio interface.
B: Make sure that one end of your cable is connected to your keyboard's Headphones port or your Output L/Mono port and the other end is connected to your audio interface, which you then connect to your Mac. Connect a pair of headphones to your audio interface.
C: Connect one end of your cable to either your keyboard's USB-B port or its MIDI IN/MIDI OUT ports and the other end to your Mac. Make sure your keyboard speaker volume is off. Connect a pair of headphones to your Mac.
Step 2: Creating your New Project
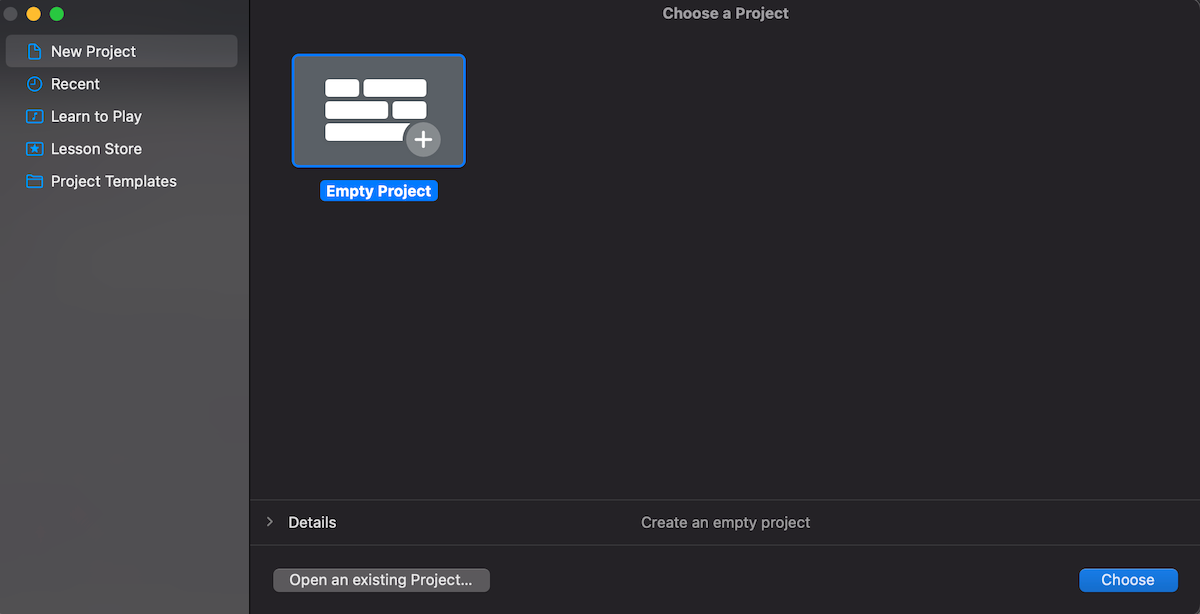
A, B, C: Open up GarageBand and select Empty Project or File. If GarageBand opens up a previous project instead of displaying this page, go to the top-left of your screen and under File, select New.
Step 3: Check Your Preferences
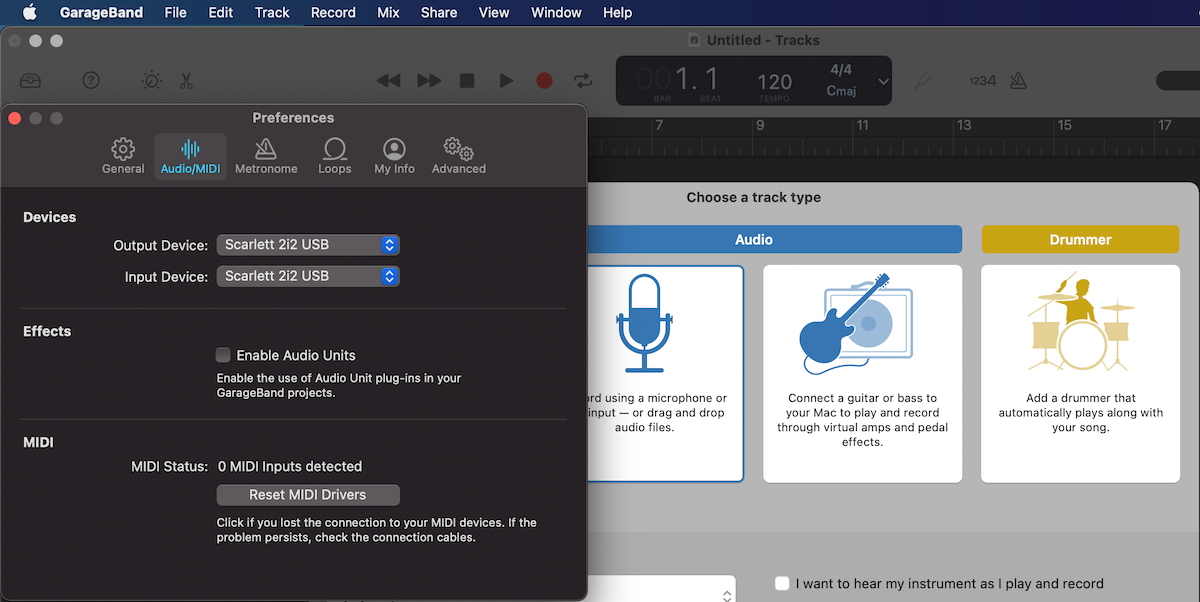
A, B, C: At the top-left of your screen under GarageBand, select Preferences, then Audio or Audio/MIDI.
A, B: In the Input Device and Output Device pop up menus, select your audio interface. Close Preferences.
C: In the Output Device pop up menu, select your headphones. Close Preferences.
Step 4: Select Your Track
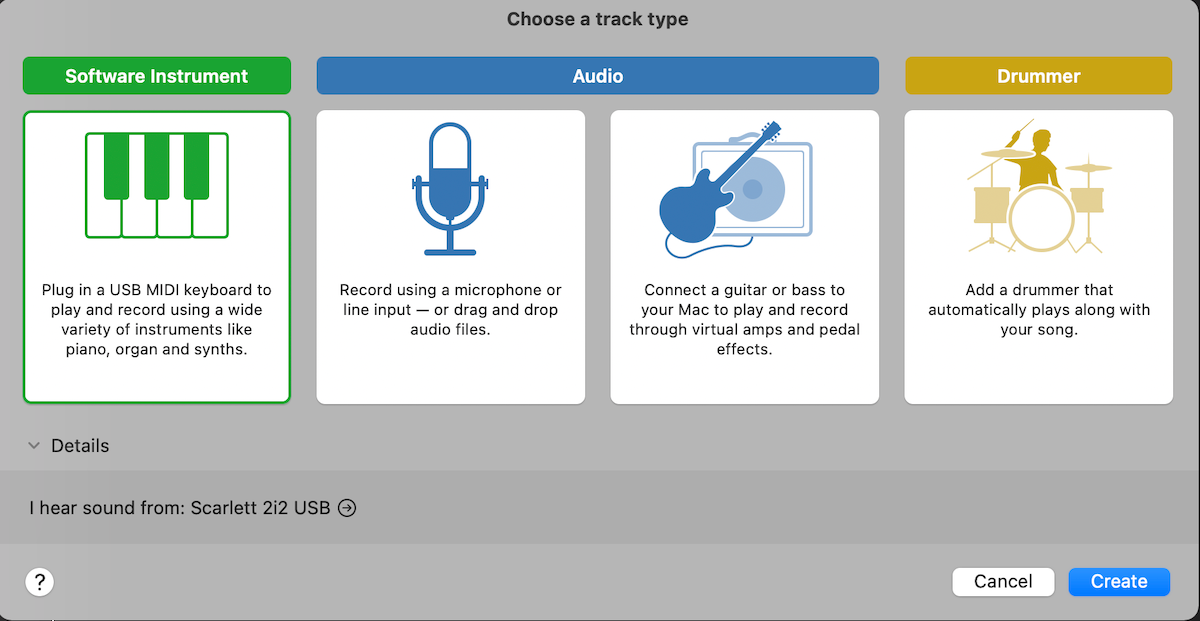
A, B: From Choose a track type, select the track with the microphone icon.
C: From Choose a track type, select Software Instrument.
Step 5: Setting Up and Recording Your Keyboard
A, B: Now that your track is created, select it and at the bottom, where it says Track and Master, make sure that Track is selected. You should be able to see a drop-down box next to where it says Input and from there, select the input for your mic.
You can rename the generic name of your track by selecting the track and double-clicking the title, and customize its EQ both manually and through the sound library on the left-hand side.
To listen to your track as you record, under Input, activate the icon next to Monitoring.
C: As you're connected directly into your Mac, your MIDI input is automatically selected and if you play your keyboard, you should hear the audio through your headphones.
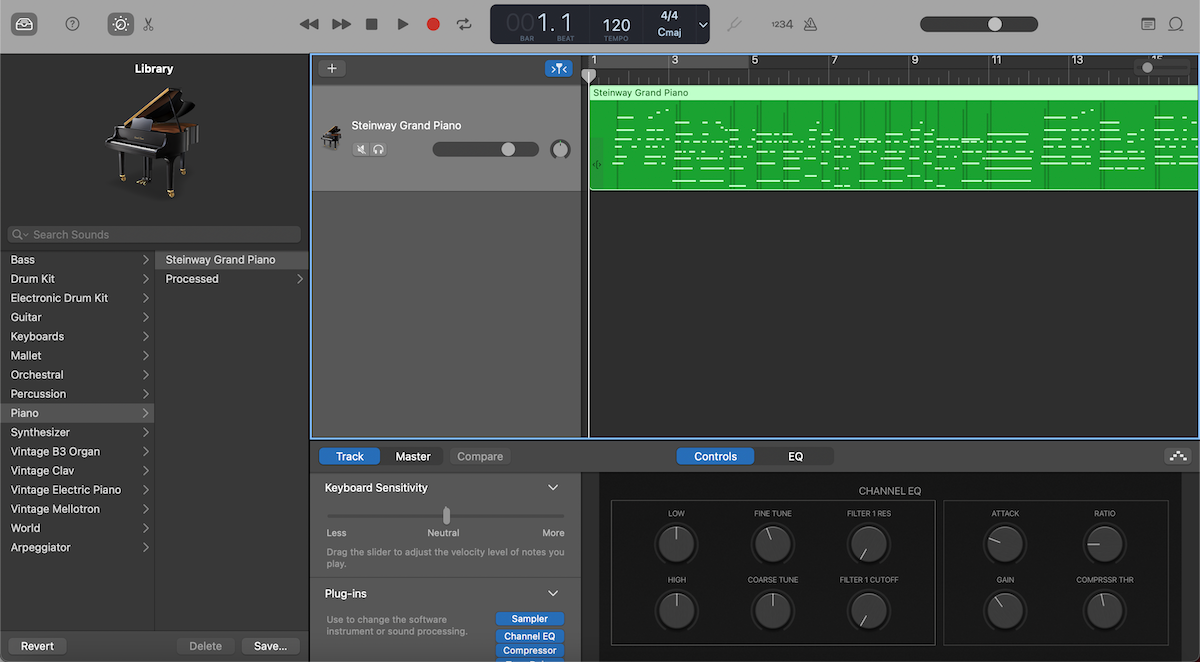
You can rename the generic name of your track by selecting the track and double-clicking the title, and customize what virtual instrument you'll be playing via your keyboard through the sound library on the left-hand side and customize your virtual instrument's EQ on the bottom right.
A, B, C: Now you're ready to record! Simply click the record icon or press R. And don't forget to save your project with Cmd + S.
Making Your Keyboard Part of a Bigger Project
Though it might sound like a lot to take in, once you get the hang of it, you'll be recording non-stop with your keyboard. The more you get familiar with this, you can even incorporate your keyboard into recording multiple live tracks at once on GarageBand.
Now that you know how to record your keyboard on GarageBand, you can use it as part of a bigger project, both solo and as part of an ensemble.

