Your iPhone has a built-in screen recorder, but did you know that you can also record your iPhone's screen using your Mac?
Apple introduced this feature in OS X Yosemite. You can easily use it to record your best gaming moments or an app walkthrough with an audio voiceover recorded with an external mic.
All you need is a USB to Lightning cable and QuickTime on your Mac, but before we guide you with the steps, let us explain why using a Mac to record your iPhone's screen is better.
Why Use a Mac to Record Your iPhone's Screen?

The iPhone already has a built-in screen recorder, so why go through the trouble of using your Mac to do it? Here are a few good reasons why:
For starters, you'll get much better video quality with QuickTime Player. Videos recorded with QuickTime are saved as MOV files, while the iPhone saves screen-recorded videos as MP4 files. The former isn't as compressed as the latter. However, MP4 files are more widely used and smaller in size. That shouldn't be a problem, though, because you can easily convert MOV to MP4 on your Mac later.
Another reason is that you can easily edit and quickly merge your videos using QuickTime Player on your Mac. And that distracting red dot that appears on the top-left corner of your iPhone's screen when you start recording? That won't be visible when you record with QuickTime on Mac.
QuickTime also allows you to record external audio. You can either use your Mac's internal mic or attach an external studio microphone, which is particularly useful if you want to record voiceovers with your screen recordings. Unfortunately, the iPhone's built-in screen recorder only records internal audio.
And lastly, you can access your videos directly on your Mac, another useful feature that can come in handy when AirDrop fails to work for some reason.
Recording Your Screen Using QuickTime Player
To record your iPhone's screen with QuickTime Player, you should first connect your phone to your Mac with a USB to Lightning cable. Now, follow these simple instructions:
- If this is the first time you've connected your iPhone to your Mac, iOS will prompt you to allow your Mac to view files. Tap Trust on your phone.
- Now, open QuickTime Player on your Mac and go to File > New Movie Recording from the menu bar.
-
A new window will open. Click the small arrow next to the red dot in the center of the window. A list of options will appear. Under the Camera section, select your iPhone. The video will begin to record. You can also use the Touch Bar on your Mac to start and pause recordings.
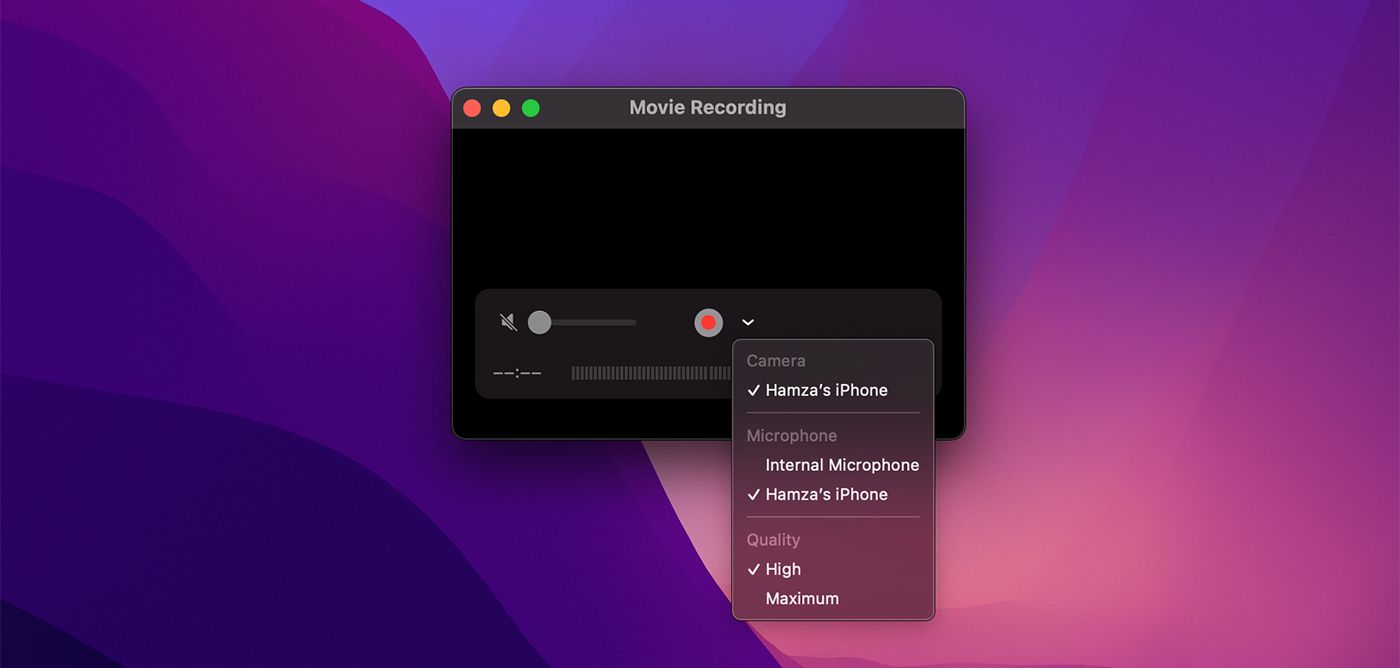
- To record your iPhone's audio, click the small arrow again and select your iPhone under the Microphone section. To record external audio, connect a microphone to your Mac and choose External Microphone.
- To use your Mac's internal mic, simply disconnect the external mic and select Internal Microphone in the drop-down menu. Unfortunately, it's not possible to record both the iPhone's audio and external audio.
- You can switch between High or Maximum video quality in the same menu.
-
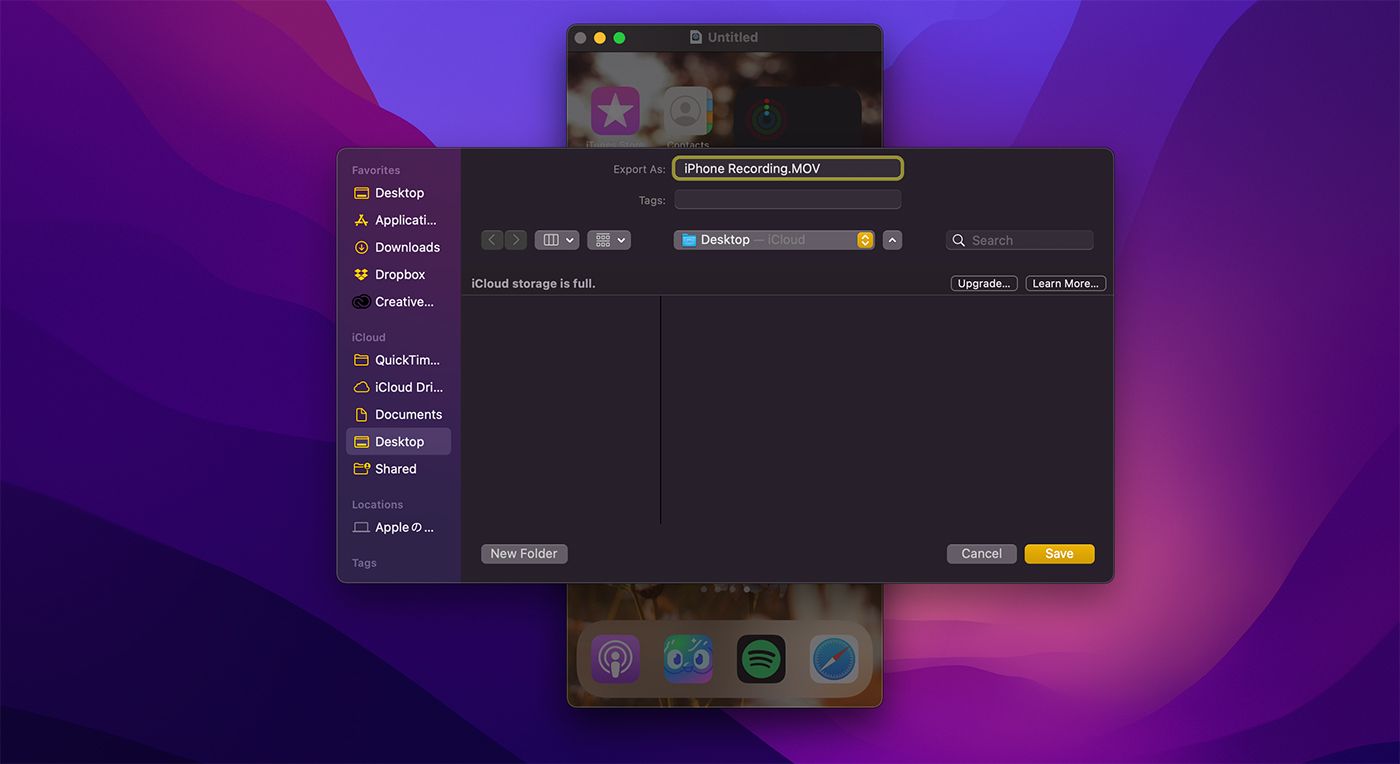
Once you've finished recording, click File > Save from the menu bar.


Keep in mind, though, that if you change the orientation of your iPhone's screen while recording, QuickTime Player will give an error and stop the recording.
Another thing to remember is that you can't record DRM-protected apps such as Netflix using this method.
Start Recording Your iPhone's Screen
Now that you know how easy it is to record your iPhone's screen with a Mac, use this method to start showing off your best gaming moments to all your friends.
Of course, it's easier to use the iPhone's built-in screen recorder or rely on third-party apps, but with QuickTime Player in macOS, you get the best video quality and the option to record external audio.