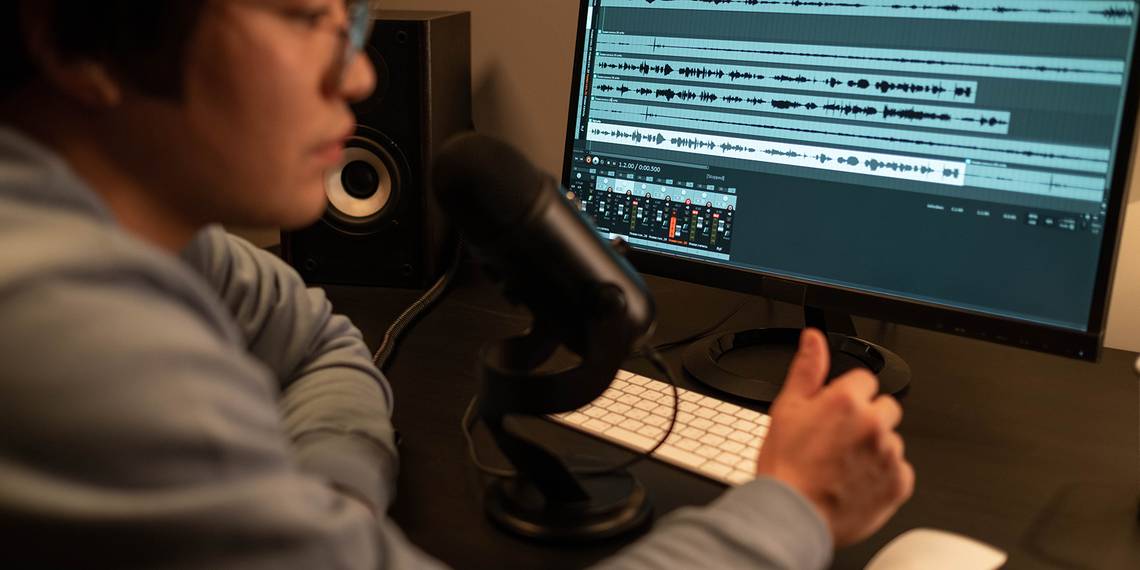
A Mac can be an excellent machine for creative work. Whether you want to record podcasts or create a quick explainer for a presentation, your Mac can handle it. There are various built-in apps you can use to record crisp audio on your Mac, which we'll be covering today.
Do You Need an External Mic?
All Macs feature an internal mic that works perfectly fine for basic tasks, such as FaceTime video calls or Zoom meetings.
However, if you're planning to record professional-sounding audio, maybe for a podcast or a voice-over, it's advisable to get an external mic. An external mic can cost as little as $50 these days. However, make sure you do your research to pick one that meets your specific recording needs. Microphones designed to record music, instruments, vocals, podcasts, and voice-overs can be vastly different in both quality and price.
Recordings made from USB microphones generally sound better than other microphones, unless you have a dedicated audio interface. The reason for this is that the conversion from analog audio to digital audio is done by the USB microphone itself, which leads to more refined and better sound quality.
There are multiple apps that you can use on your Mac to quickly record audio. We've covered some of these apps below.
Go to System Preferences > Sound > Input to select your internal or external microphone.
Recording Audio Using Voice Memos
Voice Memos is the primary interface for recording audio on your Mac. It works similar to the Voice Memos app on your iPhone or iPad. To use it:
- Go to Finder > Applications on your Mac.
- Open up Voice Memos.
- If it's your first time opening the app, you can choose whether to enable Voice Memos for iCloud, which allows you to sync your recordings across your device.
- Once you are ready, hit the red button to start recording.
-
You can choose to pause your recording if you need to revise something or repeat something for later.
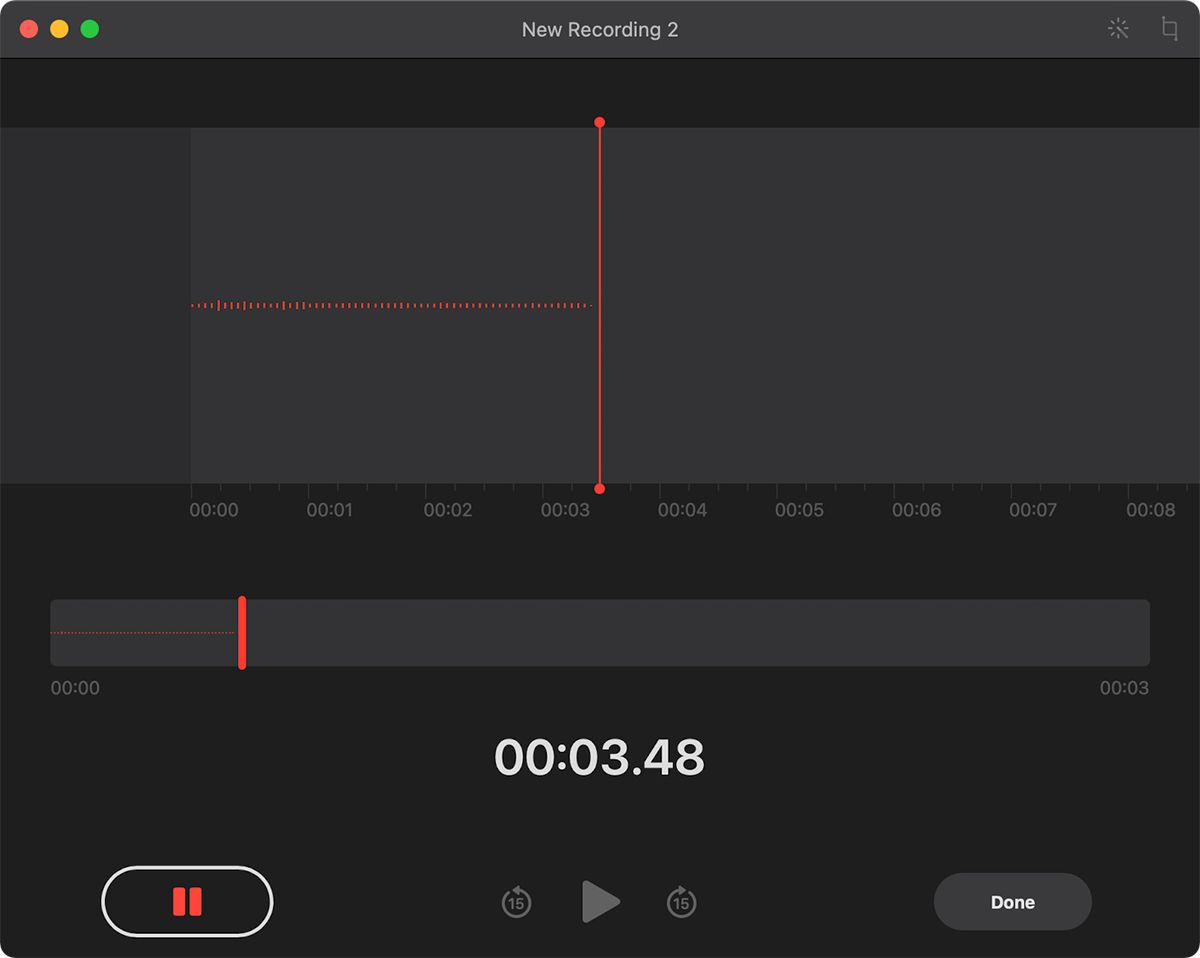
- Once done, click on the pause button followed by Done. This will end the recording.
- Double-click on the recording name to rename it according to your preference.

That's it! You can choose to edit or trim the recording later on. The Edit option lets you replace a specific portion of the audio with a new recording, which is ideal if you made a small mistake and want to change it. The Trim option, as the name suggests, lets you trim the audio from the beginning or the end. Both options can be located by Control-clicking on the recorded audio file.

You can also choose between recording compressed or lossless audio in Voice Memos. To do so, open up the Voice Memo Preferences from the menu bar and make your choice.
Recording Audio Using QuickTime
The second option for recording audio on your Mac is by using QuickTime Player. QuickTime Player is Apple's default app for video playback, but it can easily be used to record some quick audio as well.
Here's a step-by-step guide on how to record audio with QuickTime on a Mac:
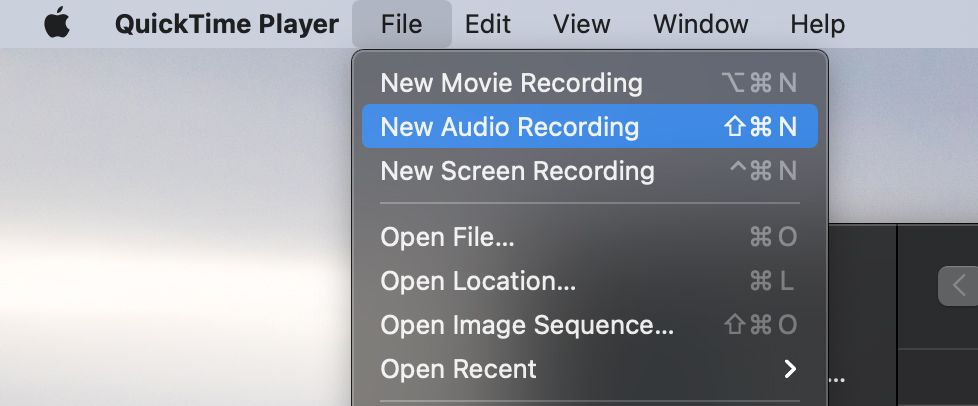
- Open up QuickTime Player from the Applications folder.
-
Open File in the menu bar and select New Audio Recording.
-
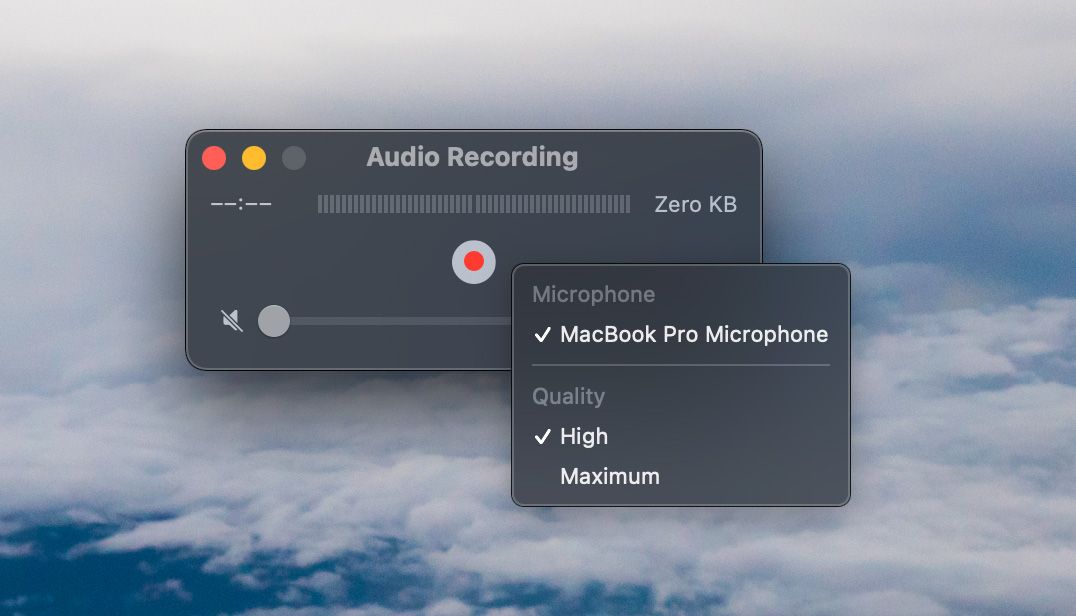
Choose your file quality and desired mic by hitting the down arrow next to the red record button.
- Hit the red record button to start your recording.
- When you're done, press the same button to finish and save your audio.


An advantage of QuickTime Player is that it allows you to select your desired microphone from within the app, as opposed to using the system-default microphone, like Voice Memos. However, it doesn't offer to edit the audio like Voice Memos does, which can be a vital feature.
Recording Audio Using Third-Party Software
As well as these default built-in software, there are multiple third-party options to record your audio. One example is Audacity, which provides more advanced tools for recording and editing audio for free. You can also choose to use GarageBand, which has a bit of a learning curve, but can be very useful once mastered.