
You may want to quickly combine two videos together on your Mac for various reasons, like sending them to your friends. But despite the fancy tools available on the web, the easiest way to merge videos on your Mac is using QuickTime.
In this guide, we’ll break the process down for you.
How to Merge Videos Using QuickTime Player
Once you’ve got all the videos you want to merge (no matter how many), follow these steps:
- Open the first video you want to add other videos to using QuickTime Player.
- Drag and drop on the the video the other clip (or clips) you want to merge with it.
-
If, for some reason, this doesn’t work out for you, click Edit > Add Clip to End from the menu bar instead. Then, select the footage you’d like to merge with the first one. Click Choose Media to open QuickTime Player’s editing mode.
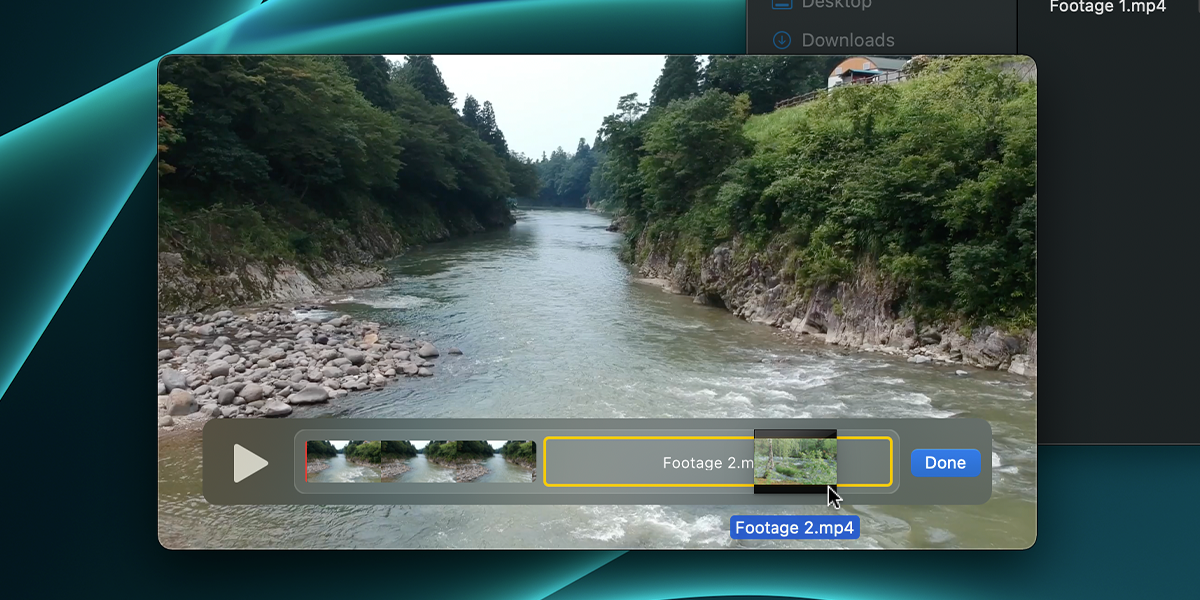


Now, you’ll see a pop up named Untitled - Edited, with two (or more) videos side-by-side in the dock at the bottom. You make a few quick edits here.
How to Edit Merged Videos Using QuickTime Player
QuickTime Player’s editing mode allows you to:
- Add more: Drag and drop more clips to the dock to add more videos to the mini-project.
- Order footage: Drag and drop clips to arrange them into the order you want.
- Scrub forwards/backward: Hover over the progress bar and drag it forward or backward to play the clip from different points.
- Export in different qualities: When exporting, you can choose what quality of your video’s output.
- Select multiple clips: You can select multiple clips at once by holding the Cmd key and then choose to either move them in sequence or delete them altogether.
When you combine two or more videos with different dimensions, they get cropped to fit the same dimensions. The first clip in the sequence will set the dimensions for the rest. This means that the remaining videos might be stretched or cropped to fit the same frame.

If you want to control the dimensions and the editing process more than what QuickTime player allows, use a better Mac editing tool, such as iMovie.
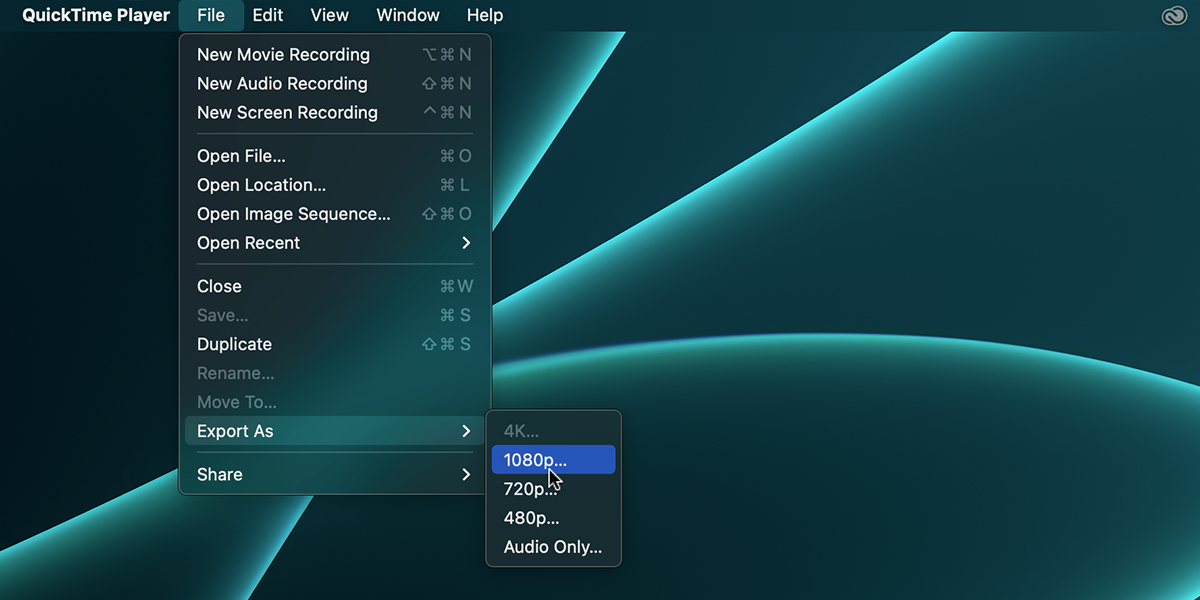
How to Export Merged Videos With QuickTime Player
Now that you have arranged videos and are ready to save them, here’s what to do:
- From the menu bar, go to Edit > Export.
-
Then, depending on the highest quality clip in the sequence, you’ll be able to choose a resolution. Click the one that you’d like your exported file to have.
- Give your file a name.
-
From the dropdown below the name box, choose a file location.
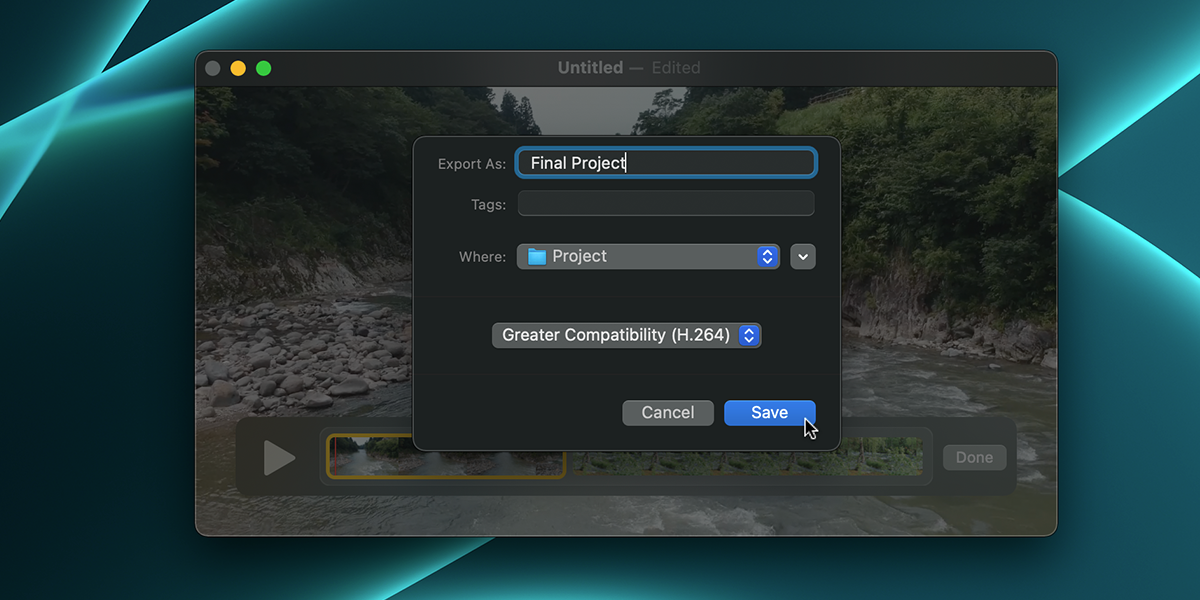
- At the bottom of the dialog box, there’s another dropdown to choose the video format (HEVC or H.264). Pick the one you want for your output file.
- Click Save and your Mac will render the video for you.


Once the video is rendered, the file will be available in the location you chose earlier.
A Little About File Formats
HEVC is an improved and new file format for Apple devices. It’s much smaller compared to the older file formats. On the other hand, H.264 is an older format that’s more compatible with non-Apple devices.
If you have to move your file around (maybe sending it to friends who are using different devices), go with H.264.
Do More With QuickTime Player
QuickTime player is a native macOS tool with many hidden features. Its video editing mode offers some good options for quick jobs. But, for a little more, you will have to use some better tools.
Another native macOS app is iMovie, which can offer you a lot more, like adding transitions, removing and adding audio, and even adjusting dimensions.