Did you know that you could play Steam games from an external drive without needing to transfer them to your local drives? If you haven’t, this feature could save you hours of transfer time that you could’ve spent playing instead.
Whether you’re bringing your games to a friend’s house or using an external drive to store your games outside of your system’s drives, we’re here to help you play Steam games straight out of an external drive.
How to Find the Steam Storage Manager
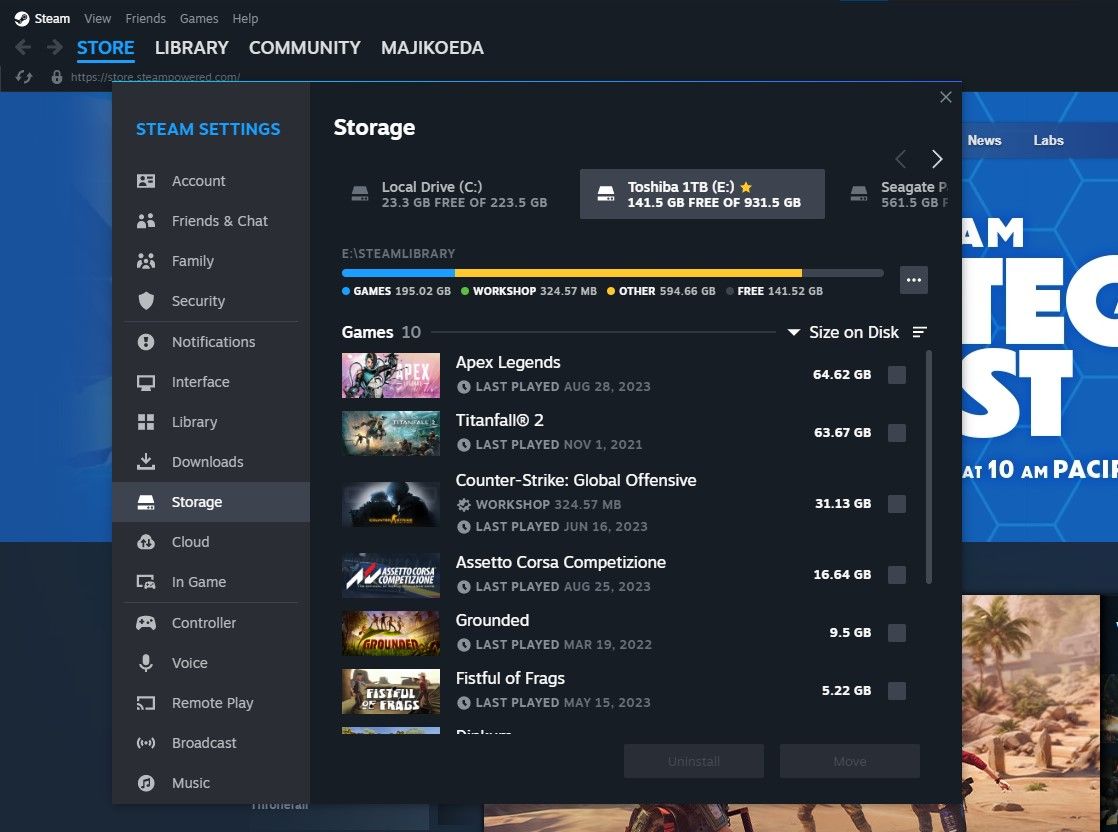
In order to be able to play from your external drive, you first need to open up the Steam Storage Manager. Managing games with Windows File Explorer can get confusing quick. However, if you know how to use Steam Storage Manager, you can manage your games directly on Steam, bypassing File Explorer.
To get to the Storage Manager, open up Steam and, in the upper left, click on Steam > Settings > Storage.
How to Add a Steam Library Folder to Your External Drive
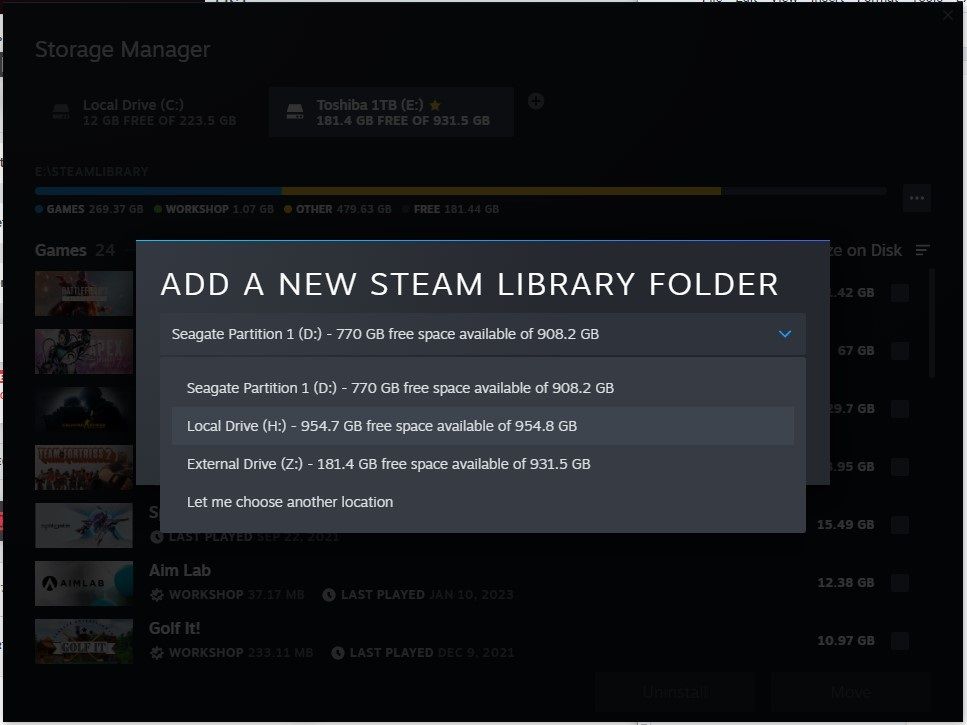
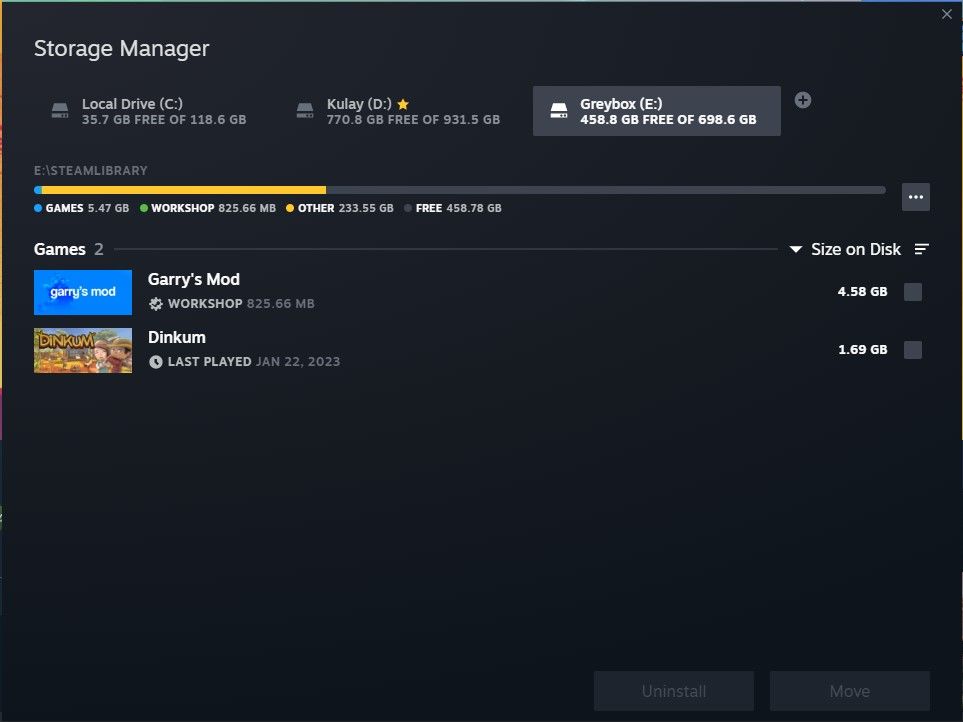
Now that you’ve found the storage manager, you’ll want to plug in your external drive and add it as a Steam Library Folder with the + button located beside the rightmost Steam drive.
Take note of which drive letter your external drive is assigned to and choose that when adding a new Steam Library Folder. Once you click Add, it will automatically create a \SteamLibrary folder with the necessary subfolders for Steam to read from.
If you don’t want to put the folder in the outermost layer, you can click Let me choose another location instead. Choose your external drive and click the location you want it to go to.
You can install Steam games directly on your external drive once you've added a Steam Library folder into it. Although, we only suggest this if the game isn't already in your internal drives as the existing files will interfere. If the game exists in your internal drives, figure out how to move it to your external drive below.
How to Move Your Steam Games to Your External Drive
Moving your Steam games to an external drive is a great way to free up some space on your local drives. If you want to free up some more space, here’s how to use SpaceSniffer to visualize your files and delete ones that you don’t use anymore but are taking up a lot of space.
Since your external drive is now one that Steam recognizes as a game library folder, you can easily move your games using the storage manager.
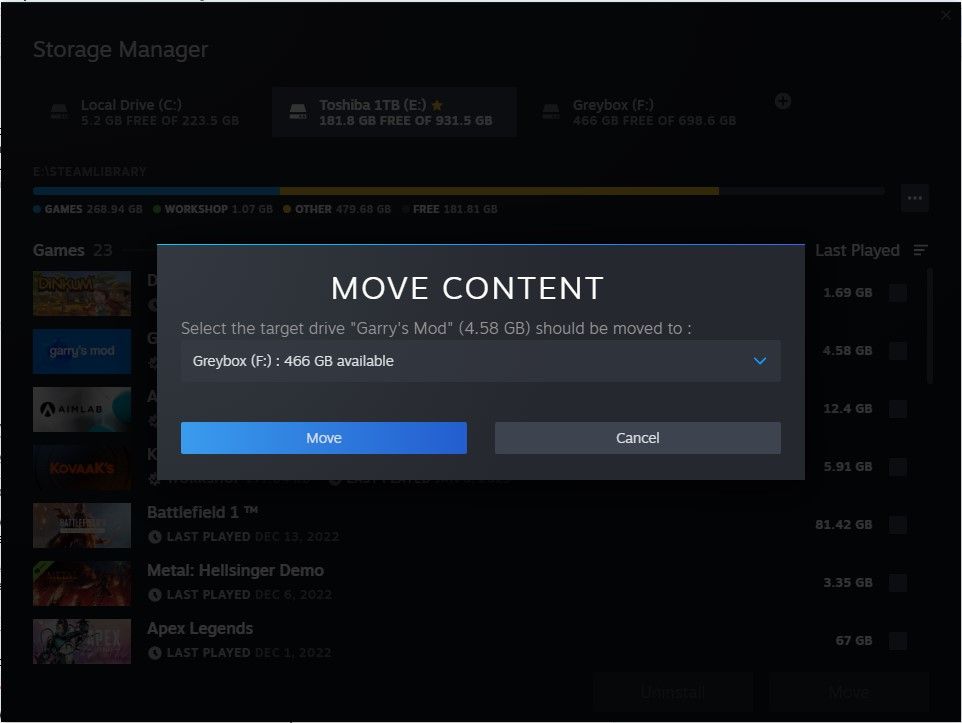
Click on the local drive that stores your games and on the right side you can check the boxes of the games you want to move to the external drive.
Once you select at least one game, the Move and Uninstall buttons will brighten up and become clickable. Click Move and choose the external drive you just added. You might want to check out the best external SSDs to speed up the transfer time and improve loading times for more demanding games.
How to Copy Your Steam Games to Your External Drive
Moving your games to an external drive is great, but the games disappear from your local drives. If you only want a copy of your games in your external drive to bring your Steam games with you on the go, unfortunately, the Steam Storage Manager doesn’t have that feature yet.
However, this isn’t too difficult to pull off. If your external drive has been added, then our external drive already has the necessary folders for Steam to read, you just need to manually copy the games the old-school way.
In the Steam Storage Manager, select your local Steam drive and on the right side of the progress bar, click on the button with three dots, then click on Browse Folder.
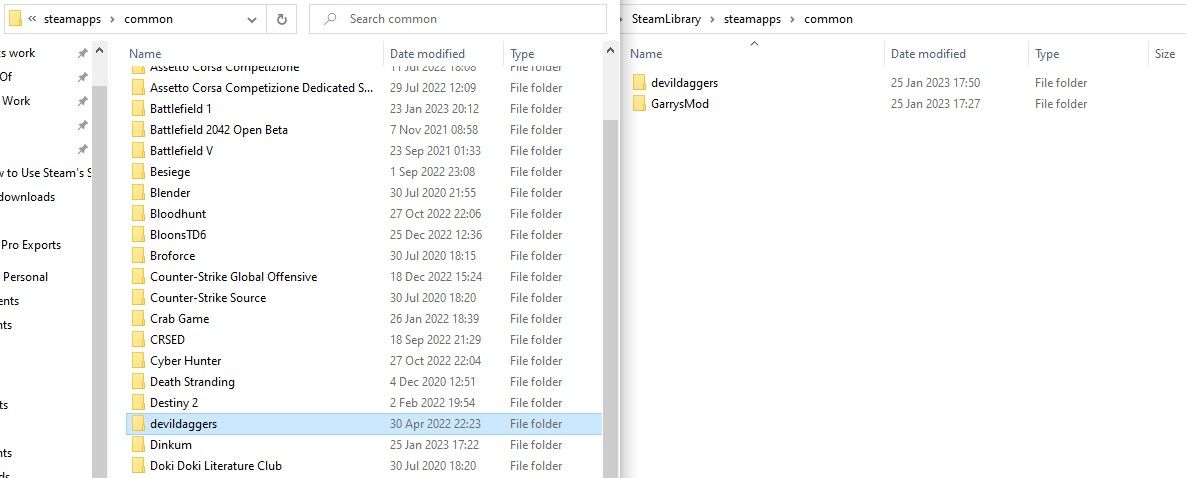
This should open up the \steamapps folder, you can then proceed to open the \common folder. Open the same folder on your external drive so you can paste it afterwards.
The \common folder is where your games are stored. Simply select and copy the games and paste them into the same \common folder on your external drive.
However, copying the games instead of moving them won’t show up on Steam immediately when adding the drive to the new PC. Getting those games to show up will require extra steps that we will show you in the next section.
How to Play Steam Games From an External Drive
Storing your games in an external drive is great stuff, but what’s even better is when you can play your Steam games directly from the external drive without transferring them to your local drives. Here’s how to play the Steam games you just moved to your external drive.
Open up the Steam Storage Manager, and add the external drive to the destination PC as we showed you above. Once it’s added, you’ll see the games that you moved to your external drive using the Steam Storage Manager. You’ll be able to play those games immediately as if they were on your local drives.
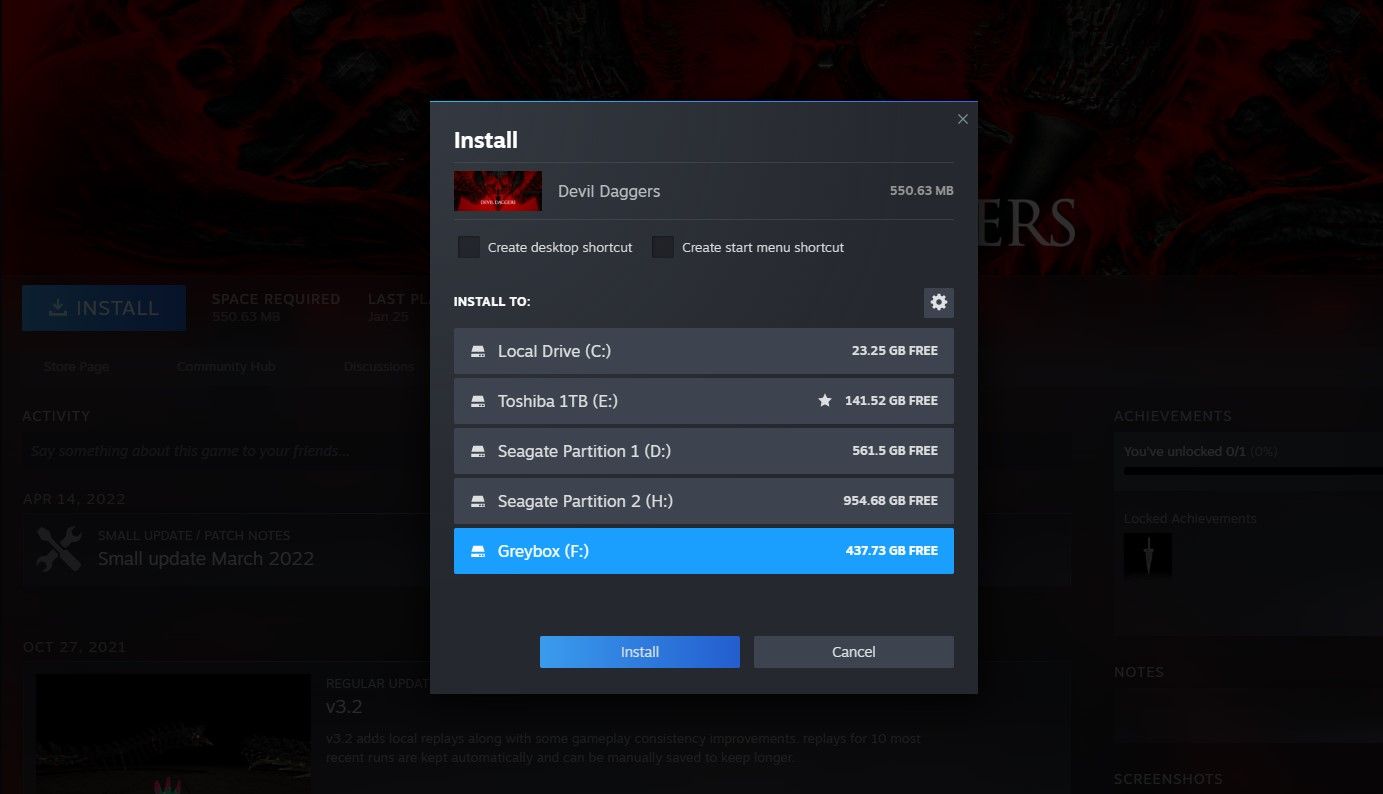
Copy-pasting Steam games on your external hard drive will require validation. To do this, simply click Install on the game you pasted to the external drive on Steam, making sure to select the external drive, and it will go through the validation process.
That's it, you're ready to play your Steam games from any capable system as long as your drive is with you. We suggest plugging your external drive into a USB 3.0 slot or higher to make sure the drive can catch up to the task. Note that some games may take longer to load as the read and write speeds depend on the port you plug it into and your external drive's speed.
Instead of a bulky external drive, you could even use a high-speed MicroSD card and a fast card reader for an ultra-compact experience that even fits in your wallet, or in your phone! Just make sure to avoid these common mistakes when buying a MicroSD card.
Carry Your Steam Library in Your Pocket
Being able to bring your Steam games with you and play on any system that can handle those games without needing to do any complicated file verification steps like in the past is a great privilege to have thanks to the Steam Storage Manager.
While the feature still needs a lot of work, we're glad Valve finally added it to the two-decade-old platform. We hope it doesn't take another decade for it to improve the Storage Manager, though.

