You scroll down your iPhone’s contact list and there are names of new acquaintances, old friends, and people you haven’t met or talked to for years. In the back of your mind, you know it’s time to organize your iPhone contacts.
Let’s look at all the different ways you get your iPhone’s contact list organized. We’ll include tips you can use when adding new contacts and show you how to clean up your existing contacts. By the time you’re finished, your iPhone Contacts app will have never looked so organized.
1. Name Your Contacts Based on Their Workplace or School
If you happen to know two people with the same name, when a message or call comes in from one of them, you probably wonder who is who. Is this John from English class or John from the tennis club? It’s even worse to make this mistake at work.
It’s awkward to not be able to put a face to a name. For example, if you’re a retail executive dealing with many suppliers and their representatives. It’s a challenge to recall who is in charge of which company because salespeople are constantly replaced.
To solve such problems and put your mind at ease, simply add the name of the workplace, school, or any other associated organization after the person’s name. You can format them like so: Denise@MakeUseOf, John@English Class, and so on. That way You’ll always know who is calling.
2. Add Emojis to Your Contact Names
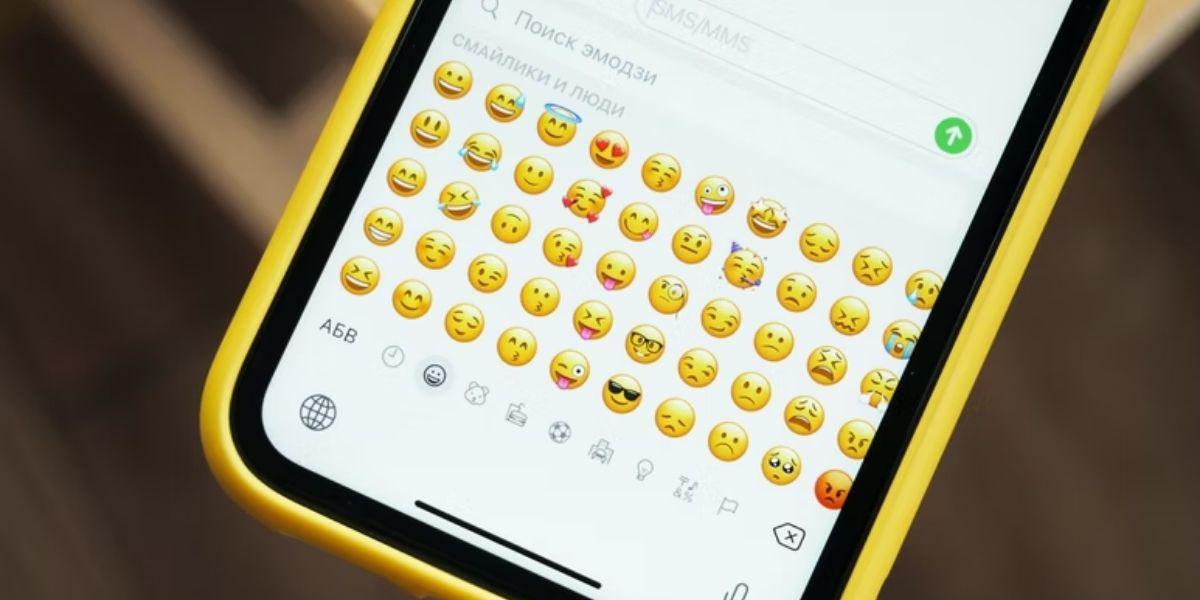
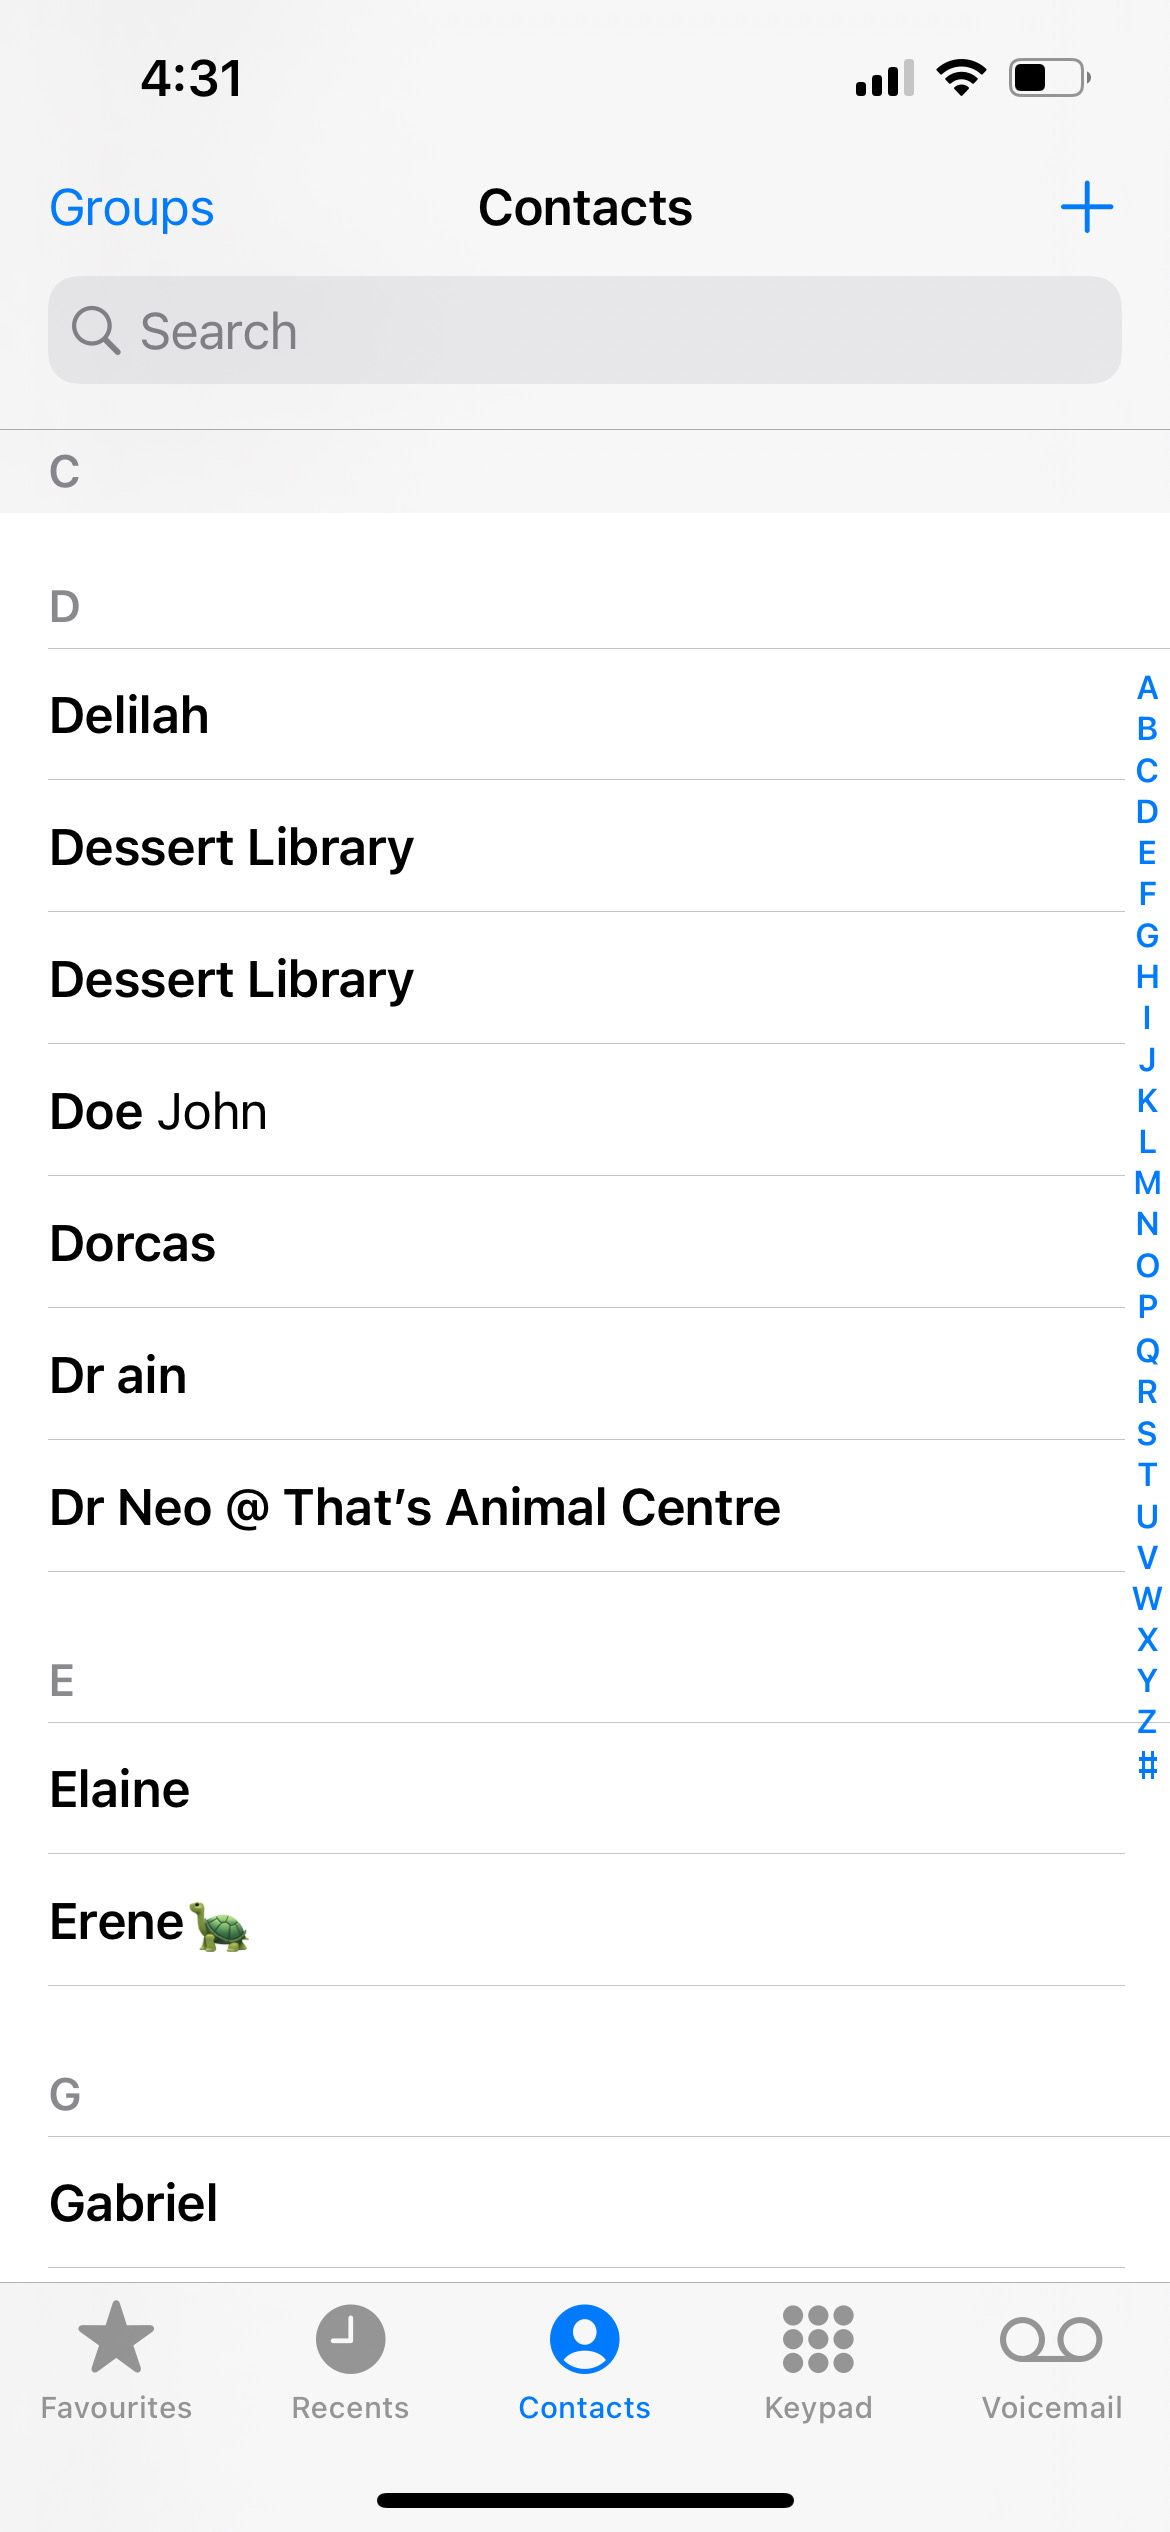
Another way to add a unique identifier to your contact is to use emojis. You can add the book emoji for your college course mates. Or assign the animal emojis that best represent your close friends and family. This injects more life and fun to the plain look of your contact list, too. It’ll help to put a smile on your face each time you receive a message or call from someone.
There are several ways to get new emojis on your iPhone if you’re struggling to find the perfect options.
3. Add Nicknames for Your Contacts
Let’s say you have a friend called Elizabeth, but in conversation you always call her “Turtle” because of her love of turtles. Instead of typing her long name when searching through your contact list, save time by adding your unique nickname for her to the contact card. Then, all you need to do is type that one word to bring up her number in your contacts.
Here’s how to add a nickname for an iPhone contact:
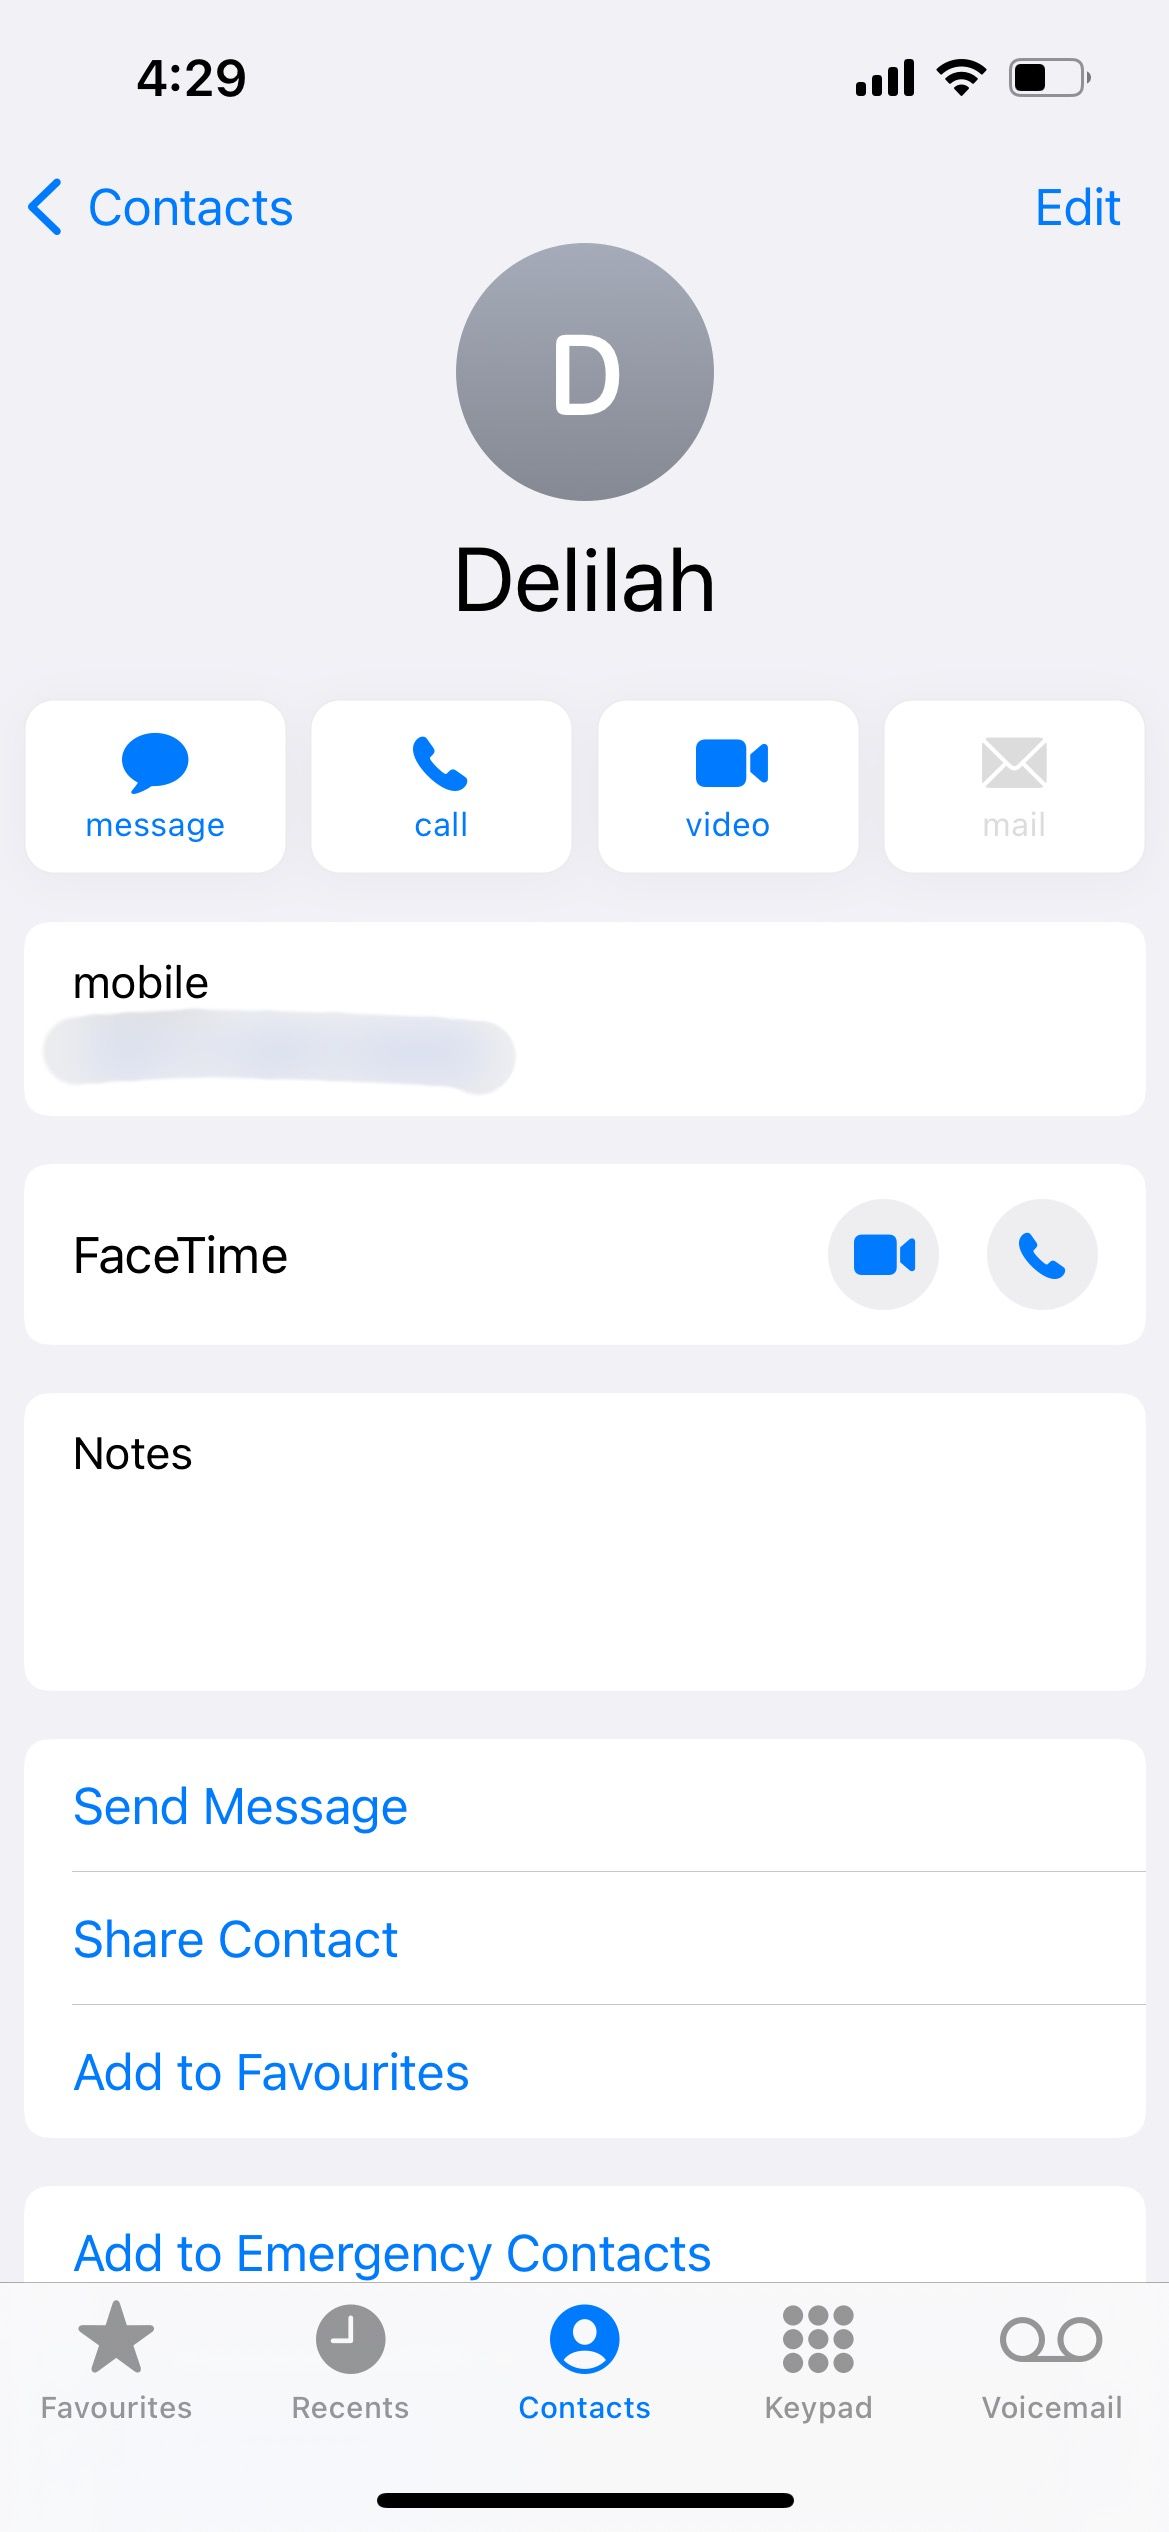
- Open to the Phone app. Select the Contacts tab.
- Tap on the contact you want to add a nickname for.
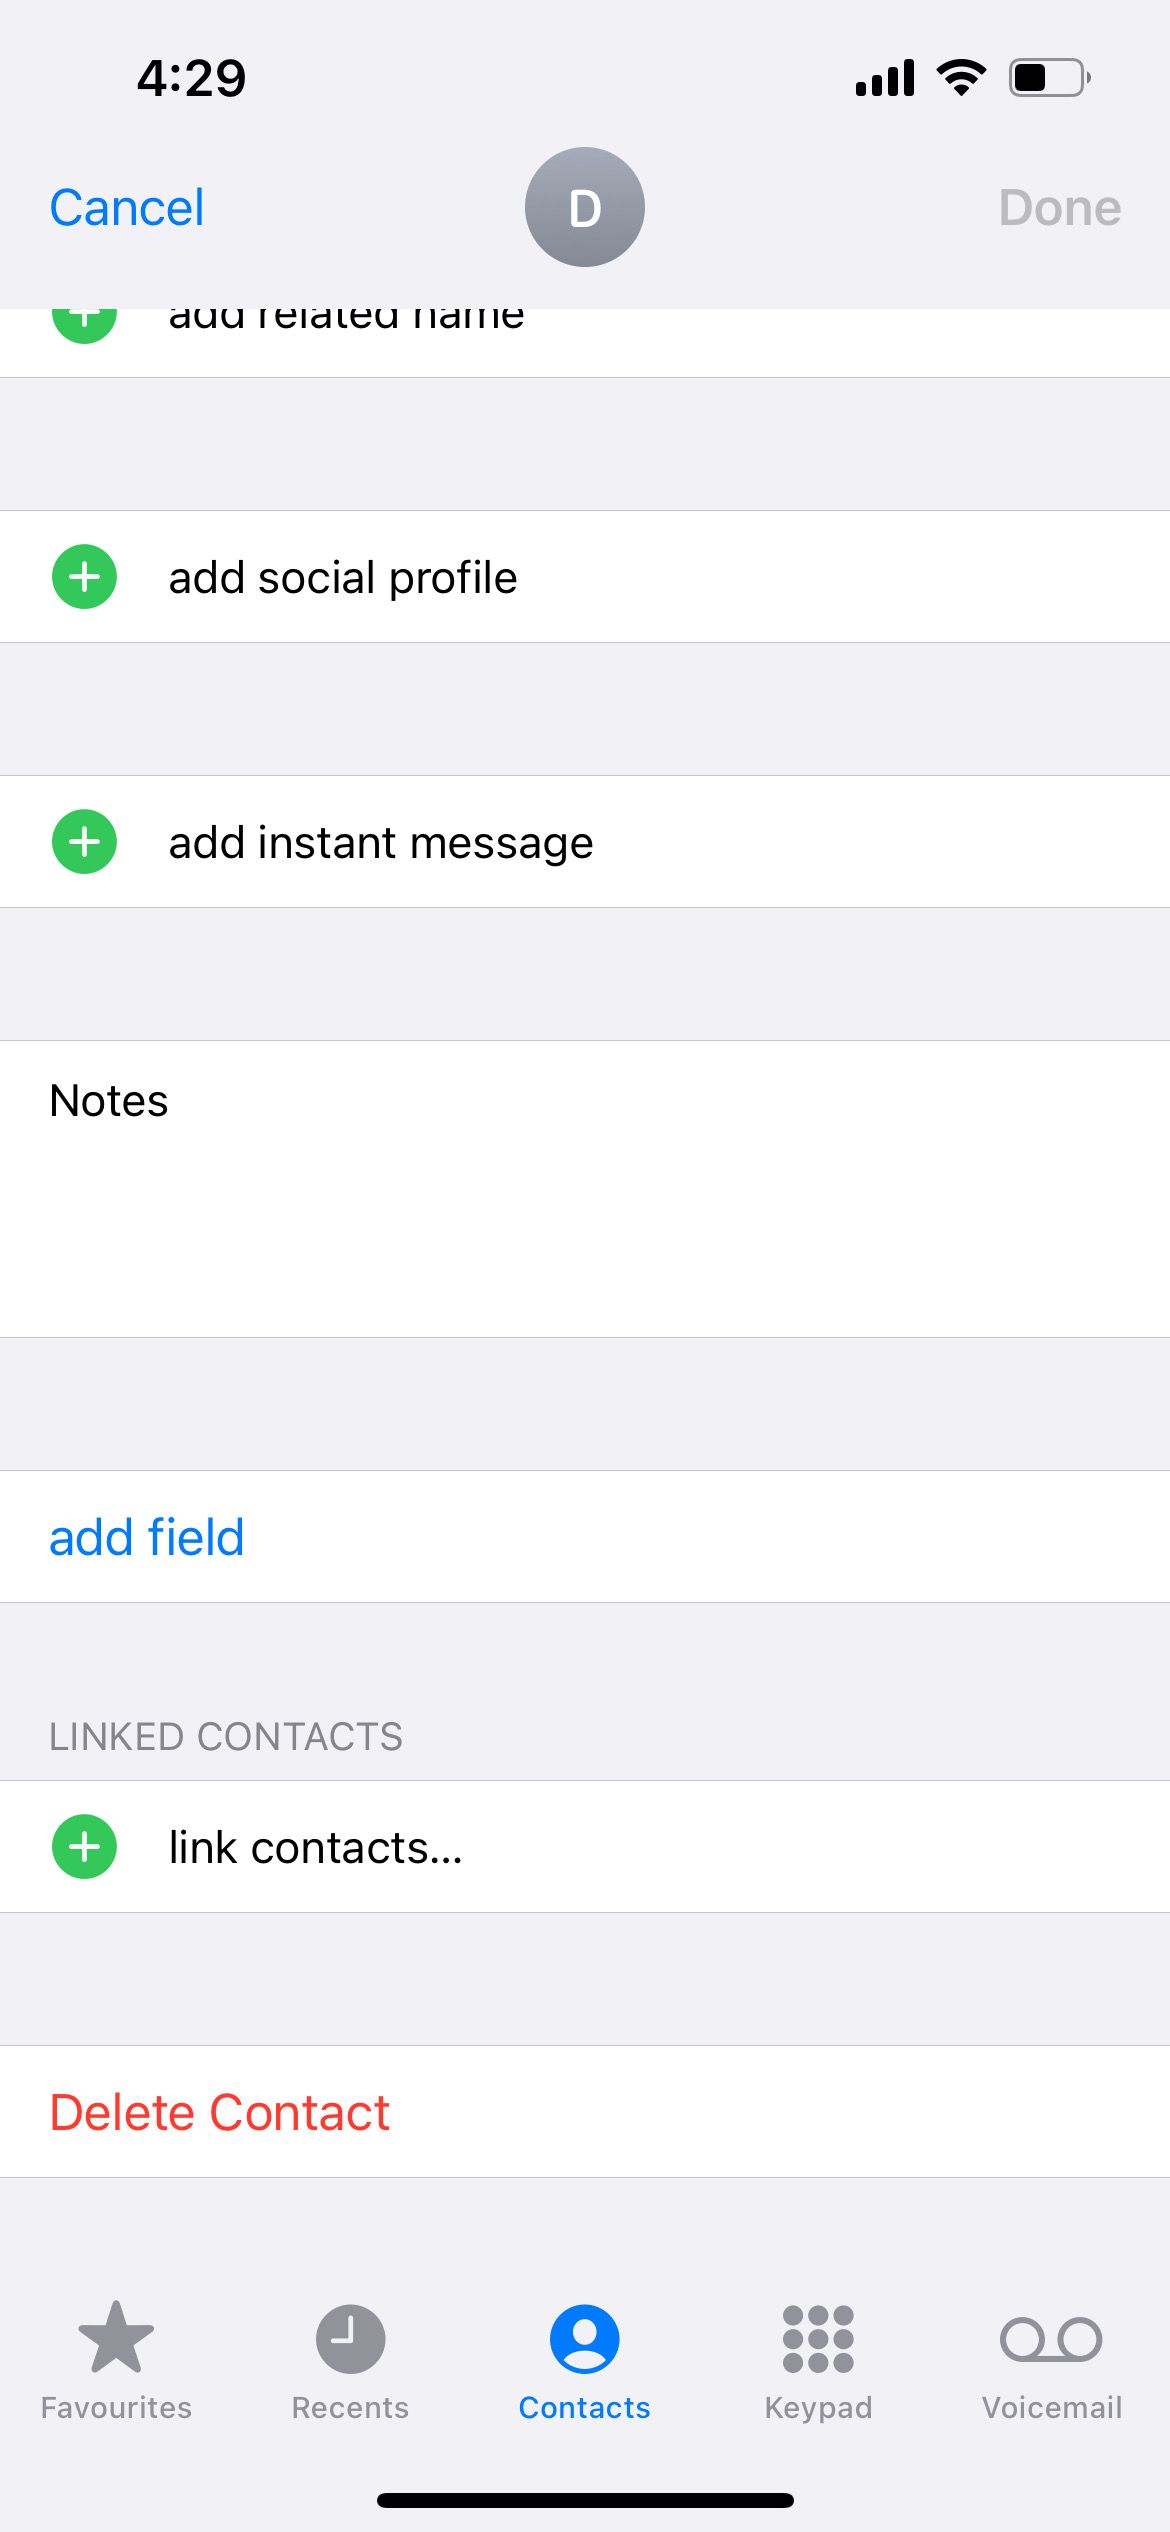
- Tap Edit.
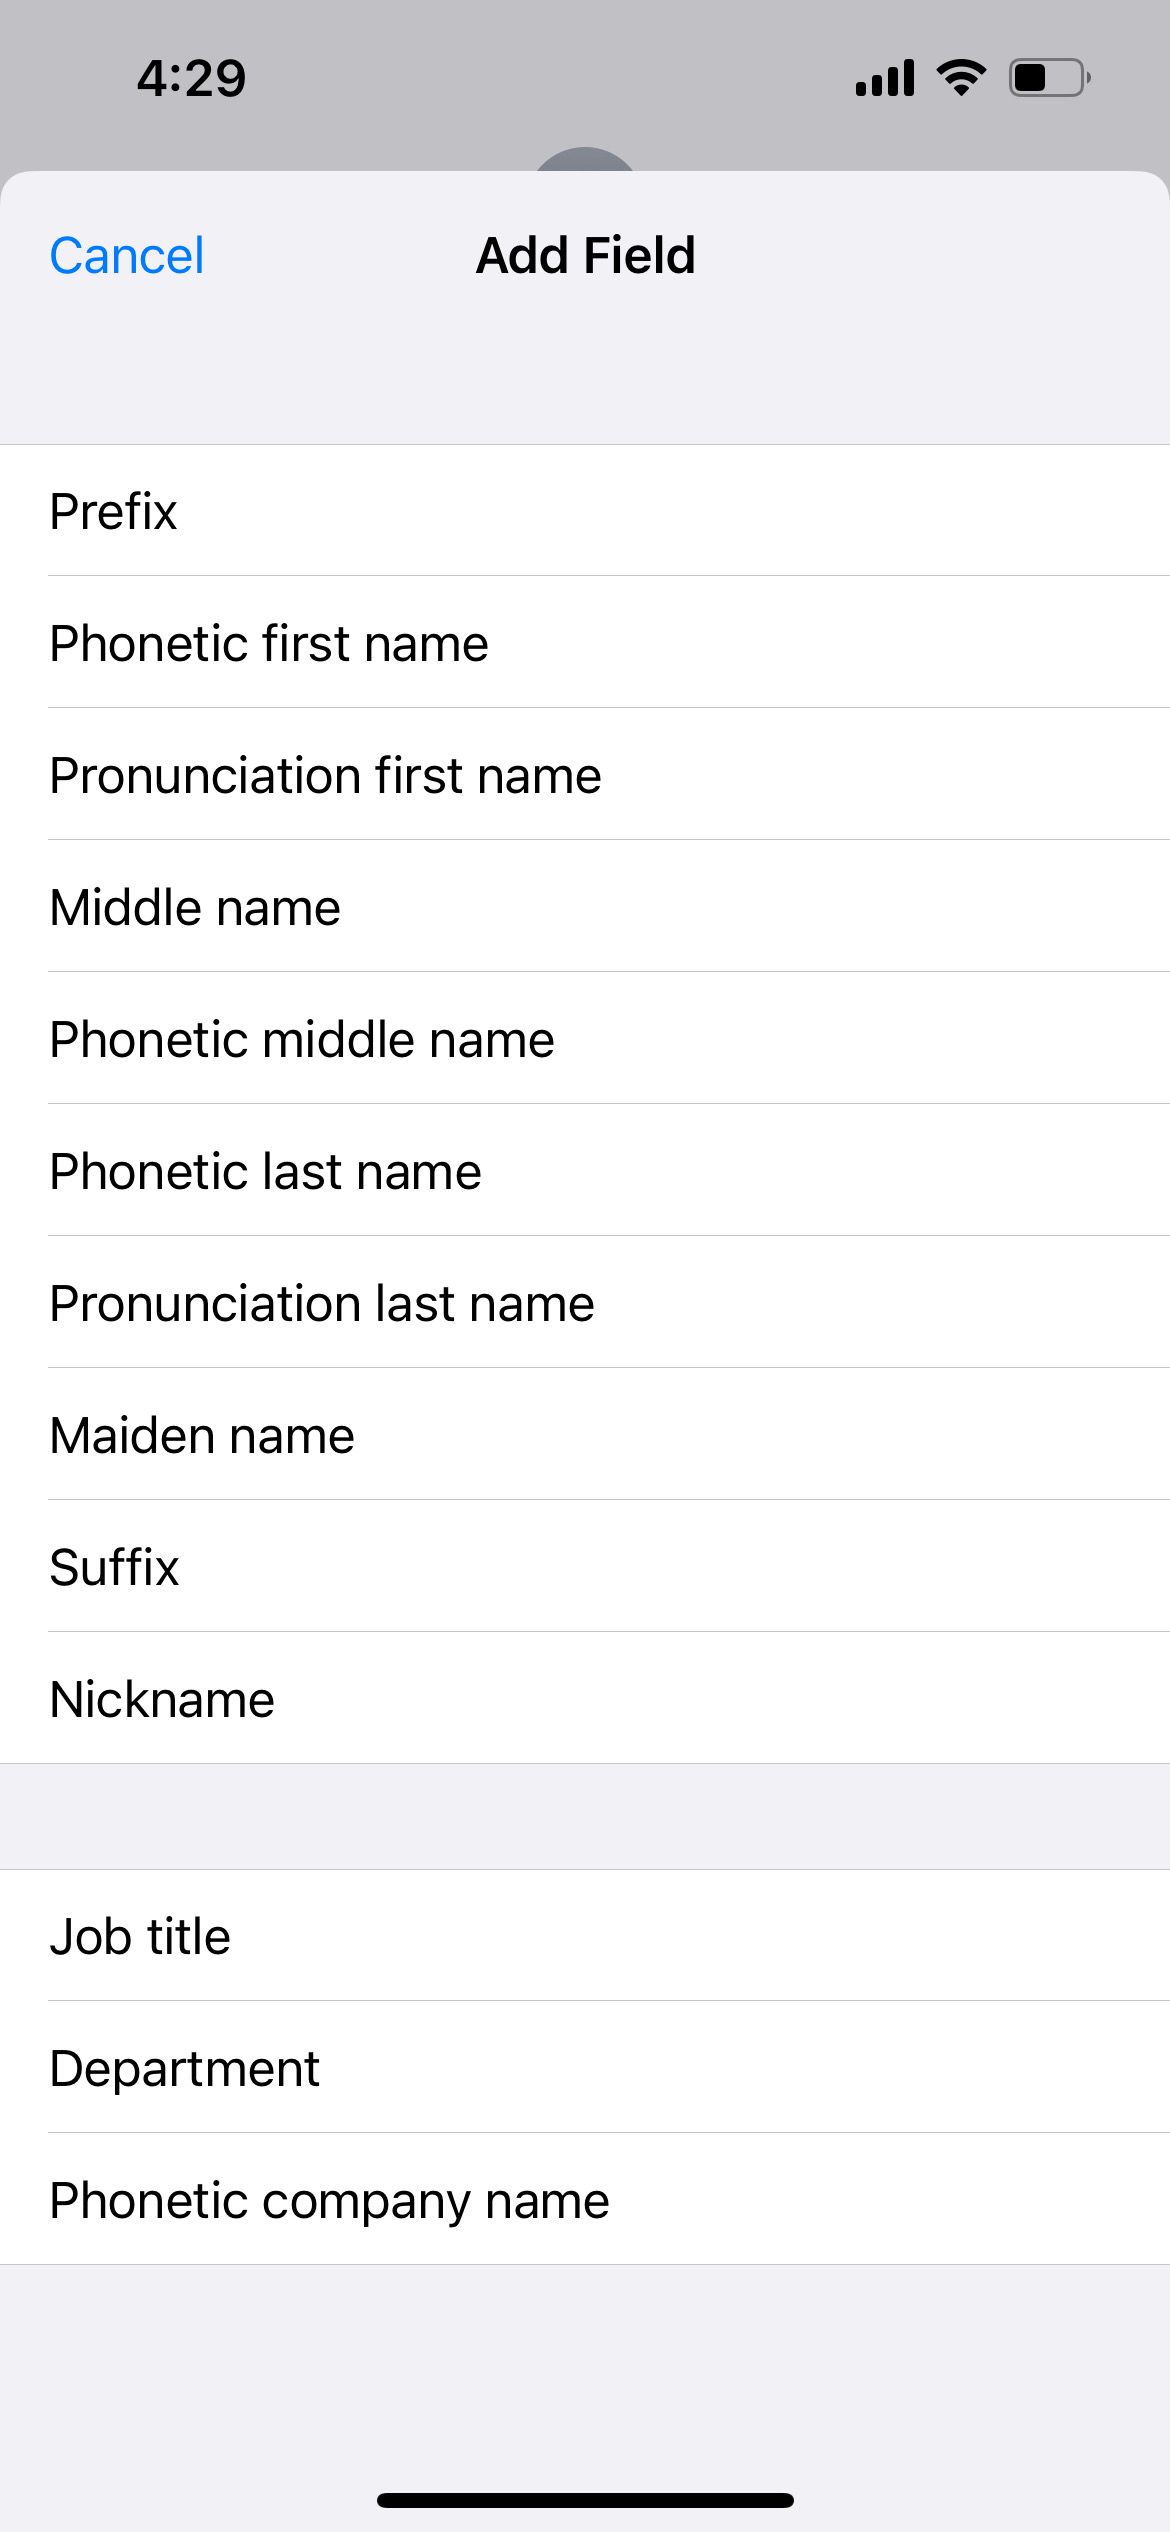
- Tap Add Field. Select Nickname.
- Type in your contact’s nickname in the new empty field. Tap Done.
4. Add Profile Pictures for Your Contacts
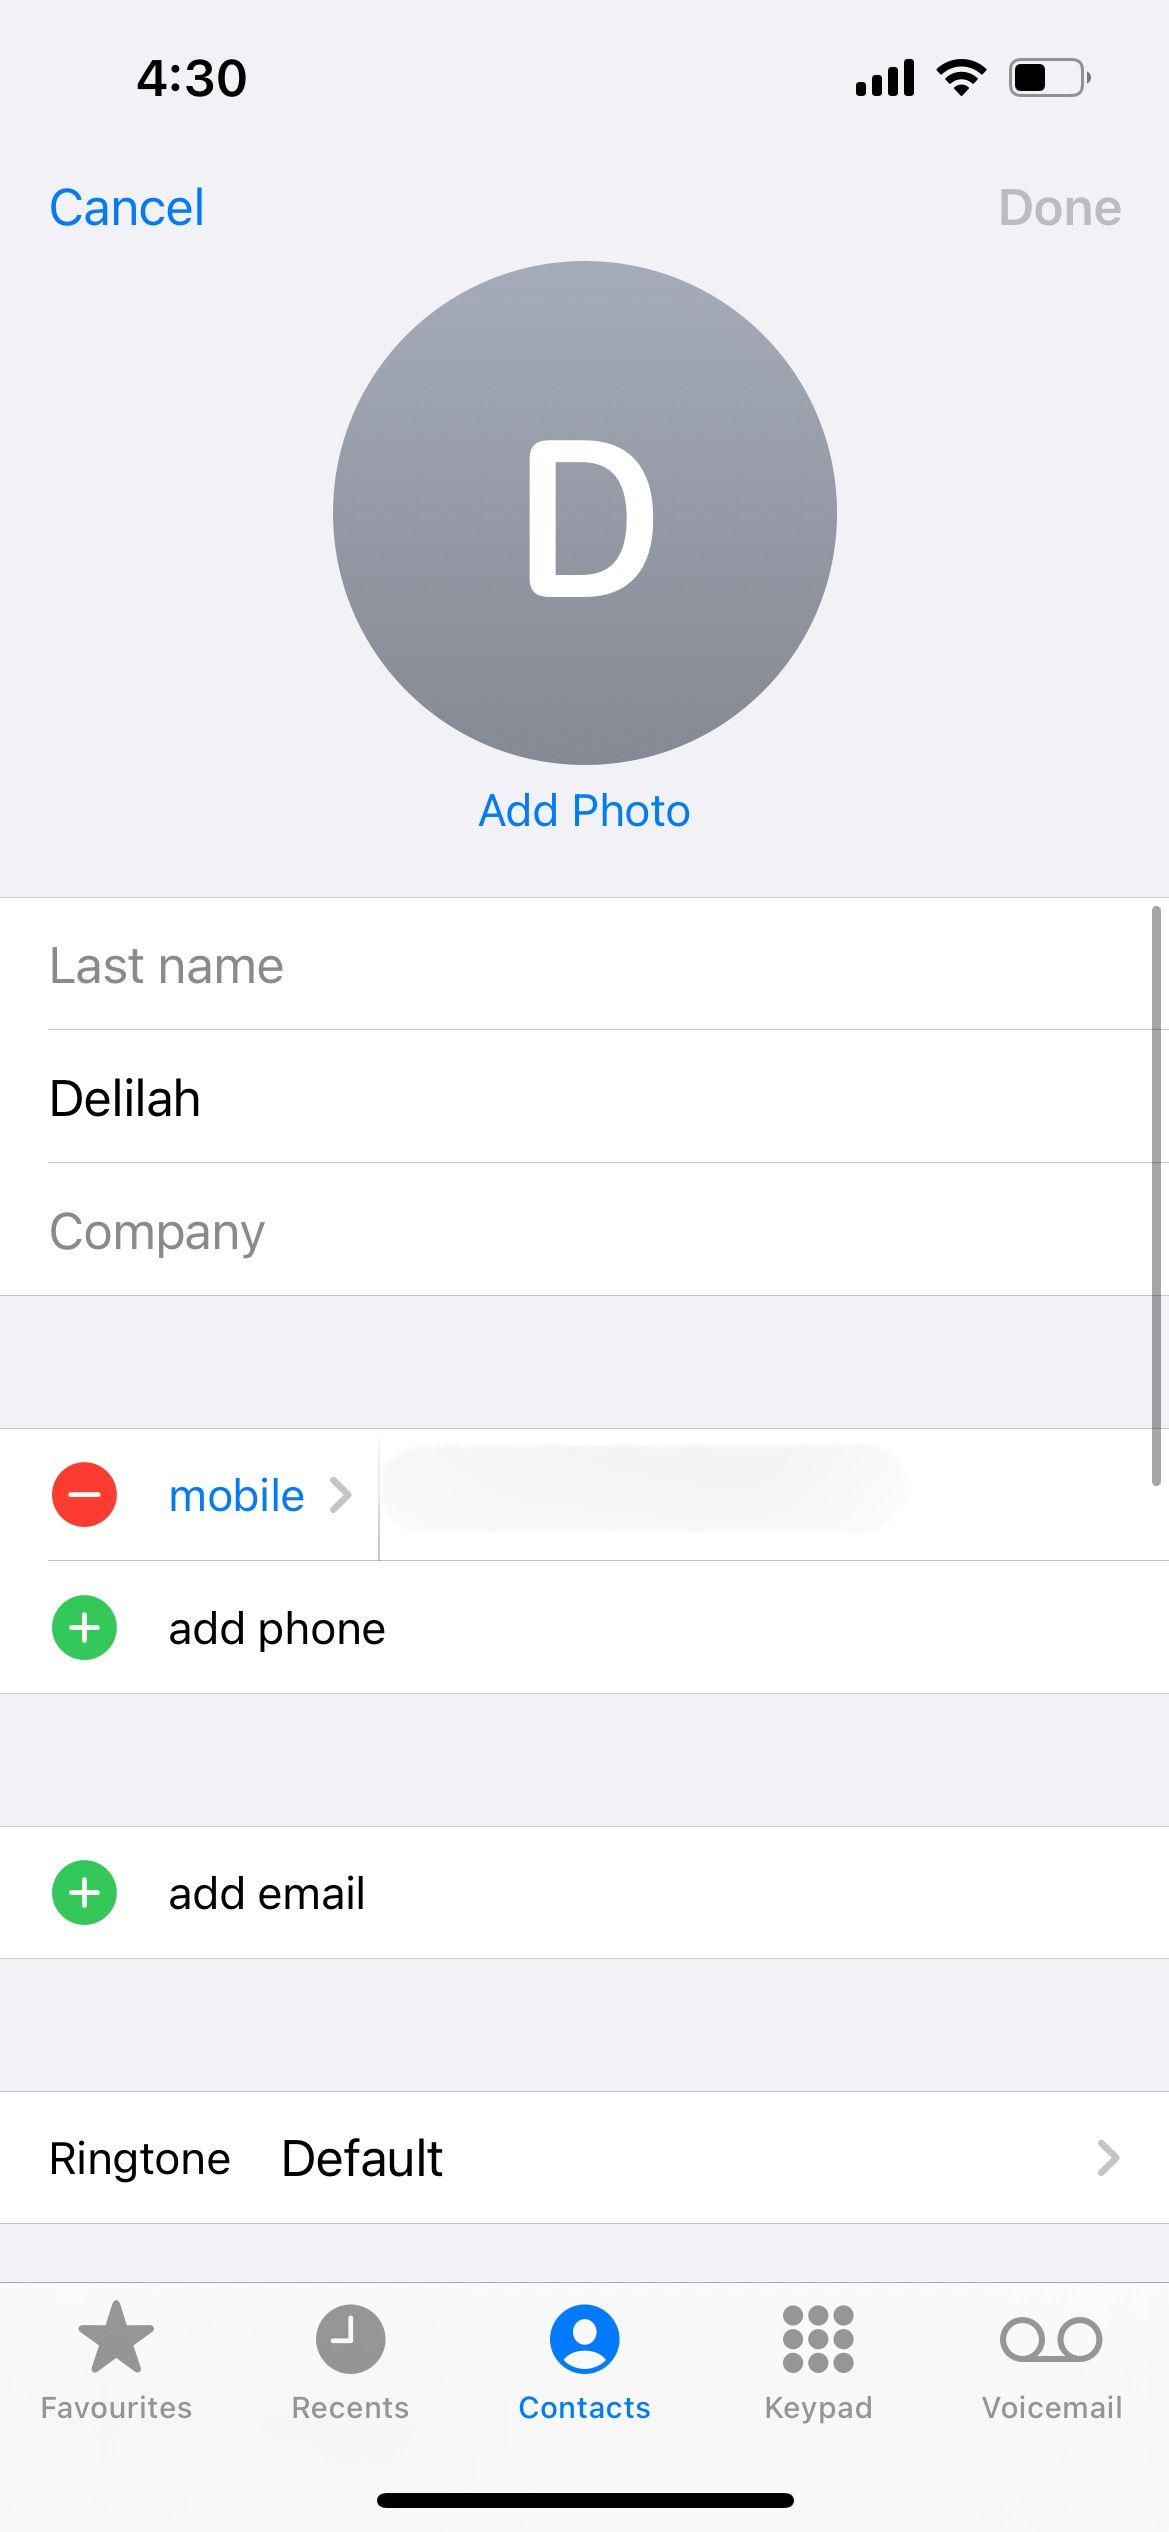
Besides customizing your contact’s name, another way to instantly identify people is to add a profile photo for your contacts. The steps are similar to how you add a nickname:
- In the Phone app, select the Contacts tab.
- Tap on the contact you want to modify. Tap Edit.
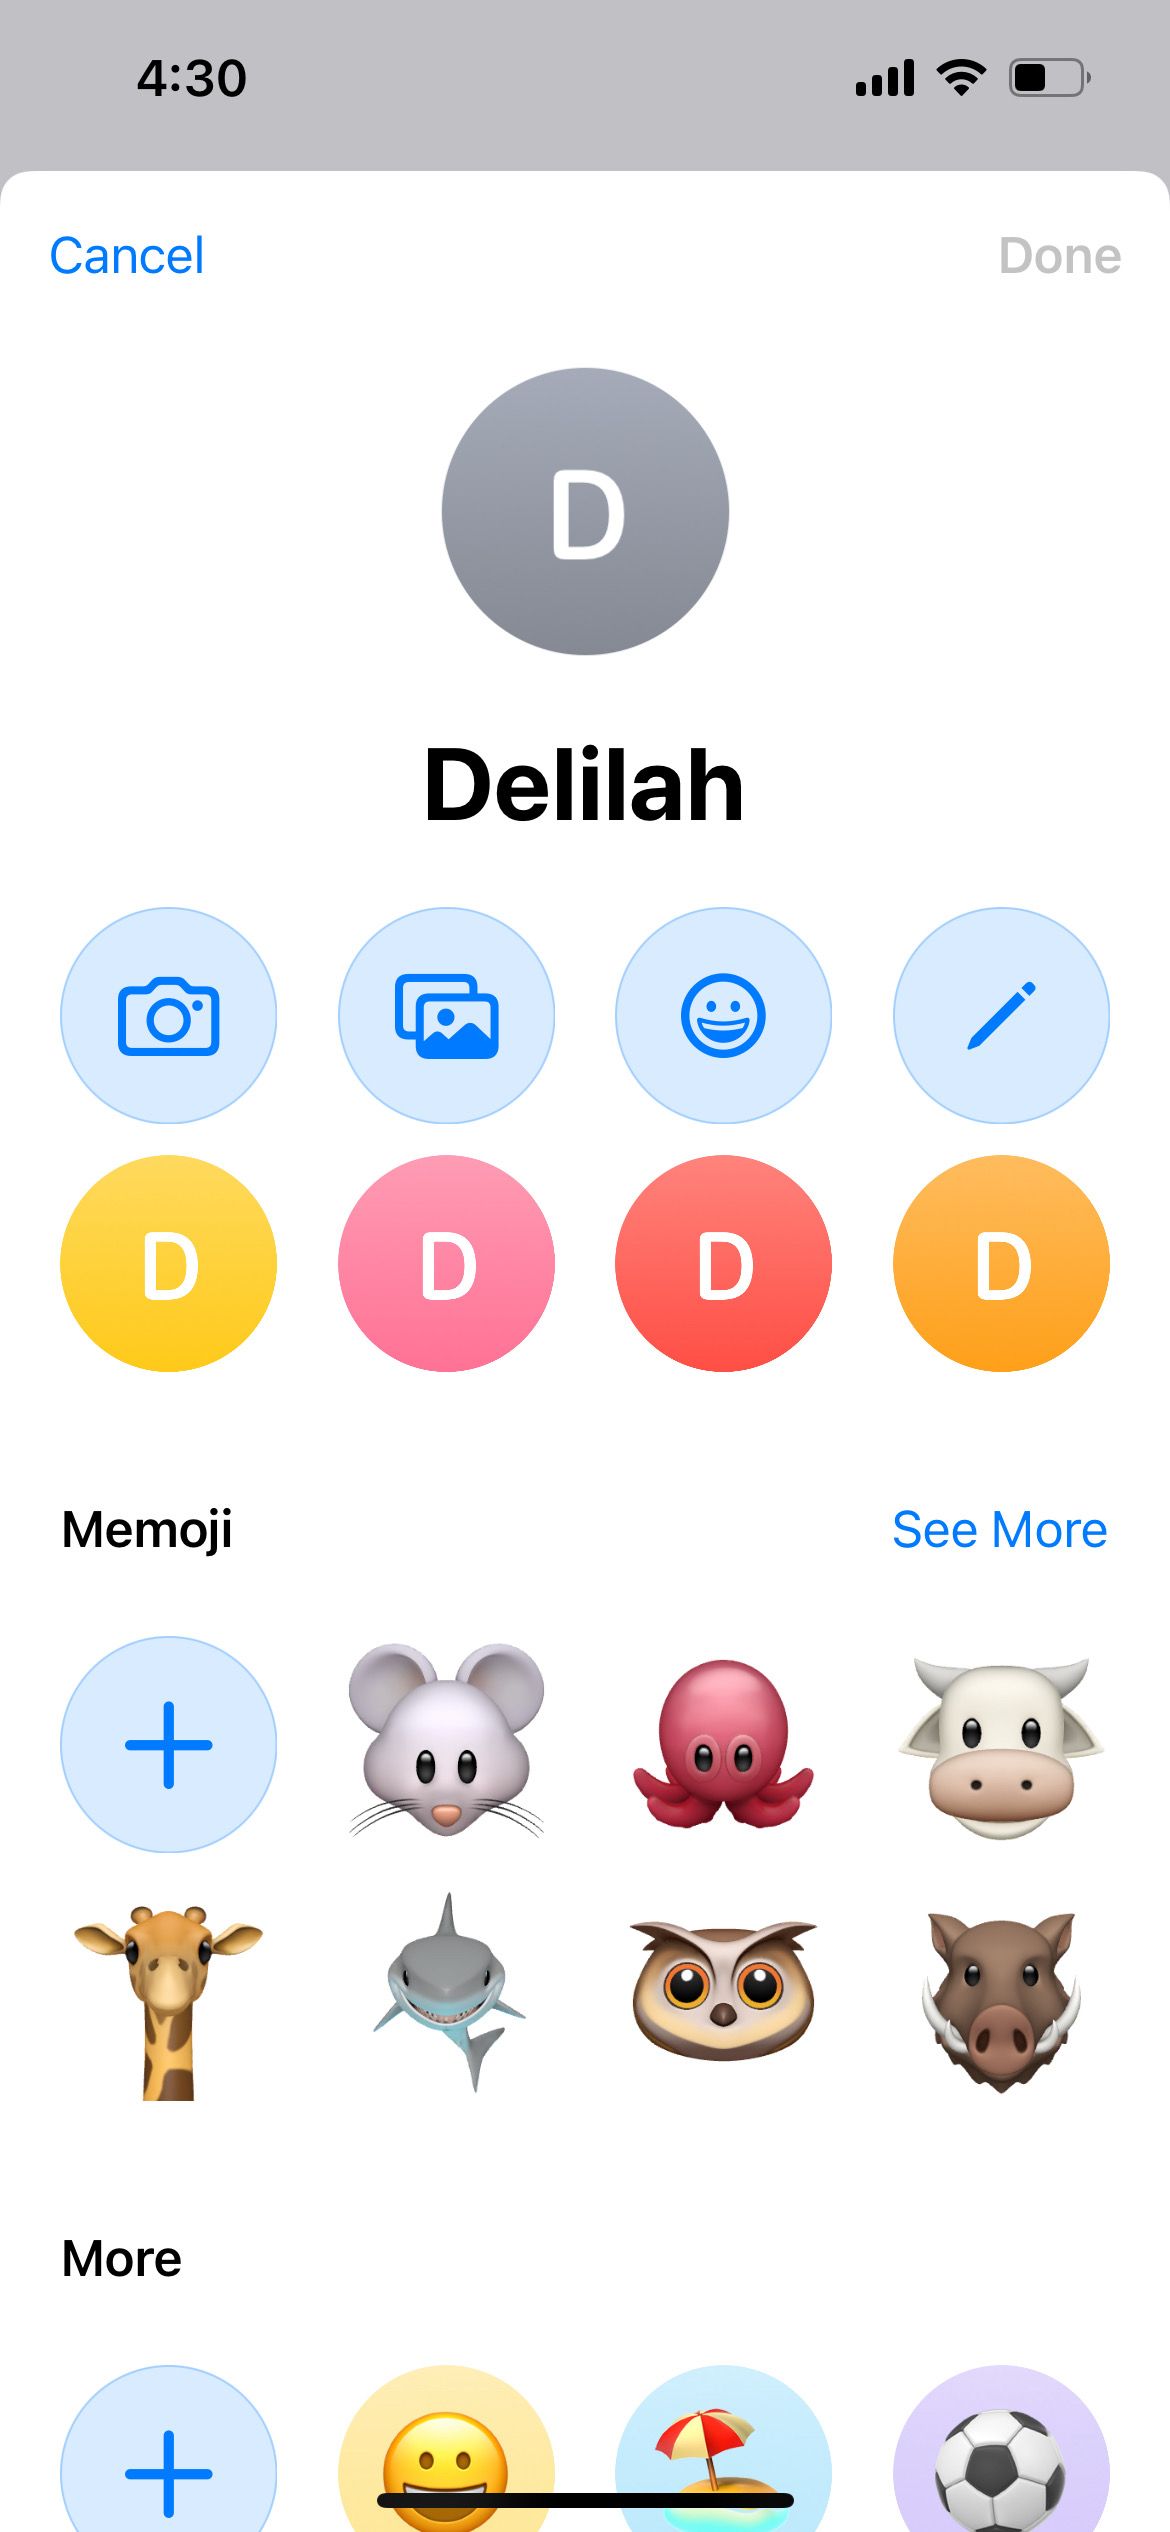
- Next, tap Add Photo.
- For the profile picture, you can add a Memoji, Emoji, or an image from your Photo Library. If the person is right in front of you, ask them to smile (or put on their goofiest face) so you can snap a picture!
- Once you added the profile picture, simply tap Done to save it.

5. Change the Sorting Order and Display of Your Contacts
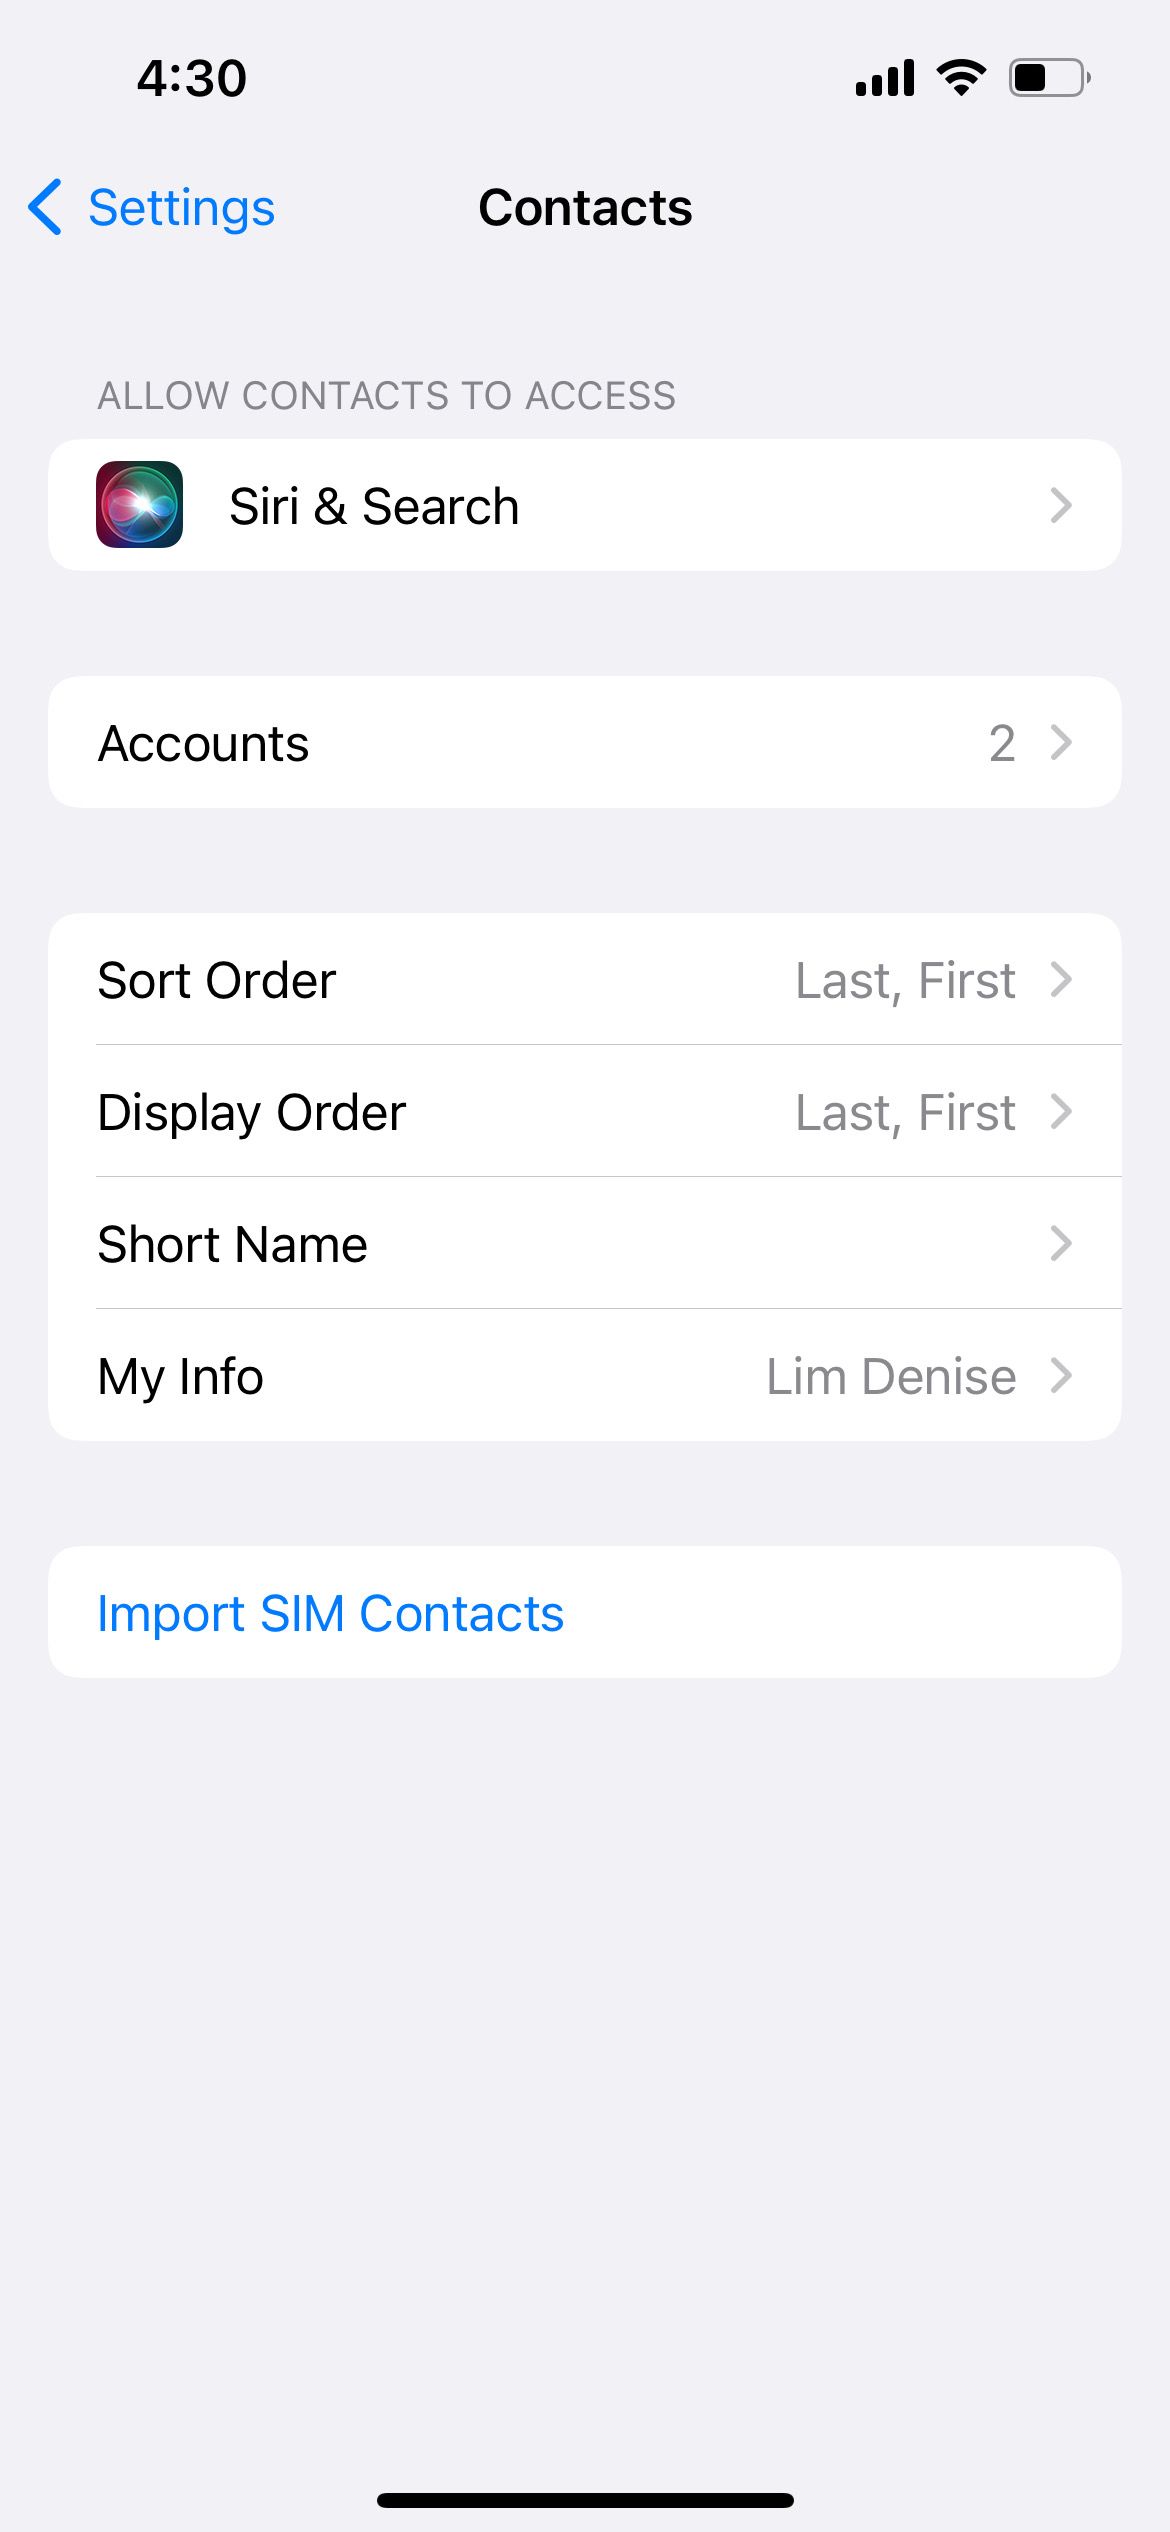
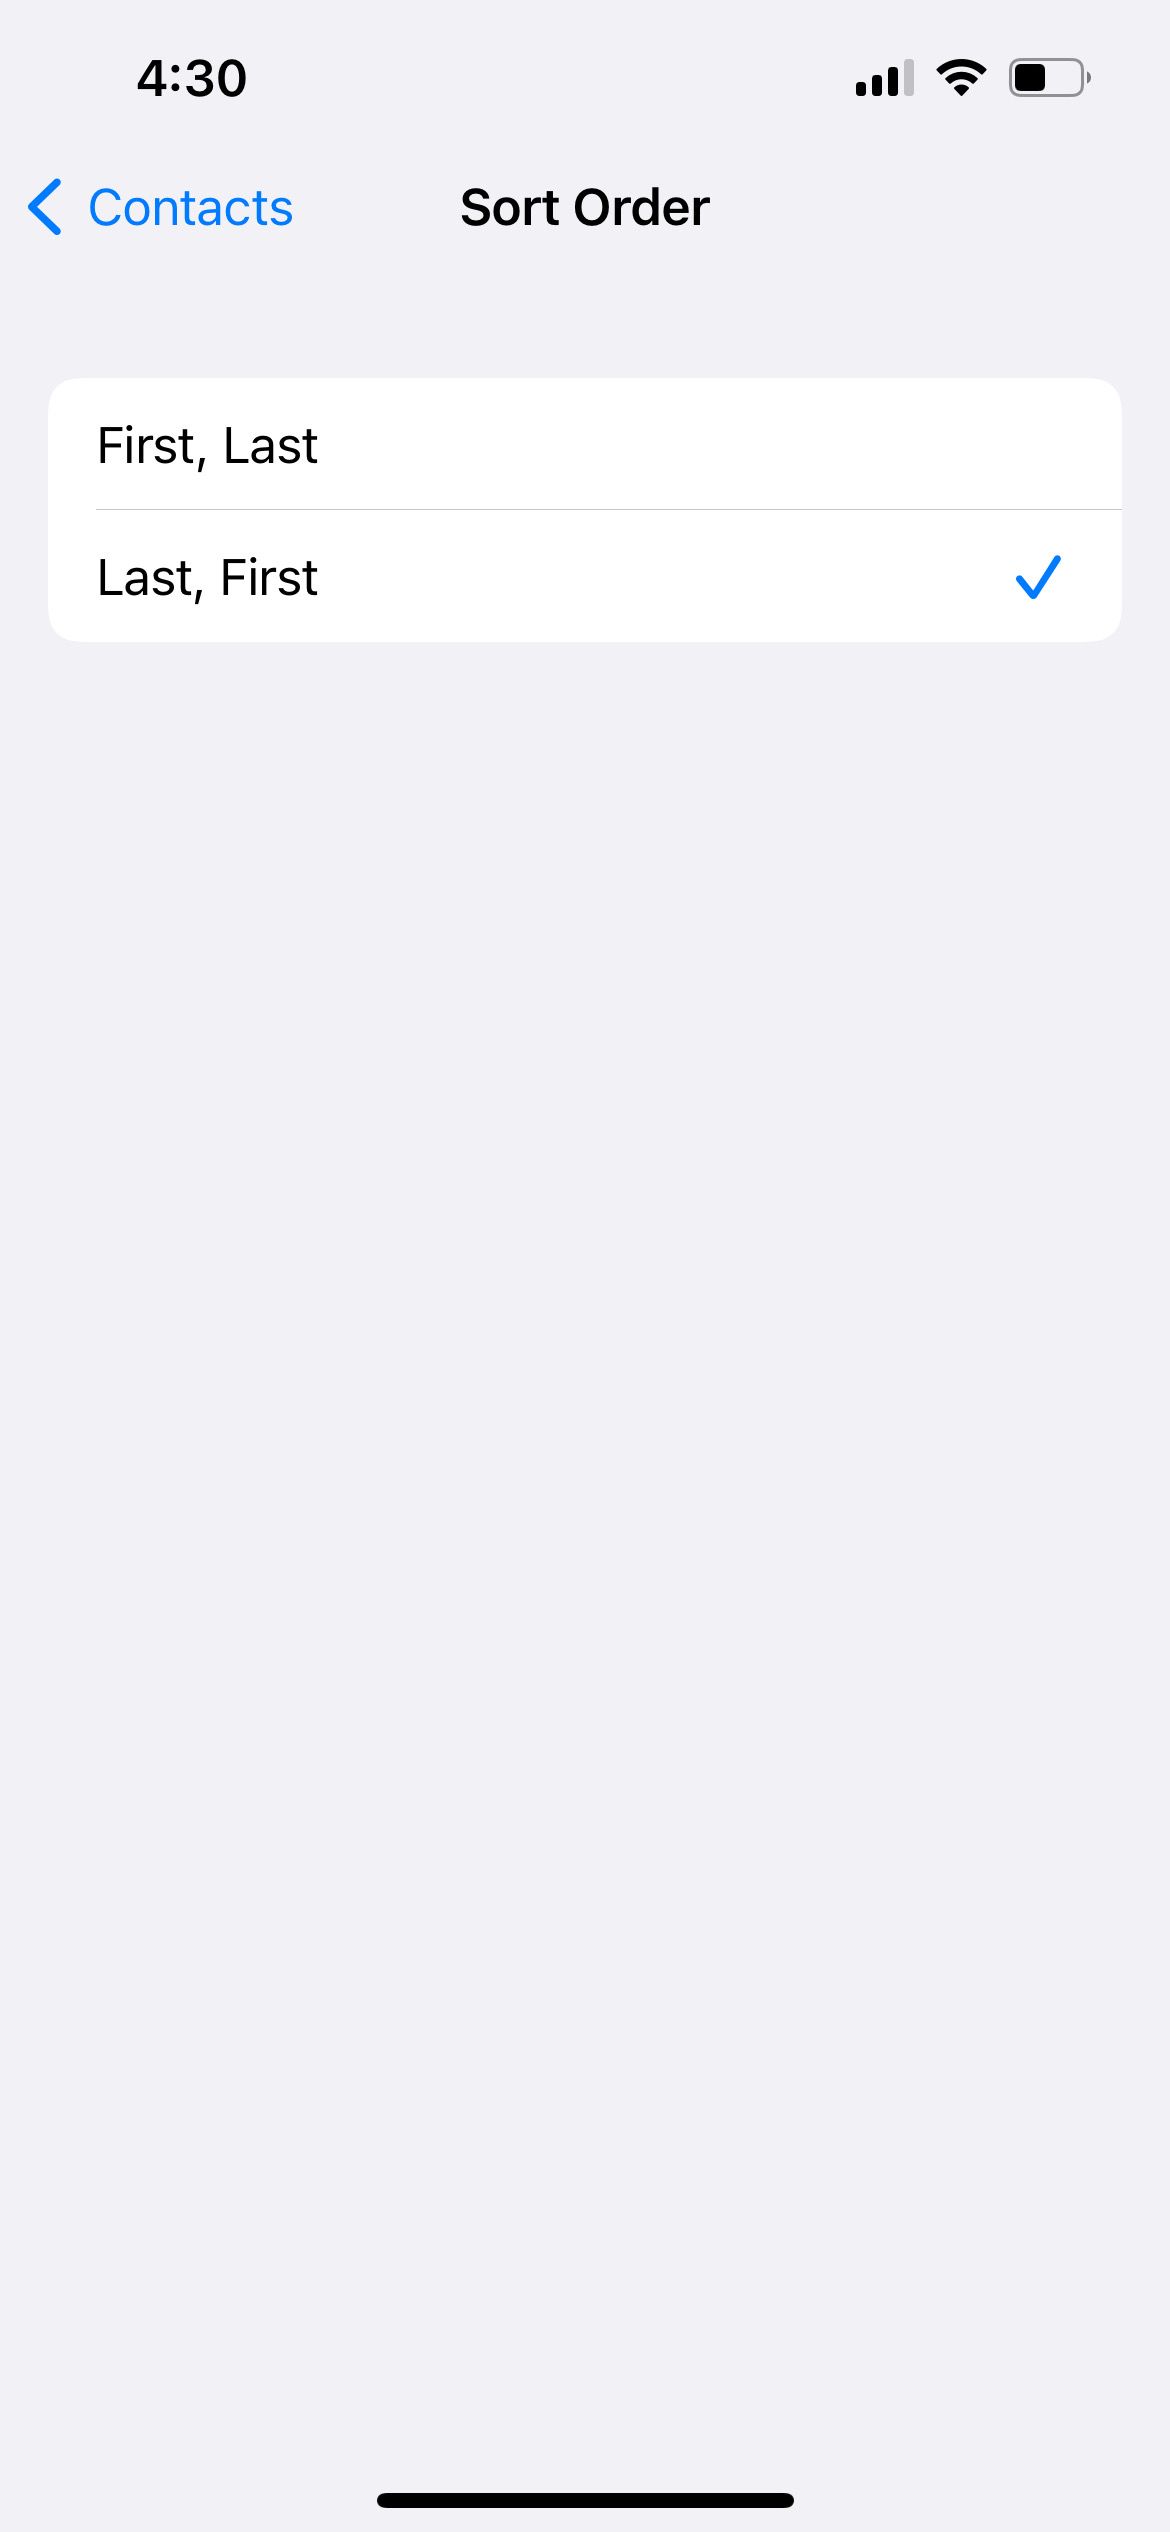
By default, your iPhone sorts your contacts by their last name, in alphabetical order. You can change this in your iPhone’s settings if you prefer to sort by their first name:
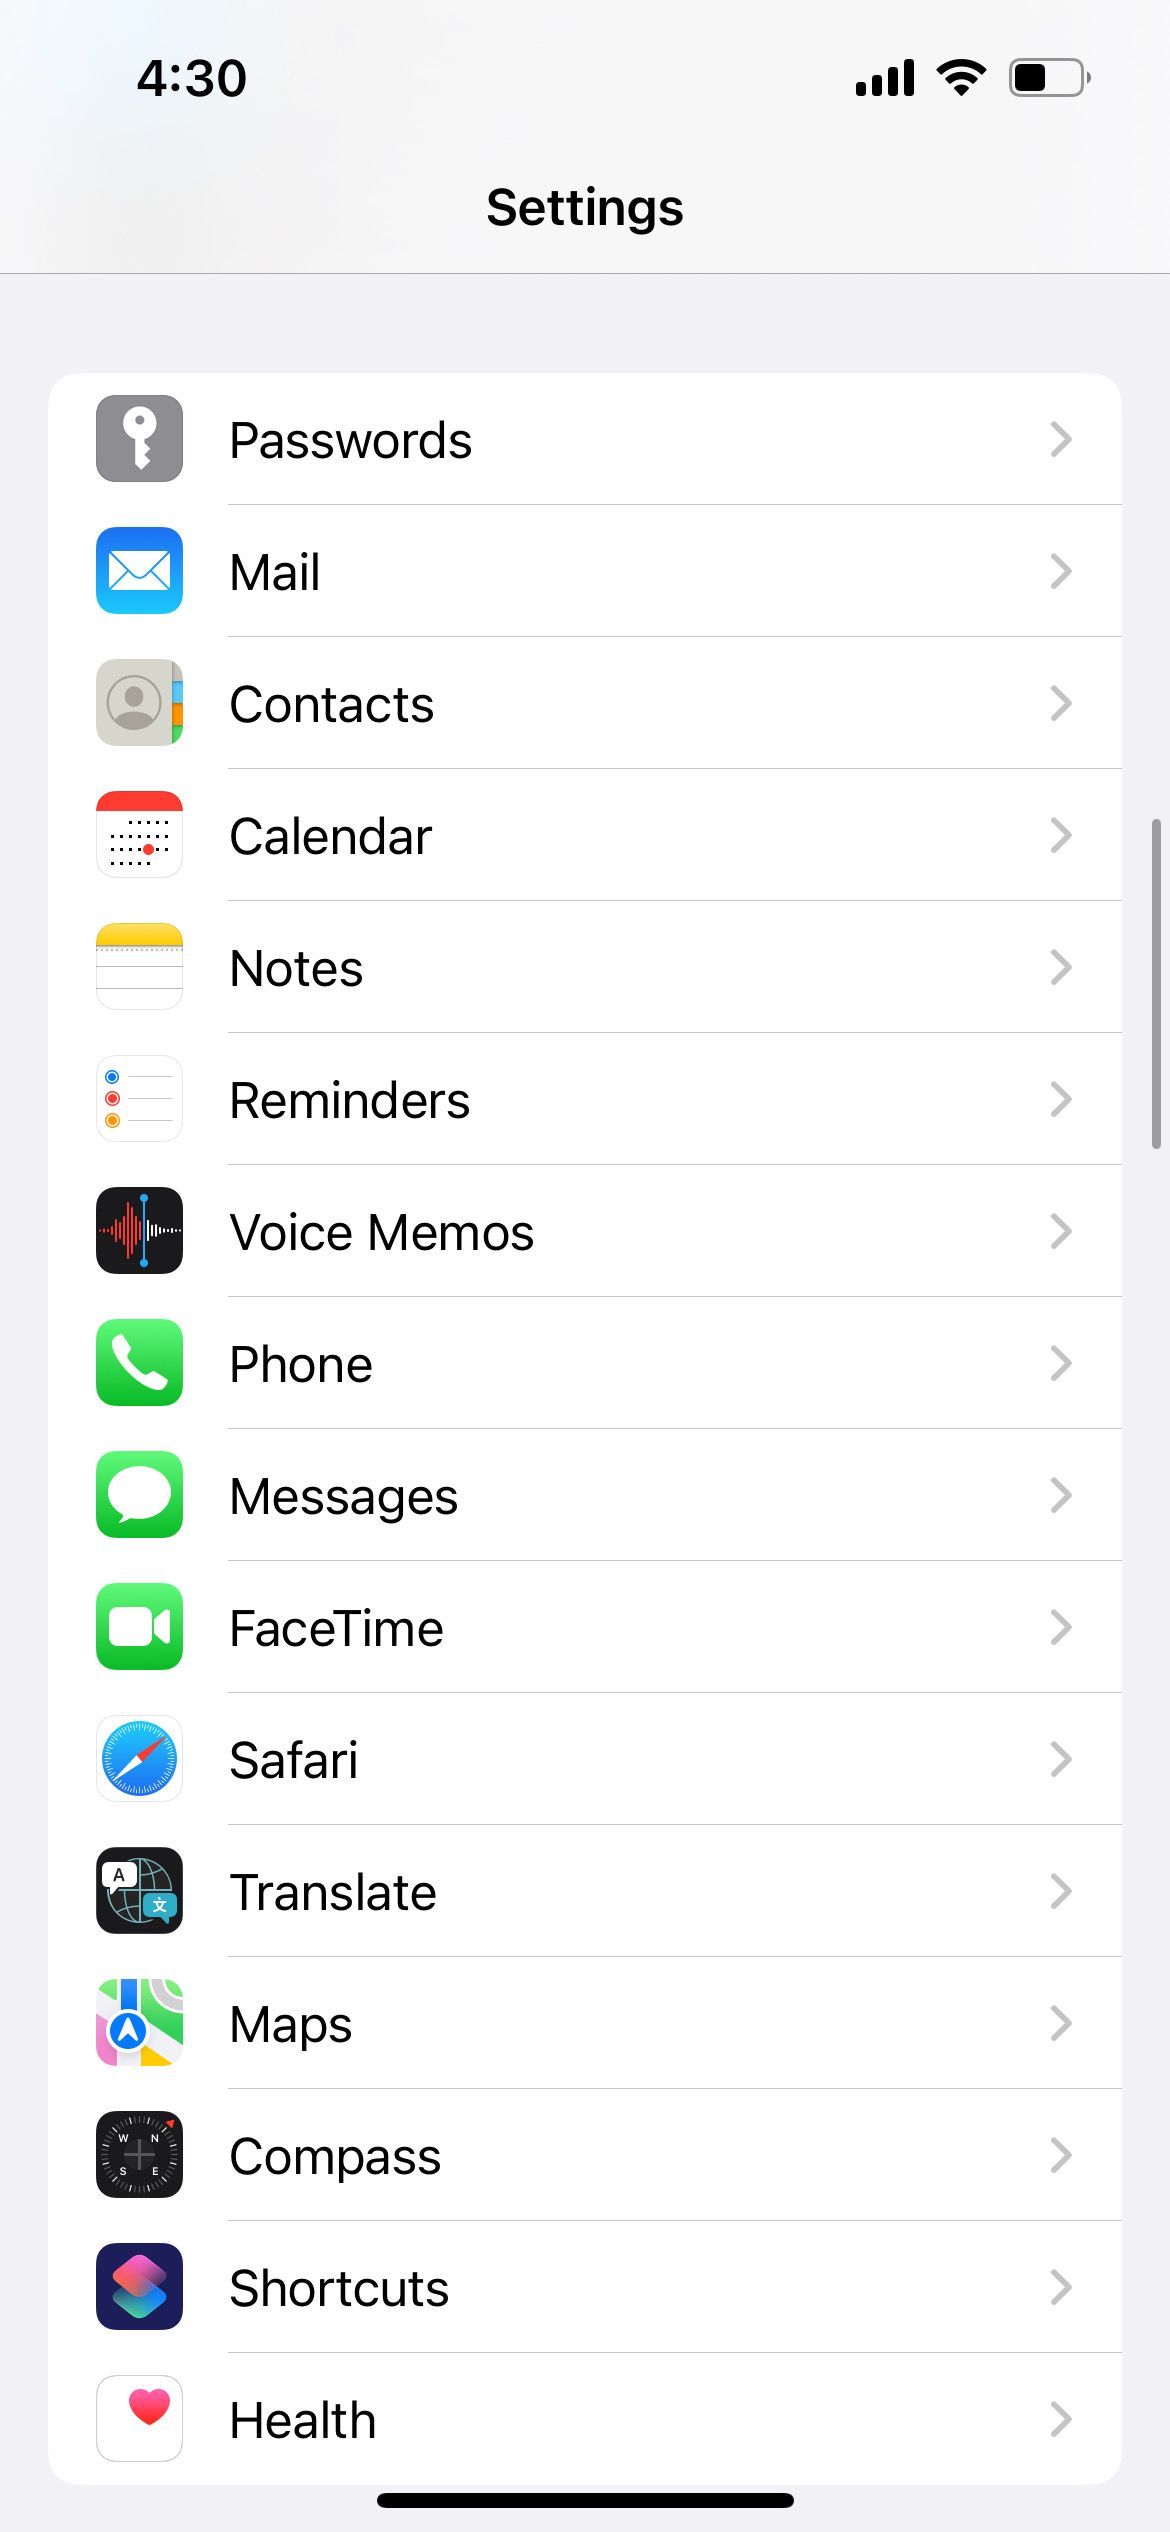
- In the Settings app, select Contacts.
- Tap Sort Order to choose whether you want to sort by first or last name.
- Tap Display Order to choose whether you prefer your contact list to display the last name before the first name, or vice versa.
6. Add Contacts to Your Favorites List
Do you tend to use the Recents tab to get your frequent contacts? Well, once it gets cluttered with unknown numbers, you’ll have to go scrolling a long way to find people you want to call back. Even worse, if you cleared your Recents list for a fresh look, you’ll need to go back to the Contacts tab to search from the master list.
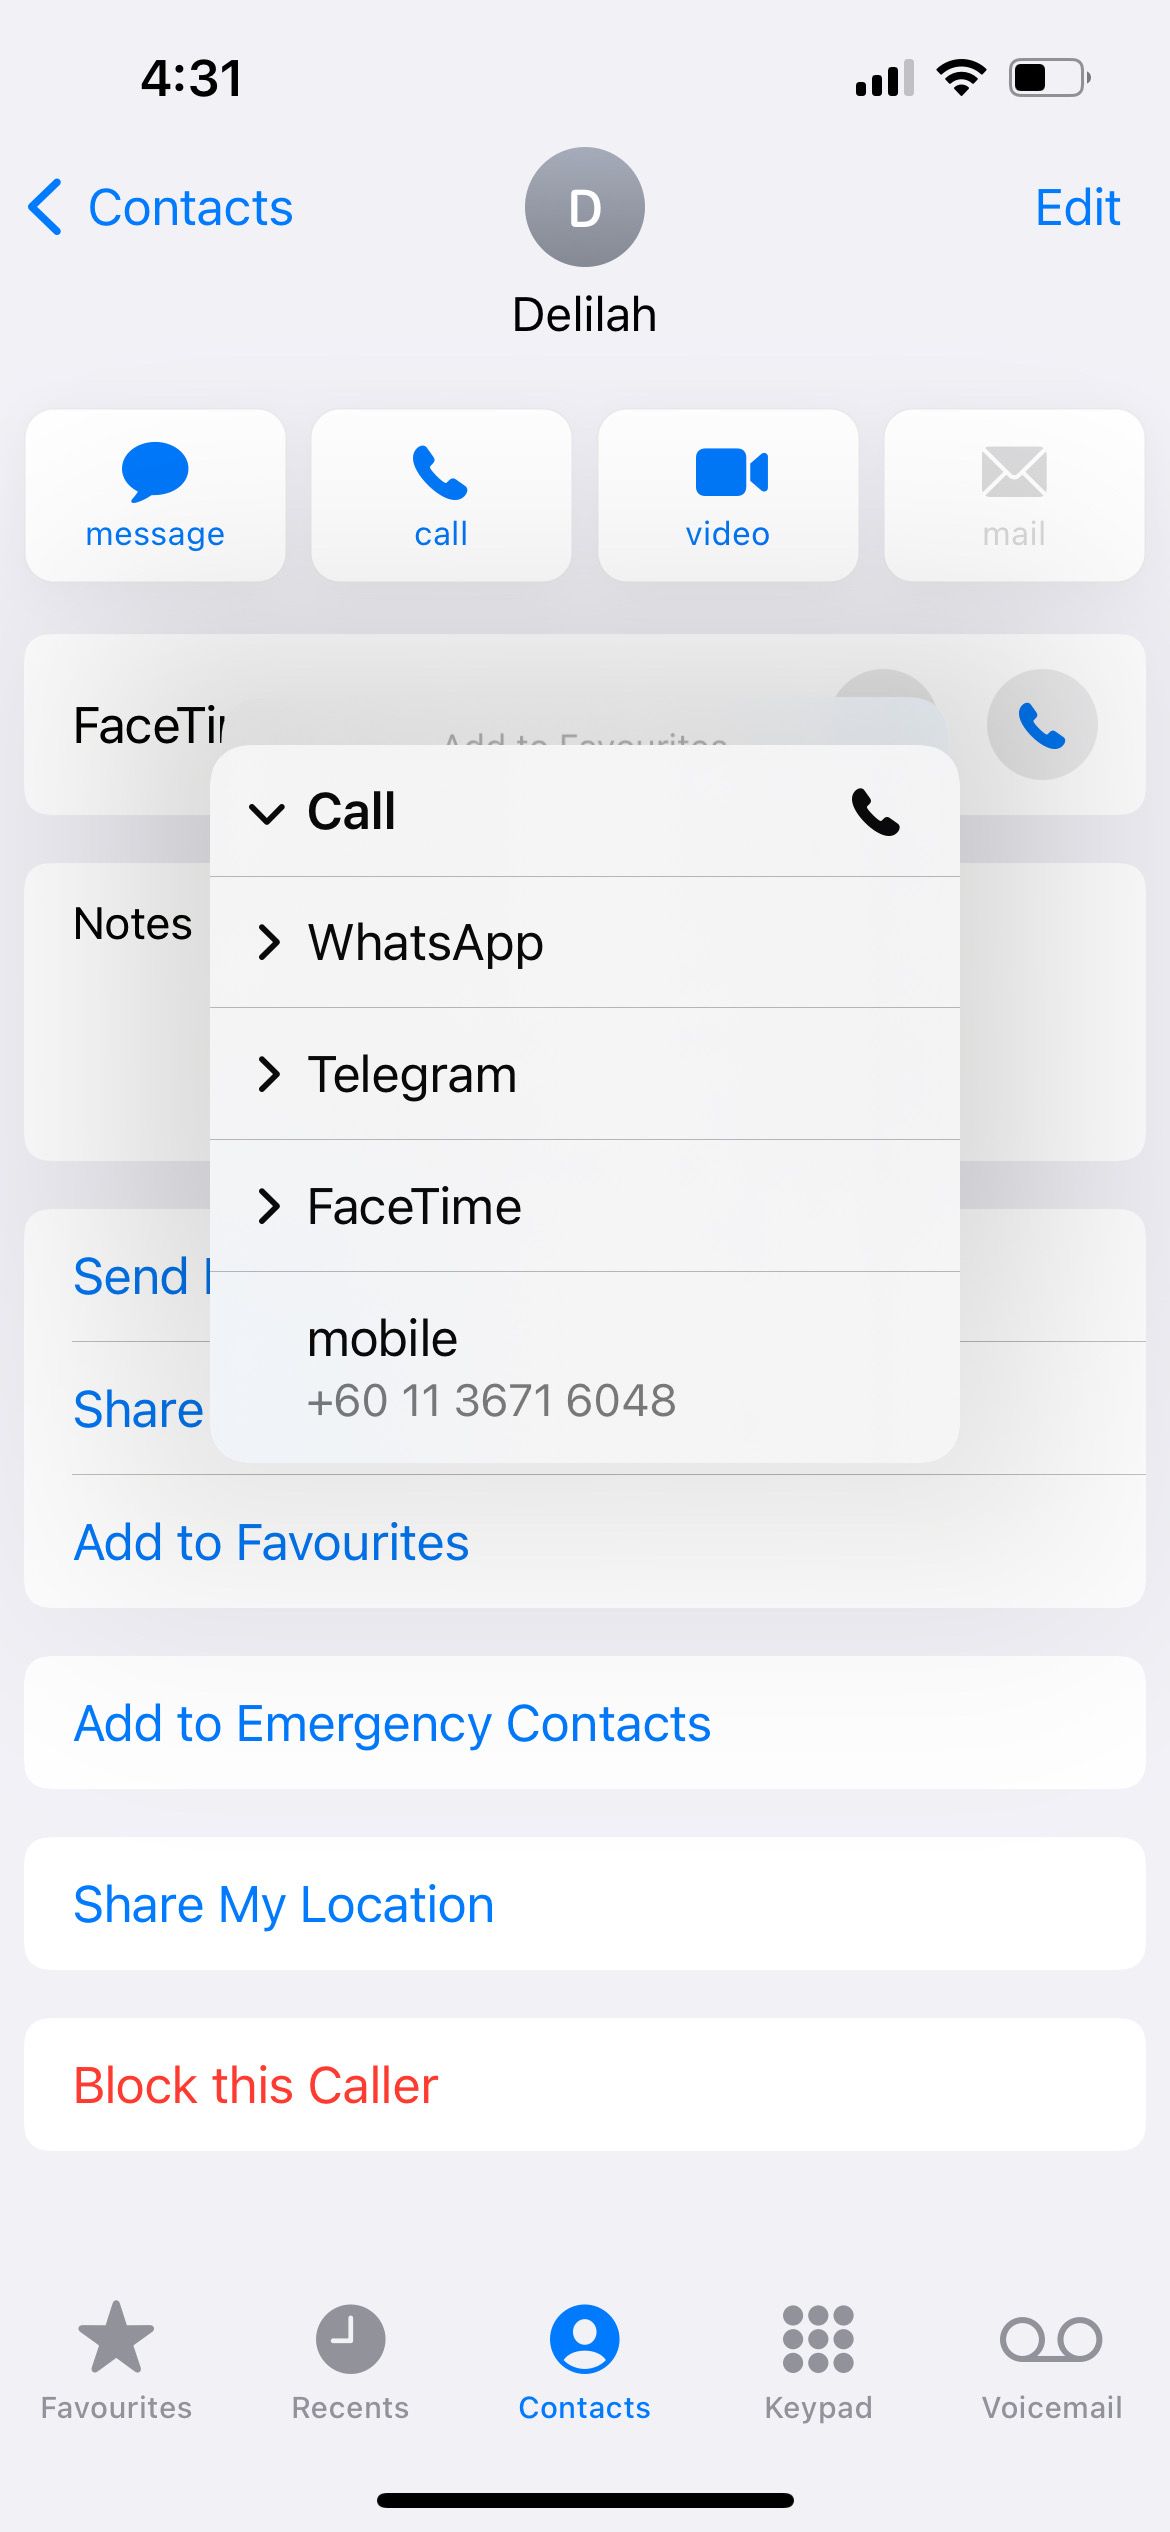
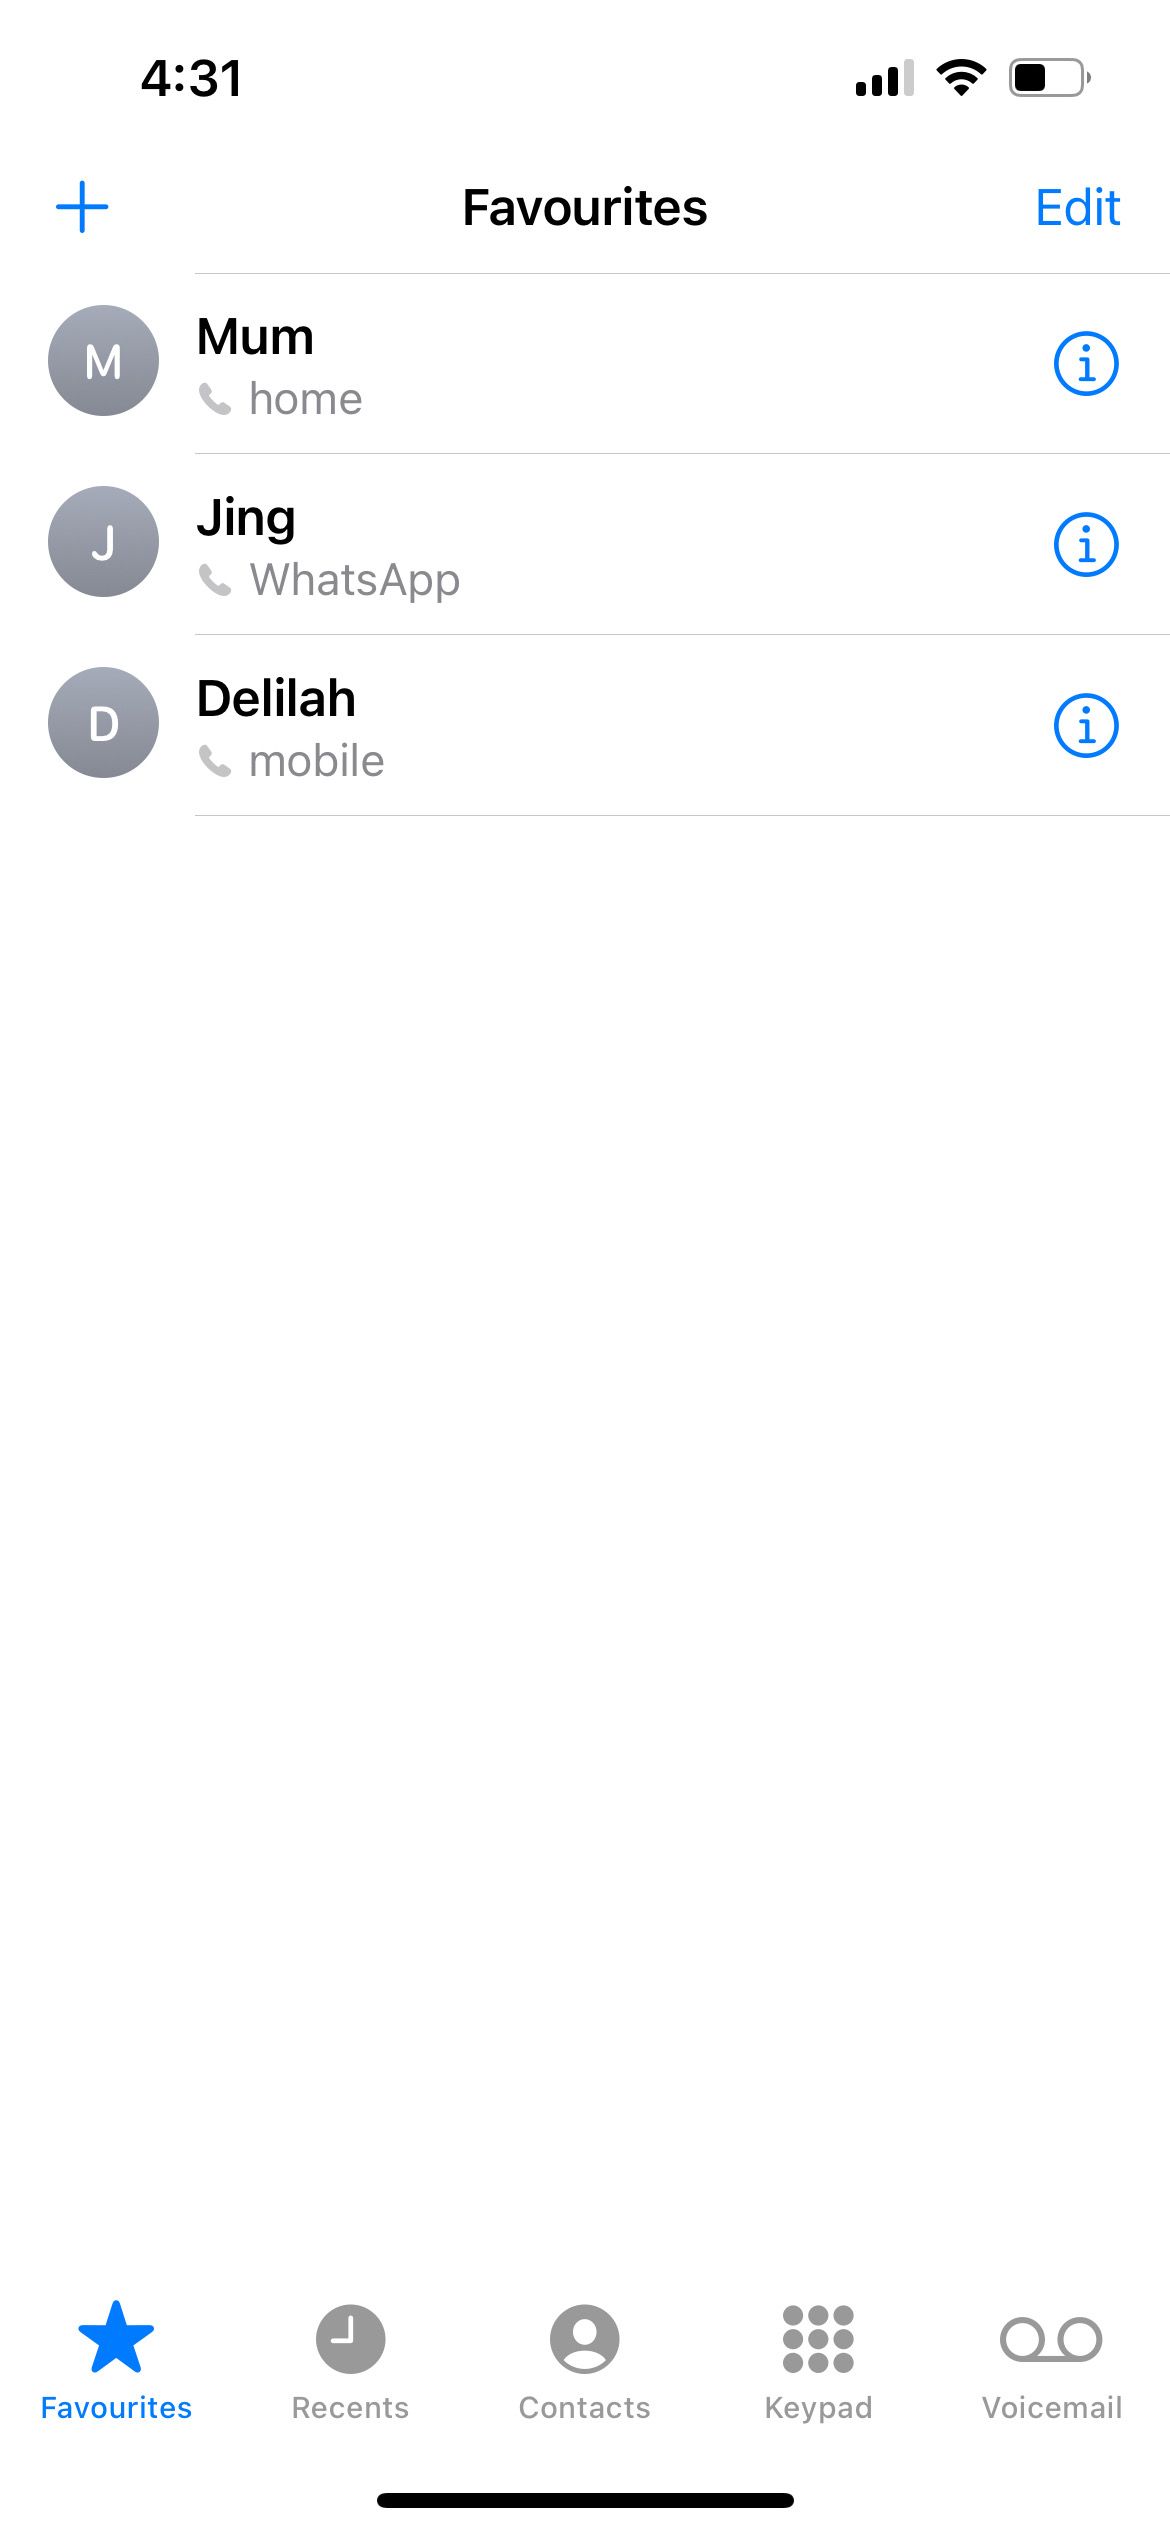
So if you haven’t done so already, it’s time to add frequent contacts to your Favorites list. This guarantees that they’re always only a few taps away. Here’s how to do it:
- In the Recents tab of the Contacts app, tap the Information icon of your contact. Or in the Contacts tab, identify and tap on your desired contact.
- Select Add to Favorites.
- Select Message, Call, or Video and then the corresponding app. This depends on which is the mode of communication you prefer the most with that contact.
- Your contact will now show up in your Favorites tab in the Phone app.

7. Batch Delete Contacts You No Longer Want
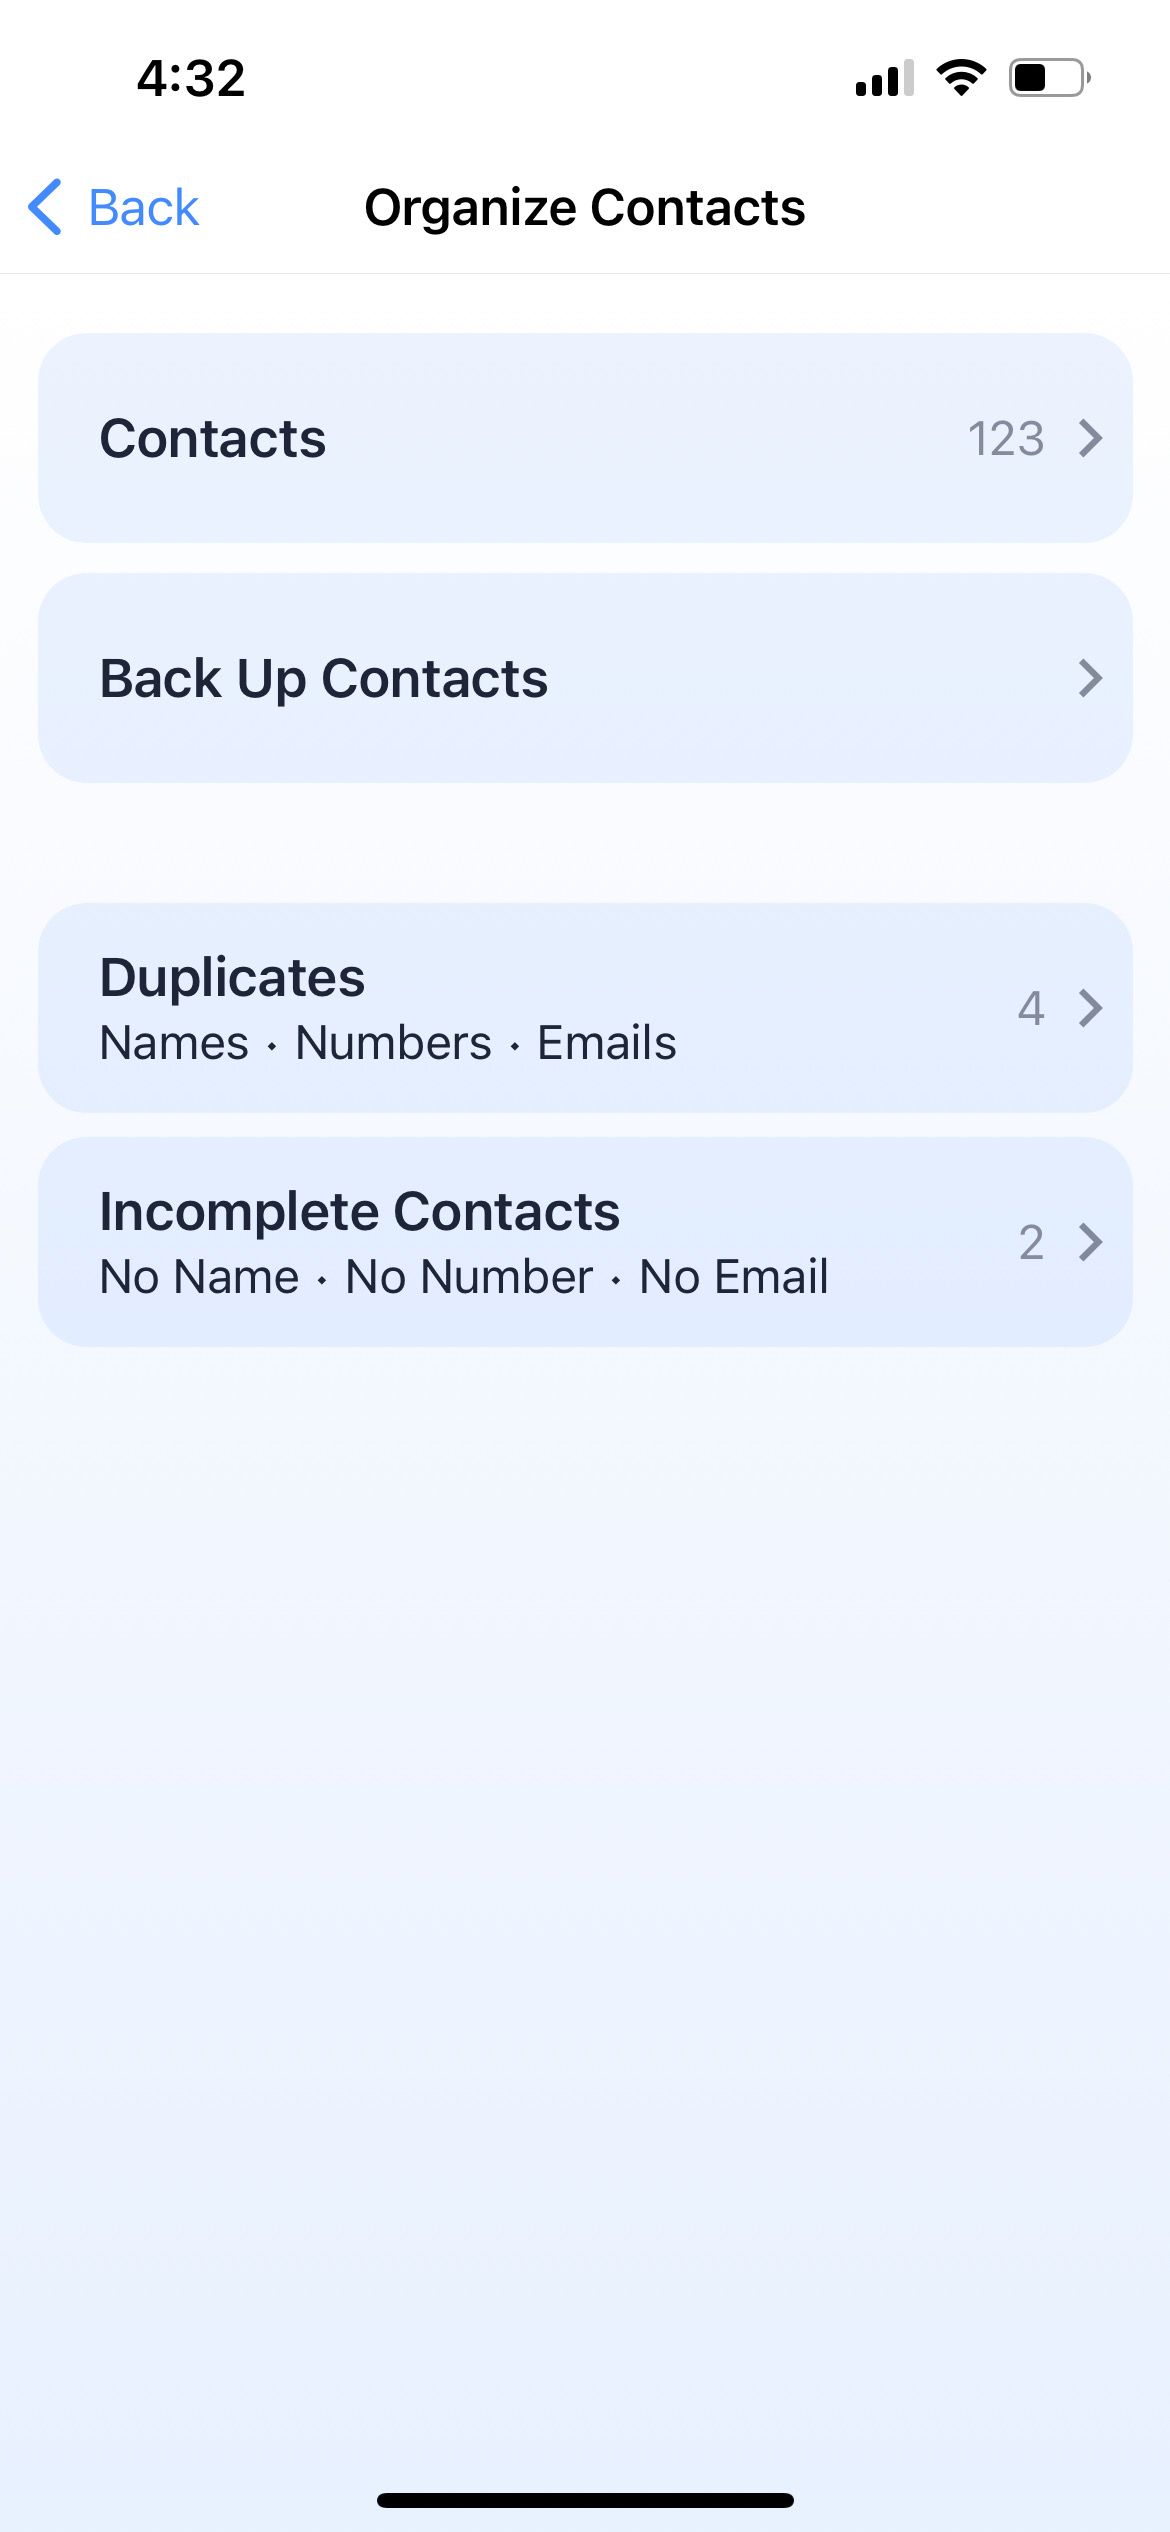
At the time of writing, there is still no way to delete multiple contacts on your iPhone directly from your contacts list. You’ll have to use workarounds to bulk delete contacts you no longer want. The easiest way is to download an app like Smart Cleaner to do so.
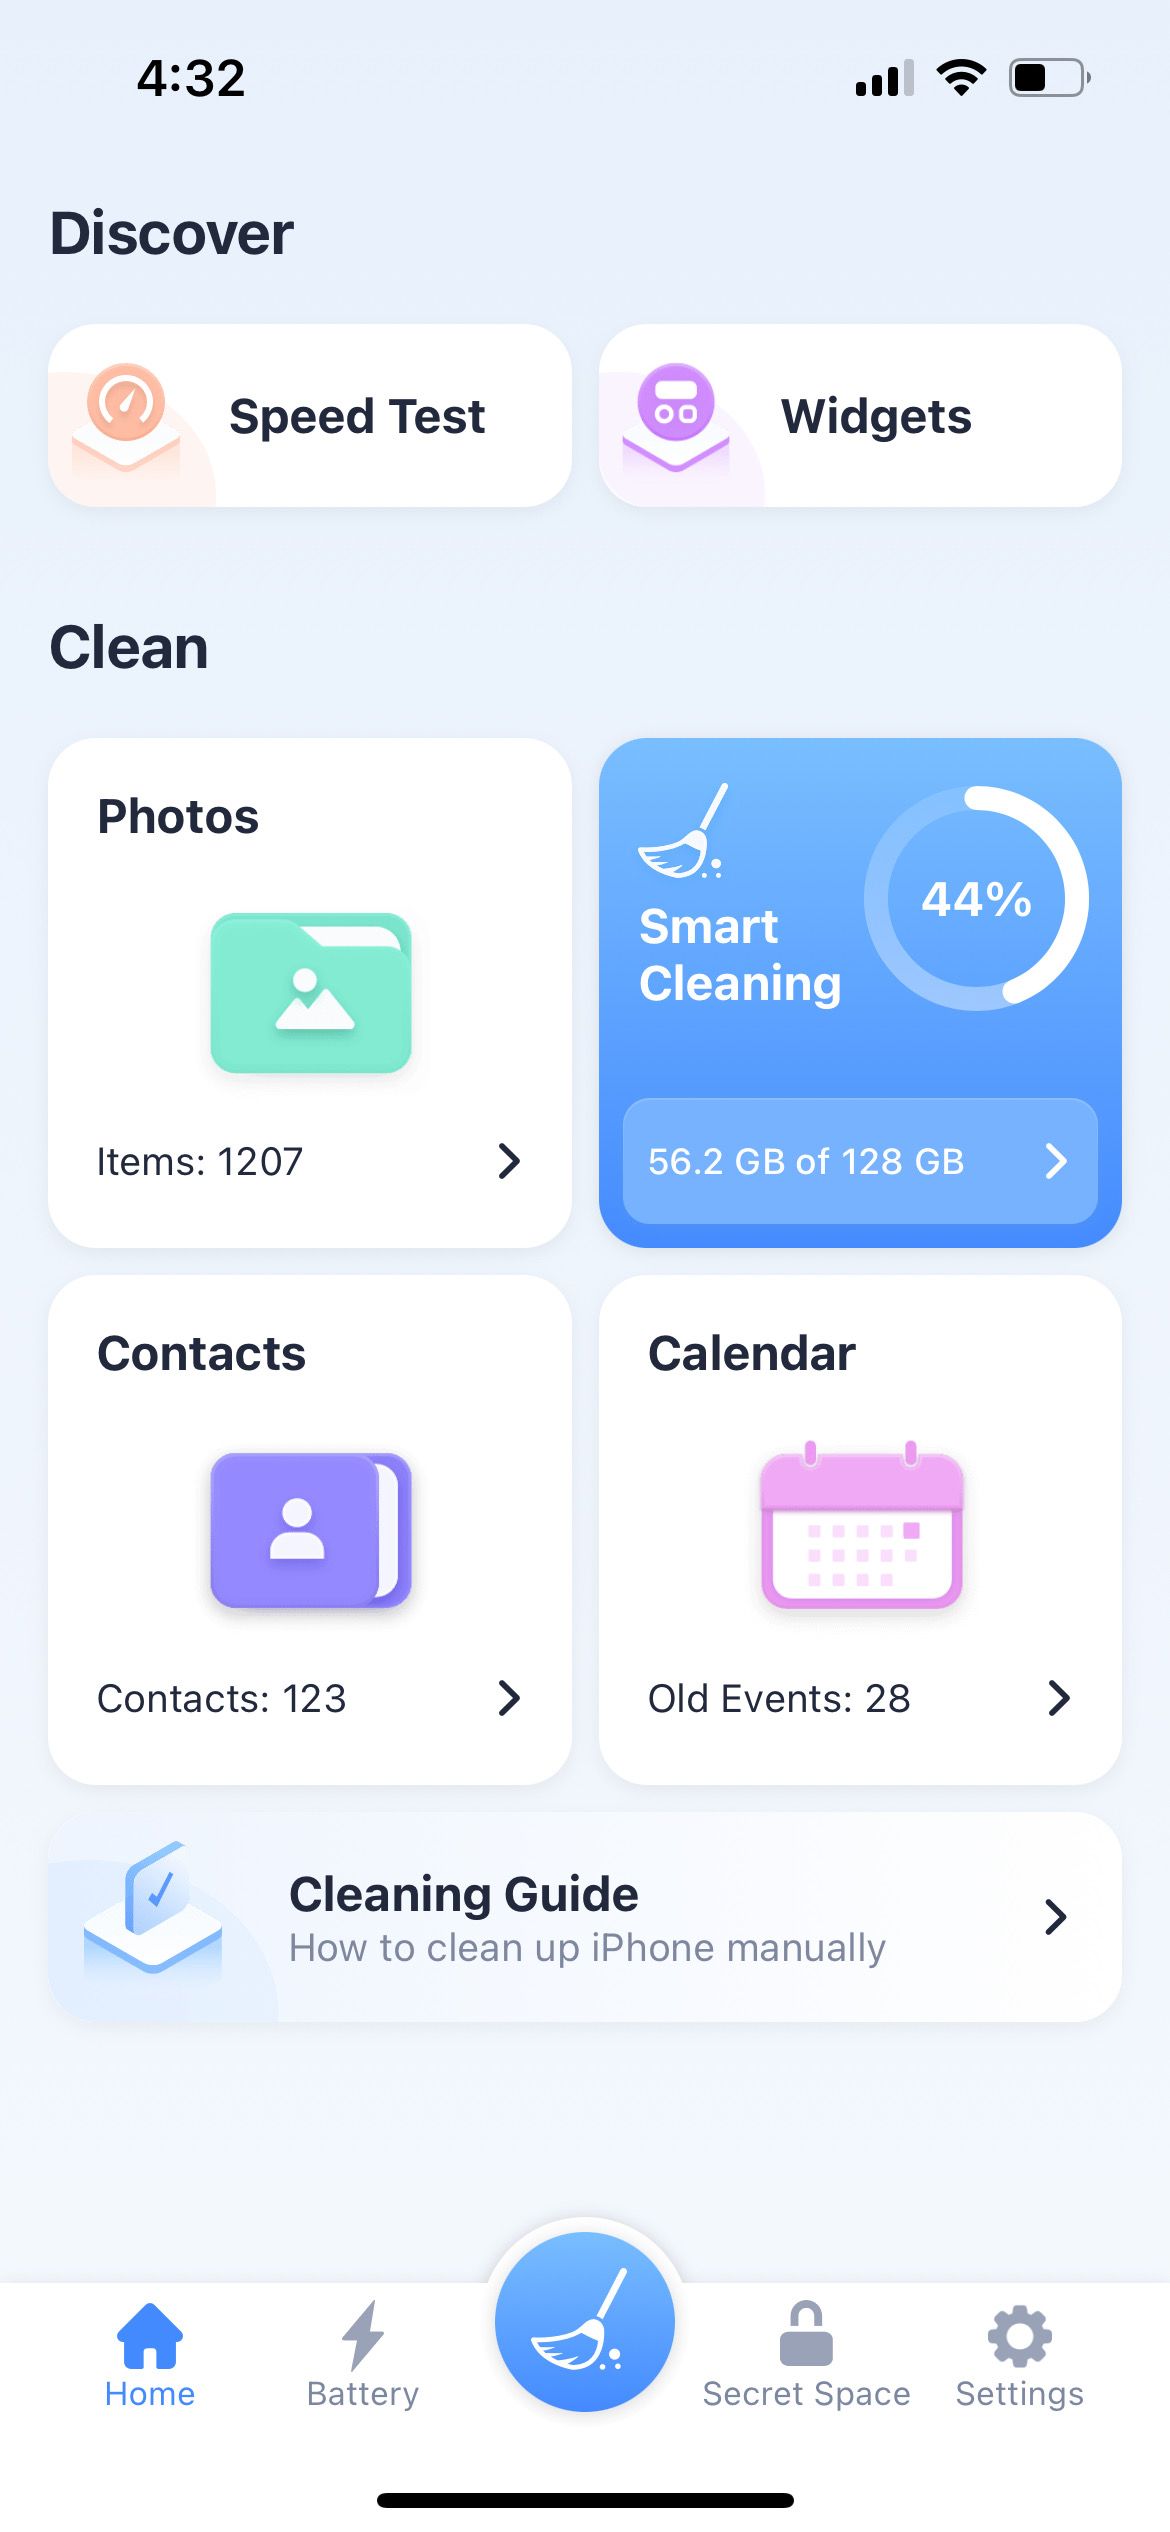
Smart Cleaner is free to download from the App Store, with a premium version available as well. Once you’ve downloaded it, here’s how to easily batch delete contacts on your iPhone:
- Launch Smart Cleaner.
- From the four options, select Contacts.
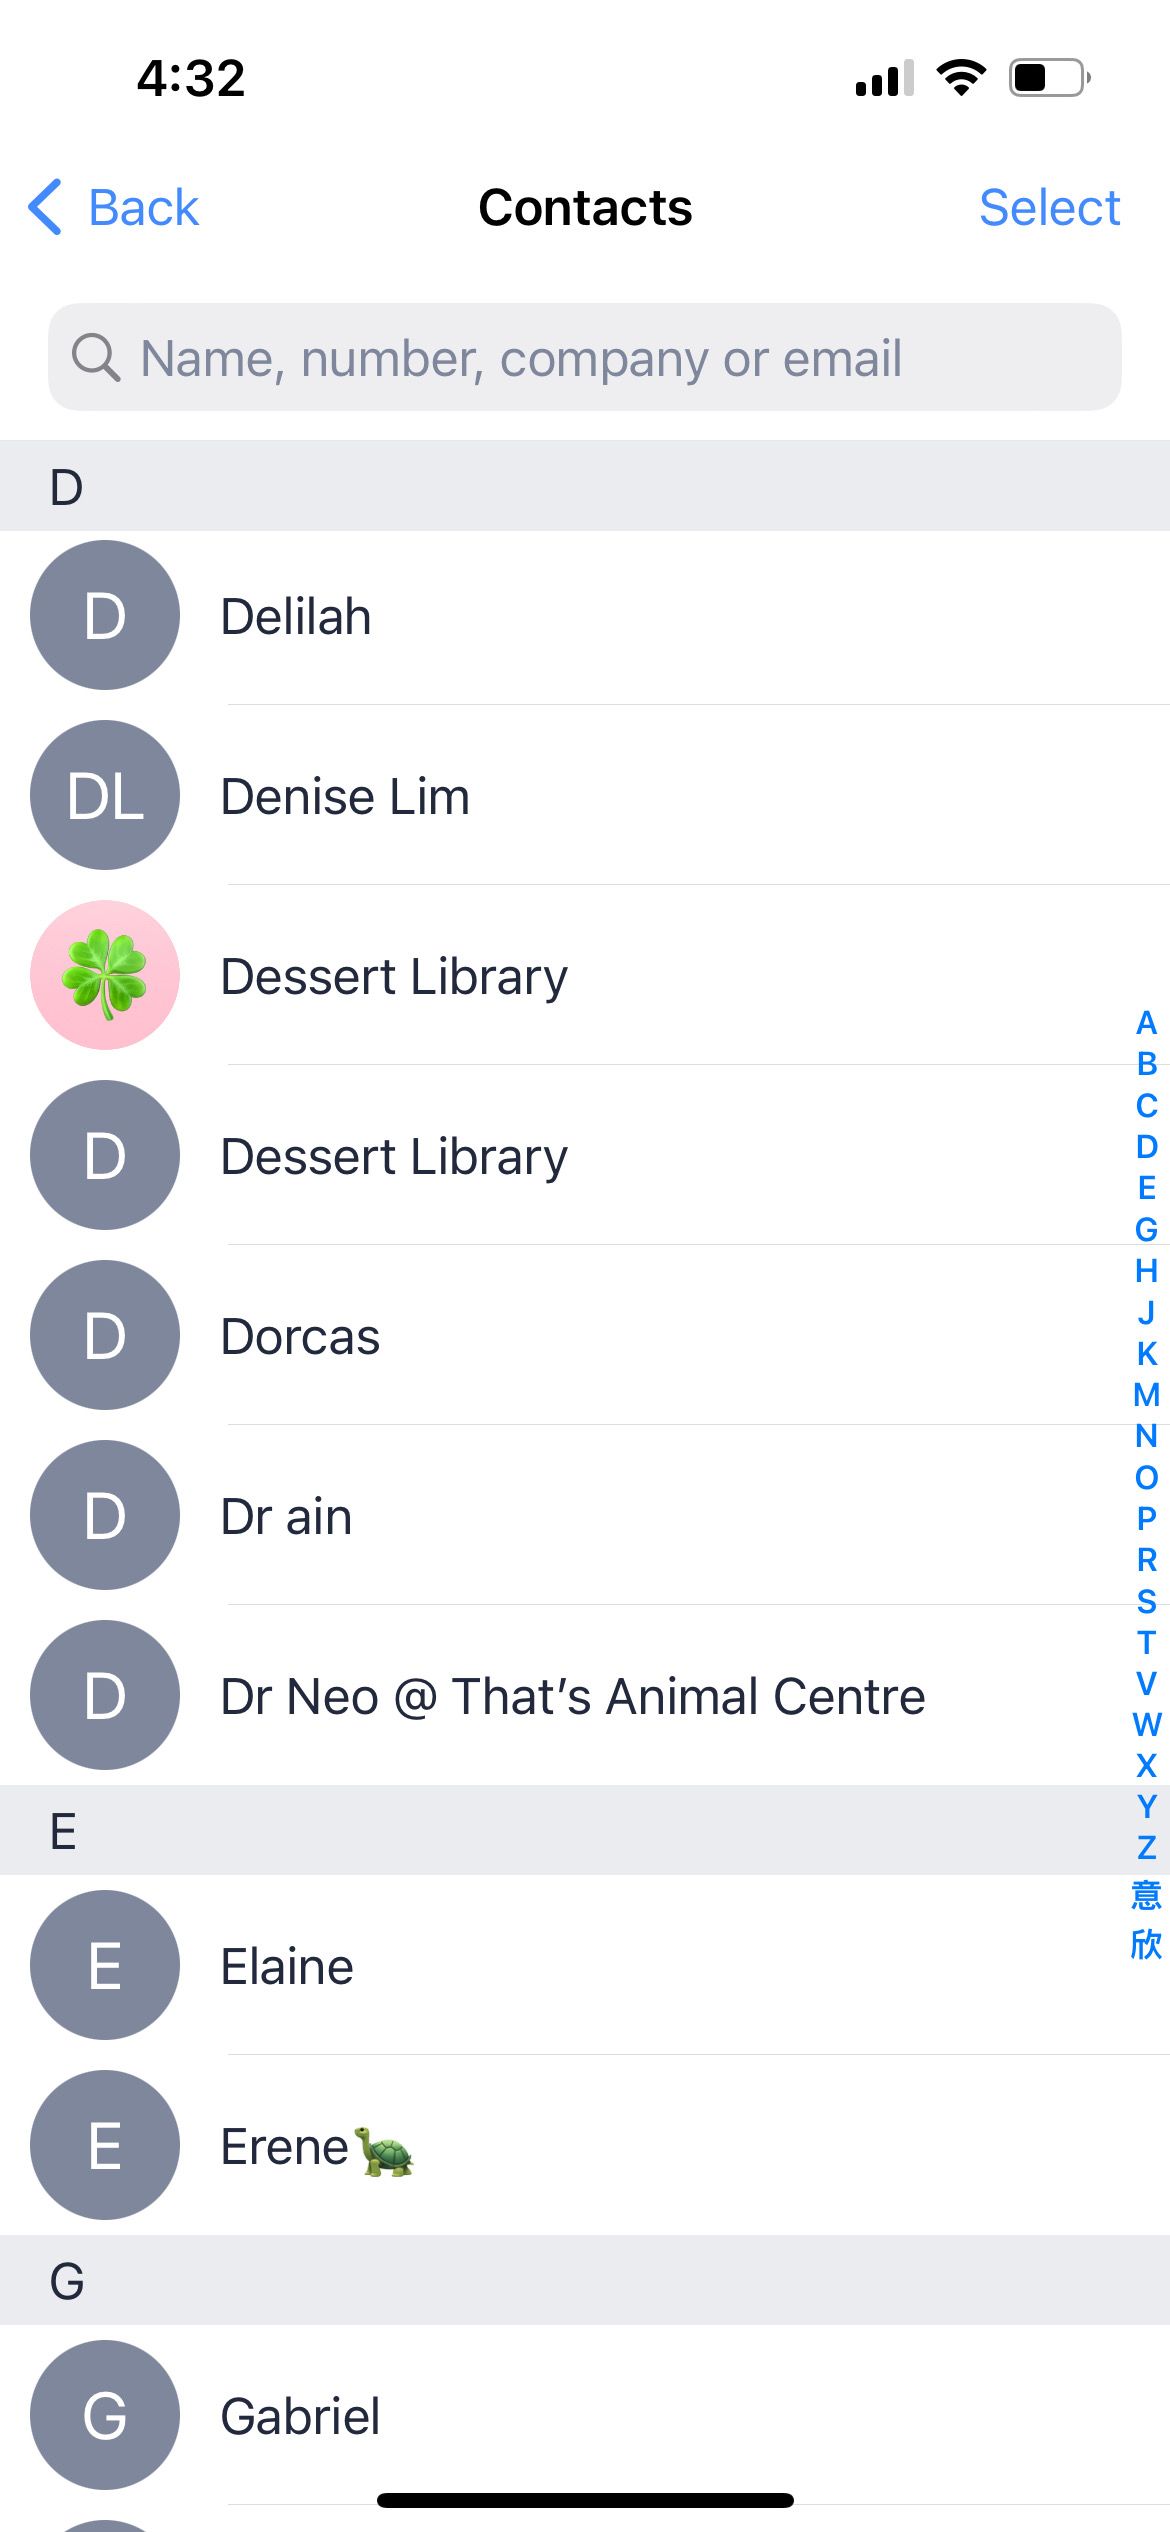
- Next, tap Contacts to access your full contact list.
- Tap Select to start checking off the contacts you want to delete.
- Tap Delete Selected to bulk delete your contacts instantly.
8. Remove and Merge Duplicate Contacts
Other than bulk deleting contacts, you can also use Smart Cleaner to help you delete duplicate contacts. Here’s how:
- Again, go to Smart Cleaner’s Contacts page.
- Select Duplicates to view the duplicate contacts on your iPhone.
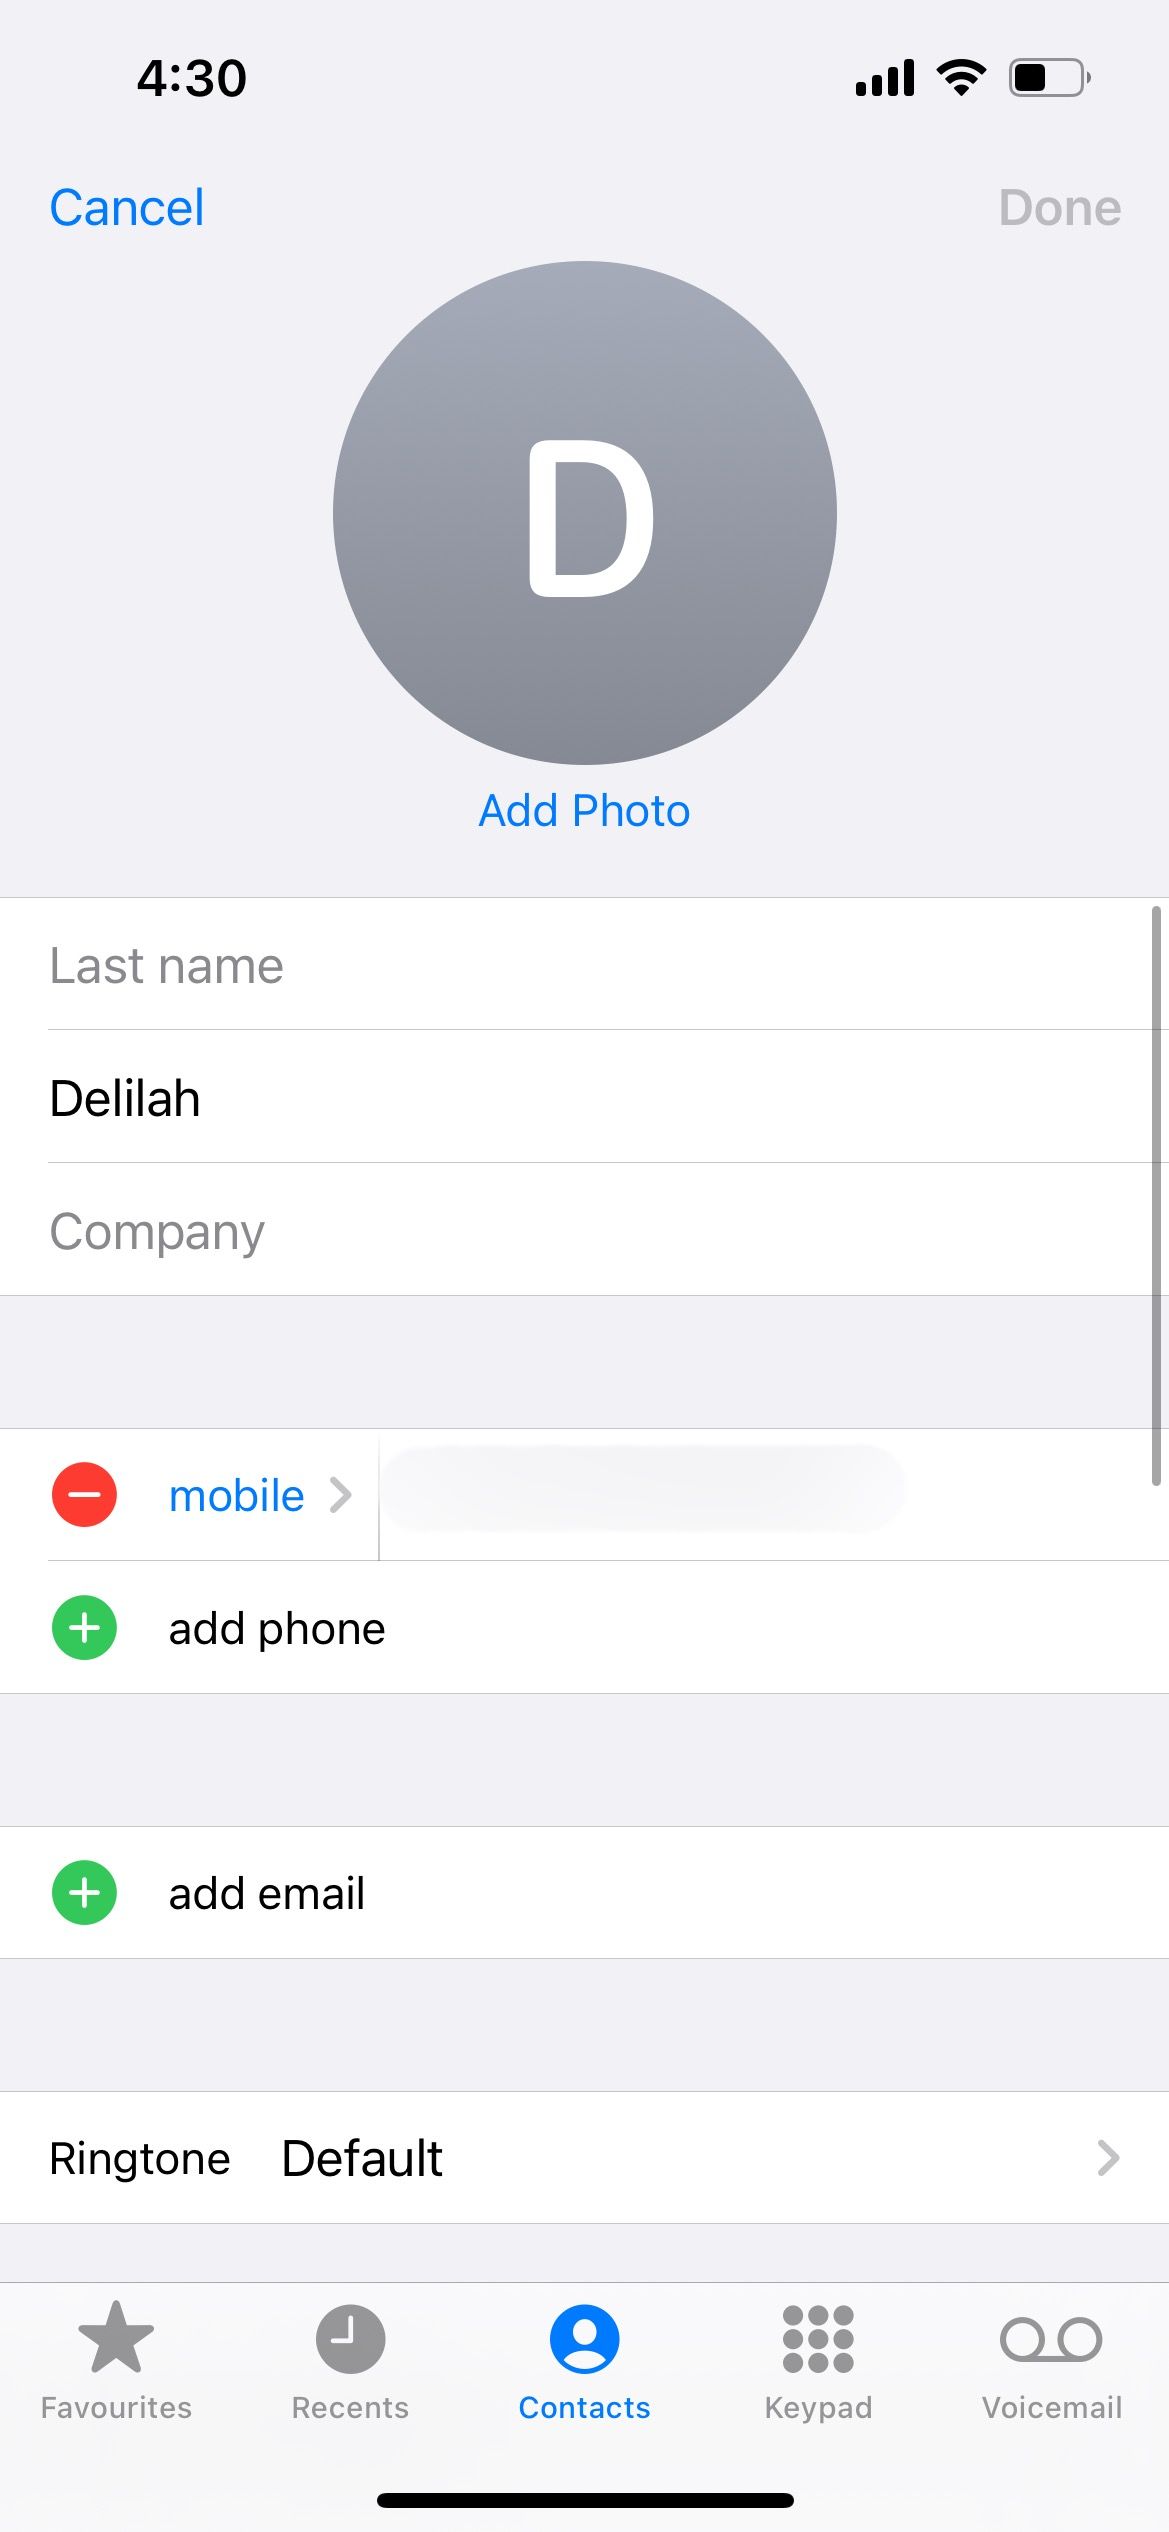
- To remove a duplicate phone number, tap on the contact.
- Tap Edit.
- Tap on the Delete icon to remove the obsolete phone number.

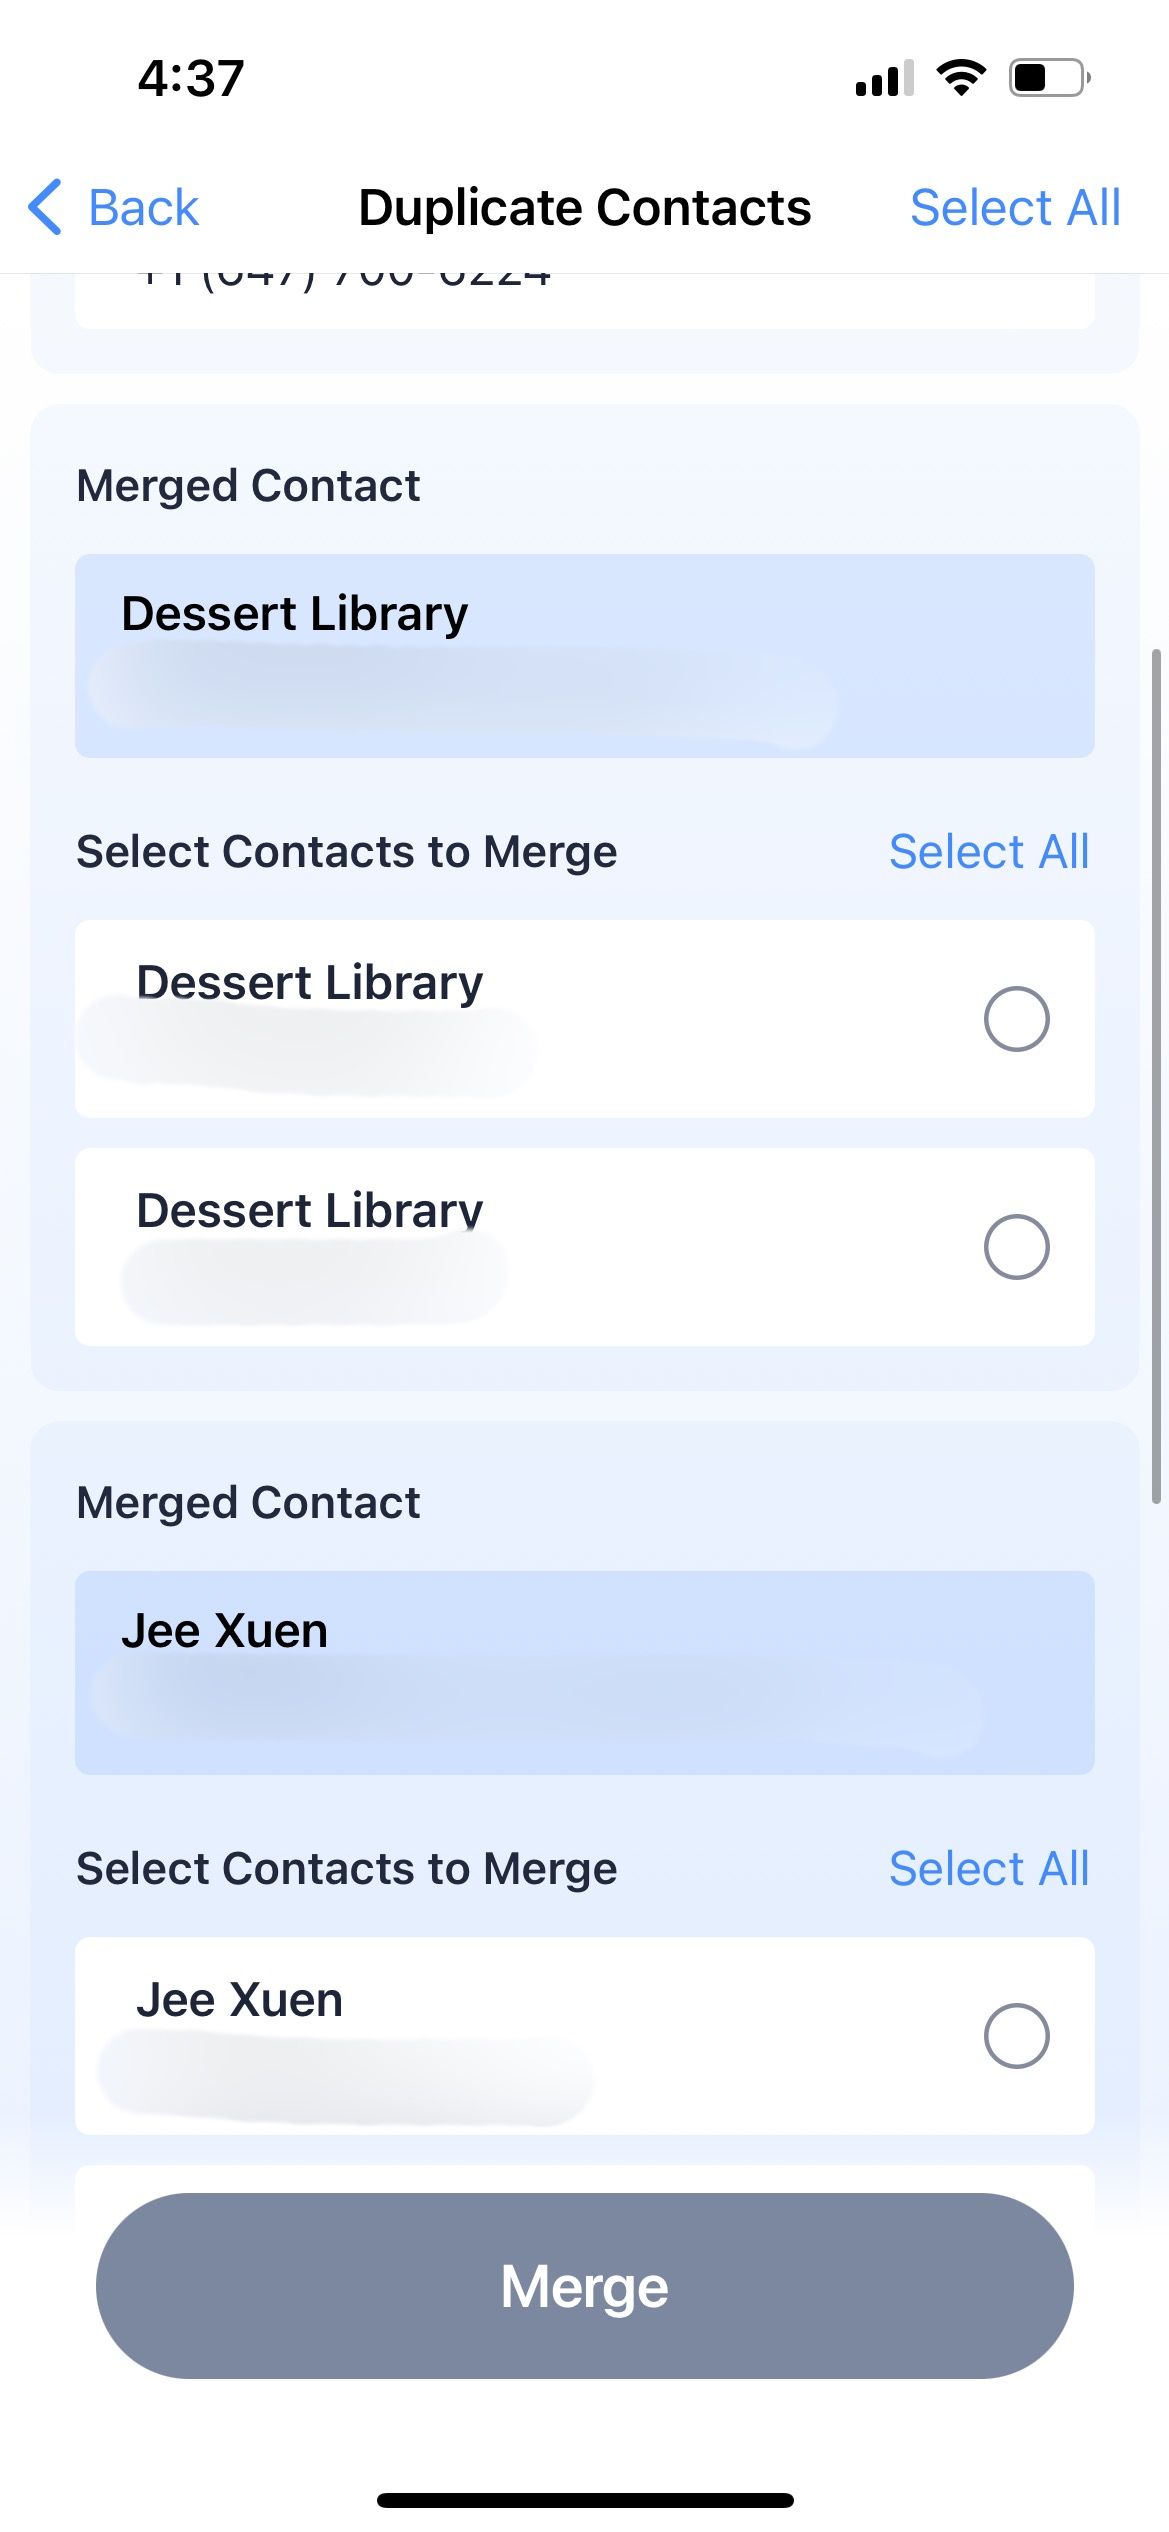
Alternatively, you can opt to merge the phone numbers into one contact:
- Go to the Duplicate Contacts page in Smart Cleaner.
- Select both contacts.
- Tap Merge.
As an additional tip, you can use Smart Cleaner to clean up photos on your iPhone more efficiently as well. Since you’re organizing your contacts, you might as well declutter your photo library while you’re at it!
9. Merge Duplicate Contacts Using the Link Contacts Button
We discussed how you can merge duplicate contacts on your iPhone using Smart Cleaner. But you can also merge contacts in the Phone app. Here’s how:
- In the Contacts tab, tap on your contact.
- Select Edit.
- Select Link Contacts.
- In the contacts list, your current selected contact is grayed out. Select the contact you want to merge it with.


Declutter and Organize Your iPhone Easily
We hope this list of tips gave you ideas on how you can declutter and organize your iPhone’s contacts effectively. Tidying up important information and frequently used apps enables you to find what you need on your iPhone quickly and easily.

-(6).jpg)
-(9).jpg)
