Knowing how to mask your video clips is a very useful skill. It allows you to add a bunch of cool elements to a video in a million different ways. The editing software or app you use will determine how much masking freedom you have; some let you outline to the very last detail, while others only provide a limited selection of masking shapes.
Today, we're going to show you how to mask a clip in Filmora. This software falls somewhere in the middle when it comes to its masking abilities. If you're looking for an easy and creative way to mask your clips, but don't need anything over the top, then keep reading.
Getting Started
Filmora is available for both Mac and Windows. You can use it for free if you're willing to settle for fewer effects and features and a watermark on your videos, but there is a free three-day trial that gives you access to all the bells and whistles. There's also a mobile version, namely FilmoraGo, for both Android and iOS.
Before getting started, you're going to need at least two things for masking: the video you want to mask, and some other form of media (a video or image) that will be used as a mask or overlay of some kind.
Download: Filmora for Windows | Mac (From $106.95 per year, free trial available)
Download: FilmoraGo for Android | iOS (Free, in-app purchases available)
How to Mask a Clip in Filmora (Desktop)
Let's start with Filmora for dekstop. It's a pretty straightforward process. Download the software and open it up.
To mask a clip in Filmora, follow the below steps:
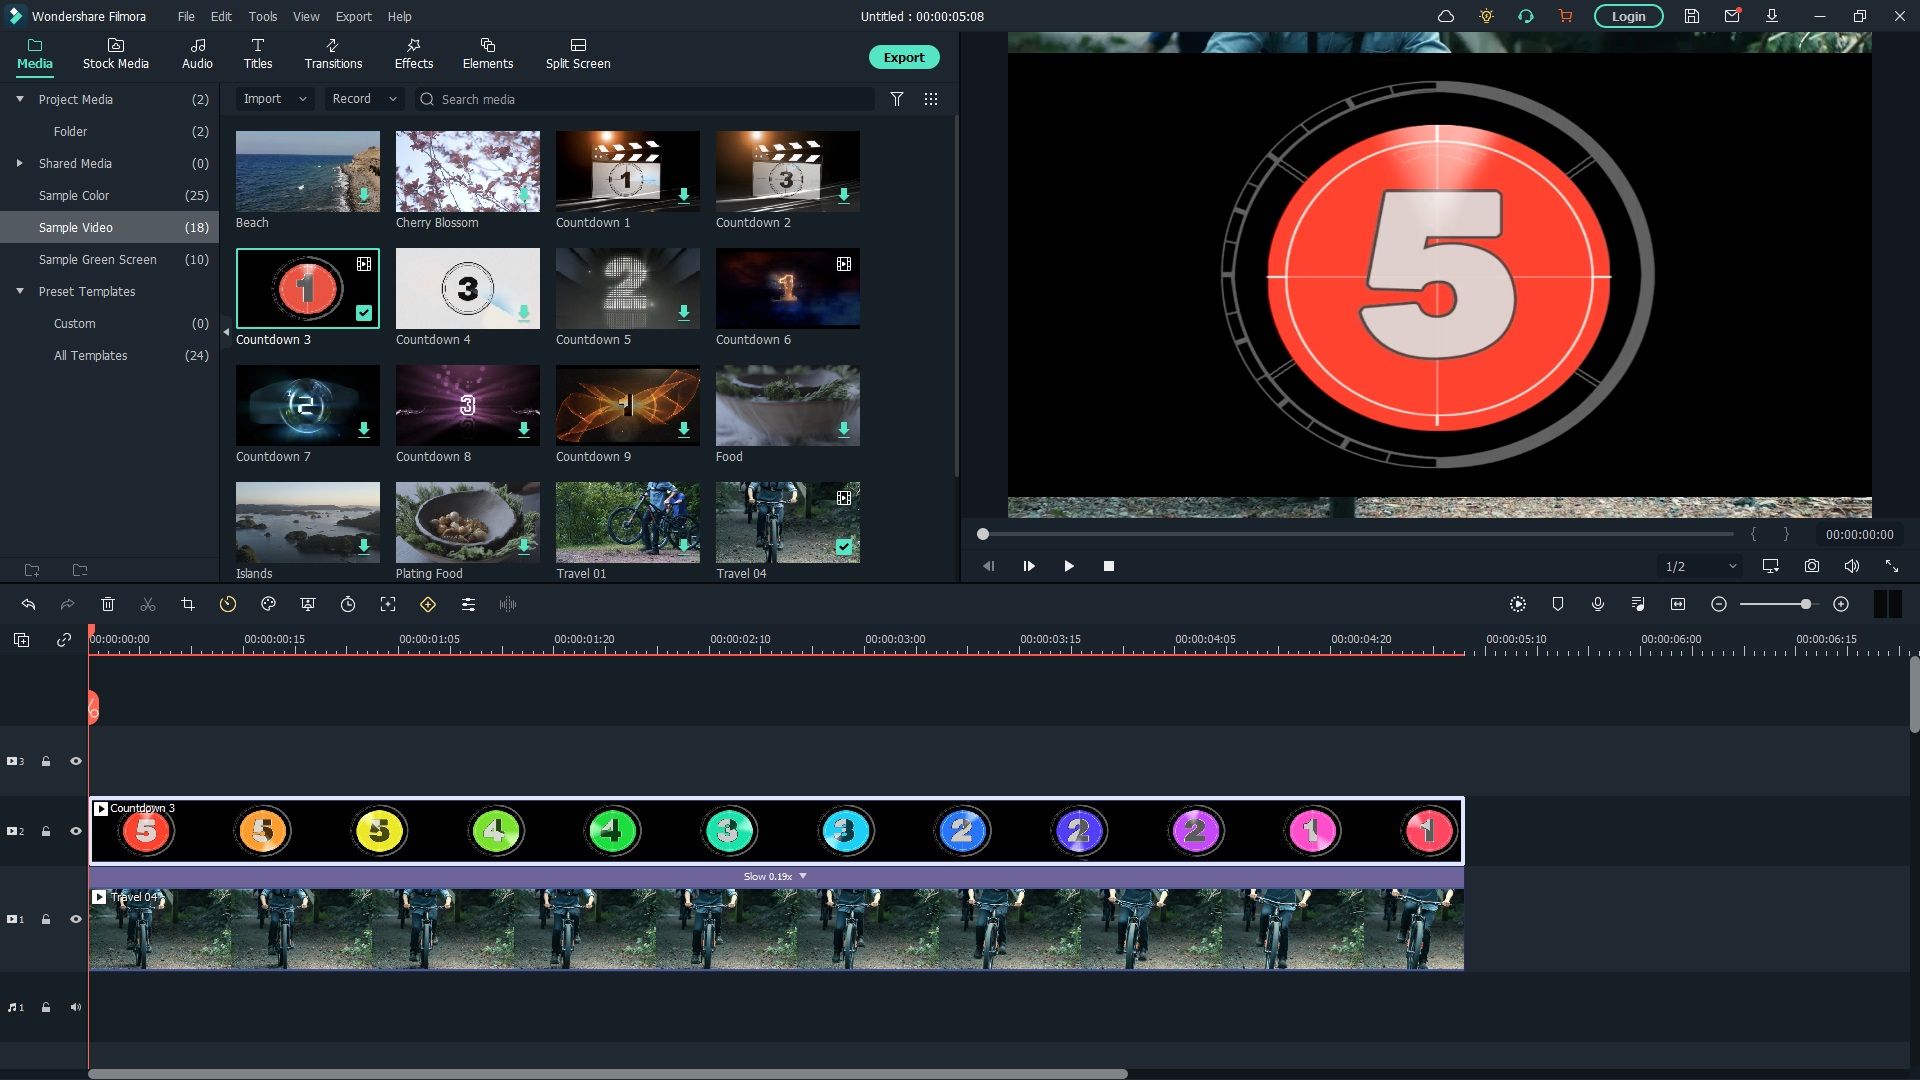
- Import the video that you want to mask. Go to Media at the top left, select Project Media from the menu, and click on the Import icon in the window right next to it. For this example, we used a sample video from the Shared Media dropdown.
- Drag the video you just imported into the timeline. Make sure it's on the first layer; there will be a row of play icons on the left, put it in number 1.
- Split your video into clips with the scissor icon if necessary.
- Follow the first step to import the image or video that you're going to use as a mask. Again, we just used a sample provided by Filmora. Drag it to the second layer in the timeline (labeled number 2).
Now:
- Trim this second layer so it lines up with the clip you want to mask.
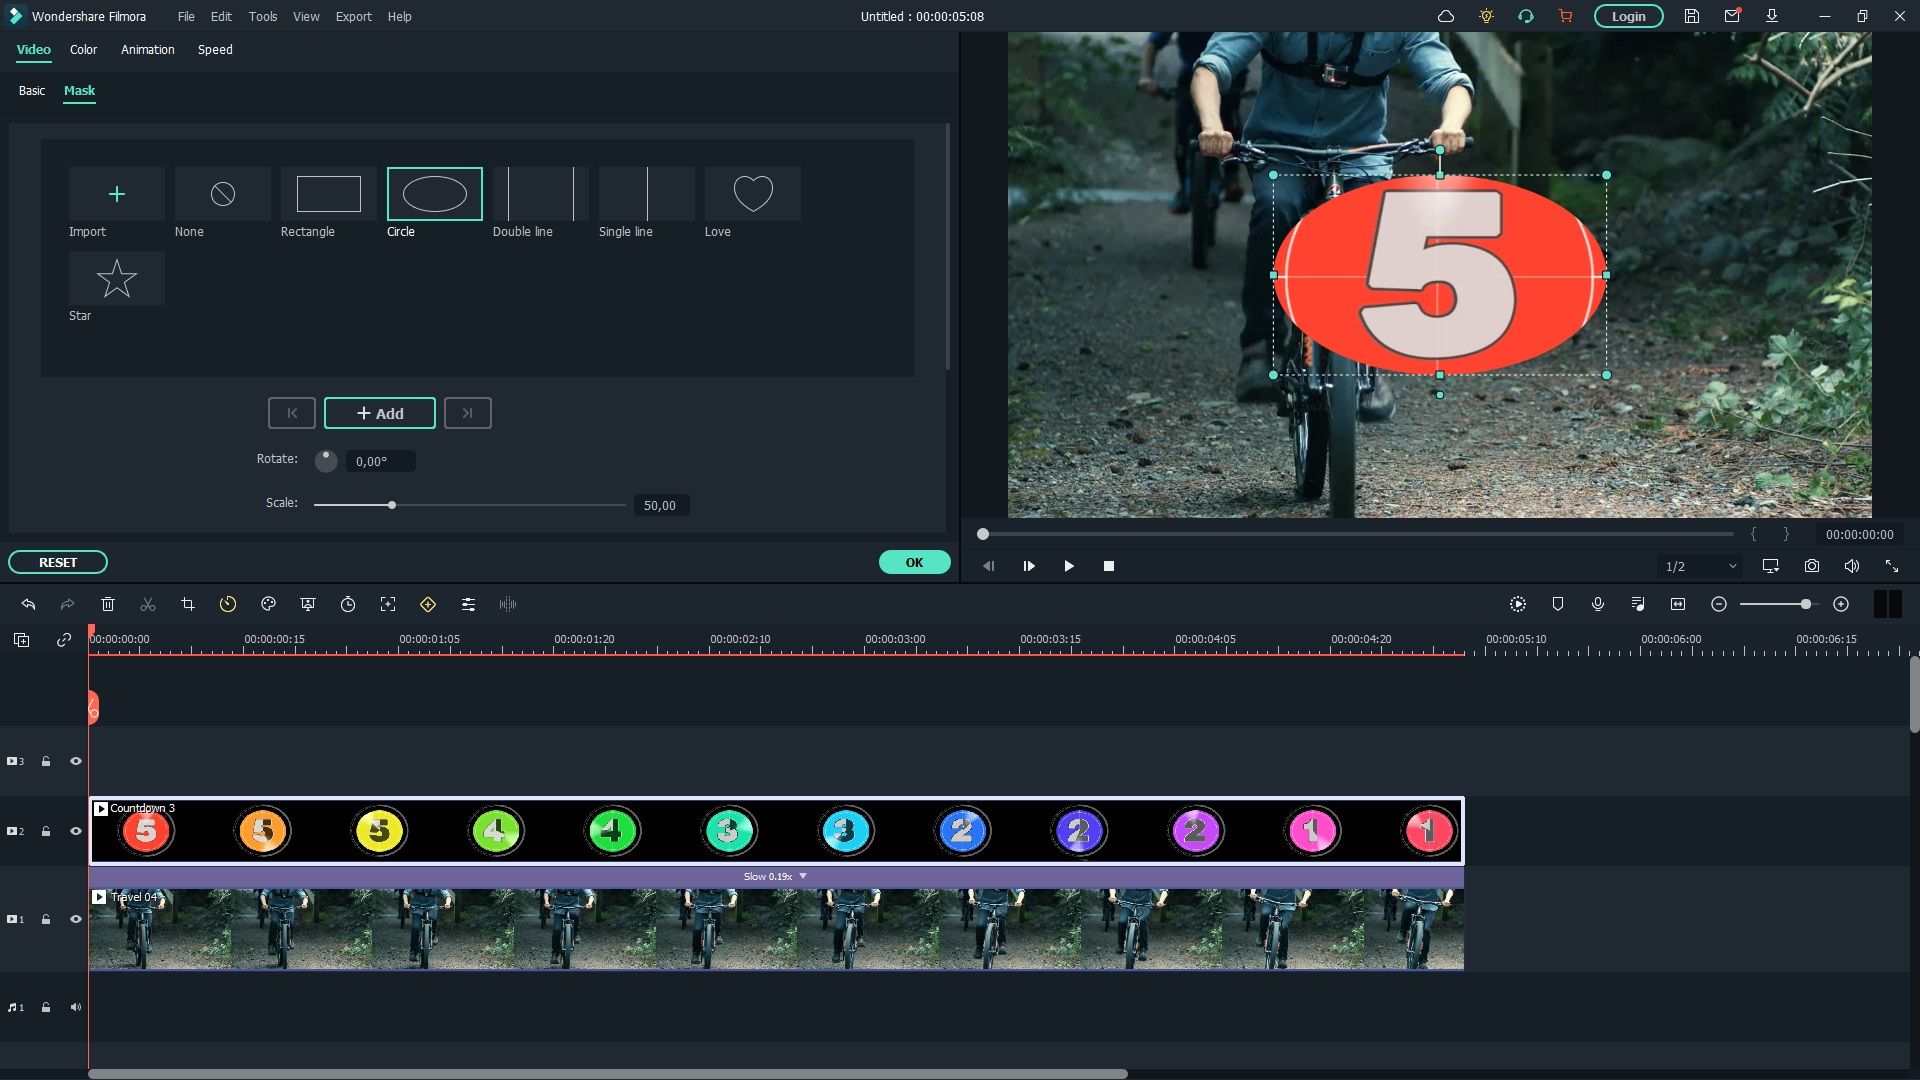
- Now we're ready to mask. Double-click on the second layer that you're going to use as a mask to select it, which will also open a window of editing tools.
- Make sure you've got Video selected. Then go to Mask. Filmora offers six different mask shapes, which doesn't seem like a lot, but they are customizable. You can also import a mask.
- Select whichever shape you think will work best with the media on your second layer. We went with the circle mask because we're working with a circled countdown timer. Our goal here is to isolate the timer and get rid of the surrounding background; effectively masking the timer and placing it over our original video in the first layer.
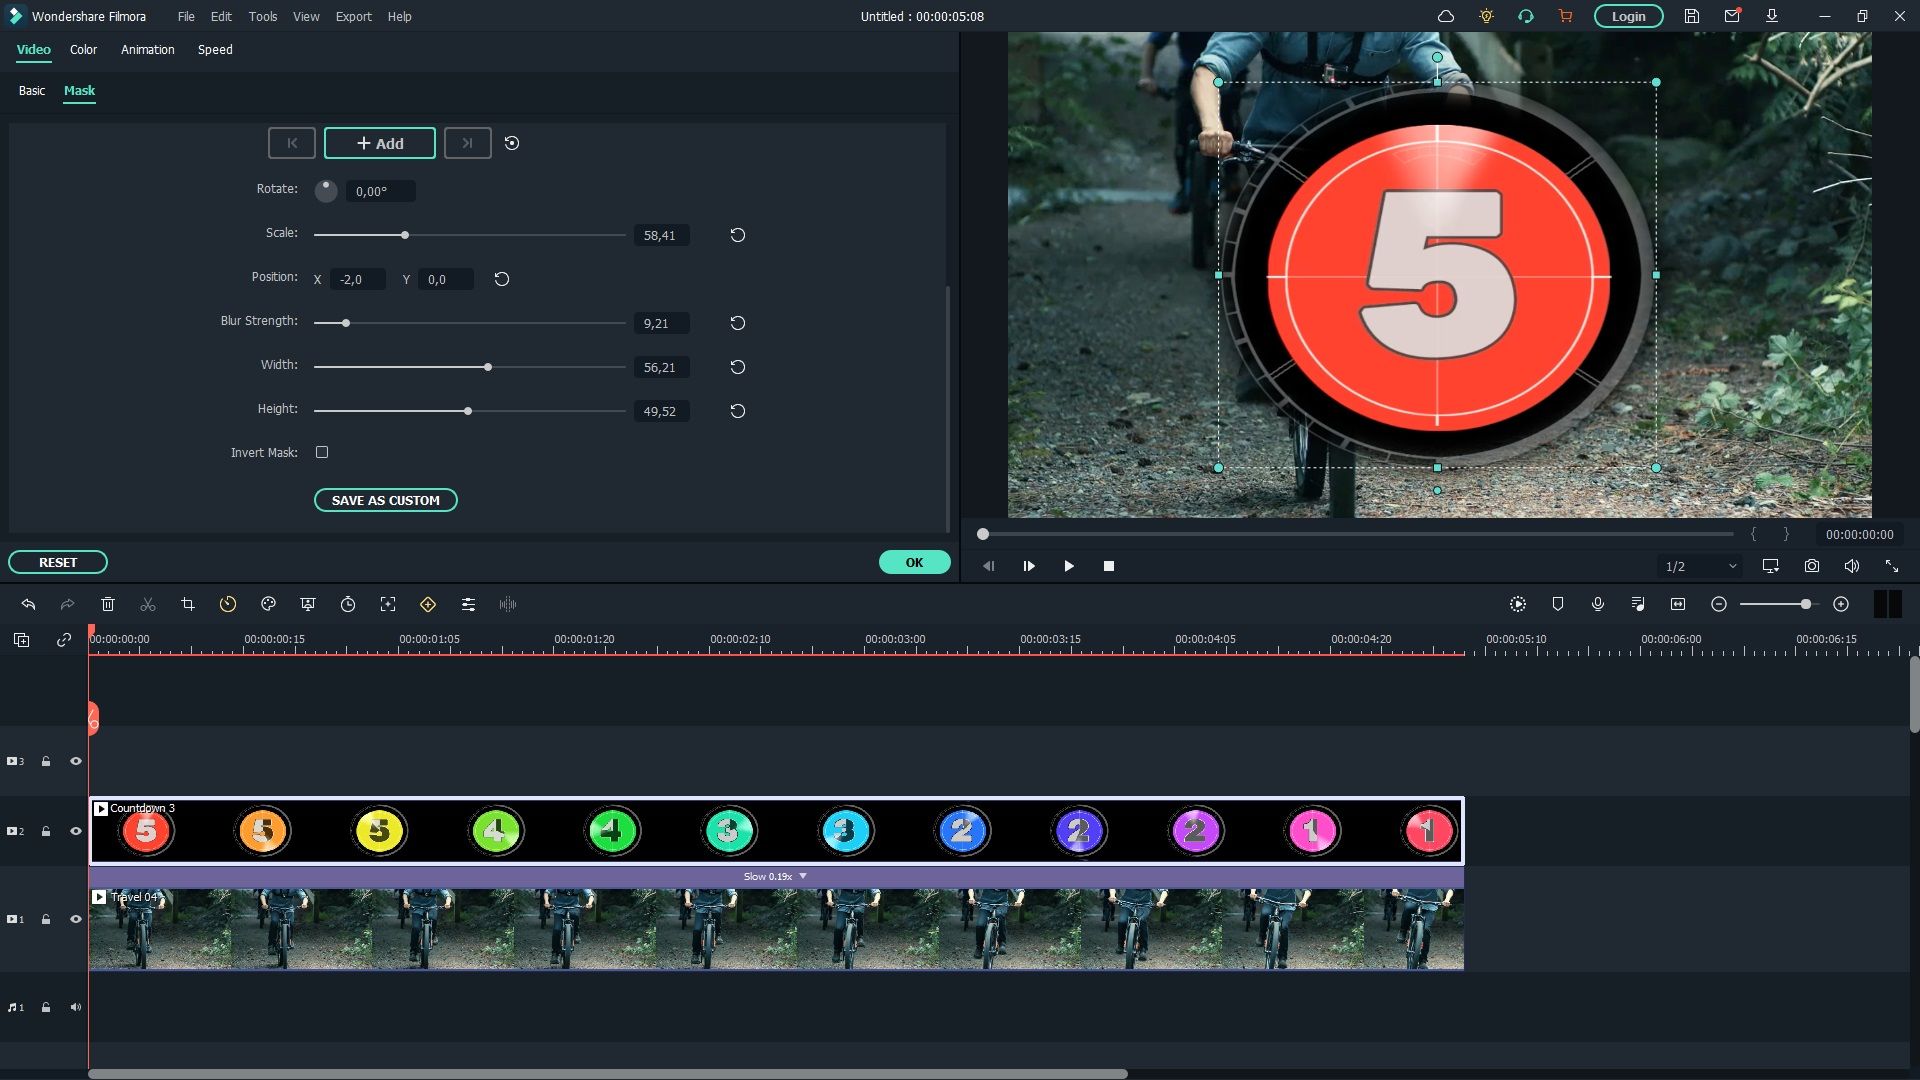
Unless the mask looks perfect as is, you're going to have to edit it. You can do this in the editing window with the Rotate, Scale, Position, Blur Strength, Width, and Height controls, or you can tug on the mask itself in the playback window with those little blue dots. We matched the shape of our circle mask with the timer and put a little blur on the edges.
Hit OK in the bottom right corner of the editing window, and you're done. Play back the results to see if you like it.
How to Mask a Clip in FilmoraGo (Mobile)
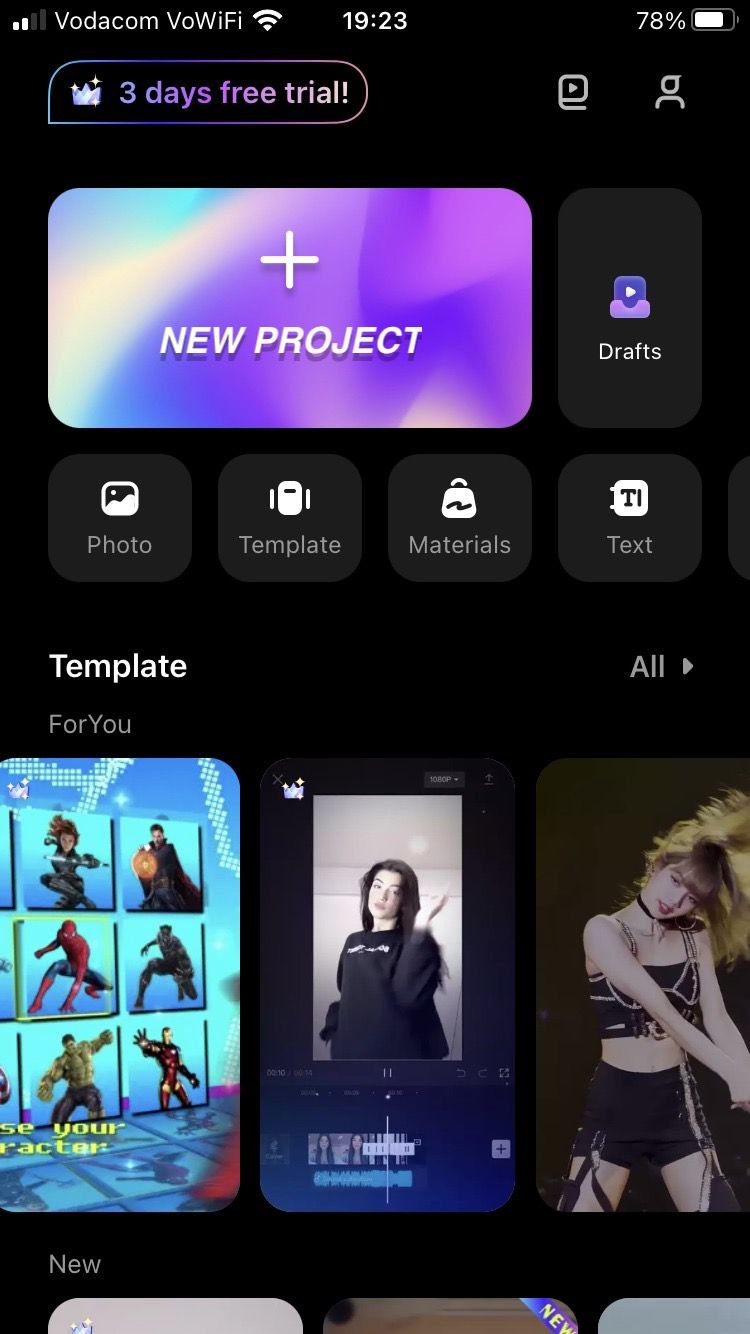
Many editors rely on their smartphones these days; it's pretty awesome how complex and involved mobile video editors have gotten. And FilmoraGo is no different. Go ahead and download the app and open it up.
To mask a clip in FilmoraGo, follow the steps below:
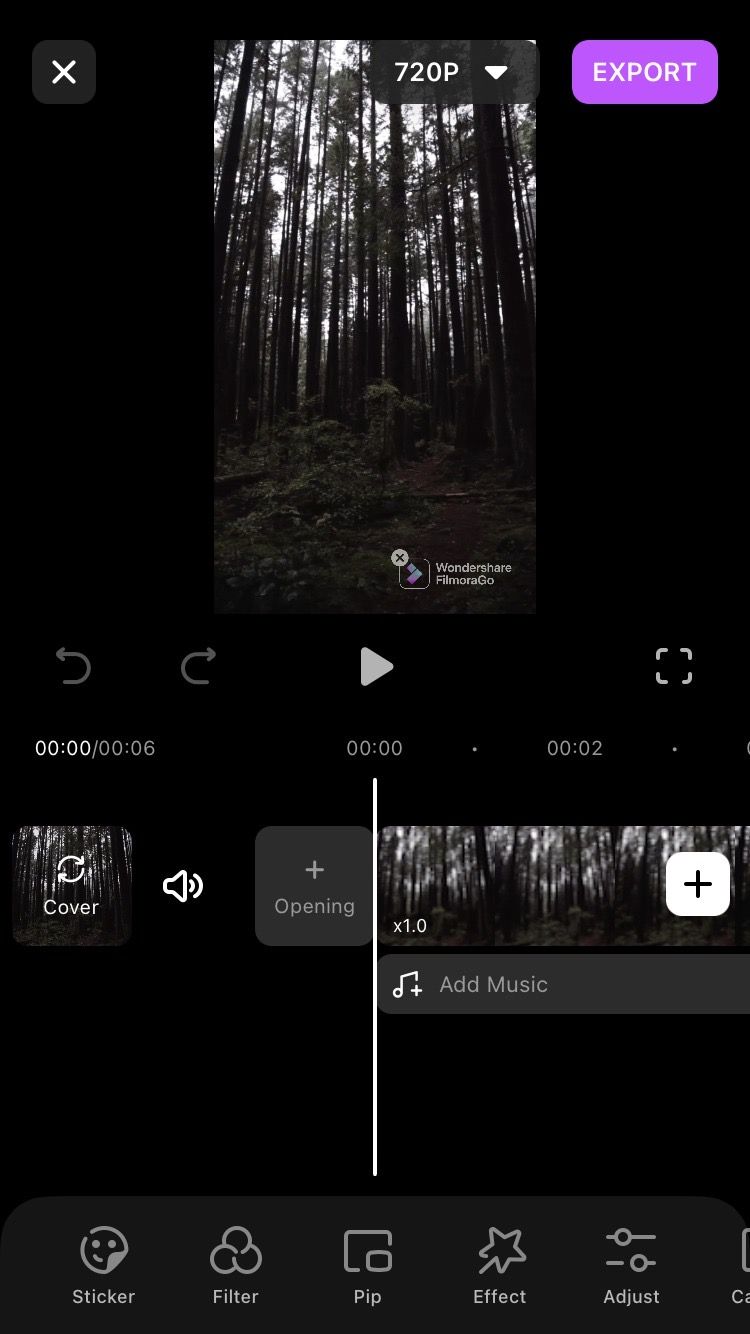
- Tap New Project and import the video you want to mask. We used a video from the Filmora Stock for this example. Hit Import.
- From the bottom tab, go to Pip > Add, and select the media you want to use as a mask. We used a custom image of a black and red gradient, which is pretty easy to make.
- Trim the second layer to the same length as the first. Simply select the layer, then hold and drag the purple bar on the right side until it lines up.
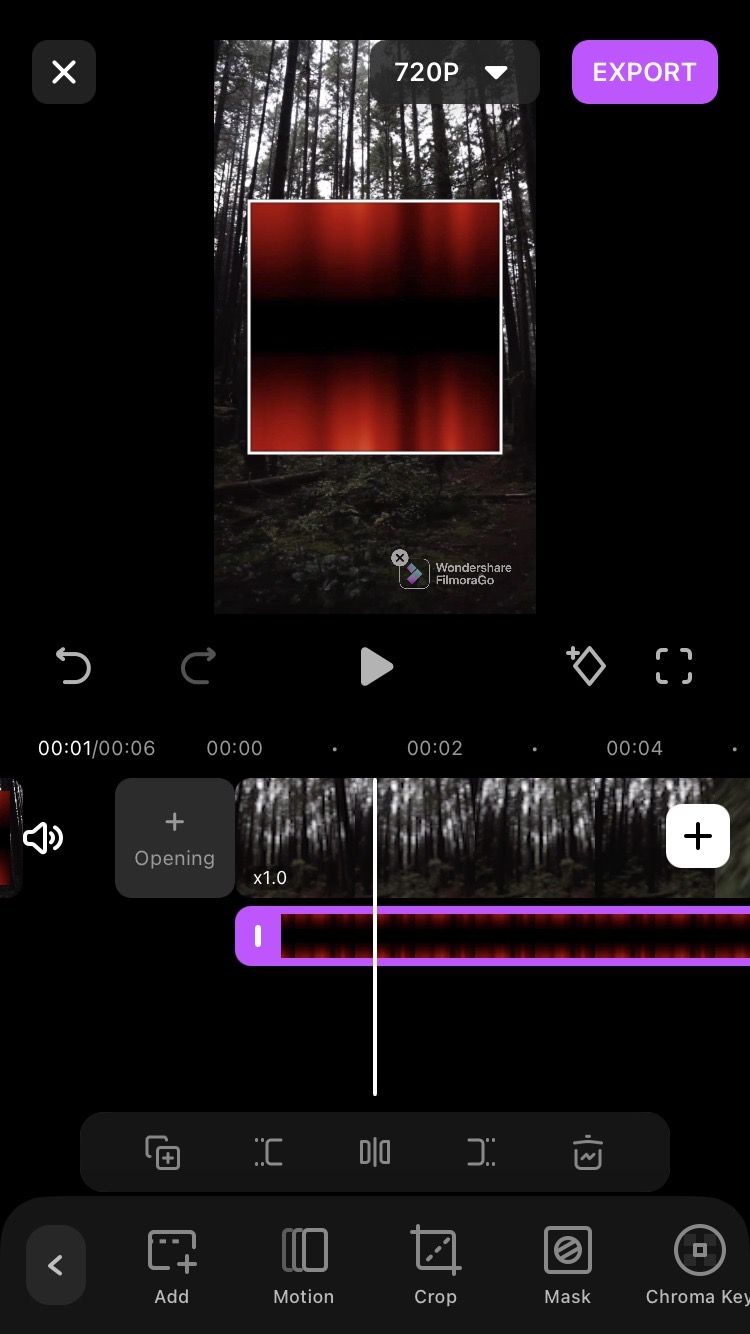
Next:
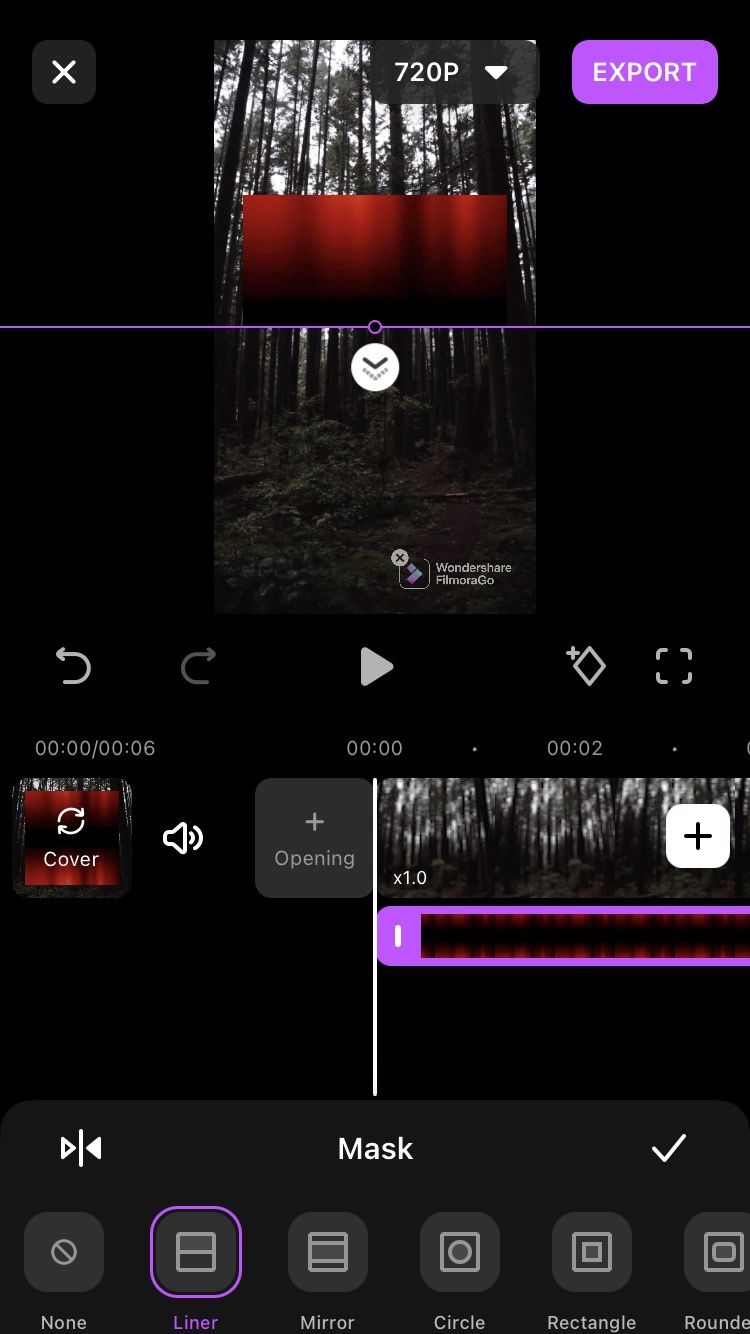
- With the second layer still selected, go to Mask. There will be a bunch of free masking shapes for you to choose from, and you can invert them with the icon on the left. Tap whichever one you like best and hit the checkmark icon on the right.
- Position your mask by dragging it in the playback window. Use two fingers to make it bigger or smaller.
- Depending on the type of media you masked, you might be good to go at this point. But for our example, we want to modify the opacity to get the effect we want; an overlay that turns the sky red. We did this with the Opacity setting.
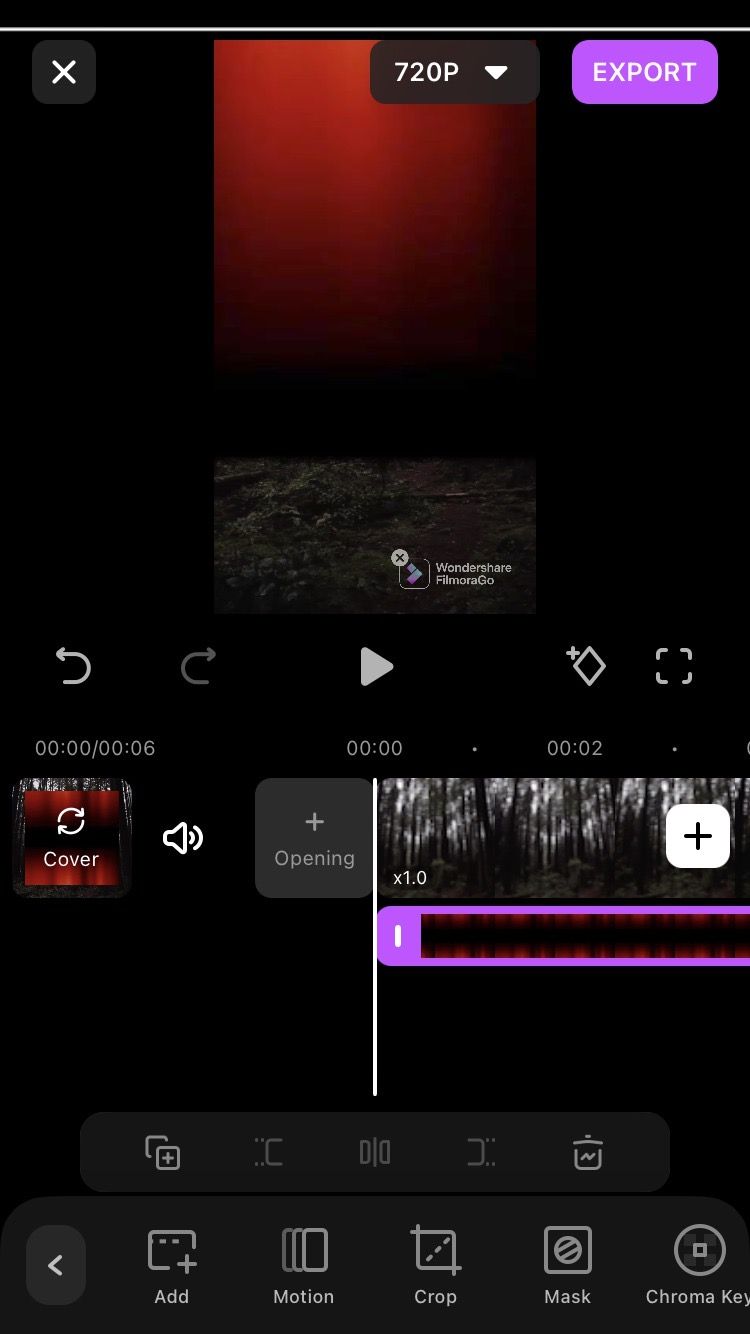
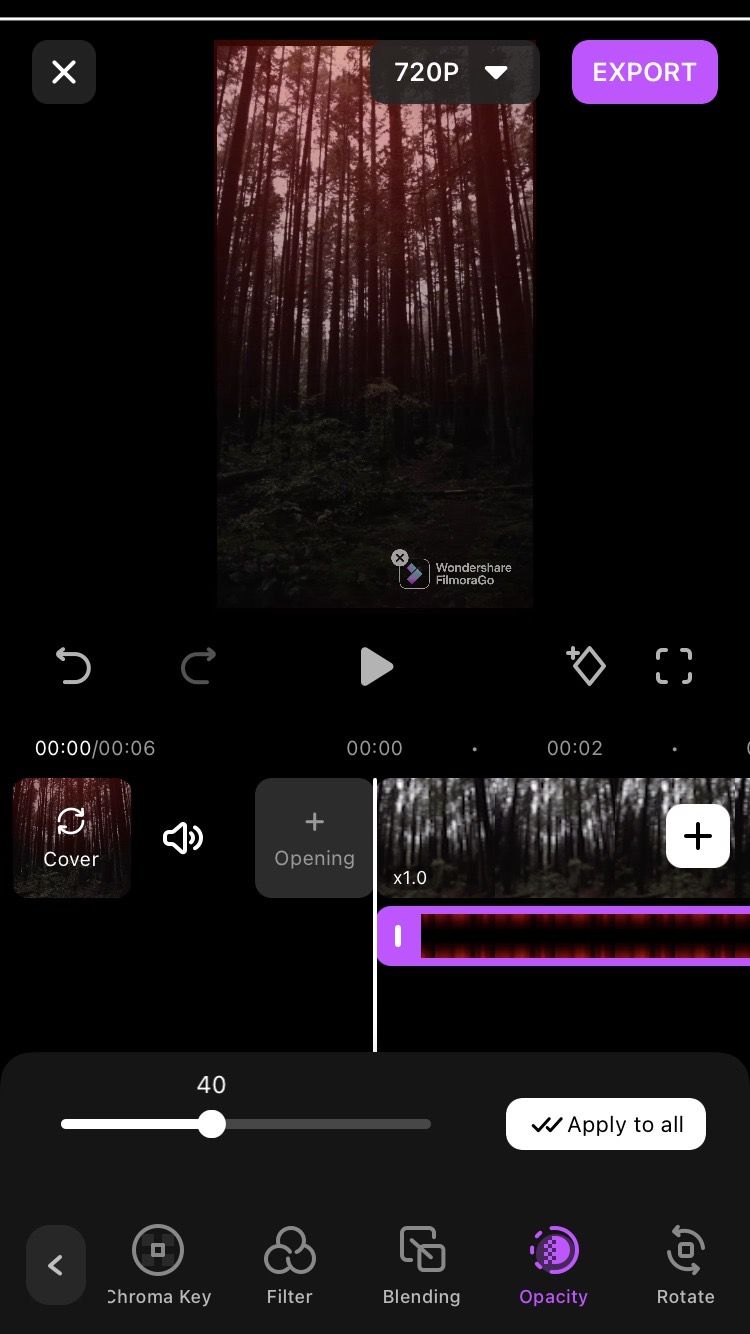
Play back the results to make sure you like it, tap Export on the top right, and hit Save Video. If you're using the free version, your video will be saved with a watermark.
Masking Made Easy With Filmora
Most of the cool video edits you see online use some type of masking; it really does grant us the opportunity to put whatever we want into an edit. Using Filmora to mask won't give you the most jaw-dropping results, but it gets the job done, and quite quickly at that.
If you want to give masking a shot, or simply want to try another editing program, follow these simple tutorials.

