Even with the growing popularity of video content, much of the information on the web is still conveyed through text. However, if we’re honest with ourselves, reading can be such a chore—especially when if you don’t have the best vision.Allow your Mac to help you by making it speak the text on your screen with the use of a keyboard shortcut. This feature is also helpful if reading tiny texts on the screen gives you eye strain.
How to Enable Speak Selection on Mac
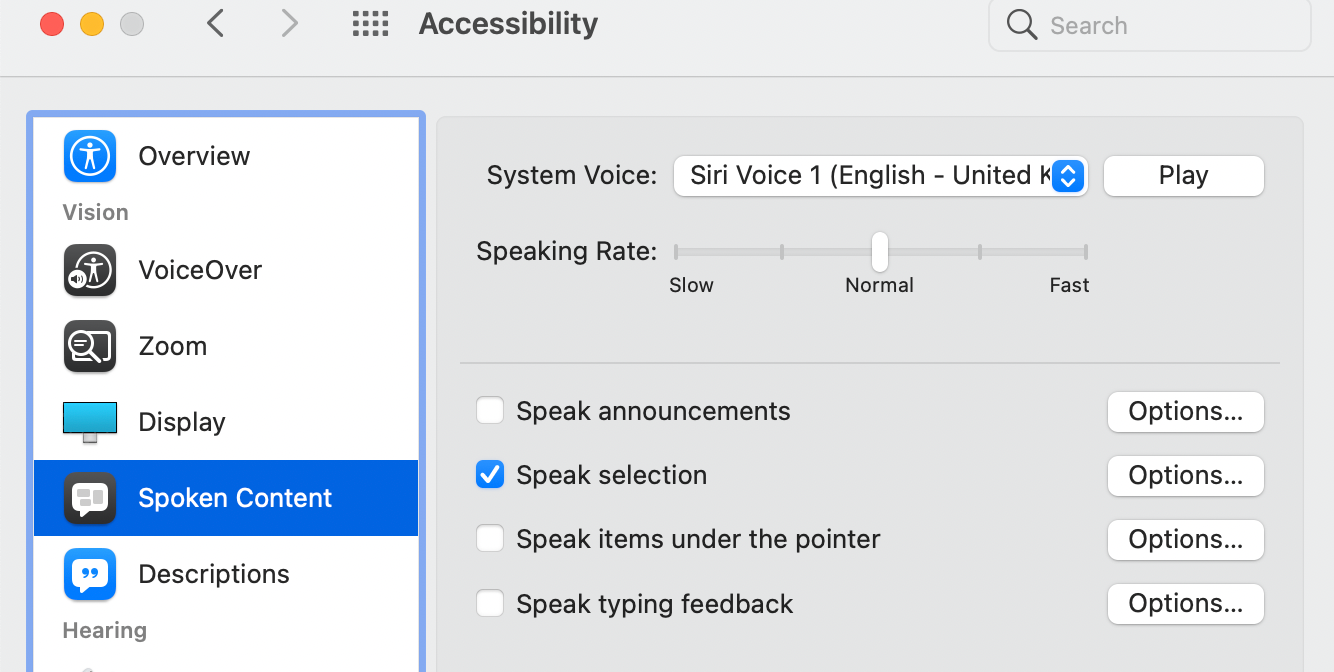
The Speak selection feature is turned off by default on your Mac. First, make sure that it’s enabled before you try it on any written content. To do this:
- Go to System Preferences > Accessibility.
- Click Spoken Content, then enable Speak selection.
How to Use the Speak Selection Keyboard Shortcut
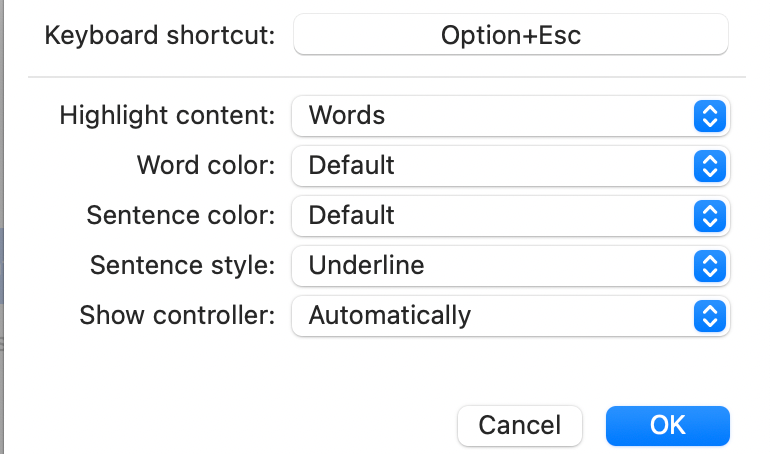
The default keyboard shortcut for Speak selection is Option + Esc. However, you can change the shortcut by clicking the Options button beside Speak selection, then typing a different keyboard shortcut in the text box.
Once that’s done, you can select any texts on your screen and press your keyboard shortcut to make your Mac read it aloud. If nothing is selected, your Mac will read any text it detects in the window you are currently using.
If you’re working on a word processing document, it will only read the text on the document itself. However, if you’re on a webpage, it will read all kinds of text, including the webpage’s menu bar, headings, and buttons.
Aside from using a keyboard shortcut, you can also make your Mac read text using its Speech feature.
Customize How Text Appears While Your Mac Speaks
You have the option to modify how to want the text to appear while your Mac speaks it aloud. That is, you can opt to have spoken words and sentences underlined or highlighted, or nothing. You can also customize their colors.
To make these changes, you also need to click the Options button next to Speak selection in the System Preferences. Here are the options it gives you:
- Highlight content: You can choose to highlight words, sentences, or both. You can click Never if you don’t want anything highlighted.
- Word color and Sentence color: You can change the highlight color for both words and sentences. By default, sentences are highlighted in blue while words are highlighted in yellow.
- Show controller: Select Automatically if you want the controller to appear automatically once you press the keyboard shortcut. Otherwise, choose from Always or Never. The controller is handy when you’re reading long-form content. It allows you to adjust the speaking rate by clicking either the turtle (slower) or rabbit (faster) buttons, skip back, skip forward, pause, and play the spoken content.
You can also change the voice of the spoken word by clicking System Voice and choosing from the options on the drop-down menu.
Listening to Text Is Just a Keyboard Shortcut Away
With Mac’s Speak selection feature, you can aid your eyes and mind into persevering through reading content on your screen. You can even customize how it appears on your screen to make reading more convenient for you.


