
Spotify has opened doors for millions of artists, created multiple ways to share subscriptions, and changed the way we listen to music everywhere.
However, many Spotify users still don't realize the power at their fingertips. Spotify lets you customize a variety of settings to personalize your entertainment, from volume to AI-enabled transitions.
If you have never bothered to check your Spotify settings before, this article is for you. We'll talk about all the ways that you can make your Spotify sound better to get the most out of your listening experience.
Here are some ways to change the audio on Spotify to make the most difference.
1. Normalize Volume Level
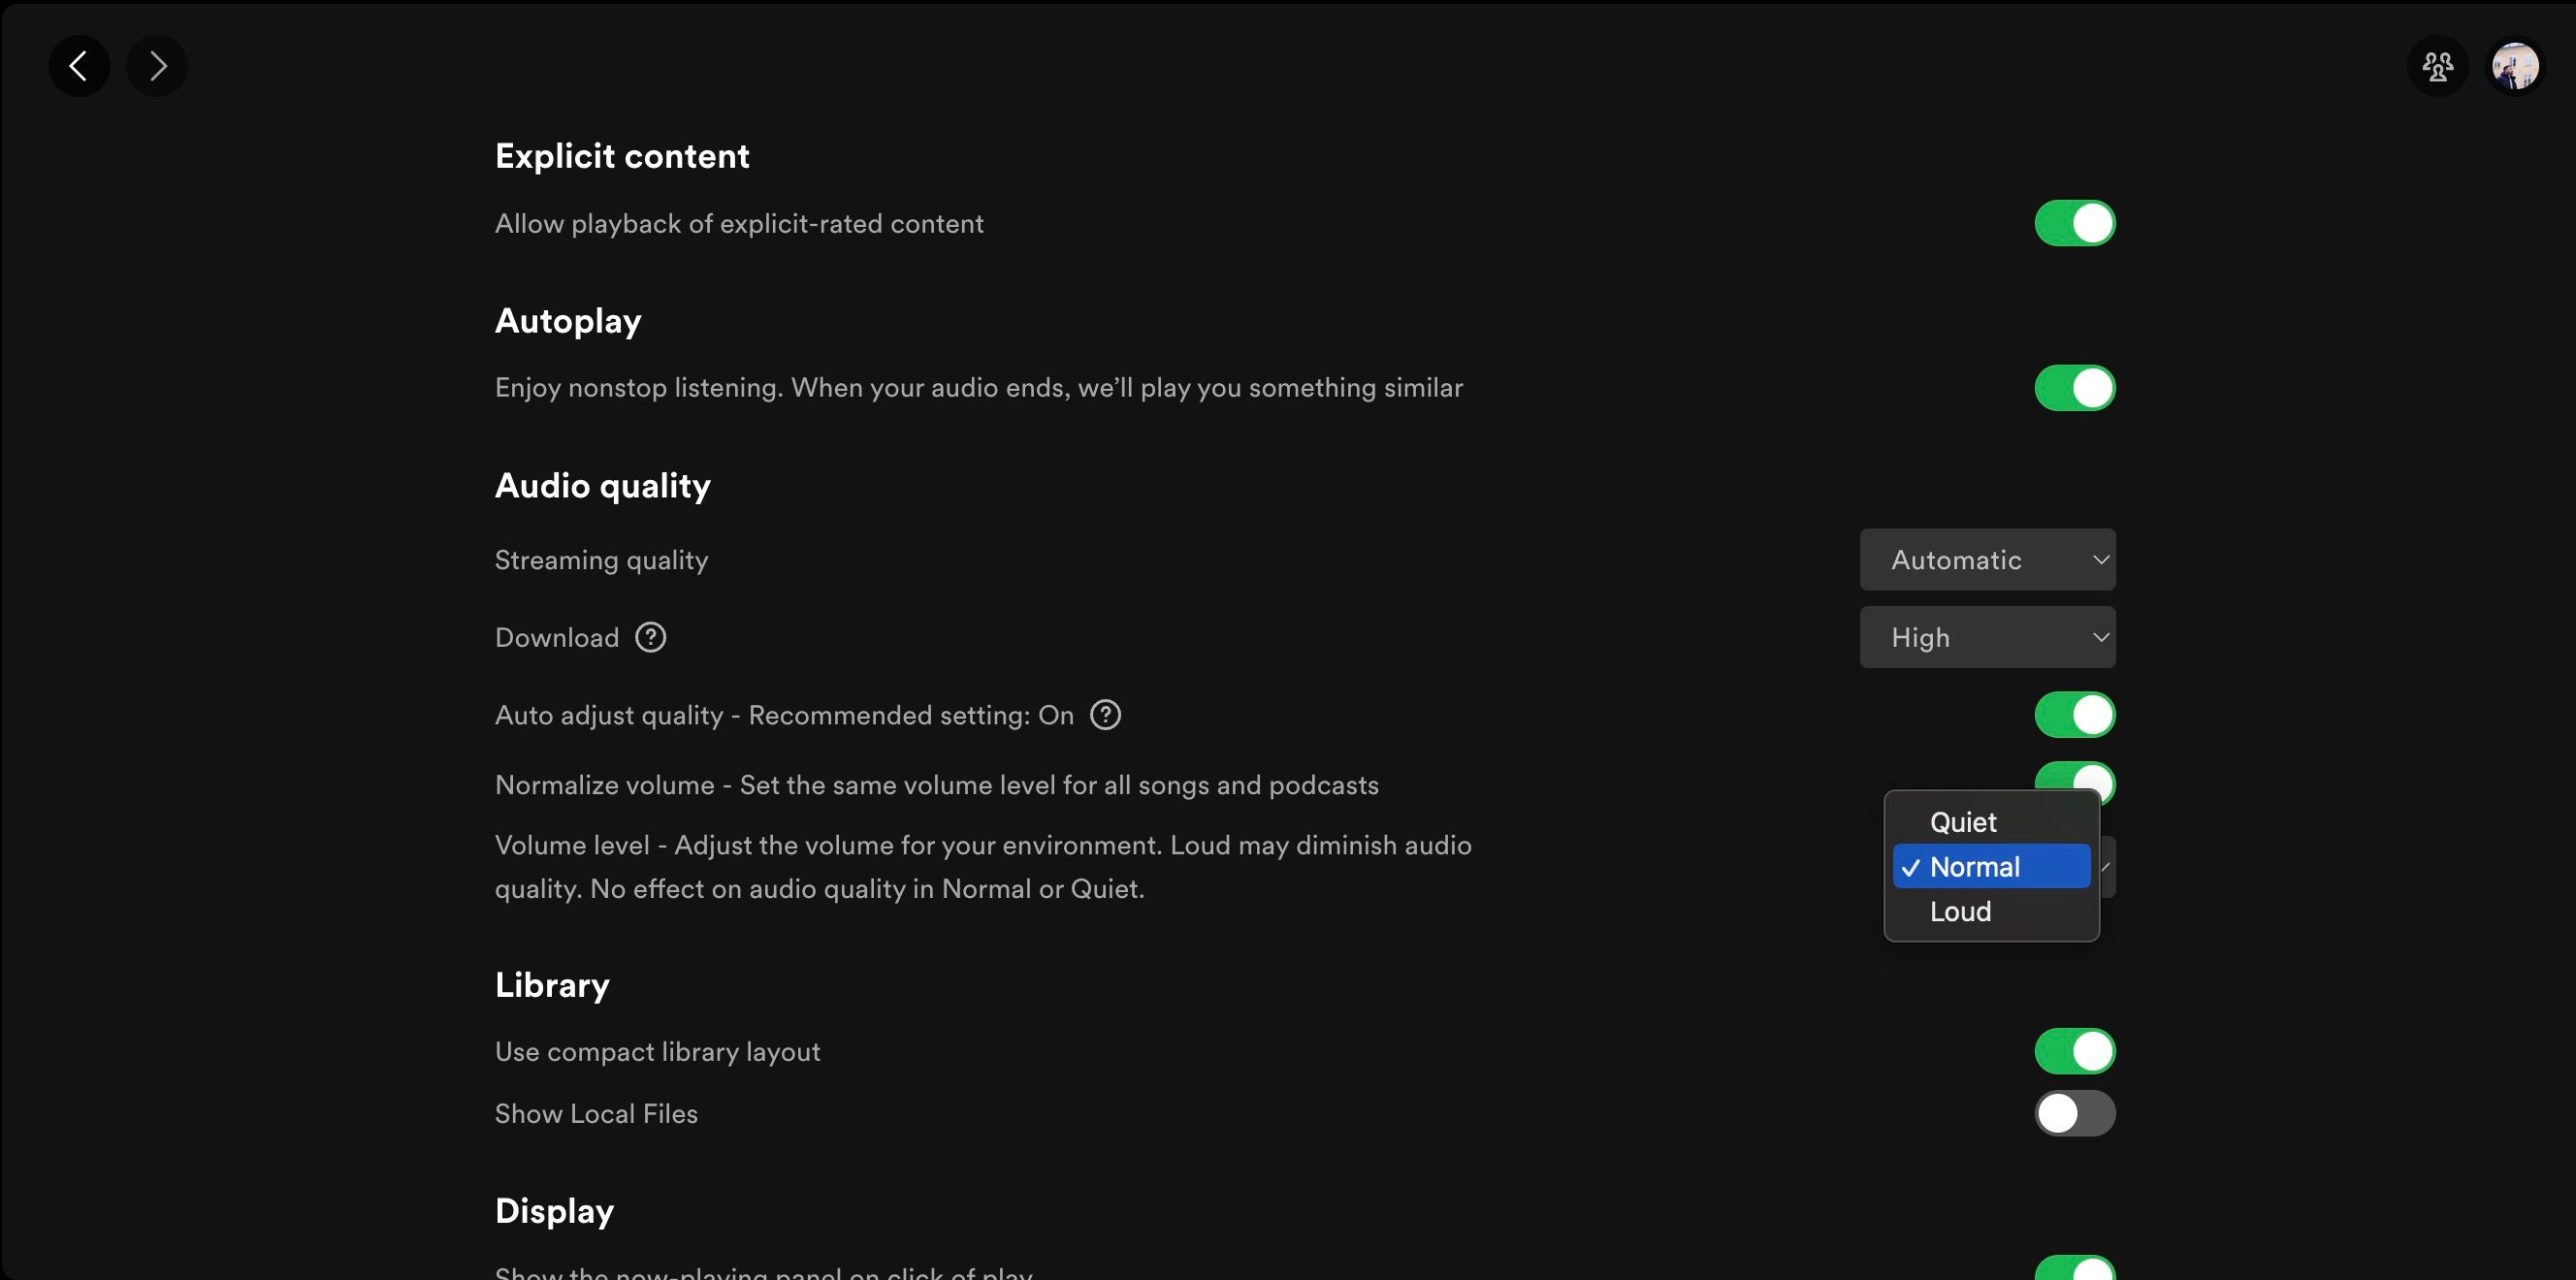
We’ve all experienced that moment when a new song plays a lot louder than the previous one. With Normalize, Spotify adjusts the volume levels for you to prevent this from happening.
To change this:
- Go to home and click on your profile > Settings.
- Click on Volume level under Audio quality.
-
Select the volume level that automatically adjusts all Spotify tracks to your environment. You will be able to choose between Loud, Normal, and Quiet.

2. Control Streaming Quality
Many people don't realize that you can adjust your Spotify settings for each type of listening session, from Wi-Fi streaming and data streaming to download.
What Are the Types of Streaming Quality on Spotify?
Spotify gives you the option to change your audio quality with five options: automatic, low, normal, high, and very high.
Automatic is the default audio quality, wherein the audio quality depends on how stable your internet connection is. With this, Spotify will select the highest level of quality without interrupting your listening session.
The approximation for each other type of audio quality on Spotify is 24kbit/s for low, 96kbit/s for normal, 160kbit/s for high, and 320kbit/s for very high. The very high audio quality option is only available on Spotify Premium.
The higher kbit/s means that you’ll hear the finer details of your music but will use up more bandwidth and data. Downloading in high quality will use more storage space on your device.
How to Change Spotify Audio Quality
To access the Audio Quality setting on iOS and Android, go to Home > Settings > Audio Quality, and customize the streaming quality to your preference.


For desktop, select Settings and scroll down to Audio quality. Under Streaming quality, you can click your preferred setting.

3. Use Equalizer
Equalizers let you adjust the volume of the audio spectrum range: Low, Mid, and High. Adjusting the frequencies should help enhance your favorite type of music to sound their best.
The Best Equalizer Settings on Spotify
When it comes to the best equalizer settings on Spotify, there is no one-size-fits-all. The ideal Spotify equalizer settings will vary across devices, genres, and even individual songs.
For example, if you're using standard laptop speakers, it's generally recommended to increase the bass and reduce the mids. In comparison, when using speakers with strong bass, you can opt to increase the highs to balance it out. For this reason, the best equalizer settings for Spotify can greatly differ based on hardware specs alone.
In fact, even factors like your age and hearing capabilities impact the ideal EQ settings for your optimal listening experience. For example, what could be the perfect Spotify equalizer settings for you may not be the same for your older family members or friends.
Thankfully, while everyone will have their own preference, the streaming giant saves most people a lot of trouble with built-in presets for the Spotify equalizer.
How to Change Spotify Equalizer on iOS and Android


To enable your Spotify equalizer, here’s how you can do it through iOS. Go to Home > Settings > Playback > Equalizer and switch it on. Then, tap one of the presets available to you or customize it by dragging the dots yourself.


If you’re an Android user, the option to use the Spotify equalizer may depend on your device manufacturer. To know if your device can handle the Spotify equalizer, you can check the option at Home > Settings > Audio Quality. If you find the word Equalize and tap it, your device will lead to your equalizer control panel.
Android users may get a warning saying that equalizers can alter volume unexpectedly and to disable it if they experience problems. Should you be using compatible audio sources such as headphones or speakers, the option to use Dolby Atmos, UHQ upscaler, and Adapt Sound will appear.


Both Dolby Atmos and UHQ upscaler provide surround sound and enhanced sound resolution experiences, while Adapt Sound helps adjust your sound profile based on your age range.
How to Use Spotify Equalizer on Other Devices
While there are many third-party equalizer options available for download, you can try to use the Spotify equalizer tool. Here's how to do that:
- Go to your settings on Spotify and scroll down to Playback.
-
Customize everything however you feel is necessary.


If you have a Mac, you should be able to use Spotify's equalizer. However, availability might vary for Windows users.
4. Enable Hardware Acceleration
For those of us with monsters for machines, it makes sense to optimize our listening experience to what our computers can handle. Spotify's hardware acceleration makes use of your existing hardware to help optimize the performance of the app. Spotify's hardware acceleration works on the Spotify desktop app for Windows and macOS.

To enable Spotify hardware acceleration on Windows, go to Settings > Show Advanced Settings. Under Compatibility, toggle on Enable hardware acceleration.
If you're on Mac, click Spotify in the top left corner of your screen and then click Hardware Acceleration.

Take note that while hardware acceleration can do so much for your listening experience, it can also cause playback issues, such as unplayable songs on Spotify.
5. Crossfade
Once you have chosen the best settings that make the starkest difference above, you can now proceed to fine-tune the little details that make your Spotify listening experience unique. Let's start with Crossfade.
Best for continuous listening for workouts and focused work, Crossfade is a neat feature that takes away all the awkward silences between songs.

To customize your crossfade settings on iOS, go to Home > Settings > Playback. Under Crossfade, drag the slider to your preferred levels.
For Android, you can go to Home > Settings > Crossfade and slide to your preference as well. Desktop users can also update Crossfade by selecting Settings, scrolling down to Playback, and toggling Crossfade songs on.

Then, click Crossfade songs and your desired crossfade length.
6. Gapless
Best for listening to live or classical music, Gapless keeps your music going without mixing them. Right under Crossfade, you can toggle the switch right to activate it.
7. Automix

Lastly, Automix is a Spotify artificial intelligence feature for smooth transitions. Using several methods such as crossfading, skipping, looping, or even adding transition effects, you will not even notice changing the track.
Found under Gapless, toggle the Automix switch to the right to get started.
Make the Most of Your Listening Experience on Spotify
Through the years, Spotify has given us increasingly better ways to enjoy our music. Not only is there an endless variety of entertainment to choose from, but there are also so many ways to experience them better.
Don’t miss out. Make sure that you adjust your settings for the best listening experience possible.