If you’re downloading a large file on a relatively slow internet connection, you might have to stay up all night waiting for the download to finish so you can shut down your Mac. This is where the ability to shut down your Mac automatically comes in handy.
We’re going to show you how to automatically boot up, restart, shut down, and put your Mac to sleep. For instance, if you have a metered internet connection, where downloads work best at night, a scheduled startup and shutdown routine helps make the most of that.
How to Schedule a Shutdown in macOS Big Sur
The process to automatically make your Mac start up, go to sleep, shut down, or restart is quite straightforward in macOS Big Sur.
Just follow these steps:
- Hit the Apple logo in the top-left corner and then click System Preferences.
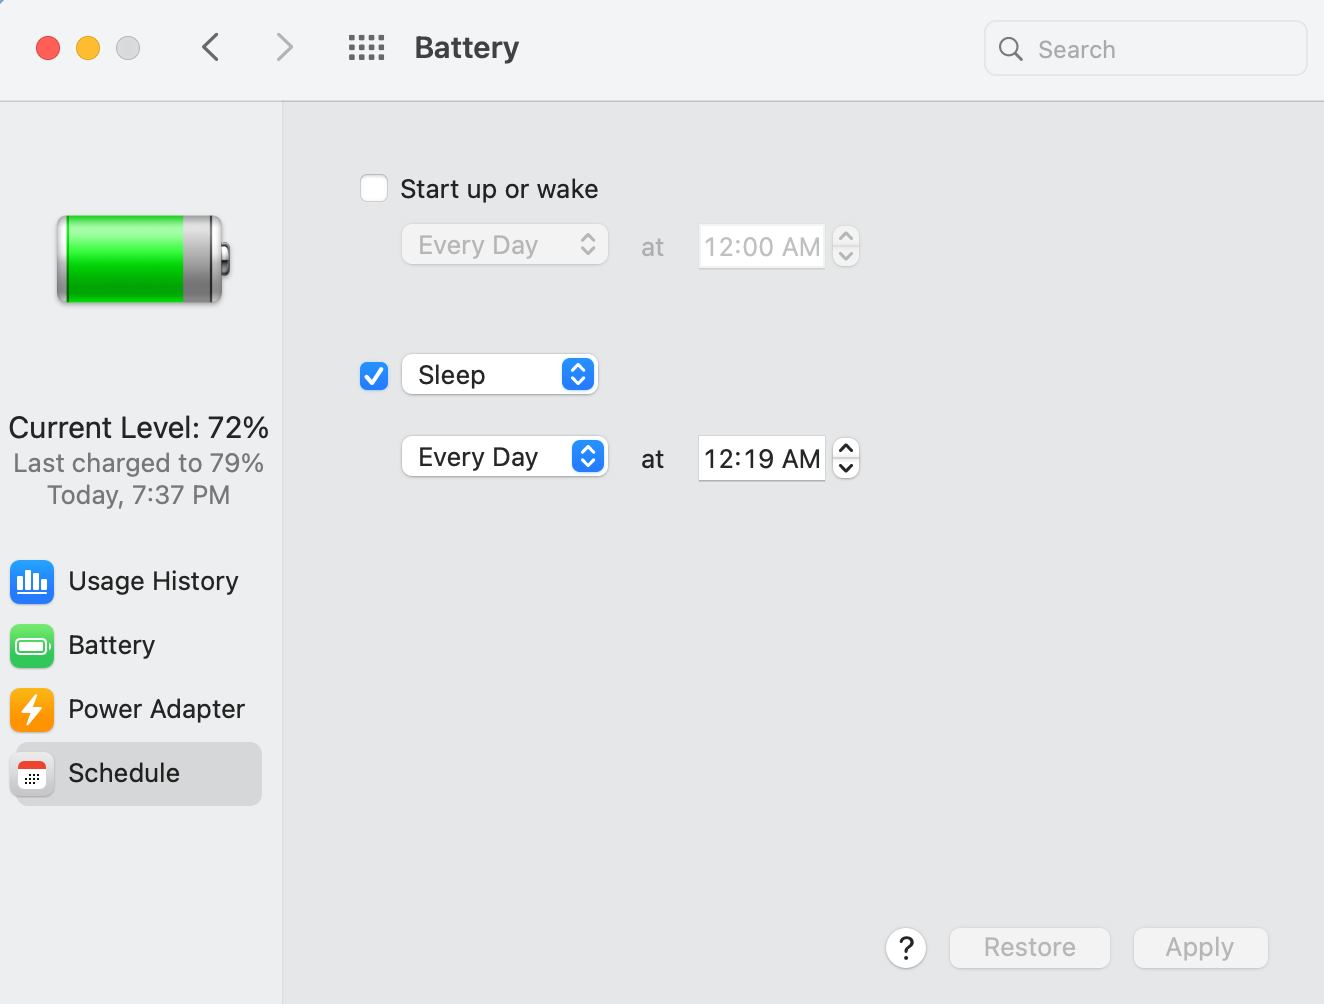
- Click Battery, then in the left pane, click Schedule.
- The first option, labeled Start up or wake, lets you schedule when your Mac boots or wakes up.
- If you’d rather schedule when your Mac goes to sleep, tick the box next to Sleep. Alternatively, you may click Sleep to reveal a dropdown menu that lets you select Shut down or Restart.
- Select the days and time when you want to schedule this action.
- Click Apply.
Now your Mac will automatically do the action you just selected. Remember that even if you schedule these actions, they will take place 10 minutes after the scheduled time to give you enough time to save your work or to cancel scheduled shutdowns.
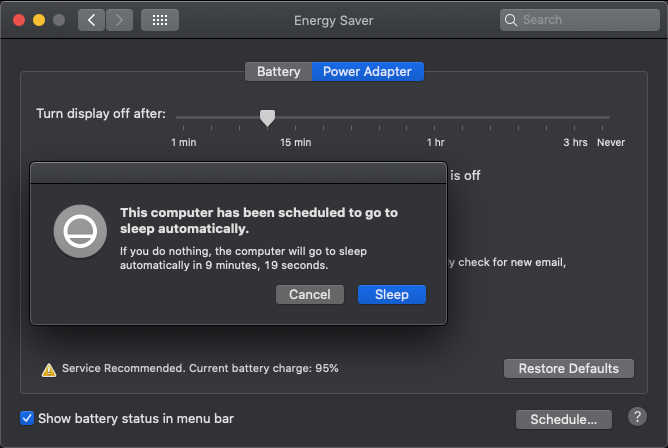
A popup window also allows you to immediately execute the scheduled action, or to cancel it.
How to Schedule a Shutdown in macOS Catalina or Older
Apple revamped the Settings menu with Big Sur, which means that scheduling your Mac to sleep, shut down, or restart is slightly different on macOS Catalina or older versions of the operating system.
Here’s the process you need to follow:
- Click the Apple logo in the top-left corner on your Mac and open System Preferences.
- Now click Energy Saver.
- Click Schedule, which is below the Restore Defaults button.
- In the small window that opens up, tick the box next to Sleep. You may also click Sleep to reveal a dropdown menu. Here you can select Restart or Shut Down if you wish to automatically restart or shut down your computer instead of putting it to sleep.
- There’s also a checkmark next to Start up or wake, which allows you to boot up your Mac at a specific time everyday or on any given day.
- Set the days and time when you want to put your Mac to sleep and click OK.
Just as we saw with Big Sur, your Mac will automatically sleep, shut down, or restart 10 minutes after the scheduled time. You can save all your important work before shutting down the machine, or you can cancel the scheduled shut down if you wish.
How to Automatically Start Apps When You Log In
Just as it’s great to have your desk nicely laid out when you arrive at work, it’s also great to have your Mac start up your favorite apps when you log in.
Not a single day goes by when I don’t fire up my writing app, Apple Music, Messages, and my email app. With each restart it feels like a chore to start the same apps over and over, so let’s automate that, shall we?
Follow these steps:
- On your Mac, click the Apple logo in the top-left corner and head over to System Preferences.
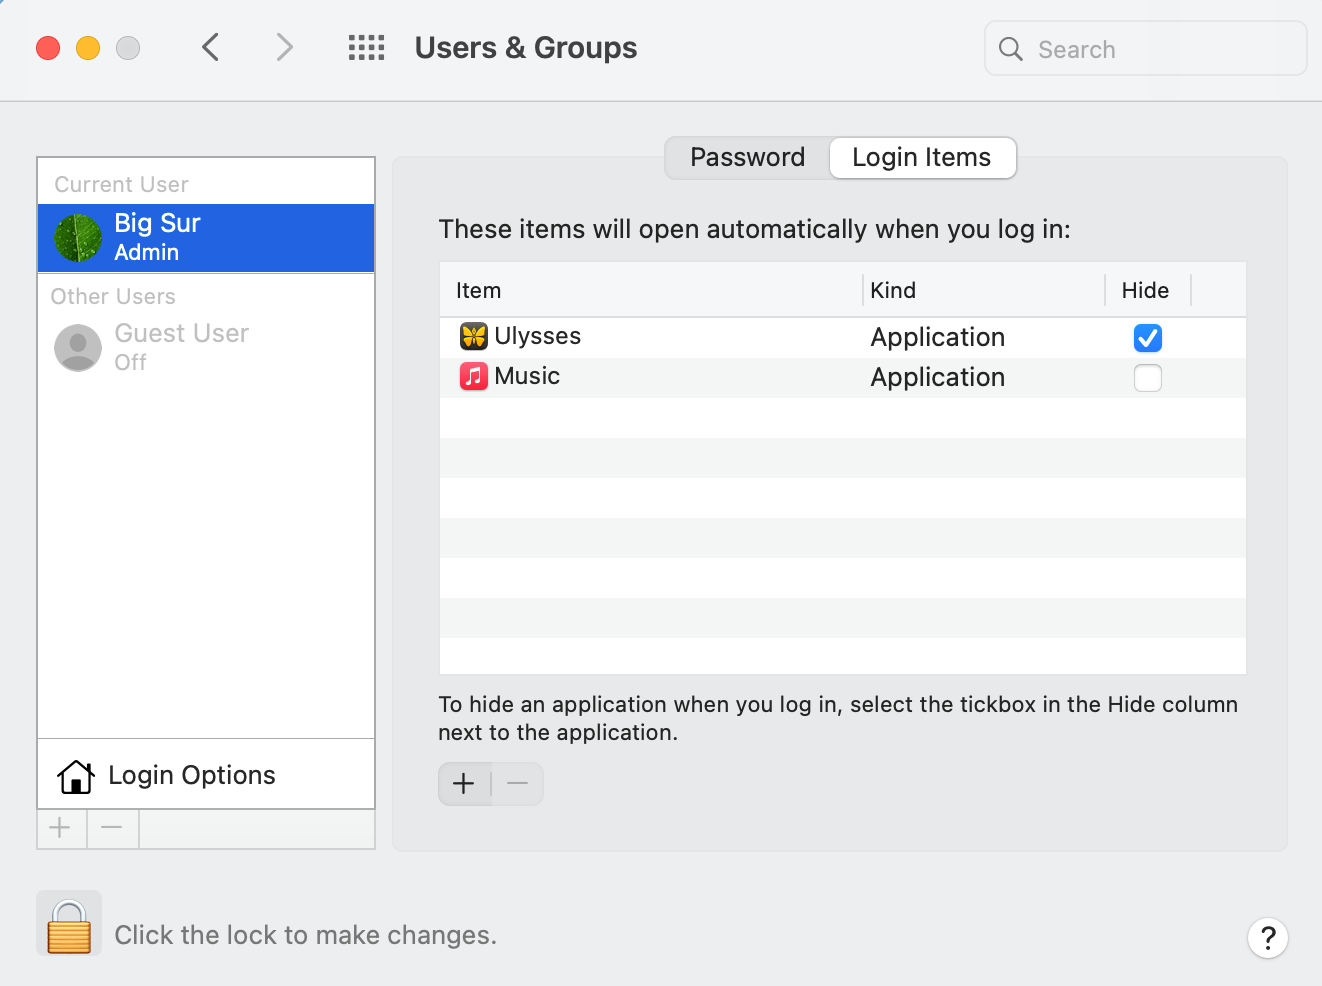
- Now click Users & Groups.
- In the left-pane, make sure that you’ve selected the correct user on your Mac.
- On the right side, click the tab labeled Login Options.
- Click the Plus button below that and select any app. You can click the Applications button on the left pane to find your apps.
- Repeat this process for each app you want to fire up when you log in to your Mac.
- If you want to start an app in the background, tick the Hide checkbox on the right.
How to Stop Your Mac Asking for a Login Password Every Time
Whenever your Mac restarts, macOS makes you enter your login password. If you’re tired of doing that, you can make your Mac skip this process and log you in automatically.
This is best used if you’re the only user of your Mac and if it is always in a secure place. Otherwise, it can quickly become a privacy and security nightmare, so be sure of the consequences before you enable automatic logins on your Mac.
If you’re sure you want to do this, follow these steps:
- Click the Apple logo and go to System Preferences > Users & Groups.
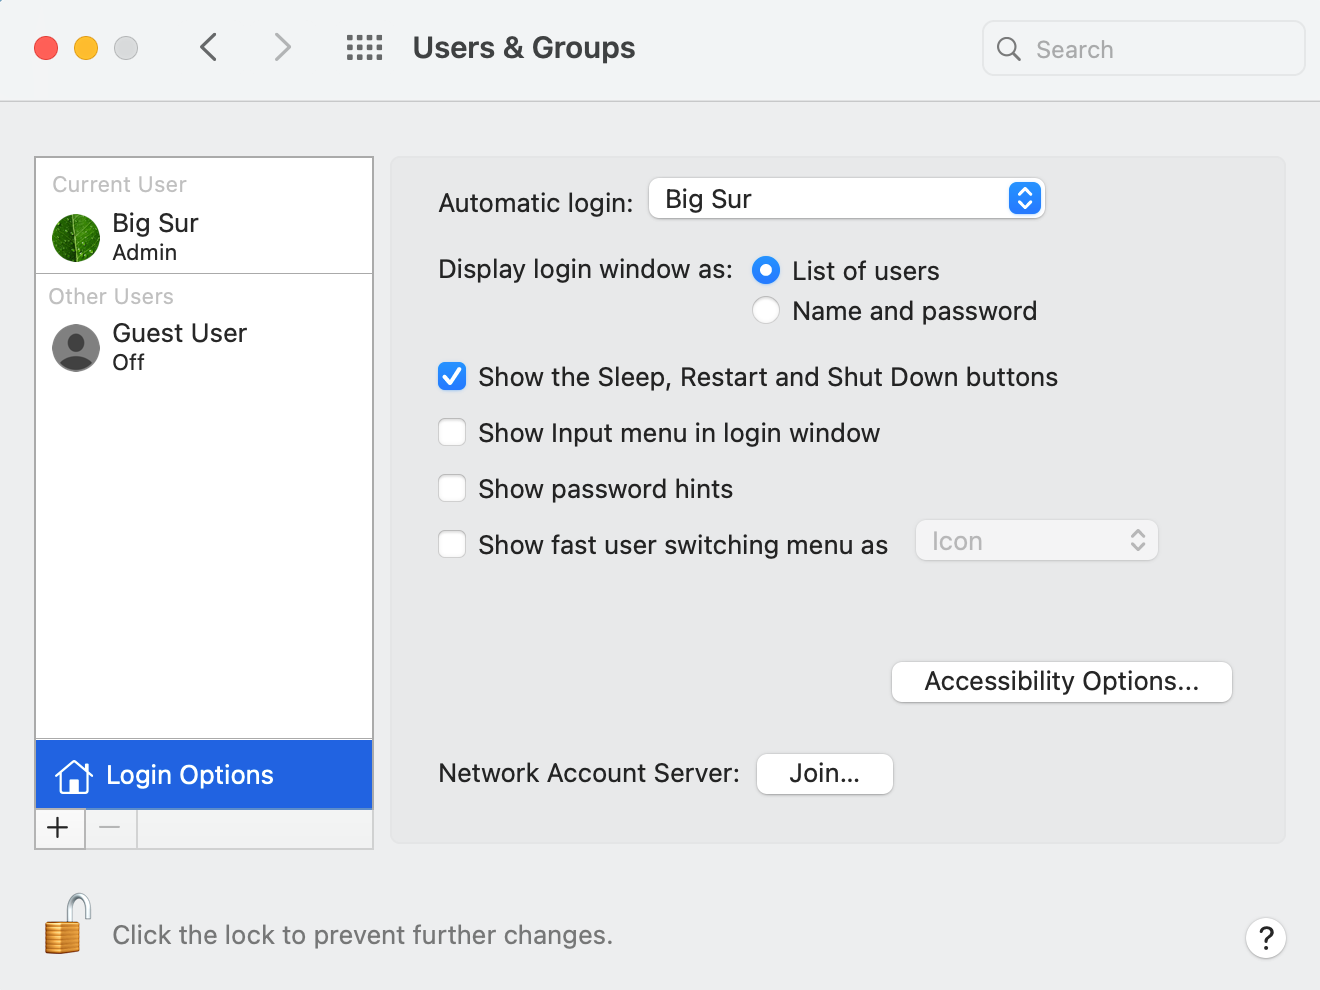
- Click Login Options in the left pane.
- Click the padlock icon right below this and enter your Mac’s login password.
- On the right side, click the dropdown menu next to Automatic login and select your username.
- Now enter your Mac’s login password once more and click OK.
- You’ll see a warning explaining that Touch ID will be disabled (if your Mac has Touch ID), and Apple Pay cards (if any) will be removed from this Mac. This is a security measure designed to minimize your losses in case someone gains access to your Mac.
- If you’re sure you still want to go ahead, click Continue.
This will enable automatic logins on your Mac. Whenever your Mac goes to sleep or restarts, you won't have to enter your login password anymore.
This Is Just the Beginning of Mac Automation
While it’s fun to automate startups and shutdowns on your Mac, you can do much, much more, such as opening a specific set of web pages every day. The Automator app on a Mac is incredibly powerful, and it makes complex tasks like this very accessible, even for beginners.

