Windows 11 offers a plethora of new functions, with an updated design and more focus on consistency and optimization. The best way to get Windows 11 is through a fresh installation, rather than an upgrade. You can do this using a Windows 11 bootable disk.
The process of creating a Windows 11 bootable disk is very simple if you're using a Windows PC, but the process becomes slightly more complicated if you're using a Mac. We'll cover how to create a Windows 11 bootable disk using macOS below.
What You Will Need Before Starting
You'll need the following items to create a bootable Windows 11 installer:
- An 8GB or larger (16GB is preferred) USB drive that you don't mind formatting.
- Your MacBook power adaptor should be plugged in, as you don't want your battery to run out during the process.
- An active internet connection, to download the Windows 11 ISO.
Download the Windows 11 ISO
The first step is to download the Windows 11 ISO, which is available for free from the Microsoft website. Select Windows 11 from the Download Windows 11 Disk Image (ISO) section and your choose preferred language from Select the product language, then press Confirm and download the installer on your Mac by selecting 64-bit Download.
The installer is around 5.2GB in size, so it may take some time to download, depending on your internet connection.
How to Make a Windows 11 Bootable Disk
There are three methods of creating a bootable Windows 11 disk on your Mac, depending on which Mac model you have.
If you have an Intel Mac, you can use the Boot Camp method to create the bootable disk. On the other hand, M1 Macs don't feature Boot Camp, so you can only use Terminal to create the bootable disk. You can also use a third-party app (UUByte ISO Editor) to create the Windows 11 bootable USB.
We'll cover all three methods below.
Option 1. Create Windows 11 Bootable Disk Using Boot Camp (Intel Macs)
The first method involves using Boot Camp on Intel Macs. Boot Camp Assistant can be used to install Windows on a Mac and create a bootable USB installer drive, eliminating the need for any lengthy Terminal commands or third-party apps. This method is not available on M1 Macs.
If you have an Intel-based Mac, follow these steps:
- Launch Boot Camp on your Mac; you can do this from Applications > Utilities in Finder or by using Spotlight.
-
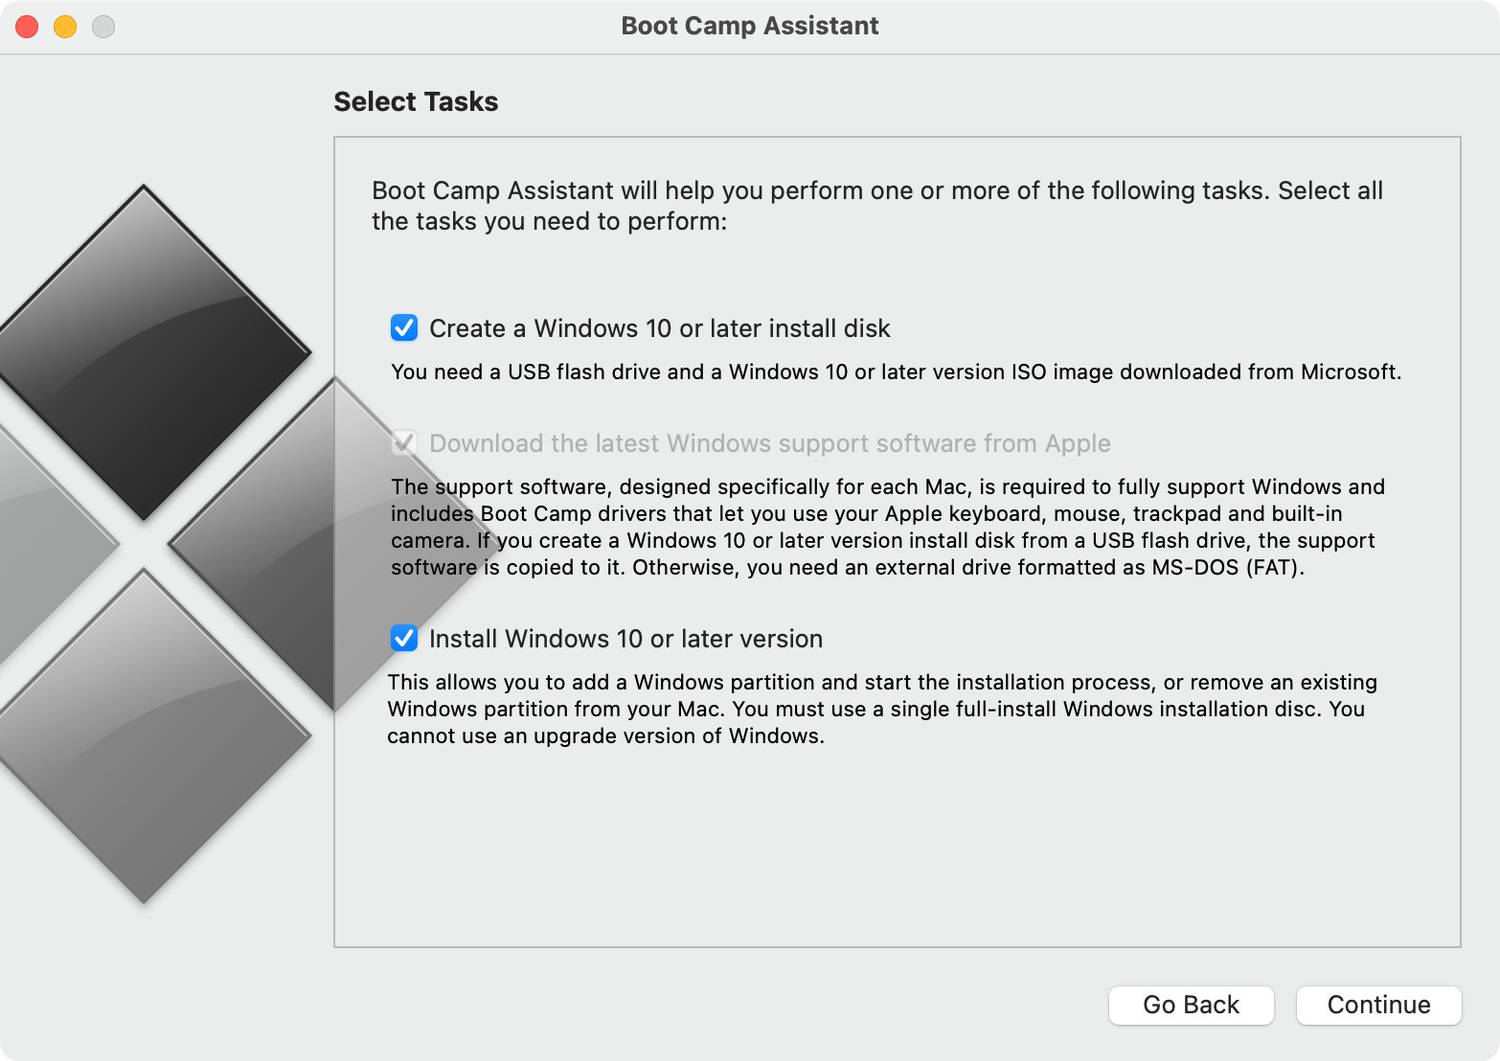
In Boot Camp, click Continue, and check the box to Create a Windows 10 or later install disk.
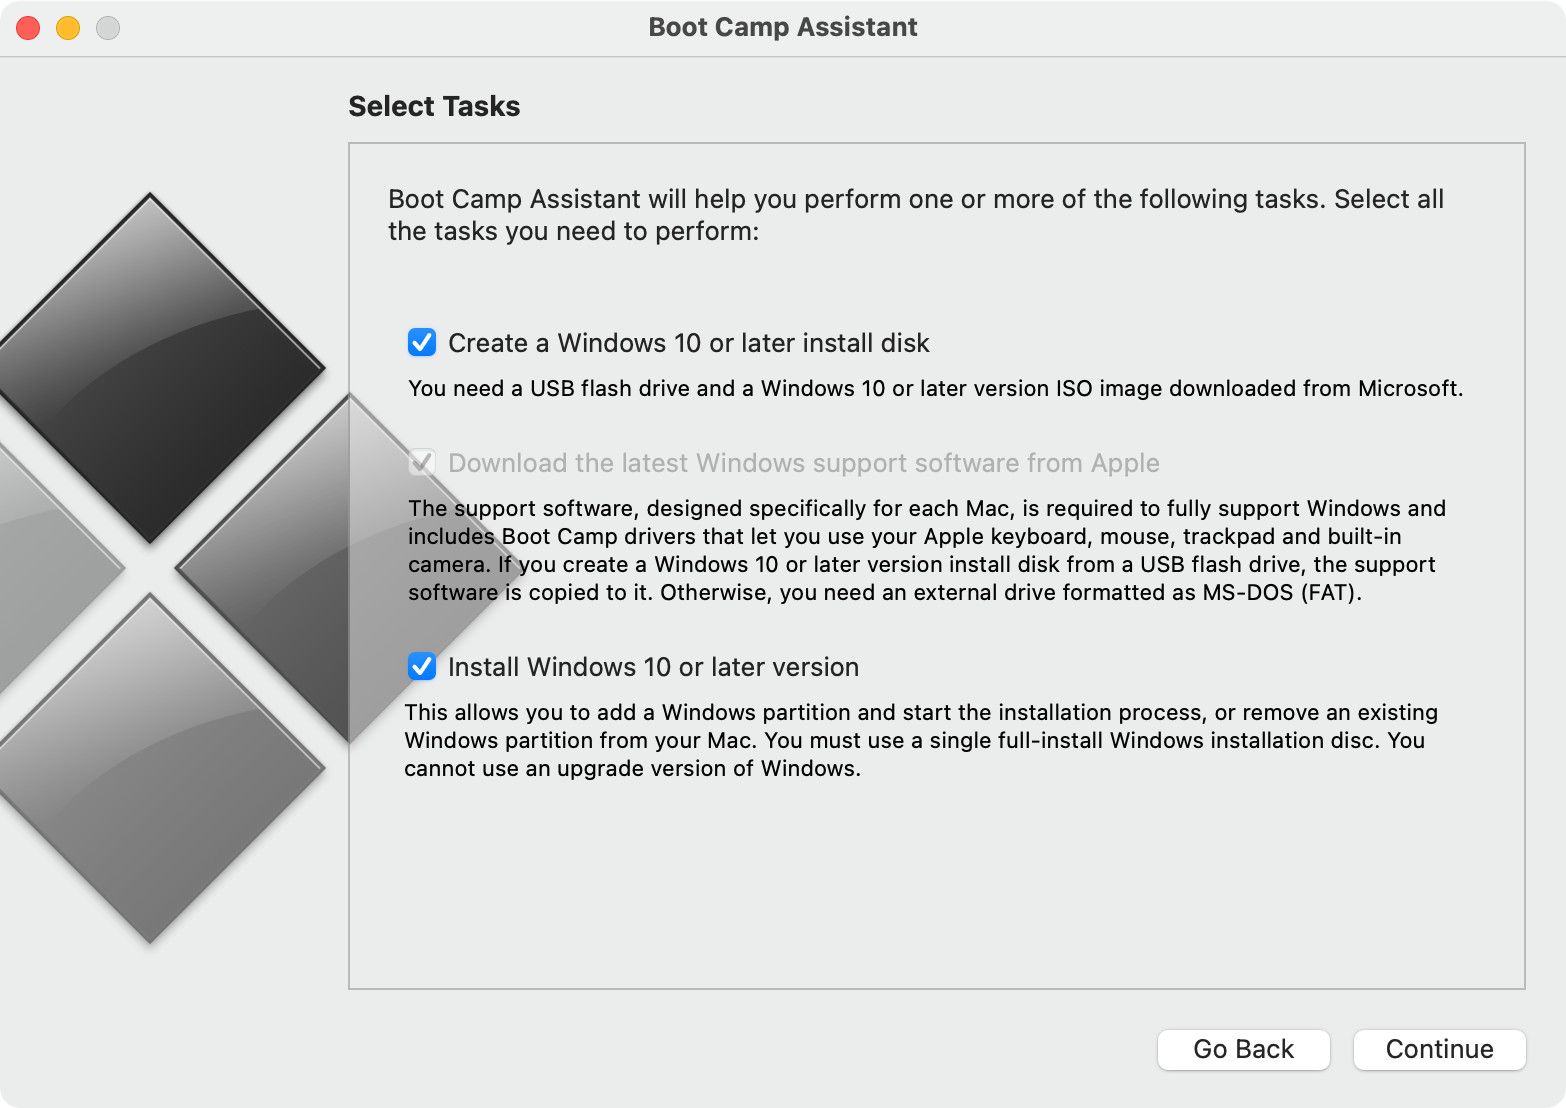
- If the second box (Download the latest Windows support software from Apple) isn't grayed out, check it. Don't check the third box.
- Click Continue when you're done.
- Browse and select the Windows 11 ISO file you downloaded.
- Under Destination Disk, select your USB drive, and click Continue.
- Boot Camp will format your USB. Press Continue to proceed. The installation process will now start. Let it run, and you'll see a window saying the Windows support software has been saved. That's it.
Note: Make sure you don't close the MacBook lid while the process is running, otherwise it'll cancel and you'll have to restart the process again.
You can now use this bootable disk to boot and install a fresh copy of Windows 11 on your PC.
Option 2. Create Windows 11 Bootable Disk Using Terminal (M1 Macs)
The second method we'll cover today involves using Terminal. The process is relatively simple; however, a limitation of this method is the issue of the installer being 5.2GB. You cannot burn a file bigger than 4GB on a FAT32 formatted drive, which is the only format that works with both Windows and macOS.
A workaround for this is to split the installer into smaller files, which requires the installation of a package manager, wimlib, that is installed through Homebrew. This will split the Windows installer file while creating the bootable disk.
To install Homebrew and create a bootable Windows 11 USB, open Terminal on your Mac from Finder > Applications and enter the following commands. Once you have entered a command, press Enter:
curl -fsSL -o install.sh https://raw.githubusercontent.com/Homebrew/install/HEAD/install.sh
/bin/bash install.sh

This process will download and install Xcode before installing Homebrew. Xcode is an integrated development environment (IDE) that is comprised of software development tools for macOS. The process may take a few minutes to complete.
You will be required to type in your Mac user password to authenticate yourself. You won't see anything appear on the screen when you type it in, so just type it and press Enter to install Homebrew.
Once the installation is complete, enter the following command and press Enter to install wimlib:
brew install wimlib
You might get an error message saying command not found:brew, you may also see two commands in Terminal right at the end of the previous Homebrew installation. Enter the commands to activate Homebrew, followed by the command above again to get it working successfully.

Now, make sure your USB is connected to your Mac. Run the following command:
diskutil list
This will bring up a list of drives connected to your Mac. Find and note down the USB drive's disk identifier, which should appear to the left of (external, physical), and should resemble disk2, disk3, and so on.
Use the following command to format the USB stick in Terminal (replace disk2 with your disk identifier):
diskutil eraseDisk MS-DOS WINDOWS11 GPT /dev/disk2
Terminal should now format your disk and rename it as WINDOWS11.

Mount the Windows 11 ISO from the Downloads folder on your Mac. You can do this by double-clicking on the ISO file, which should then show up in your Mac's connected devices as CCCOMA_X64FRE_EN-US_DV9 or similar. Remember to match the file name exactly to the one above. If it's different (due to a different language preference), make sure to change it accordingly in the commands below.
Since the installer file is bigger than 4GB, we'll be using two separate commands to create the bootable disk. The first command will copy all the files apart from the install.wim file (which is 4.2GB) in size. The second command will use wimlib to split and copy the install.wim file to the USB stick.
Use the following command to copy the content of the ISO image—excluding the install.wim file—onto the USB drive:
rsync -vha --exclude=sources/install.wim /Volumes/CCCOMA_X64FRE_EN-US_DV9/* /Volumes/WINDOWS11
Then run the following command to split and copy the install.wim file:
wimlib-imagex split /Volumes/CCCOMA_X64FRE_EN-US_DV9/sources/install.wim /Volumes/WINDOWS11/sources/install.swm 3000

That's it! Terminal should successfully create the bootable disk, which you can now use to boot a fresh Windows installation.
Option 3. Use a Third-Party App to Create a Windows Bootable Disk
The two methods detailed above are free and can be done on Intel or M1 Macs. However, if you want to avoid Terminal and want a UI-based experience instead, you can use UUByte ISO Editor ($29.95, free trial available) to create a bootable disk. The app has broad support for different Mac models and macOS versions, and you can easily create a Windows 11 installer USB using it.

The only downside to this method is that the app isn't free. However, it is a viable alternative if you are on an M1 Mac and are not fond of Terminal.
Get a Fresh Windows Installation
Now that you've successfully created a Windows 11 bootable disk, you can use it to install a fresh copy of Windows on your PC. In all essence, we'd recommend creating the bootable disk on a Windows PC if you have access to one, since the process is much simpler. But in a pinch, you can use this guide to use Boot Camp or Terminal method on your Mac to create one.