Raspberry Pi OS is based on Debian, a Linux operating system. Most other operating systems you’ve seen or used on the Raspberry Pi are Linux-based. But what if you wanted to use a different approach?
What if you wanted to run Windows on the Raspberry Pi?
A cursory glance at Windows 11’s system requirements show that it is simply too big to run on a Raspberry Pi. Incredibly, however, it can be done. Thanks to a tool called WoR-flasher, you can now install Windows 10 and 11 on a Raspberry Pi 4.
Why Would You Install Windows on a Raspberry Pi 4?
Using a Raspberry Pi typically means embracing the open source world of Linux. Most software you know from Windows won’t work, either due to the ARM architecture of the Raspberry Pi, the low spec of the system, or because it runs Linux. Some cross-platform software may work, as should web-based tools (in the right browser).

This might make you think that running Windows on the Raspberry Pi is a good idea. It’s certainly now feasible, but you should temper your expectations until you’ve got it running.
On the other hand, there is a very good reason to install Windows 10 on a Raspberry Pi 4: because you can.
Shortcomings of Running Windows on the Raspberry Pi 4
Before you get excited, keep in mind that even a Raspberry Pi 4 with 8GB of RAM is a lot less powerful than a typical Windows 11 PC. As such, you will be limited with what you can achieve. At best, this is going to run like a very cheap work or college PC. Which is fair enough, as that's essentially what it is.
The obvious thing to do on a computer is browse the web. Can you do this on a Raspberry Pi running Windows 10 or 11? Yes, you can--Microsoft Edge is pre-installed, after all, and works fine.
Various old 32-bit programs seem to work well, as do some older games, although titles with a 3D element tend not to start. Oh, and you can still use the Raspberry Pi’s GPIO pins.
Ultimately, the Windows experience on a Raspberry Pi may be quite different to that on your main PC, but it is quite usable.
What You Need for Installing Windows 10/11 on a Raspberry Pi 4
WoR-flasher will install Windows 10 or 11 on a Raspberry Pi 4 or 400. To get started, you need:
- A computer running Linux (Debian-based)--this could be a standard desktop, laptop, or even a Raspberry Pi 4
- A Raspberry Pi 4 (4GB or 8GB preferred) or 400
- Ethernet cable connection to your router (Wi-Fi drivers are currently unavailable for Windows on a Raspberry Pi)
- USB-compatible SSD or minimum 16GB microSD card (32GB is better)
- Display and suitable HDMI cable
- Keyboard and mouse
- Optional additional USB storage
Note that while you can use another computer for this process, it is not necessary. It is feasible to use the WoR-flasher tool with just a Raspberry Pi 4.
Installing Windows 10/11 on a Raspberry Pi, Step-by-Step
To install WoR-flasher, you can either install it from Pi-Apps, or manually using two terminal commands. First, clone the GitHub repository:
git clone https://github.com/Botspot/wor-flasher
This will install all the required packages. Next, run the script:
~/wor-flasher/install-wor-gui.sh
You should shortly see the WoR-flasher tool, in a neat box labeled “Windows on Raspberry.”
Before proceeding, ensure the microSD card is inserted in your computer. If you’re using a Raspberry Pi, the inserted SD card can be used, providing it has 16GB+ free space.
In the Windows on Raspberry box, select your preferred version of Windows, then your Raspberry Pi model.

For example, I wanted to run Windows 11 on a Raspberry Pi 4, so selected these options:
- Click Next
-
Select the correct Language, then Next
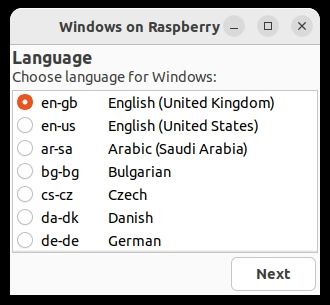
-
Select the correct device to flash, then Next
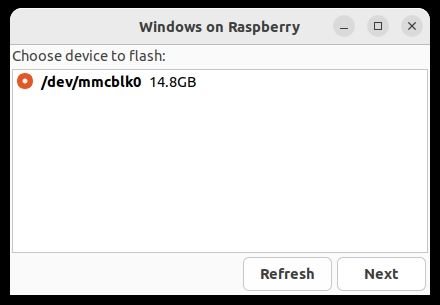
-
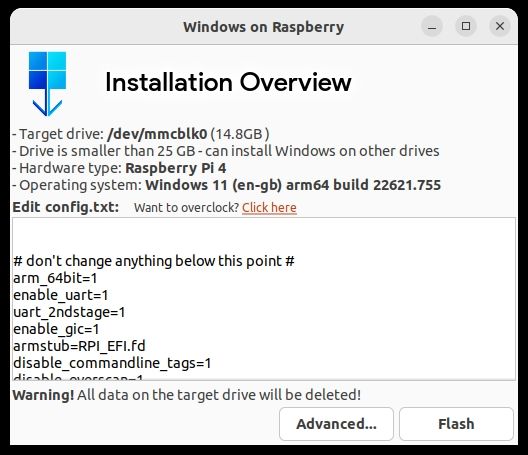
In the Installation Overview screen, you can edit config.txt, or simply Flash (the Advanced screen lets you change the working directory, or end the process without flashing)


After this, the necessary files will be downloaded. This can take a while, so it is worth finding something else to do while the process completes. Once it’s done, input your Linux password to confirm the copying of the necessary files to the SD card.

Once that completes, safely eject the microSD card from your PC, insert it in your Raspberry Pi, and power it up. (If you ran the WoR-flasher on your Raspberry Pi 4, simply reboot.)
Booting the Raspberry Pi for the first time with the Windows-based microSD card will take a while. All you can do is wait, once again, as the files are extracted and Windows 10 or 11 is installed.
If your SD card is under 32GB, you will be prompted to Select the destination disk via a drop-down menu. This should be a device with at least 24GB of space if it contains the installation files. Alternatively, another disk with at least 15GB of storage can be used.

Click Next to move onto the next part of the setup. Here, confirm the editor of Windows to be installed, and click Install.
With an SD card of 32GB or more, installation will happen automatically without your input.
When the process completes, your Raspberry Pi will reboot into Windows 10 or 11, depending on what you installed.
You Might Need an Update
When installing Windows 11 on my Raspberry Pi 4, I found that after confirming the keyboard language, layout, and location settings, the OS needed an update. As there are no Wi-Fi drivers for Windows 10 or 11 on the Raspberry Pi, instead connect an Ethernet cable from the Pi to your router.
If this doesn't work, exiting in favor of a network-free setup is an option preferable. As per our guide on setting up Windows 11 without an internet connection, open the command prompt with SHIFT+F10 and enter:
OOBE\BYPASSNRO
This bypasses the online setup, allowing the creation of a local user account. A reboot restarts the latter stages of Windows setup--select the I don’t have internet option, which should be followed with Continue with limited setup.

Proceed with creating a local account, confirming your preference for “location-based experiences” (e.g. there is no need to enable Find My Device) and sending diagnostic data to Microsoft.
You may also prefer to prevent apps using your assigned advertising ID.
On the other hand, you may be happy with each of these options. After all, you get to use Windows free for a time.
Configuring the Raspberry Pi for Improved Windows Performance
While the setup automatically handles overclocking, you may want to tweak a few options in the OS to get Windows running more efficiently on the Pi.
In the Start menu, type “startup” to find the Startup screen (Startup Apps on Windows 11). Here, disable Microsoft OneDrive and Microsoft Security notification icon.

Next, in the search bar, type “performance” and click Adjust the appearance and performance of Windows. In the Performance Options screen, on the Visual Effects tab, click Adjust for best performance, then OK.

Other options can be found by pressing Esc when the computer boots. Among the options here is a Raspberry Pi Configuration tool, a stripped-down version of the utility you probably used on Raspberry Pi OS.

Another OS Option for Your Raspberry Pi
The Raspberry Pi’s list if operating systems continues to grow. While Windows on Raspberry Pi projects have come and gone, WoR has adapted well, particularly to the arrival of the Raspberry Pi 4. For it to support both Windows 10 and Windows 11 is a particularly welcome surprise.
Incredibly, Windows 11 on a Raspberry Pi works really well. While you’re limited with your choice of software, this is actually true of any Windows-compatible computer. Low-end laptops can’t run high-end games, for example; editing video in anything above Full HD (1080p) can become a chore, too.
The Raspberry Pi proves that Windows 10 and 11 can run on low spec, inexpensive computers.