Linux Mint is at the forefront of making Linux accessible to beginners switching from other operating systems. Although Linux Mint tries its best to help newcomers transition to Linux successfully, its installation process is often what catches most people off-guard.
Luckily, installing Linux Mint on a PC or virtual machine is easier than you might think. Here's everything you need to know to get started.
Step 1: Choosing Your Favorite Linux Mint Flavor
Chances are you might have heard of Linux Mint on a forum online, or maybe a friend you know from work recommended you try the operating system instead of Windows. Either way, you'll eventually end up on the official Linux Mint website, only to find that there are different versions (or "flavors") of the OS.
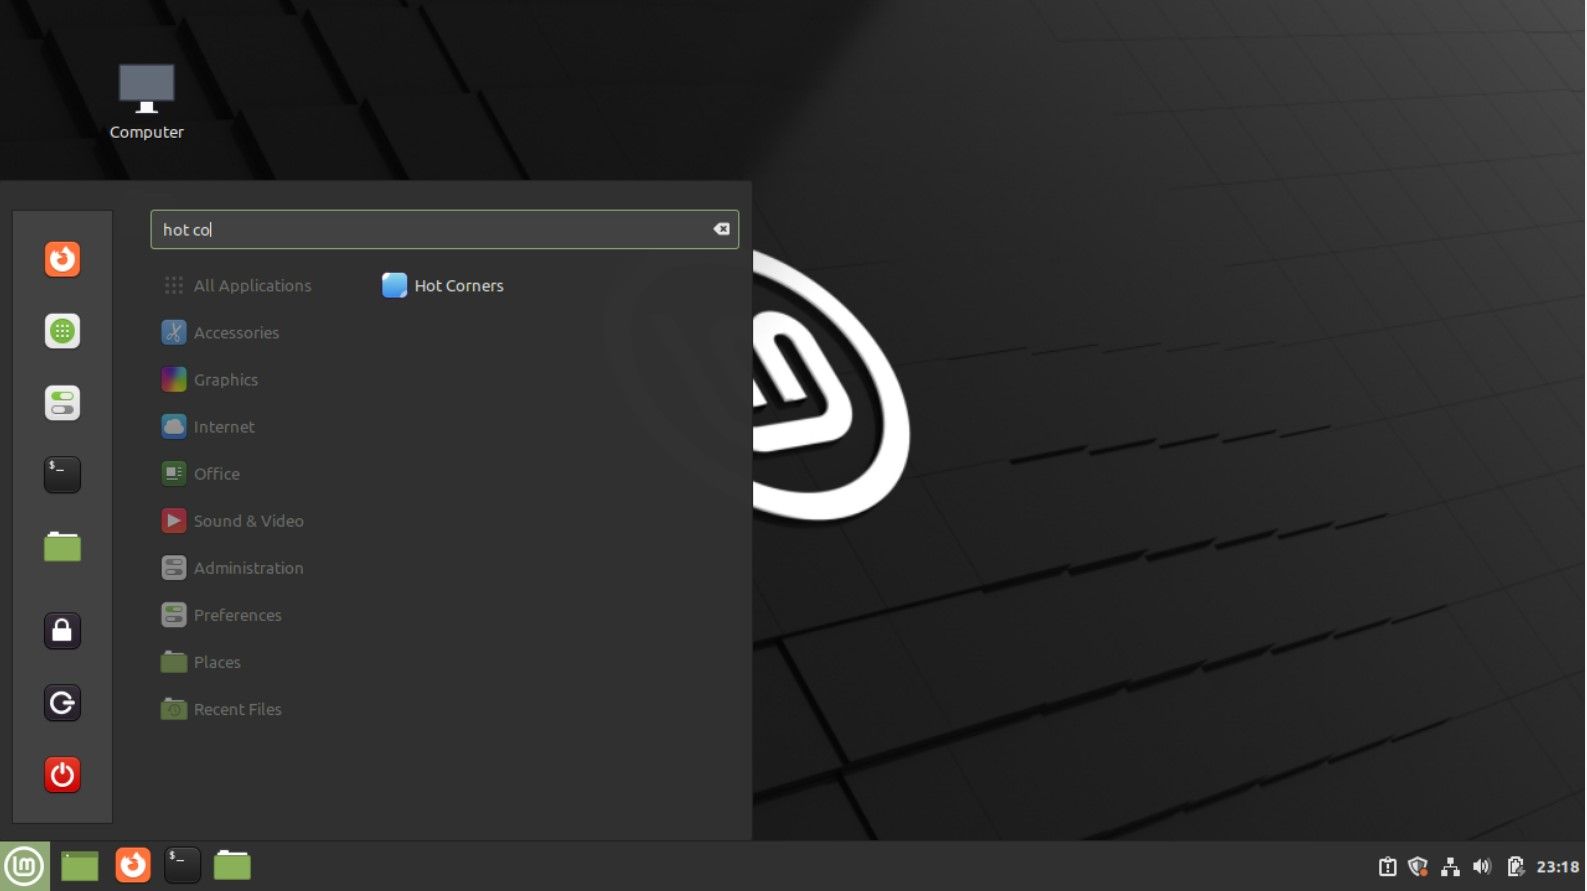
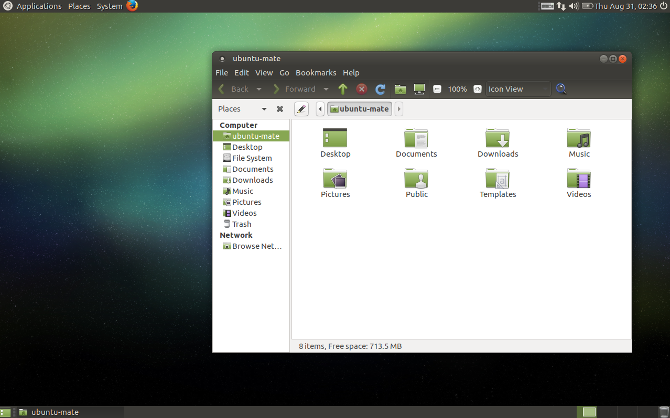
Which one you choose depends on the desktop you want to install. Linux Mint offers three official flavors of the OS: Cinnamon, MATE, and XFCE. All three desktops resemble the look and feel of Windows, with a taskbar across the bottom of the screen and an applications menu to the extreme left corner.
Cinnamon is the flagship variant of Linux Mint and offers extreme customizability out of the box.
MATE is a desktop environment based on GNOME 2. It's very similar to Cinnamon and was Linux Mint's default desktop for five long years before Cinnamon took over. It's light on resources and is much faster when compared to Cinnamon.
If you're looking for a snappier Linux experience, you should go for the third flavor: XFCE. Apart from being lightweight and highly customizable, there are several other reasons to choose XFCE over other desktop environments.
Once you've decided which Linux Mint flavor to install, download its ISO image from the official website.
Download: Linux Mint
Step 2: Creating a Bootable Linux Mint USB
After downloading the Linux Mint ISO, you need to create a bootable USB that you'll use to install Linux Mint on your computer. You can use Rufus on Windows and balenaEtcher on macOS and Linux.
With the bootable USB in place, you need to restart your computer and boot using the newly created USB. Proceed to the next step when you see the Linux Mint boot menu.
Alternative Way: Setting Up a Virtual Machine for Linux Mint
For those who are not sure whether Linux Mint is for them, you can test out the OS by installing it on a virtual machine. You can use hypervisors like VirtualBox, VMware, or Hyper-V to create a virtual machine for Linux Mint.
To set up a virtual machine on Windows or Linux, follow our step-by-step guide on using VirtualBox to manage virtual machines.
After creating a Linux Mint VM, start up the virtual machine and proceed to the next step.
Step 3: Installing Linux Mint on a PC
At the Linux Mint boot menu, press Enter to select the highlighted option, i.e. Start Linux Mint. You'll see a Linux Mint logo on the screen after which you'll be taken to the desktop. You can choose to either test out the environment before committing to the operating system or directly jump into the installation process.
Basic Configurations
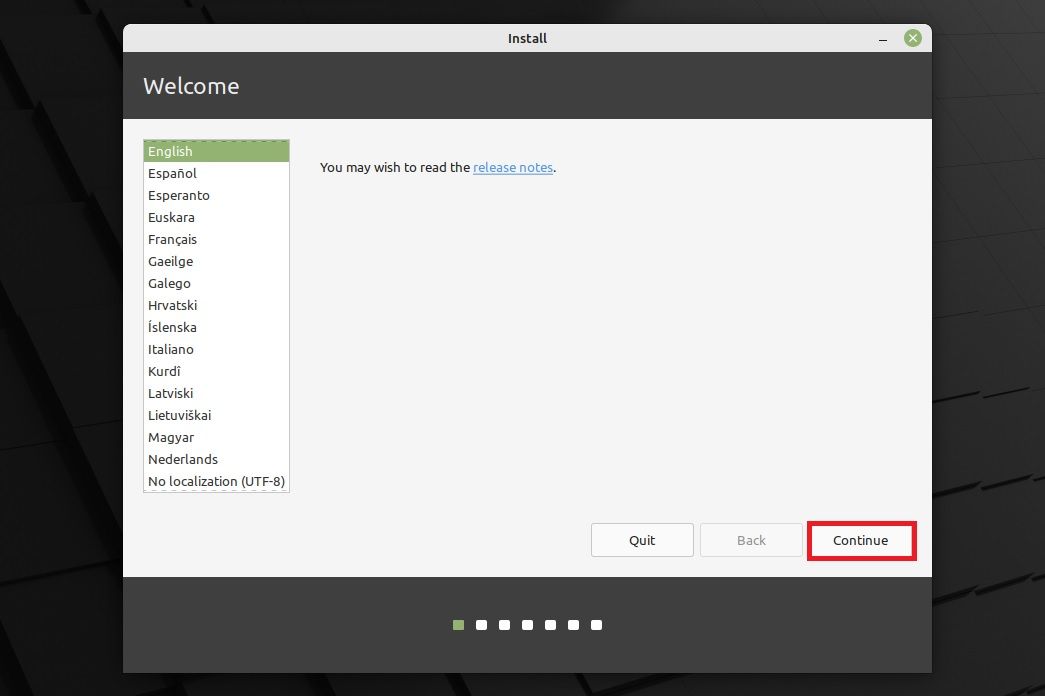
When you're ready to proceed, double-click the Install Linux Mint desktop icon. Once you see the installer window, select your preferred language from the left sidebar and click Continue.
On the following screen, choose your keyboard layout. You can also test out the selected layout by typing into the given field. Once done, click Continue to move to the next screen.
Linux Mint gives you the choice to install additional multimedia codes that add support for more media formats. It's always a good option to check that off and hit Continue.
Disk Partitioning and Time Zone Selection
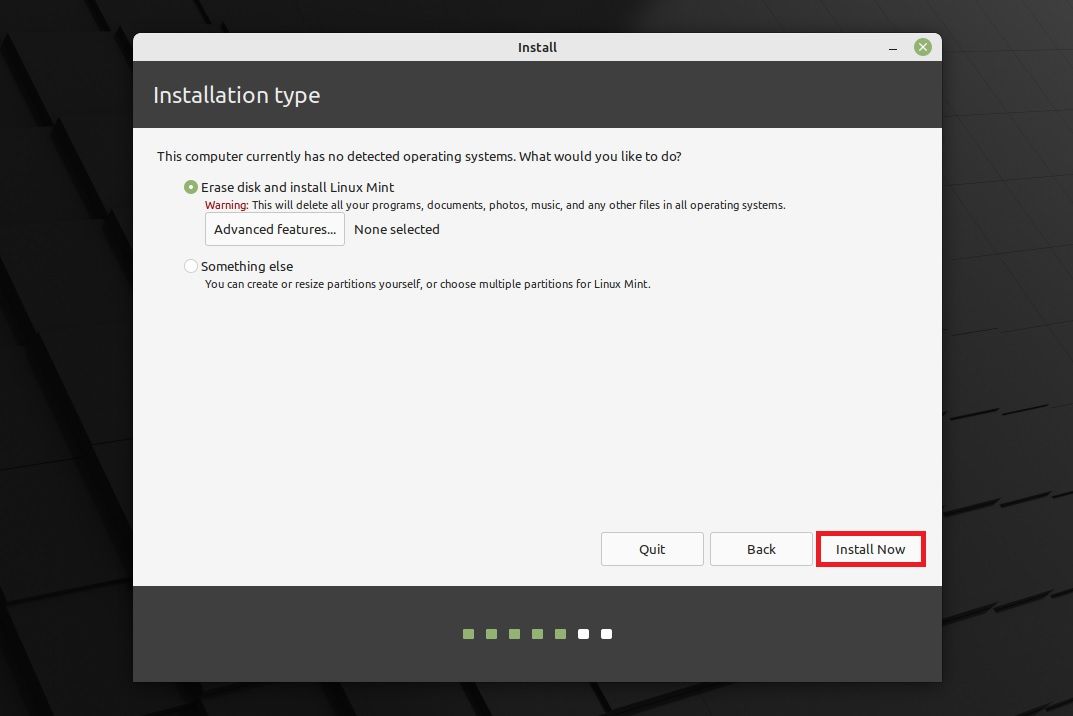
Next, the installer will offer options to format and partition your disk. If you're just starting out and want to install Linux Mint on your computer, select Erase disk and install Linux Mint and click Install Now.
To dual-boot Linux Mint with an existing operating system, you need to select Something Else and manually configure the partitions, although that's not recommended for beginners as it can mess up your disk partitions.
Either way, click Install Now to begin the installation process. The installer will notify you of the changes it'll make to the disk. If you're sure and want to proceed, click Continue to approve the operation.
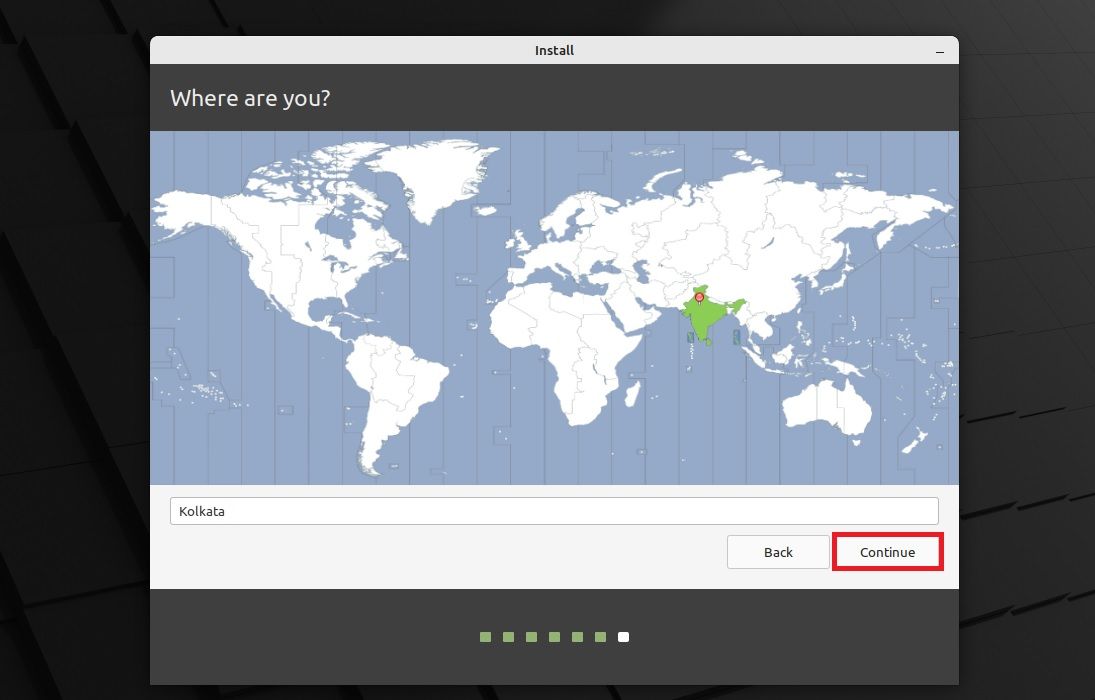
Next, select your time zone from the graphical map and click Continue.
User Details and Finishing Installation
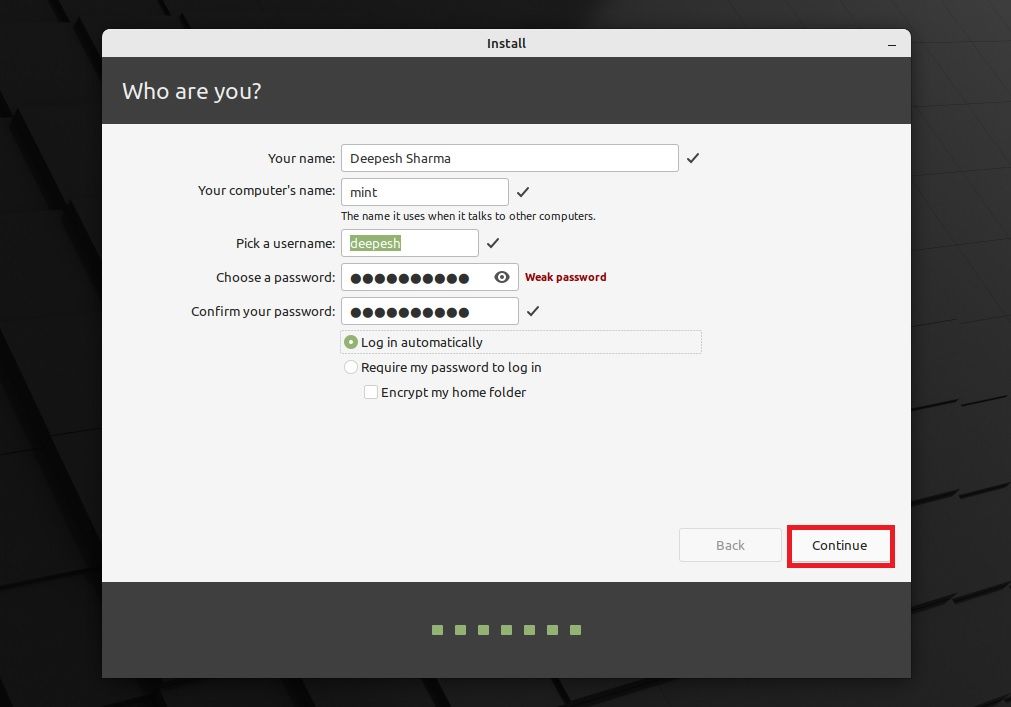
On the following screen, enter your full name, computer name, username, and password. Confirm your password by typing it again in the corresponding field. You can also choose to enable automatic login by checking off the Log in automatically option. The default option will require your password to log in.
Also, if you want to encrypt your entire home folder for added security, check the Encrypt my home folder option.
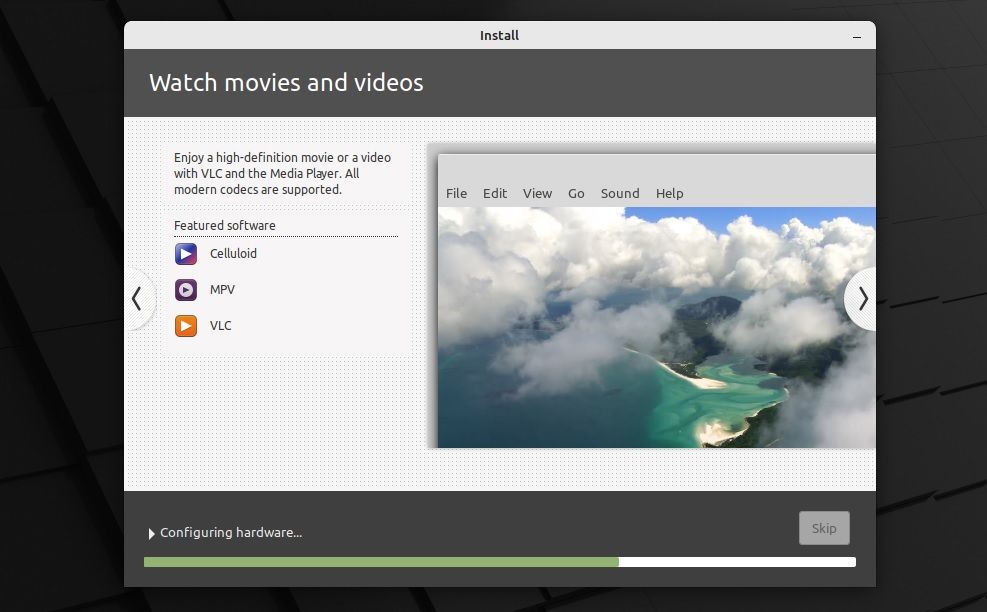
With all the details in place, click Continue to proceed with the installation. The process will take a considerable amount of time, and the duration will most probably be proportional to your machine's specifications.
When the installation is complete, you have the choice to either continue browsing the system or restart your machine and log into the desktop.
You can now check out your newly installed Linux environment. Replacing the desktop image with a more personalized wallpaper and trying out Linux-exclusive things that you can't do on Windows is a good start for beginners.
Exploring the Linux Mint Desktop
Once you're done with the installation, the Linux Mint desktop will be all yours. You're free to play around with the environment, add your customizations on top of it, and even break the system if you wish to. But keep in mind that you'll have to be the one to fix it all and bring the machine back to its original state.
And that's exactly how you should learn to use Linux too. Apart from getting to use a "free" operating system, there are other immense benefits of familiarizing yourself with the Linux ecosystem.

