
If you're a fan of customization and on the lookout for ways to boost your productivity on Linux, then Cerebro is a must-have app for your computer.
It's essentially a search app for Linux—much like Spotlight on macOS—that lets you easily search your computer and perform various operations on it efficiently. So if you've switched from a Mac and always wanted a Spotlight-like search functionality on Linux, Cerebro can help you achieve just that.
Follow along as we walk you through the steps to install and use Cerebro on Linux.
What Is Cerebro?
Cerebro is a free and open-source search app for your machine and the internet. It gives you the ability to search files, launch apps, look up places on maps, perform translations, convert units, and more on your computer.
Additionally, it lets you install plugins to extend its capabilities even further. And, if you know how to code, you can even build your own Cerebro plugin using its API to accomplish your desired tasks with the app.
How to Install Cerebro on Linux
Cerebro used to offer a few different modes of installation. However, as of recent releases, the easiest way to get Cerebro working on a Linux computer is using its AppImage.
As of writing this guide, this is the only method that works well across all Linux distros. Other methods may throw errors or require you to install certain dependencies, depending on your Linux distro.
To install Cerebro on your computer, first, click the link below and download the latest Cerebro AppImage to your computer.
Download: Cerebro AppImage
Once it’s downloaded, you have two ways to make this AppImage executable:
1. Make AppImage Executable via GUI
Open the Downloads directory on your system, right-click on the Cerebro AppImage file, and select Properties.
In the Properties tab, tick the checkbox next to Allow executing file as program if you're using a Nautilus-based file manager and hit Close.

If your system has Dolphin, check off the Is executable option, and change the Execute dropdown to Anyone if you're using the PCManFM file manager.
2. Grant Execute Permissions via CLI
Open the terminal and use the cd and ls commands to navigate to the Downloads directory. Once inside, run the following command to make the Cerebro AppImage executable:
chmod +x cerebro-0.*.AppImage
After you've granted execute permissions to the AppImage, we recommend you create a shortcut for Cerebro on your desktop or in the Applications menu for quick access.
How to Use Cerebro Search
To use Cerebro Search, start by launching Cerebro. If you prefer using the GUI, double-click the Cerebro AppImage to launch it. Or, if you wish to do it from a terminal, you can run Cerebro using the following command:
./cerebro-0.*.AppImage
Once Cerebro is up and running, you’ll see its icon in the system tray. To use it, right-click on this icon and select Toggle Cerebro. Alternatively, press the Ctrl + Space hotkey (keyboard shortcut), and it will bring up Cerebro Search.

Now, the first thing you must do is change the default country to ensure Cerebro shows you more relevant results. For this, type settings in the Cerebro Search to bring up Cerebro Settings. Inside these settings, tap on the dropdown button next to Country and select your country from the available options.

While you're at it, you can also change the hotkey to bring up Cerebro Search, select a different theme, or even use a proxy. If you want Cerebro to launch automatically every time you log in to your computer, tick the checkbox next to Open at login.
We also recommend that you enable Developer Mode in Cerebro. You’ll need it to reload a plugin when it fails to work automatically after installation.
With Cerebro configured to your preference, you’re now ready to use it. Bear in mind, though, that with some recent versions of Cerebro, you may only get the local and online search functionalities. So to unlock Cerebro's full capabilities, you'll have to use plugins, as demonstrated later in the guide.
Find an Item on Your Computer
To look up something locally (like a file or directory) on your computer, bring up Cerebro Search using the Ctrl + Space shortcut and enter your query.

When Cerebro returns the results, hover over the result (you find the most relevant) to preview it. Or, click on it to open it in the default file manager on your Linux distro.
Find an Item Online
Similar to finding files or directories locally, Cerebro also lets you search for things on the internet.
For this, enter your query in the Cerebro Search window and select the Search web for option.

If there are multiple results, they'll appear in the preview window, and you can tap on any one of them to open them in your default web browser.
Extend Cerebro's Functionality With Plugins
With the latest Cerebro release, you only get the local and online search functionalities bundled with the AppImage. To get other functionalities, you'll need to install plugins.
Follow these steps to add a plugin to Cerebro:
- Press Ctrl + Space to bring up Cerebro Search.
-
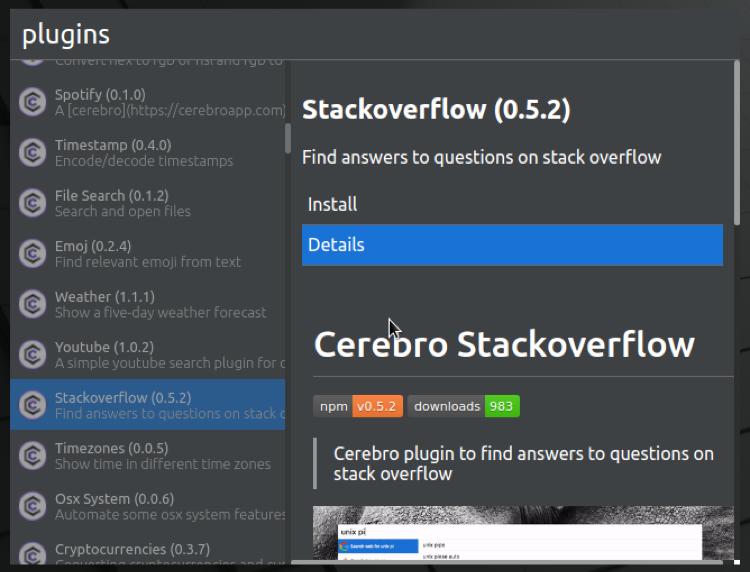
Type plugins and search a plugin by its name. Alternatively, scroll the list of available plugins to find a plugin. To learn more about a plugin, hover over it and click Details.
- When you've found a plugin to install, hover over it and hit the Install button on the adjacent screen.
- Click Ctrl + Space or Esc to close Cerebro Search.
- Right-click on the Cerebro icon in the system tray and select Development > Reload. This is required when a plugin you just installed doesn't appear in Cerebro Search or work automatically.

Once you've installed a plugin, you can find it under Installed upon querying plugins in Cerebro Search. To delete an installed plugin, hover over it and click Uninstall in the preview window.
Cerebro Plugins You Must Use
Cerebro has a wide selection of plugins, with new ones being added to the mix as they are developed.
Below are some of the most useful Cerebro plugins you must use to perform operations on your computer efficiently:
- Stackoverflow: Find answers to questions on Stack Overflow
- Translate: Translate words or phrases between languages
- Color: Convert colors between HEX, RGB, and HSL color schemes
- Shell: Execute shell commands from Cerebro Search
- Photos: Find pictures on Unsplash
- Kill: Kill a process by its name
- Clipboard: Record and recall a list of items on your clipboard
- Wiki: Use Wikipedia in Cerebro Search
- IP: View your local and external IP address
- Define: Look up the definition of a word
Of course, these are just a few of the many Cerebro plugins, and you can explore the available options by simply entering plugins in the Cerebro Search.
Most plugins offer instructions on their usage, which you can find under Details when you query a plugin in Cerebro Search.
Boost Your Productivity With Cerebro
Cerebro is a useful Linux app that can simplify a lot of operations on your Linux computer. With Cerebro, you can accomplish everything from local and online web searches to quick everyday operations (like calculation, translation, conversion, etc.) quickly and efficiently right from the desktop.
If you like the idea of using an app launcher on your computer, you can check out some other Linux app launchers, too, some of which provide a few extra functionalities.