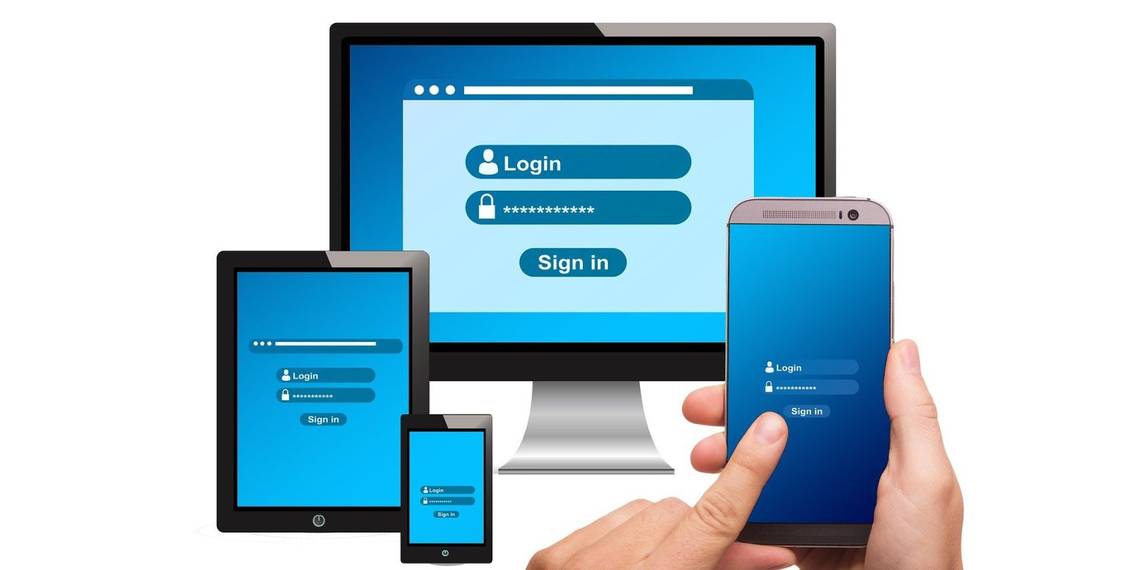
The same Home Assistant server that makes your home smart can also run other services, such as Bitwarden. All you need to do is set up a self-hosted Bitwarden Server on top of your Home Assistant installation as an add-on. You can then use this Bitwarden server to create and save complex passwords on your smartphone or within a web browser on your PC.
The best part is you will never have to pay for the password manager service as it’s completely open-source and free.
Things You Will Need
You will need Home Assistant Server running on a Raspberry Pi (preferably on a Raspberry Pi 4 4GB or 8GB). Although you can also install Home Assistant Server on a PC or other hardware, since that version is non-supervised, you will have to install and configure the add-ons manually via the Command Line shell.
Once you have set up Home Assistant on the Raspberry Pi, follow the steps below to install, configure and deploy Bitwarden.
Install the Bitwarden Add-On
To install the Bitwarden add-on in Home Assistant, follow these steps:
- Login to your Home Assistant Server and navigate to Settings > Add-ons.
- Click the ADD-ON STORE button.
- Use the Search bar to search and click on Vaultwarden (Bitwarden).
-
Click the Install button to begin installing the Bitwarden add-on on your Home Assistant Server. This may take up to a minute to finish.
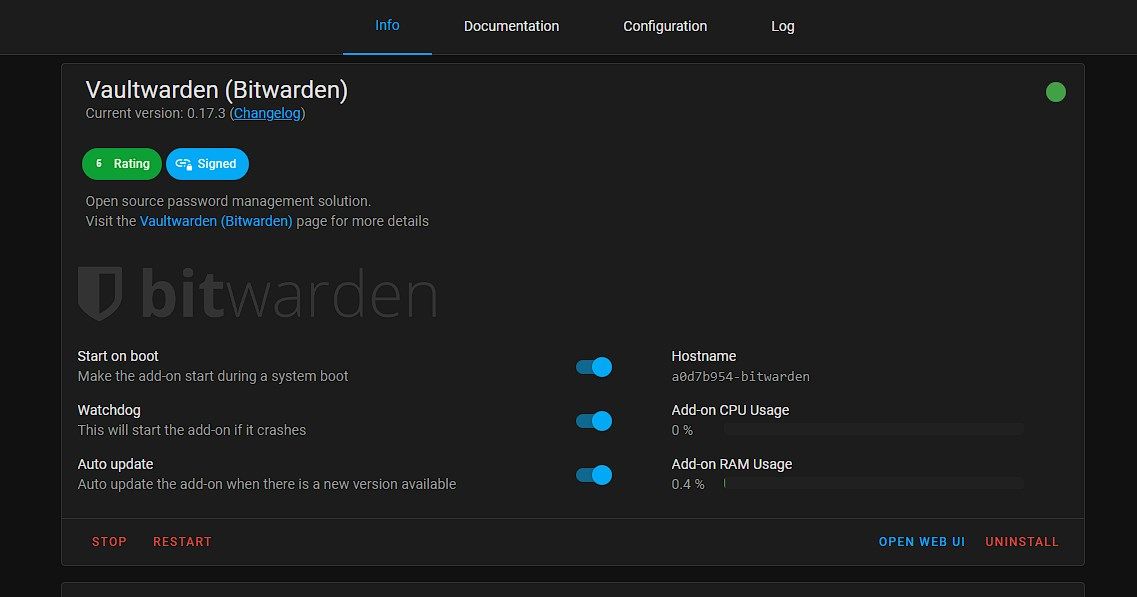
- Once installed, enable Start on boot, Watchdog, and Auto-update options.
- Then click Start.

If you can’t find it, click this link > Open link to add the repository and then search and install the Bitwarden add-on.
You can now visit the IP of your Home Assistant Server with port 7277. For instance, 192.168.0.111:7277.
You may also click on the open Web UI button on the add-on page to open the Bitwarden Web UI. However, you cannot create an account or register unless you secure the Bitwarden Server.
Configure the SSL using Cloudflared Tunnel
In the Home Assistant Server, you can install and use the Cloudflared add-on to expose the local Bitwarden server to the internet with secure SSL/TLS encryption. Once you start the Cloudflared tunnel, you or other users for whom you create accounts in Bitwarden can easily access and manage their password vaults from across all their devices.
The steps are as follows:
-
Register a free domain on Freenom.com or you may purchase a new domain for hosting your Bitwarden server. Once you have the domain, create an account on Cloudflare and add your domain. Also, enable HTTPS.
-
Click on this link and then click the Open Link option. This will open your local Home Assistant instance and allow you to add this custom repository to your Home Assistant for installing the required Cloudflared add-on.
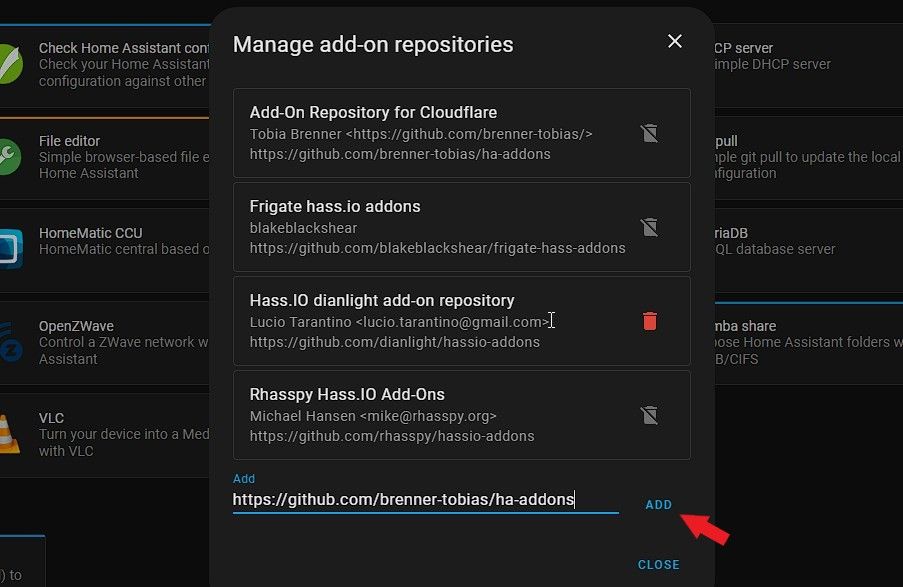
- Click Add to add the repository.
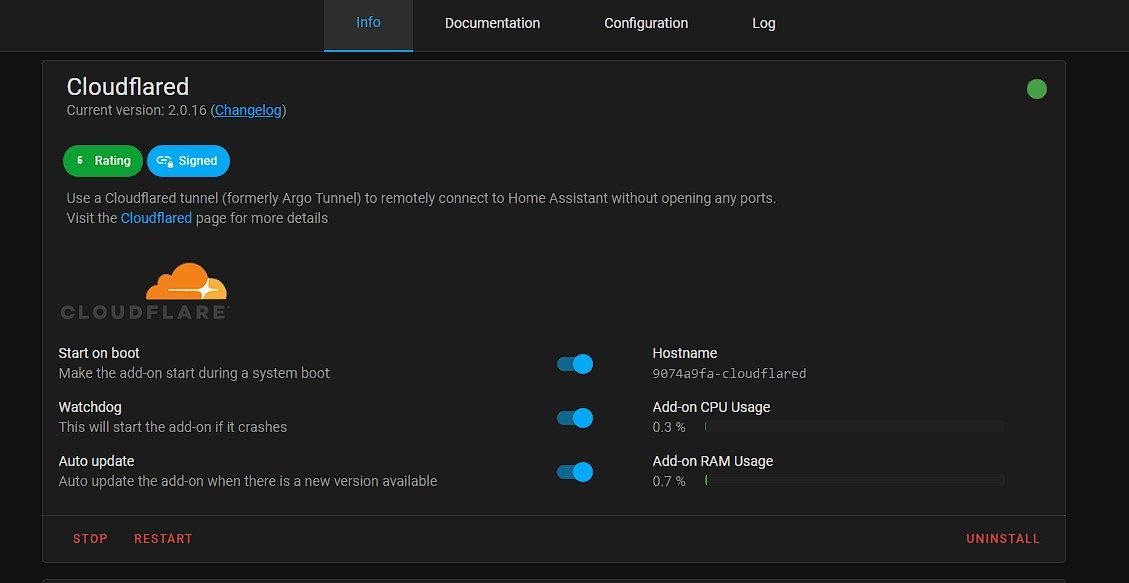
- Under Settings > Add-Ons, search for Cloudflared and click Install.
- After the installation, enable Start on boot and Watchdog options.
- Then click Configuration and then click on the three dots > Edit in YAML.
-
Paste the following code in the Options field. Make sure to replace ‘YourDomainName’ with your domain name and the IP address in the Service: with your Home Assistant Server IP. Keep the Port 7277.
        additional_hosts:
  - hostname: bitwarden.YourDomainName.org
    service: http://192.168.0.111:7277
external_hostname: YourDomainName.org
tunnel_name: bitwardenserver
tunnel_token: ""
nginx_proxy_manager: false
log_level: debug
warp_enable: true
warp_routes:
  - 192.168.0.2/24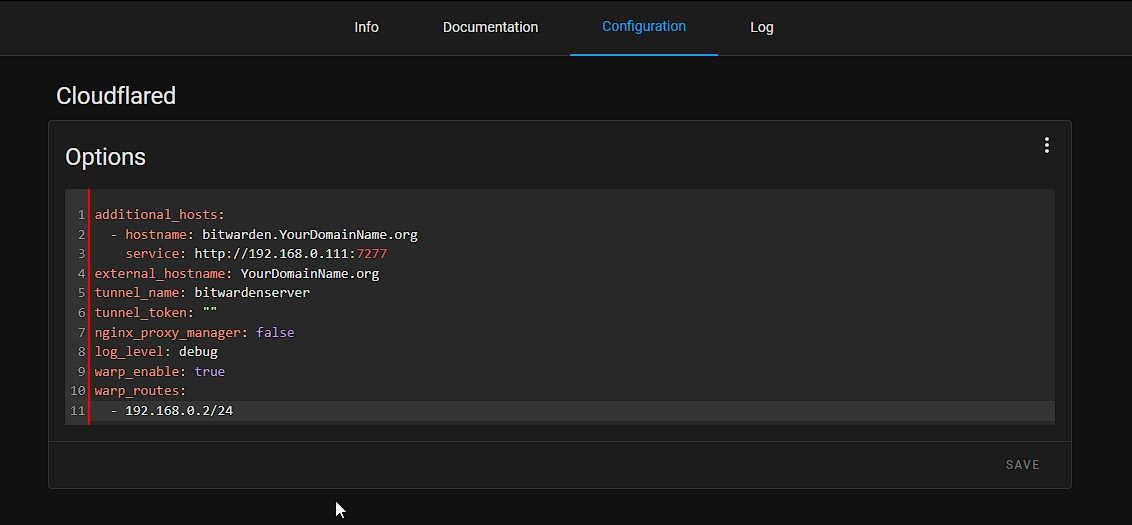
- Click Save and then click Restart ADD-ON.
-
Con the Cloudflared add-on page, and click the Log tab.
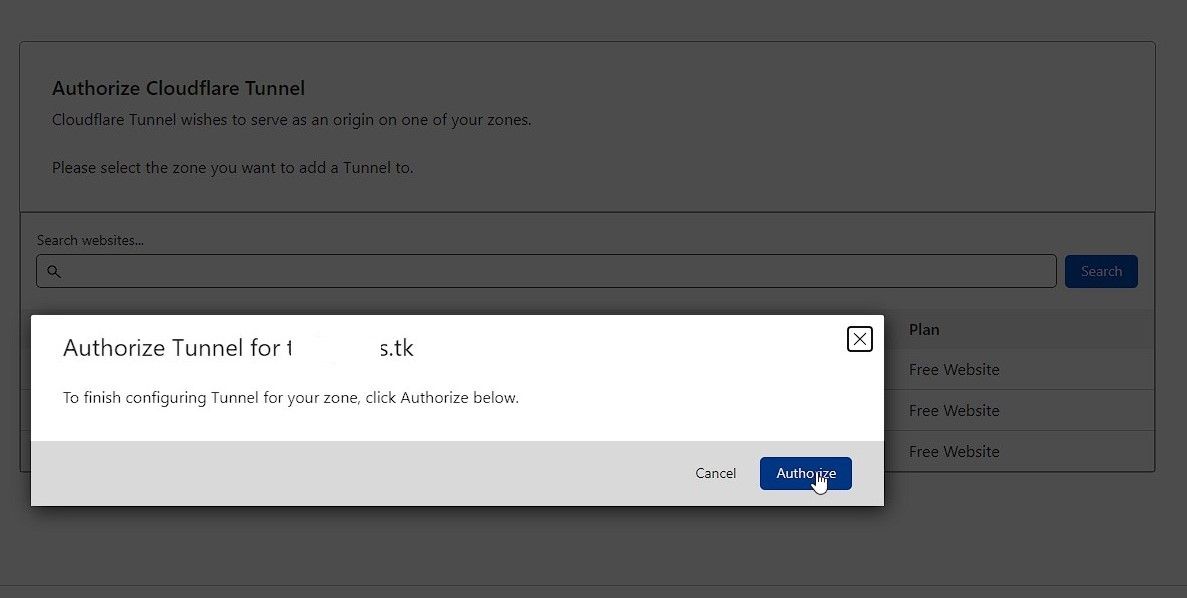
- After a few seconds, you will see a Cloudflare URL. Copy this URL and paste it into your web browser. This will open the Cloudflare page.
- Log in to Cloudflare and then select the domain name you added.
- Click Authorize. Once authorized, the add-on will create a secure tunnel for your Bitwarden server.
- Open File Editor and click on the folder icon at the top left.
-
Click on the Configuration.yaml file and paste the following lines as shown below and click the Save icon.
        http:
use_x_forwarded_for: true
trusted_proxies:
- 172.30.33.0/24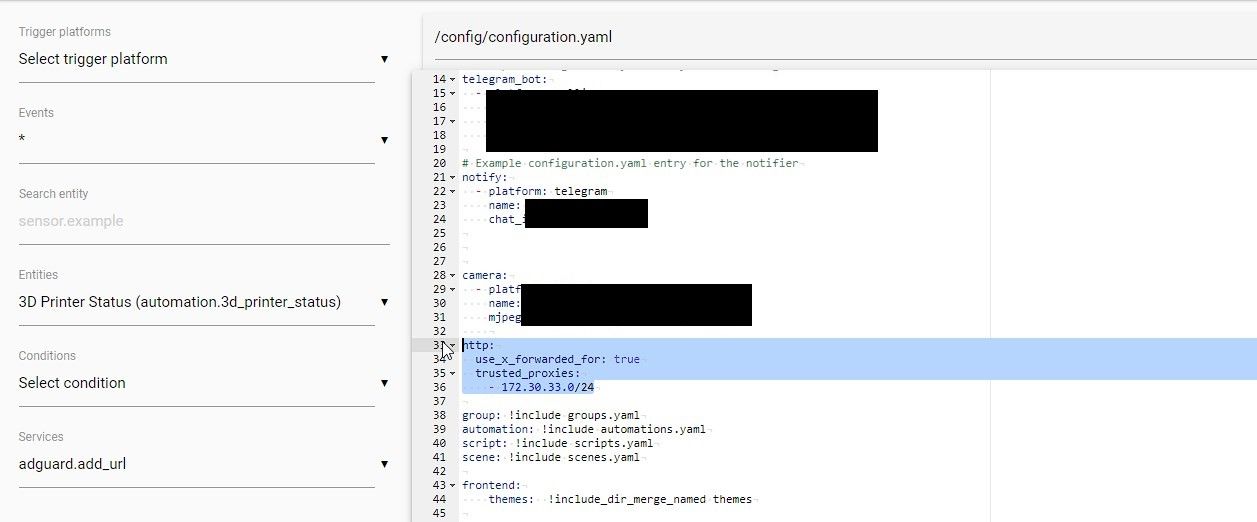
- Go to the Developer tools and click Check Configuration. If it shows Configuration valid, click Restart. Wait for the server to restart.
-
Once restarted, you can visit the https://bitwarden.yourdomainname.com URL to access the Bitwarden server on the internet with secure SSL/TLS encryption.
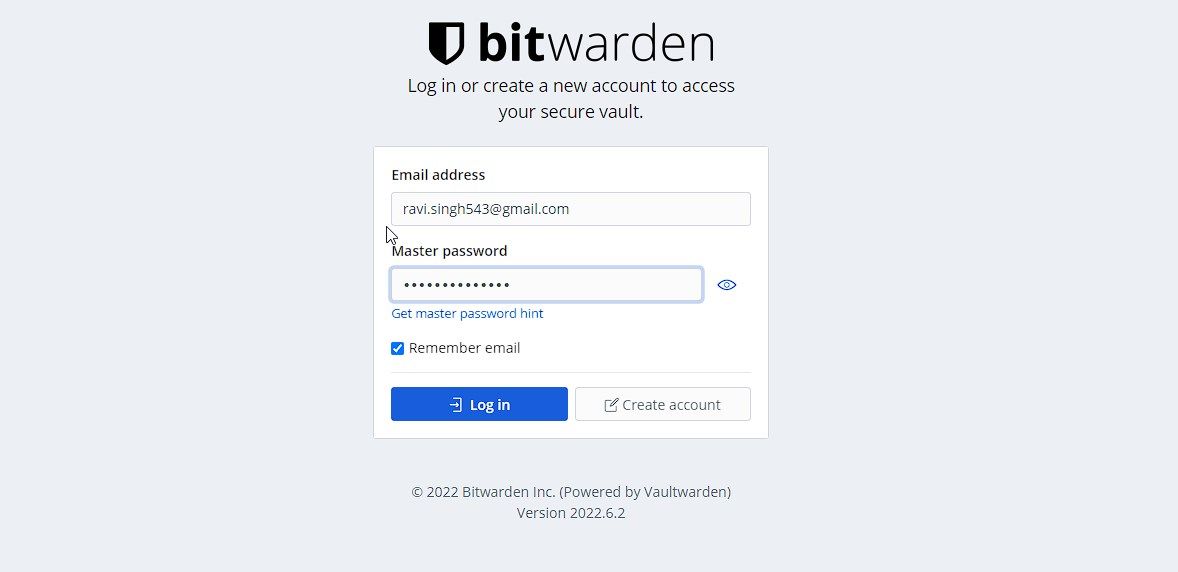


You can now sign up and create user accounts for yourself and your family and friends.
Disable Sign-Ups
Currently, anyone with your Bitwarden URL can sign up and create vaults. To avoid this, you can disable sign-ups. For this, you need to access the Bitwarden admin panel at the following address:
https://bitwarden.yourdomainname.org/admin
Then paste the admin token (get the admin token/password in the logs) to open the admin panel. If you don’t see the access token, re-install the add-on again and then check the log again after starting the add-on.
The add-on shows the admin token only once. Note it down somewhere safe.
Once you access the admin panel, you can edit and change various settings, including disabling sign-ups. You can also enable two-factor authentication and create policies on how users can access and use their Bitwarden accounts hosted on your Home Assistant Server.
Use Bitwarden on Android or iOS Devices
To access and use Bitwarden on your Android or iOS device, you need to install the Bitwarden Password manager App from the Google Play Store or App Store.
Once the app is installed, follow these steps on your Android or iOS device:
- Open the Bitwarden Password Manager app and then tap on the gear icon at the top-left of the app.
-
Enter your Bitwarden server URL, i.e. https://bitwarden.yourdomainname.com, and save it.
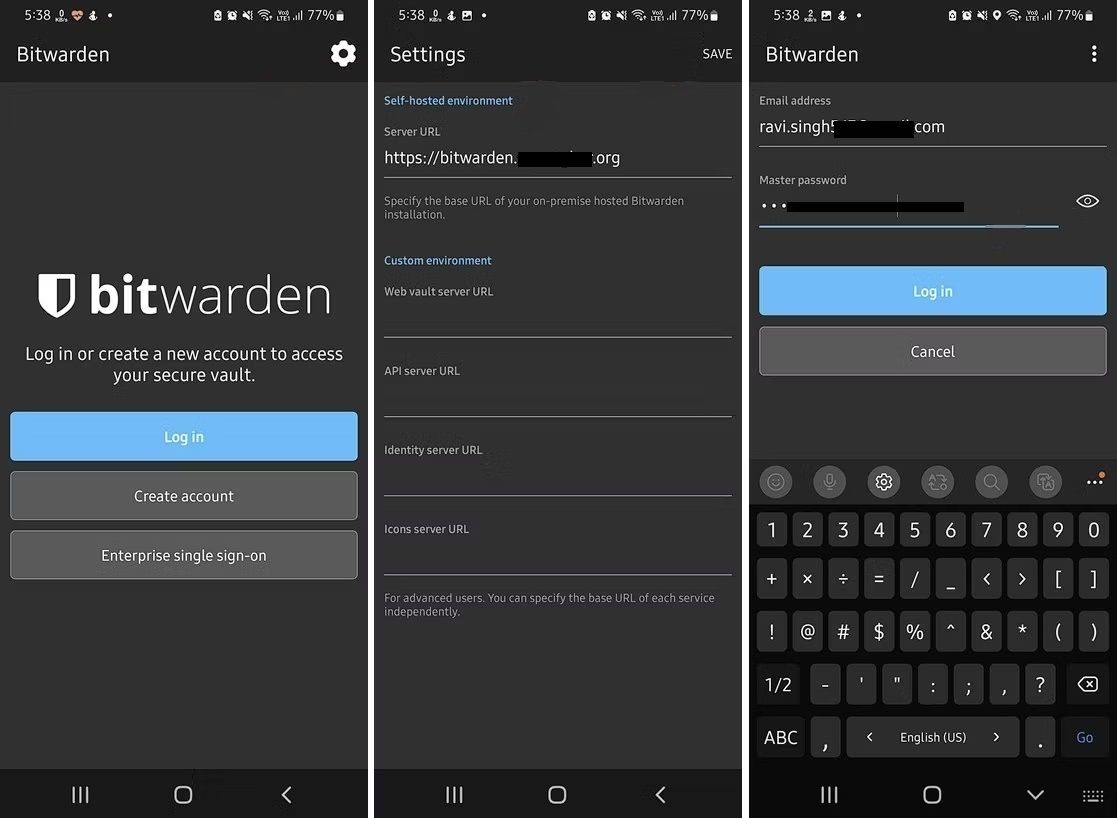
- Then tap on the Log In button and enter the username and password to login into your Bitwarden Server vault and access all passwords.

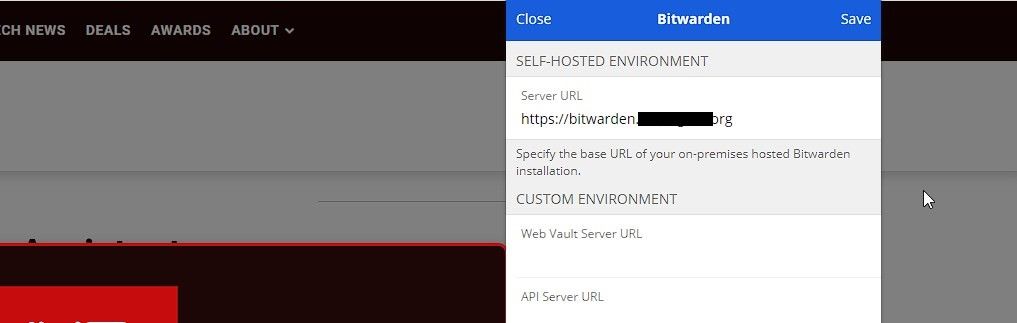
Setup Bitwarden on Web Browser
To access and use the Bitwarden Server and accounts on your web browsers, you need to install the Bitwarden password manager extension. The extension is available for all major web browsers, such as Chrome, Edge, Mozilla Firefox, etc.
After installing the Extension, follow these steps to configure it and access or save all your passwords securely on your web browsers across all devices.
- In the Chrome web browser, click on the Bitwarden extension and then click on the Gear icon.
-
Enter your Bitwarden Server URL, i.e., https://bitwarden.yourdomainname.com, and click Save.
- Click login and then enter the username and password on your Bitwarden server. If you have enabled Two-factor authentication, enter the code to log in.
- You can now access all passwords and manage them securely right on your web browser.

The steps are more or less similar to other web browsers.
Free Password Manager for Lifetime
Now that setup is complete, you can export all your passwords from your web browser in JSON or CSV format and import them directly into your BitWarden vault.
With a self-hosted Bitwarden Server, you will never have to get a subscription for a password manager. Secured with SSL/TLS via Cloudflared tunnel and multi-factor authentication (MFA), your server remains secure, and the passwords remain encrypted on all your devices. The passwords are also auto-synced across all your devices. Plus Bitwarden will also notify you if any of your passwords are found in leaks or data breaches.