
Microsoft Excel is a widely used spreadsheet software, developed by Microsoft. To some, Excel is an easy program to use, while many first-timers struggle with the easiest tasks.
In case you are having trouble with how to insert multiple rows in Excel, here are some methods that could help you.
1. Manually Inserting Rows
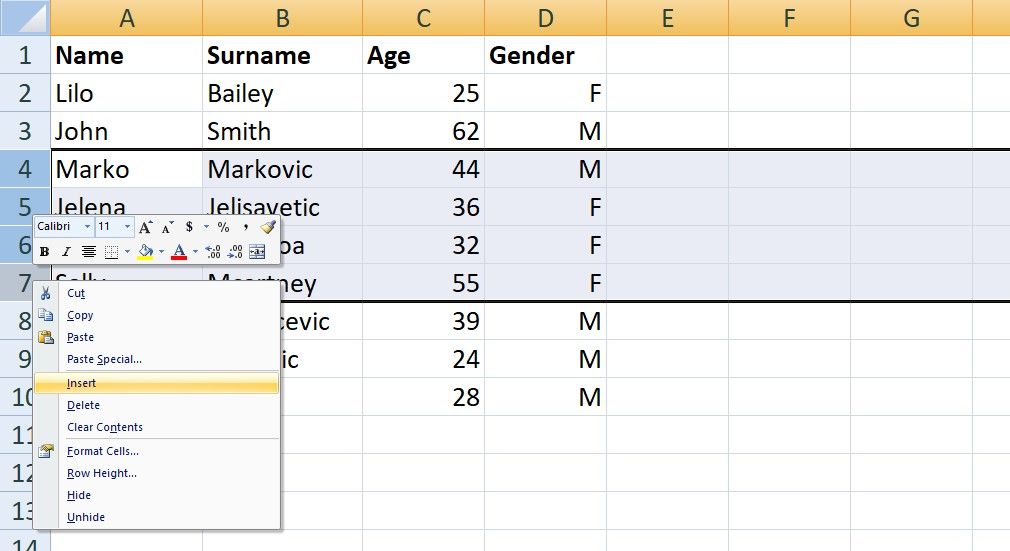
- Select the rows equal to the number of empty rows you want to add. Keep in mind that the rows are always added above your selection. When making the selection in Excel, make sure that you select the numbers on the left of the screen, instead of the actual rows and columns.
- Right-click on your selection.
-
Then click on Insert, and the empty rows are automatically added.
-
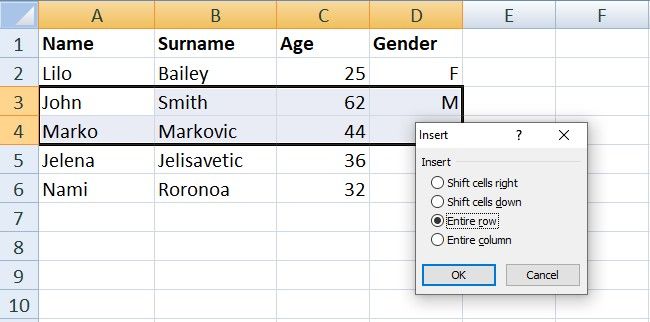
If you select multiple rows instead of the numbers on the left side, you will get a small Insert window. Click on Entire row and then OK.


2. Inserting Rows With a Shortcut
- Select multiple rows in Excel, above which you want to add empty rows.
- Press Ctrl + Shift + =
- The rows should be automatically added, or you will have to select the entire row and click on OK.
3. Inserting Rows Through the Quick Access Toolbar
- Select the rows above which you want to add empty rows.
- Press and release the Alt key.
- Then consecutively press H, I, and E on your keyboard. The rows should be automatically added.
- If nothing happens, press R additionally, then select Entire row, and click on OK.
4. Using the F4 Key
- In case you want to insert just one row, right-click on the number above which you want to insert the empty row.
- Click on Insert.
- If you press the F4 key on your keyboard, you can keep adding empty rows.
5. Using Shortcuts to Automatically Add Rows
- Click on the row above which you want to add an empty row.
- On your keyboard, press Alt + I, and then press R.
- A row should be automatically added, and at this point, you can keep pressing F4 to add more if needed.
6. Inserting Multiple Rows in Different Lines Simultaneously
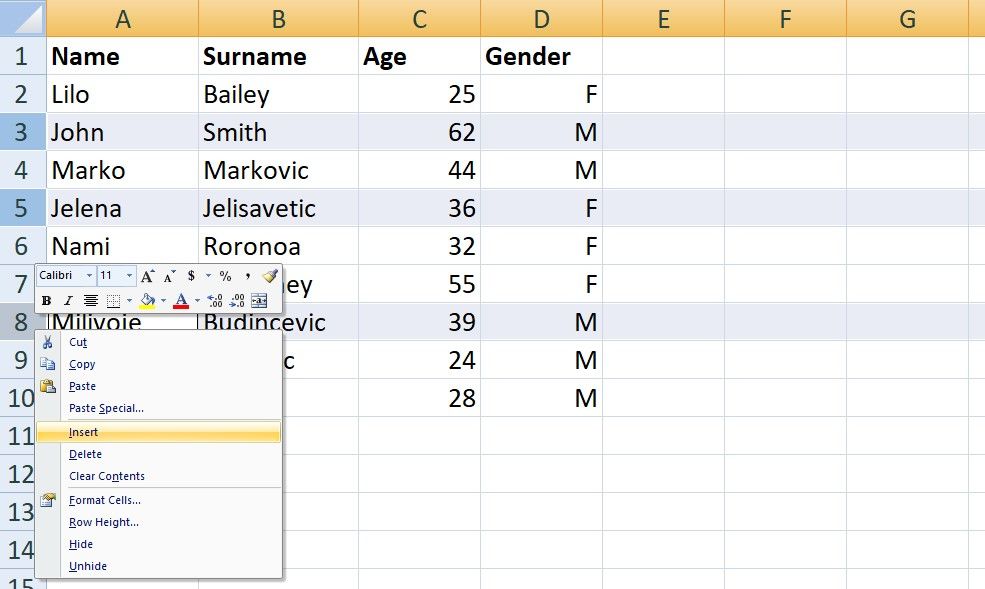
- If you wish to insert an empty row above a couple of rows of data at the same time, you can select them by holding the Ctrl button and clicking on the numbers on the left side.
-
Once you have selected the rows above which you want to add empty rows, right-click on the cells, and click on Insert.

7. Inserting Blank Rows Between Data
In case you have a lot of data, the above-mentioned methods of inserting rows manually is going to take you a lot of time. So, what can you do?
There is a simpler way you can insert a blank row between data, no matter how much data you have. If you want to know how to go from A to B, follow the steps below.

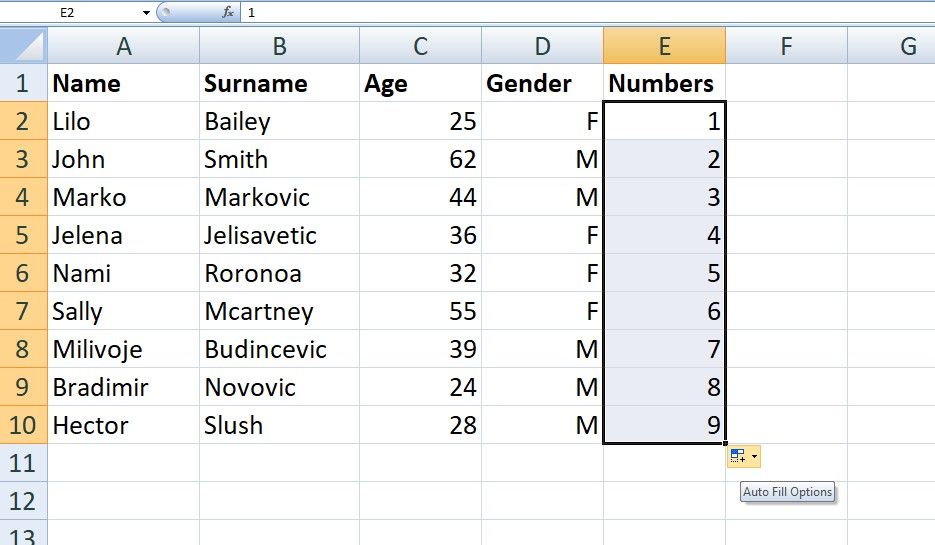
- Besides your table, you first need to create another column. You can name it whatever you want, and make it numbered.
-
To do this, input the first three numbers, then select those numbers, and double-click on the right corner of the selection. This will automatically continue the numeration for the rest of your rows.
- Then copy that numbered column and paste it below.
-
Select everything, and go to Data > Sort.

-
In the window that pops up, for Sort by, select the name of the column with the Numbers.

- Then click OK, and your table should have an empty row after every row with data.


Getting Used to Excel Can Be a Challenge
Microsoft Excel is a spreadsheet software program developed by Microsoft. It is a powerful visualization and analysis tool, featuring calculations, pivot tables, graphing tools, and even Visual Basic for Applications, a macro programming language.
If you are new to Microsoft Excel, all you need to know is that sometimes it takes time to get used to all the formulas and functions that the program offers. Check out the next article to learn more about Microsoft Excel and how to utilize it.