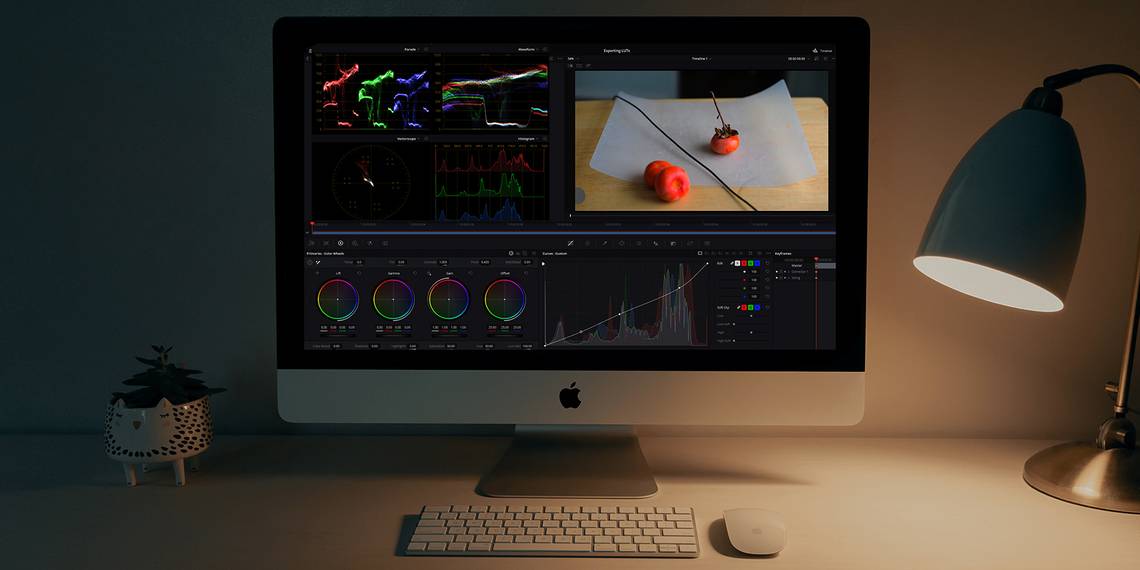
When your blacks are looking milky and your highlights are through the roof, where do you turn? For DIY filmmakers who want to impart their footage with a dramatic, professional-feeling edge, there is no contest. DaVinci Resolve is the undisputed champ.
Creating a LUT in Resolve is the simplest way to save a graded look and to apply it to other media, both within the project and throughout Resolve as a whole, as well as cross-functionally in other creative apps. This includes the Adobe suite, Final Cut, and even AVID.
Here, we show you how to export the LUTs you've created, and then import them back into DaVinci Resolve so you can apply them to your other projects. Let's get started!
How to Export a LUT From DaVinci Resolve

Ideally, before taking part in this exercise, you should already have a project open in DaVinci and some clips that have recently received a well-deserved makeover.
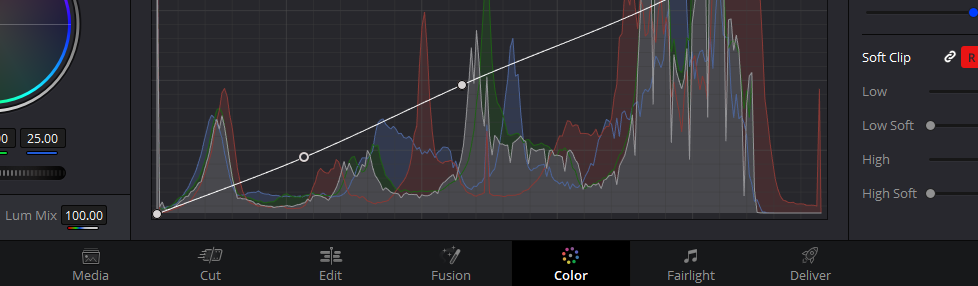
If you don't, set up a new project and add some media to the Timeline under the Cut tab. Use the Color workspace to adjust the footage—for our purposes here, this grade doesn't have to be anything too wild. It just has to be something other than having every parameter set to the baseline default.
Now that you have a look to work with, we can start teasing it out of the application. Follow these steps:
-
At the bottom, you'll see the entire DaVinci pipeline laid out in a series of tabs. From the one that you currently have selected, choose Color if it's not already active.
-
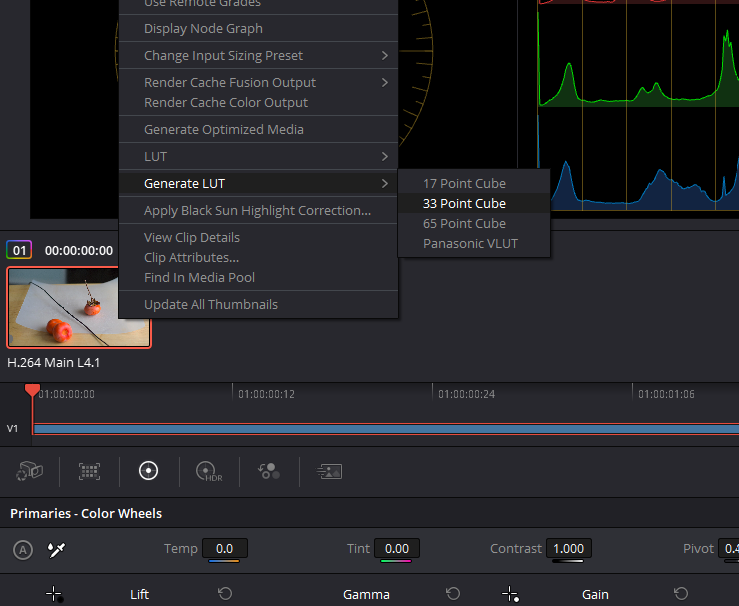
In the Color workspace, you should already have some media in your Timeline. Right-click on the thumbnail image of the clip that you would like to swipe your new LUT from.
-
Pull out the Generate LUT menu. Choose either 17 Point Cube, 33 Point Cube, or 65 Point Cube. A 33 Point Cube is what most people consider the standard in an ordinary sense.
-
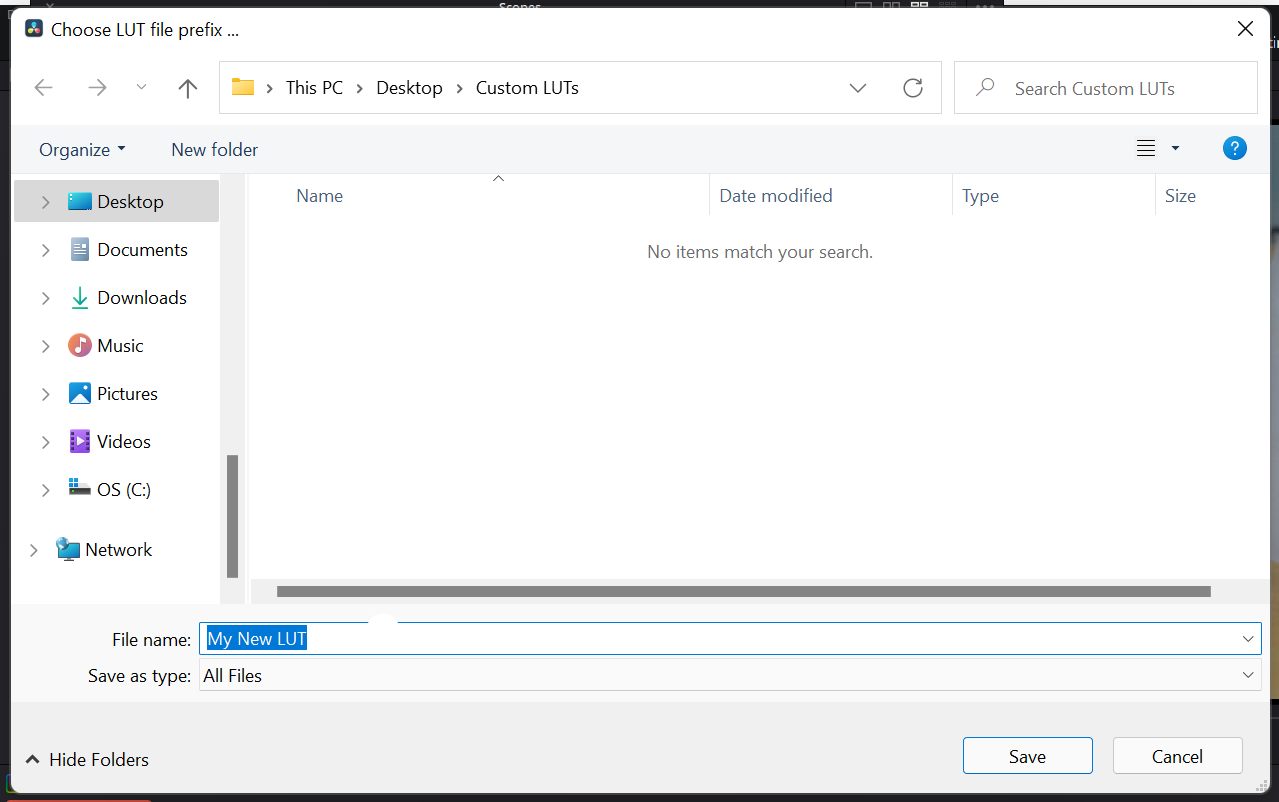
Select a destination folder, name the LUT, and hit Save.
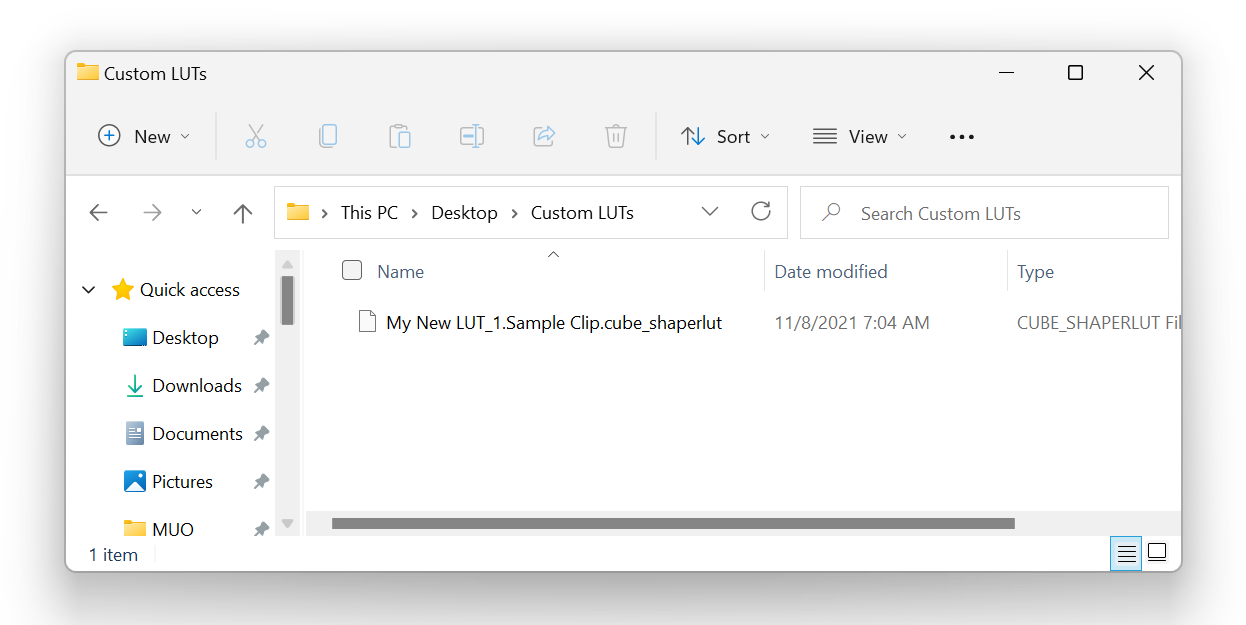


You should see your LUT saved as a CUBE file in the destination folder that you chose. It doesn't matter where you save it right now; we'll be moving it into Resolve's dedicated LUT folder momentarily.
Once you've exported your LUT, it can be applied to another clip.
Import the footage that you would like to apply the LUT to in either the project that you were just working with or a new one. Add your media to the Timeline using the Cut workspace, and then switch back to Color.
How to Import a LUT Into DaVinci Resolve
Applying the LUT that you've just created is easy, but you'll need to do a bit of maneuvering before throwing it down. First, let's check out the LUT panel in Resolve.
At the top of the screen, right below the dropdown menu, you should see a few buttons—Gallery, LUTs, and Media Pool. Select LUTs to display the LUT panel.

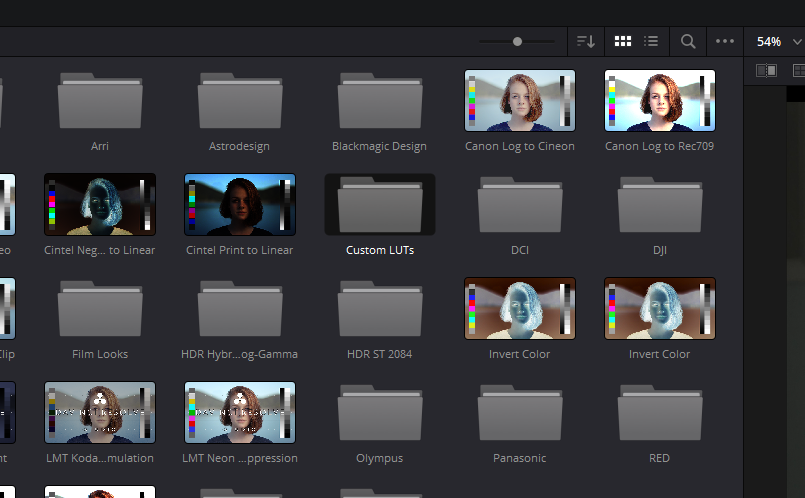
Now, you can see all of the default LUTs that DaVinci Resolve offers. You'll find all kinds of stuff in here, from simple inversions to more technically-minded LUTs, such as the ever-loving Sony S-Log 2 to Rec. 709, a fan favorite and iconic classic.
Adding a LUT in DaVinci Resolve
One LUT that is conspicuously missing, however, is the one that we've just exported. In order to use it within the application, we need to copy the destination folder that we chose into the one that Resolve uses for LUTs.
Blackmagic actually makes this part super easy. To add a LUT to Resolve, here's what you'll need to do:
-
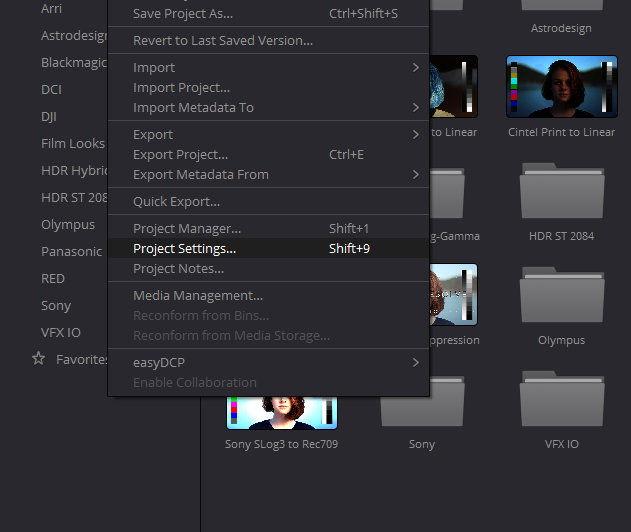
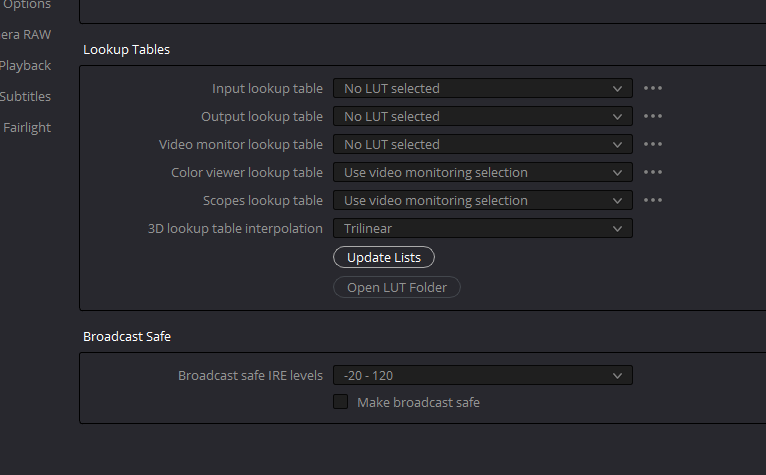
Under the File dropdown, click into your Project Settings or use the shortcut Shift + 9 instead.
-
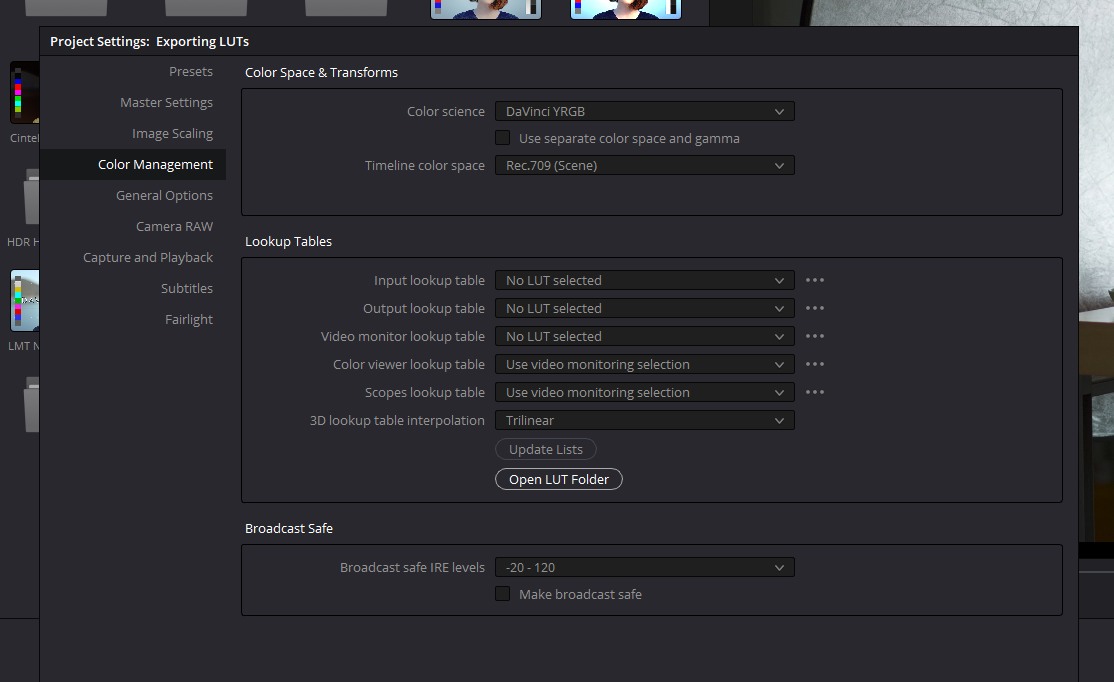
Switch to the Color Management tab, found on the left-hand sidebar. Hit the Open LUT Folder button. This will reveal the Resolve LUT folder in your computer's file directory, outside of the app.
-
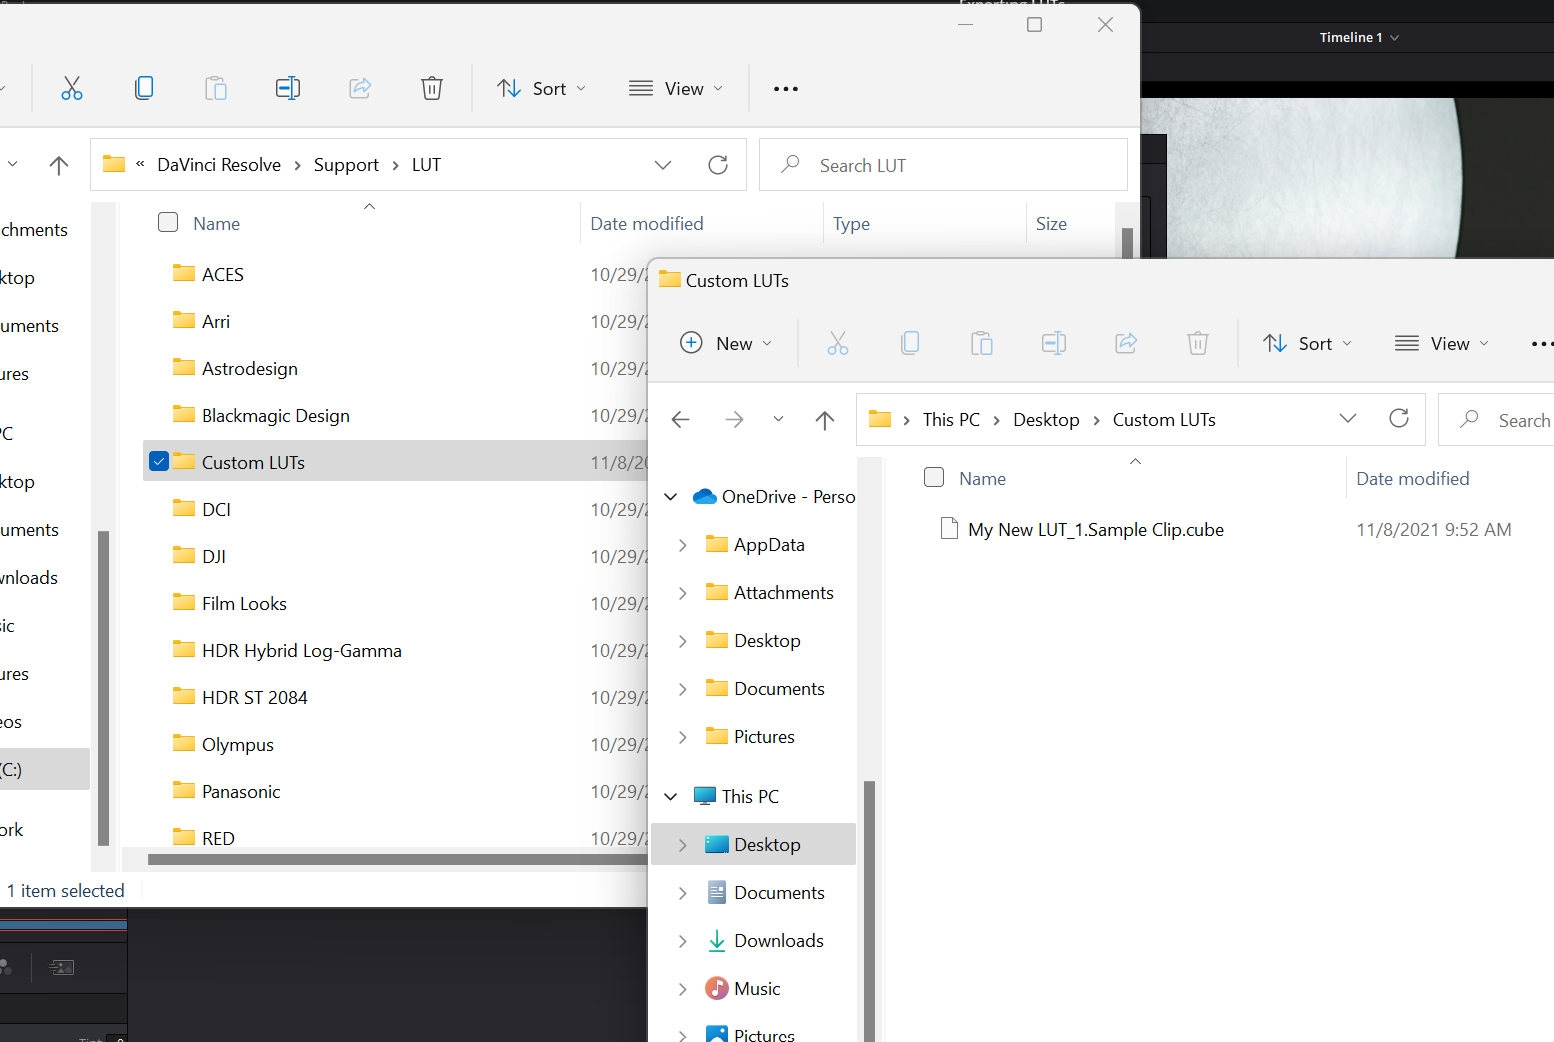
Drag and drop your CUBE file or your original destination folder into Resolve's LUT folder.
-
Hop back into Resolve's Project Settings menu. Just above the Open LUT Folder button is another labeled Update Lists. Click this button to refresh your LUT panel.
-
Hit Save at the bottom to lock these changes in and to resume your session. If we click into the folder, we'll see our LUT, ready and waiting for action.


How to Apply Your Custom LUT in DaVinci Resolve
To add the LUT to your footage, drag and drop the LUT onto the media in your Timeline. One cool feature in Resolve is that you can actually audition LUTs on the fly by hovering over the thumbnail of the clip as you drag without actually dropping the LUT.
The preview of the shot will update itself, and you'll be able to see whether or not it's the right one to use. If you decide to apply the LUT after seeing how it plays, simply release the mouse to seal the deal.

Right-clicking on the thumbnail image shows us another way to add the LUT—through the LUT pull-out just above the one that we used to generate the LUT in the first place. You can follow the checkmarks until you find your custom LUT folder and the CUBE file in question.

Is it a perfect fit? It looks better than it did, but it could definitely use some tweaking, just to polish it off a bit. Let's finesse and save this new version as a second LUT.

From this point forward, we've got both of them on deck for whenever duty calls. After a couple of projects, you'll have an entire library of custom LUT options to choose from. The more that you make, the more you'll start to see what DaVinci is capable of.
Import and Export LUTs in DaVinci Resolve
Of course, you're free to choose one of the designer LUTs that come included with Resolve if you're ever in a pinch. Creating your own LUT, however, will likely result in something much more artful and unique.
Once you've extracted your CUBE file from DaVinci's gaping maw, you'll be able to use it anywhere, including in Premiere and even in Photoshop; one look to rule them all, and we wouldn't have it any other way.