
File Explorer in Windows displays any internal or external drives that are connected to your system by default. However, if you don't want a certain drive to appear in File Explorer, you can always hide it.
By hiding a drive on Windows, you can prevent others from accessing sensitive files within that drive and keep them safe. If you're interested in doing that, this guide will walk you through four different methods to hide drives on Windows.
1. Hide a Drive Using the Disk Management App
The Disk Management tool on Windows makes it easy to perform various storage-related tasks such as formatting hard disk partitions, assigning drive letters, managing disk space, and more. You can also use it to hide a drive partition on Windows. Here's how:
- Press Win + R or use one of the many ways to open the Run dialog box.
- Type diskmgmt.msc in the text field and press Enter.
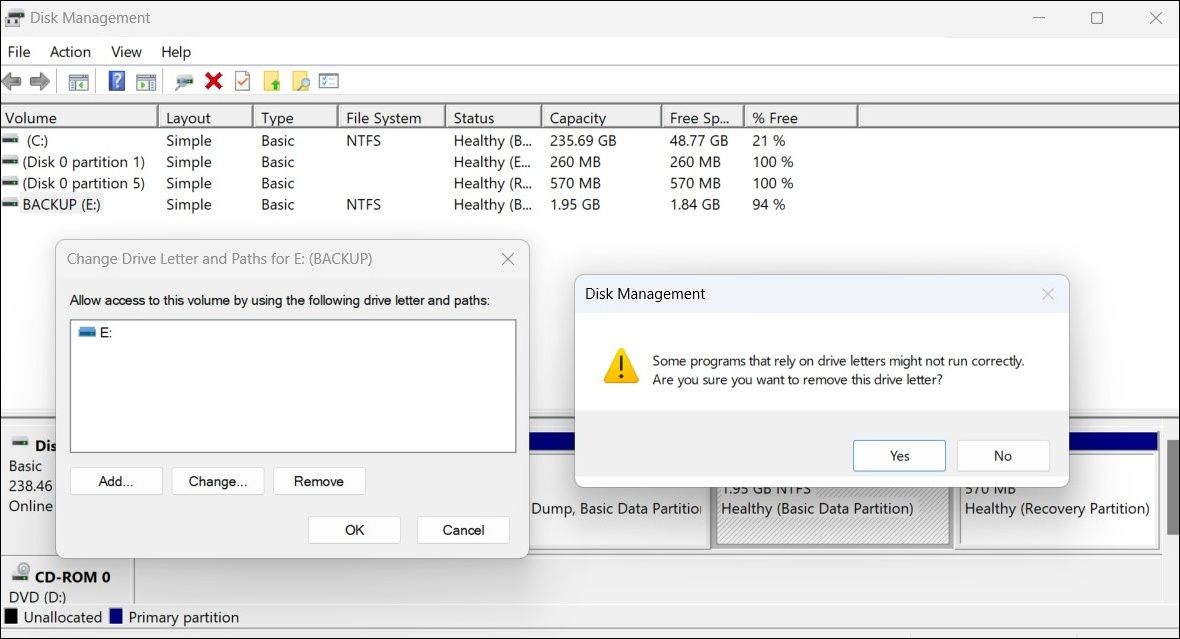
- In the Disk Management window that opens, right-click on the drive you wish to hide and select Change Drive Letter and Paths.
- Now, click the Remove button from the pop-up window.
-
Choose Yes when the warning message appears.

Once you complete the above steps, your drive will no longer appear in File Explorer.
2. Hide a Drive in Windows With Diskpart Command
If you're a power user who prefers to make changes via the command-line interface, you can use the diskpart command to hide a drive on Windows. Fortunately, this isn't as intimidating as it might sound.
To hide a drive in Windows with Command Prompt, follow these steps:
- Press Win + X and select Terminal (Admin) from the menu that appears.
- Select Yes when the User Account Control (UAC) prompt shows up.
- In the console, type diskpart and press Enter.
-
Input the following command in the console and press Enter to view a list of drives connected to your system:
list volume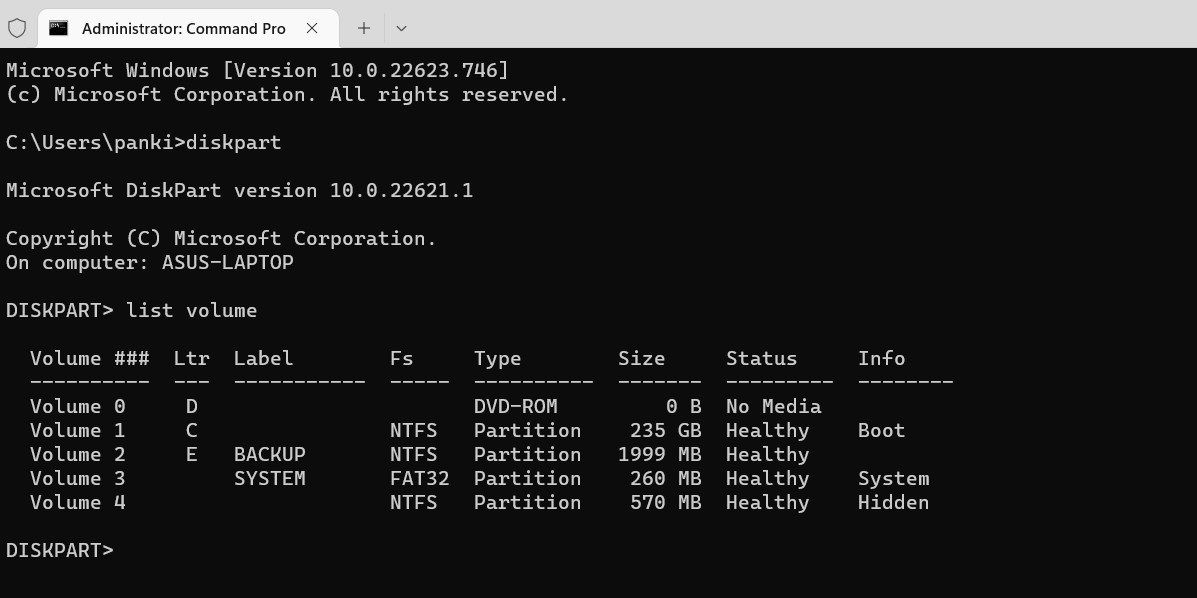
- Note down the letter of the drive you want to hide from the Ltr column.
-
Type the following command to select your drive. Make sure you replace X in the command with the drive letter noted in the last step.
select volume X -
Lastly, run the following command to remove the drive letter and hide the volume.
remove letter X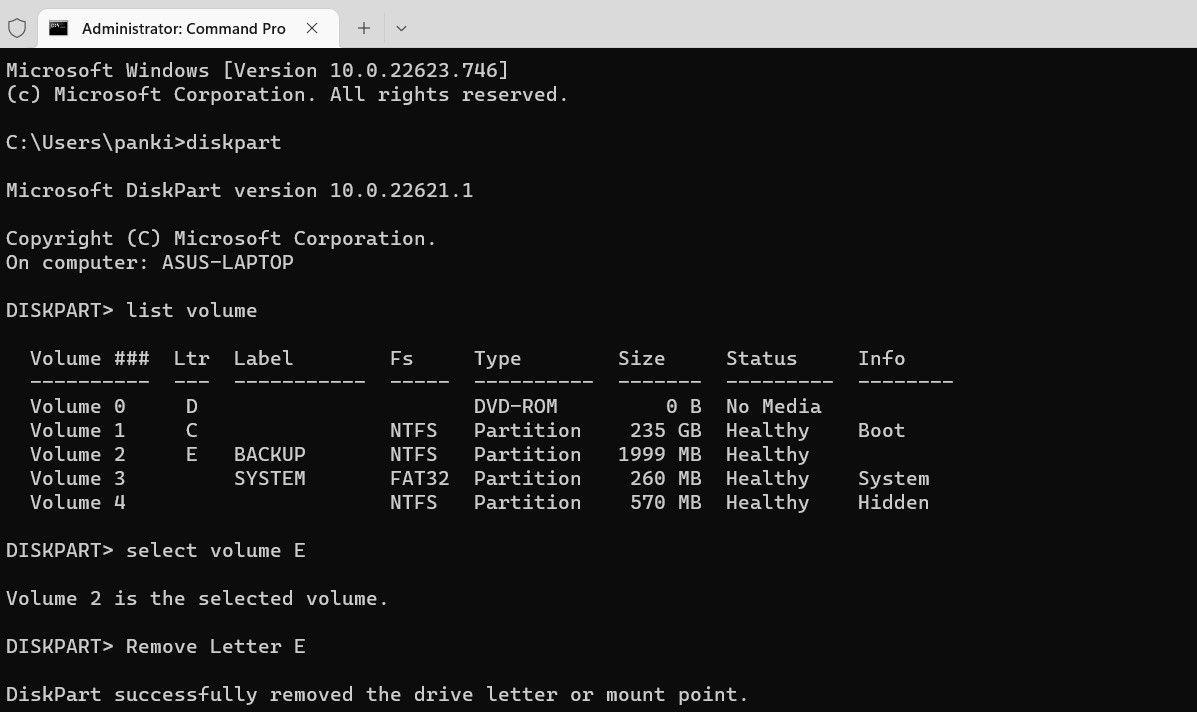


You should see a message that reads Diskpart successfully removed the drive letter or mount point. Following that, the drive will no longer appear on your PC.
If you like using Command Prompt, why not check our guide on how to master the Command Prompt in Windows?
3. Hide a Drive Using the Group Policy Editor
The Local Group Policy Editor is a tool that allows you to configure a wide range of settings on your computer. You can use it to hide a drive from your Windows computer.
The Local Group Policy Editor is only available in Professional, Enterprise, and Education editions of Windows. If you're using the Windows Home edition, check our guide on how to access the Group Policy Editor in Windows Home before proceeding.
Here's what you need to do:
- Press Win + R to open the Run dialog box.
- Type gpedit.msc in the box and click OK.
- Select Yes when the User Account Control (UAC) prompt shows up.
- In the Local Group Policy Editor window, use the left pane to navigate to User Configuration > Administrative Templates > Windows Components > File Explorer.
-
Double-click the Hide these specified drives in My Computer policy on your right.
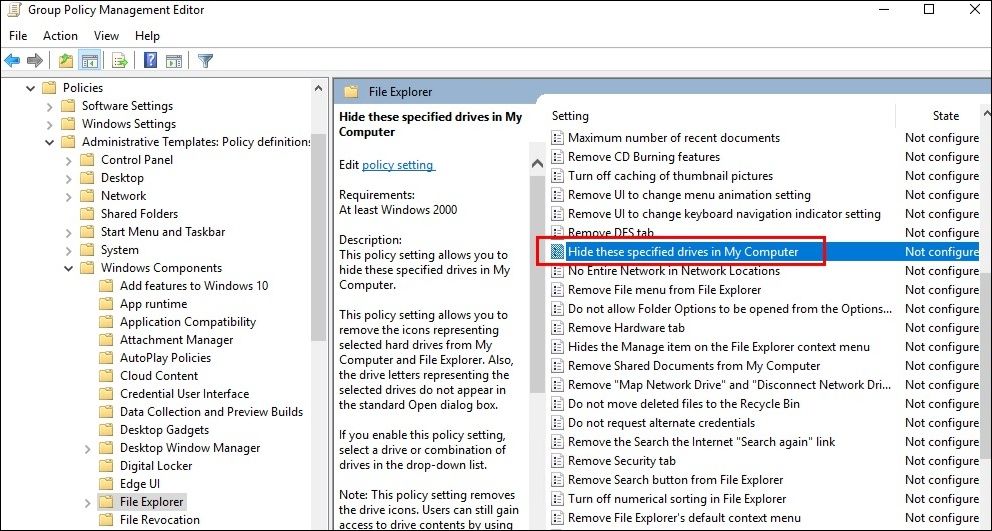
- Select the Enabled option.
- Under Options, select the drive you want to hide.
- Click Apply followed by OK.

Once you complete the above steps, Windows will hide the specified drive from File Explorer. If you want to unhide the drive later, use the same steps and set the Hide these specified drives in My Computer policy to Not configured.
4. Hide a Drive in Windows via the Registry Editor
Another brilliant tool that allows you to configure system settings in Windows easily is the Registry Editor. You can use Registry Editor to hide a drive if none of the above methods work. However, you must be careful not to accidentally mess up the Windows Registry in the process.
To be safe, you should back up all the registry files before proceeding. If you need help with that, check our guide on how to back up the Windows registry and follow the steps outlined there.
Once you're done with that, use the following steps to hide a drive using Windows Registry:
- Press Win + S to open the search menu.
- Type registry editor in the box and select the first result that appears.
- Select Yes when the User Account Control (UAC) prompt appears.
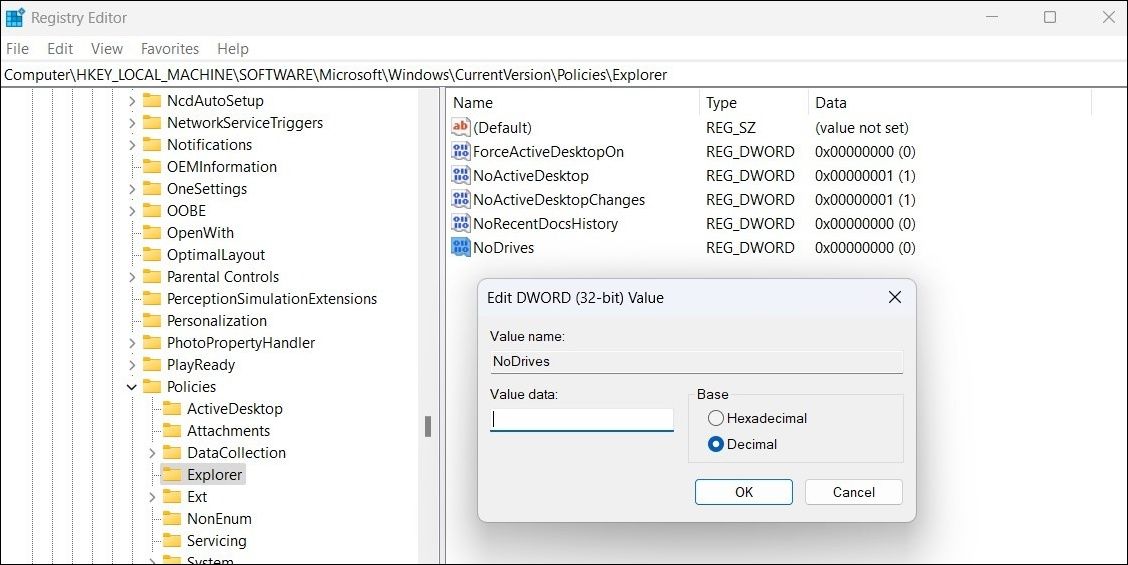
- Use the left pane to navigate to HKEY_LOCAL_MACHINE > Software > Microsoft > Windows > CurrentVersion > Policies > Explorer.
- Right-click on the Explorer key and go to New and select DWORD (32-bit) Value from the sub-menu.
- Rename the DWORD to NoDrives.
- Double-click the NoDrives DWORD.
-
In the Edit DWORD (32-bit) Value dialog box, select Decimal as the Base.
-
Enter a number corresponding to the drive you want to hide in the Value data field and click OK. Refer to the table below to determine which number to use.
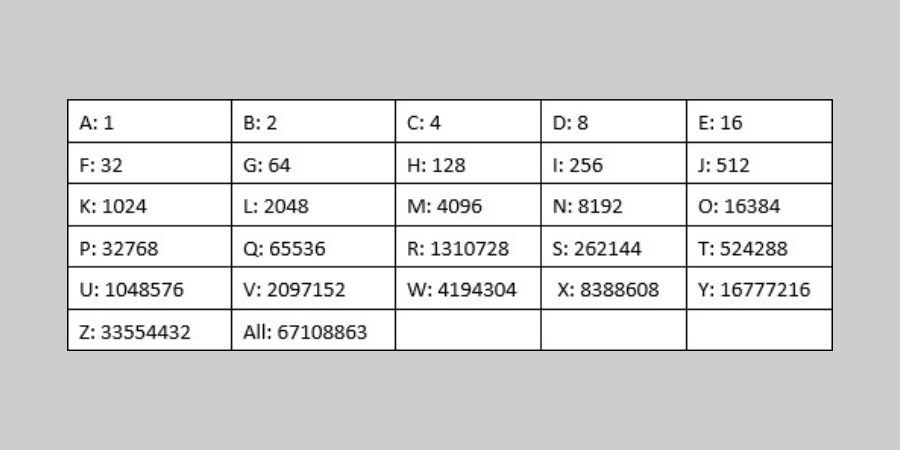


For instance, if you were to hide the E: drive from your computer, you'd enter 16 in the Value data field.
You can also use this method to hide multiple drives at the same time. To do so, add the decimal numbers for both drives and enter the total in the Value data field. For example, if you're looking to hide drive G: and H: from your computer, you should enter 192 (64 + 128) in the Value data field.
You'll have to restart your PC to apply the changes. Following that, the drive will not appear in File Explorer. You can undo the above changes at any point by deleting the NoDrives DWORD.
Hiding Drives in Windows Is Easy
Regardless of the method you use, hiding a drive on Windows is fairly simple and shouldn't take more than a few minutes.
Alternatively, if you don't want to hide an entire drive, Windows also lets you hide specific files and folders in a few easy steps.