PaintTool SAI is a free, lightweight painting application, developed and published by Systemax Software. It's a high-quality program with full digitizer support, as well as pressure detection.
It gives you the ability to create detailed digital artwork through its powerful yet simple user interface. If this is your first rodeo with PaintTool SAI, here are some tips that can help you get started!
Creating Your First Canvas
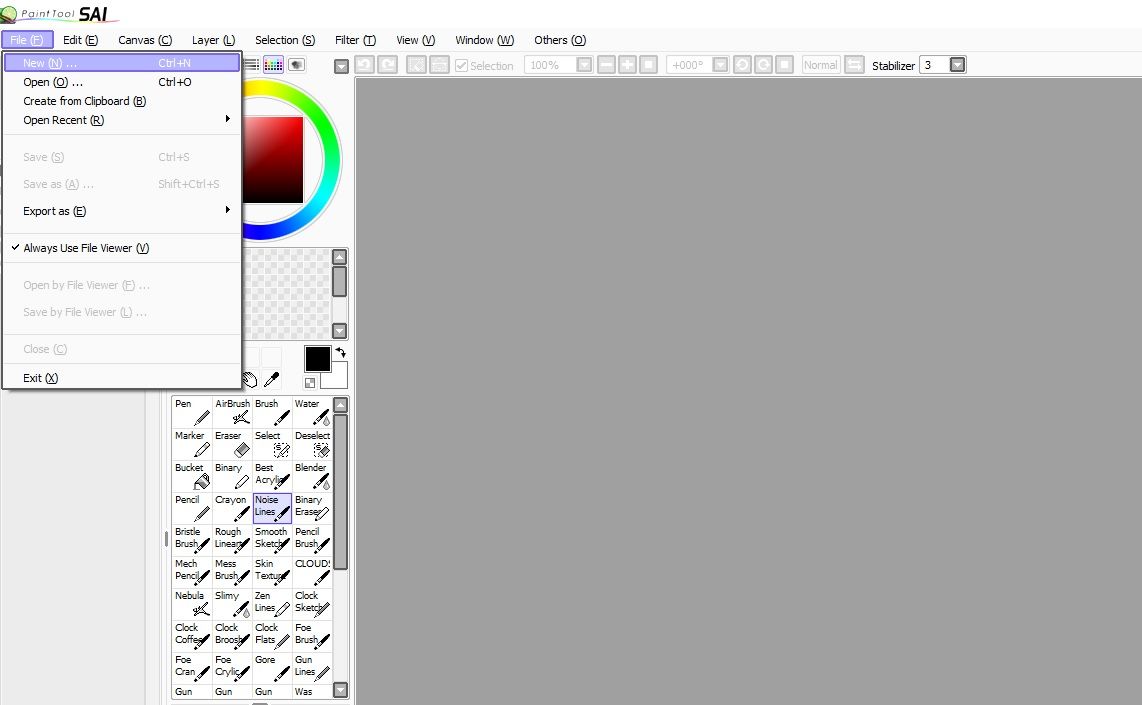
To create a new canvas, the first thing you need to do is click on File > New or press Ctrl + N on your keyboard.
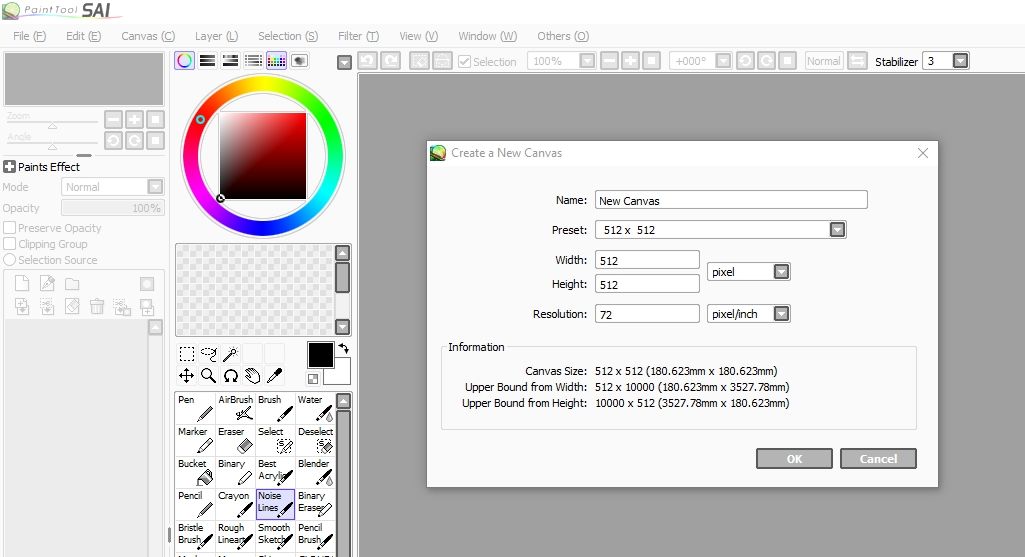
After doing that, another window will open where you can specify the details of your new canvas. You can give your canvas a name, as well as choose the size and resolution. Then, press OK, and your canvas will appear.
An Introduction to PaintTool SAI's Tools
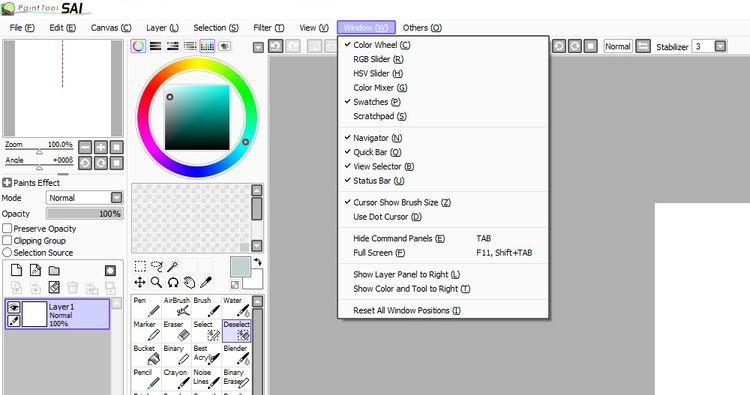
On the left side of the program, you have two main columns. One of them is for the layers and opacity options, while the other one will have all the brush options. However, if you do not have these columns by default, you can bring them up manually.
Here's a rundown of PaintTool SAI's most important tools:
- Color Wheel: your typical color wheel that lets you select different colors.
- Navigator: shows you a small preview of your canvas on the left side. It also allows you to rotate your canvas easily.
- Quick Bar: the bar on the top of the screen, where you have quick access to the undo/redo buttons, zoom tools, inversion options, and more.
- View Selector: tells you which canvases you have open (in case you have more than one) and allows you to easily switch between them.
- Cursor Show Brush Size: shows you the size of the brush you have selected.
Here are the most frequently used brushes in PaintTool SAI:
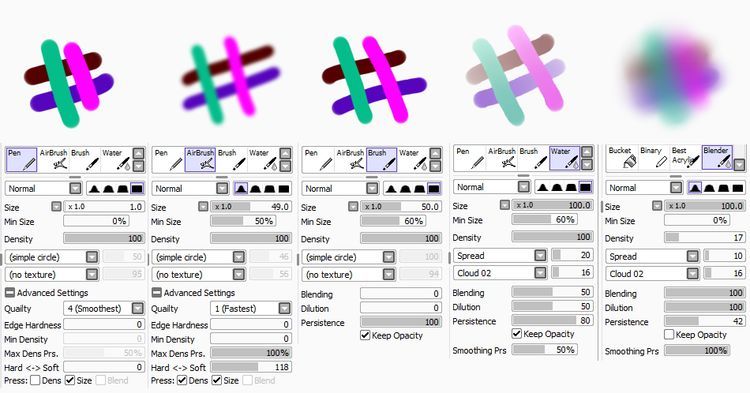
- Pen: a great option for making a rough sketch. It is quite similar to Microsoft Paint’s Pencil tool.
- AirBrush: is often used for soft shading. You can also use it as a soft brush.
- Brush: is perfect for sketching, coloring, shading, and final touchups. It offers a nice blend.
- Water: offers a slight watercolor effect. It is an all-purpose tool.
- Blender: this makes everything blend together with the intensity you choose.
- Eraser: your typical eraser tool.
In addition to the tools mentioned above, you also have the Select and Deselect tools, which are rather self-explanatory. However, these tools are similar to brushes.
You might end up confusing them for something else because they leave a purple trail when you make a selection. But don't worry, that purple trail is invisible in the end result.
There is also the Selection tool, Lasso, and Magic Wand, which are all tools used for selection. These tools are more than enough to get you started with your first PaintTool SAI project.
Adding Your Own Brushes
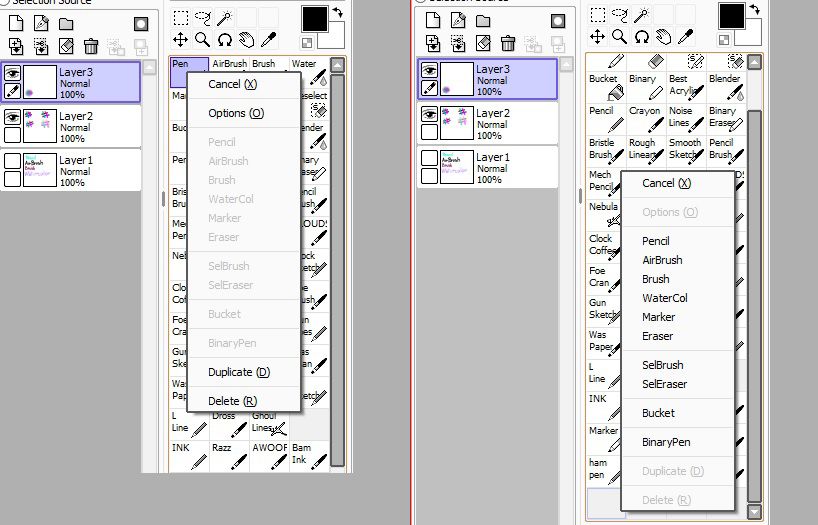
If you would like to change the order of the brushes in PaintTool SAI, all you have to do is right-click on an existing brush or an empty field within the brush panel.
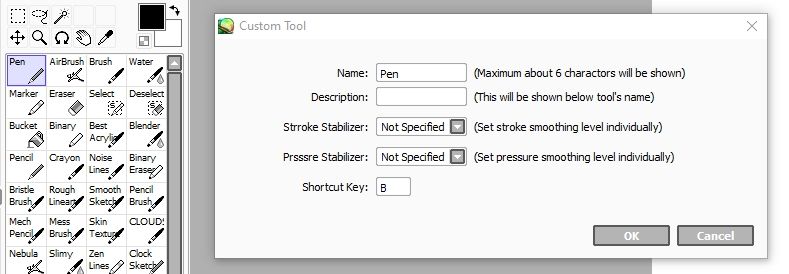
When clicking on an empty spot, you can choose which one of the main brushes you want to add. When clicking on an existing brush, you can change its settings, as shown in the picture below.
You can change the name of the brush, give it a description, and set some default properties, including a shortcut key.
Choosing Your Colors
As you might have noticed, there is a Color Wheel on the left side of PaintTool SAI by default. When you select a brush, you need to click on a color from the Color Wheel. You can select up to two colors at a time. These colors are visible in the two squares above the brushes. You can switch between the two colors by clicking on the arrows.
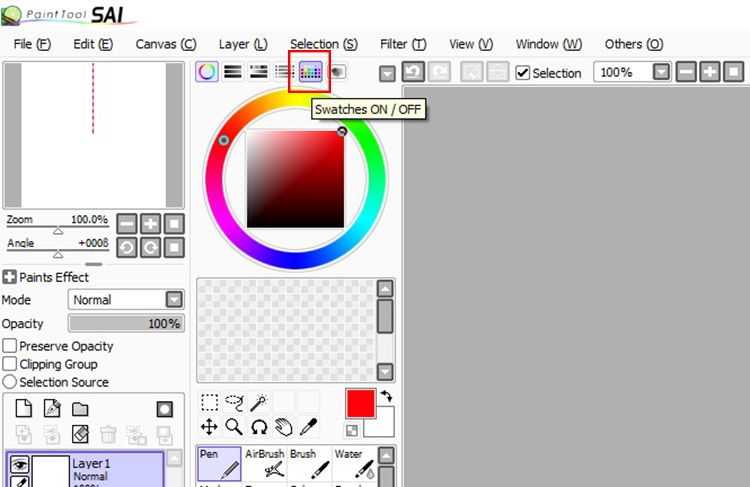
If you want to, you can create your own palette of colors by selecting Swatches. A small box below the Color Wheel will appear, where you can save 112 additional colors. That should definitely be more than enough!
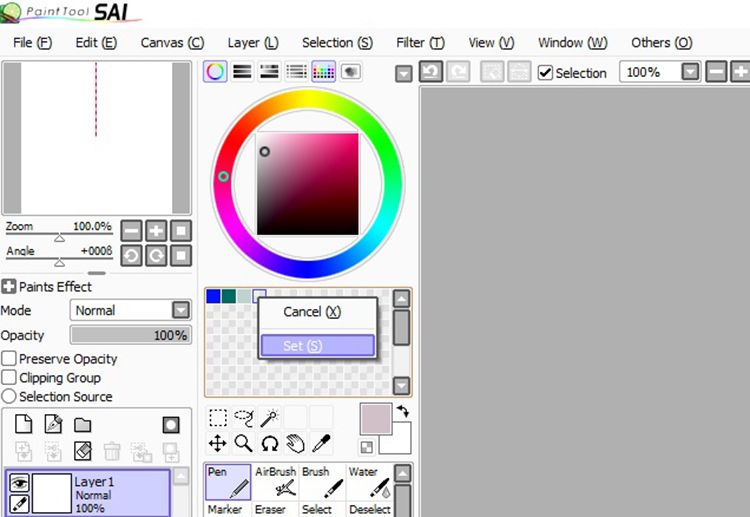
To save the color, you need to select it. Then, right-click on one of the small boxes within the Swatches and click on Set. You can also delete the colors by right-clicking and selecting Delete.
The settings you save while working will be active until you change them. This means that you will have the same palette when you create a new canvas.
How to Use Layers
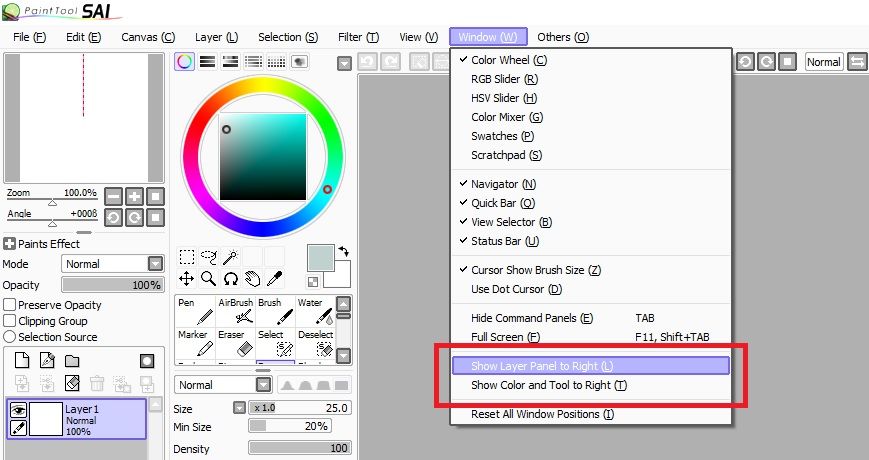
By default, the Layer Panel is on the left side of the screen. However, you can choose to show the Layer Panel as well as the Color and Tool options on the right if that is what you prefer. Click on Window and choose your preference.
If you've used Photoshop before, you should be fairly familiar with how layers work. Imagine if you had sheets of acetate paper stacked up. You get to draw on each one separately, but you can see what's on each sheet. You can also choose to remove and correct each sheet as you paint.
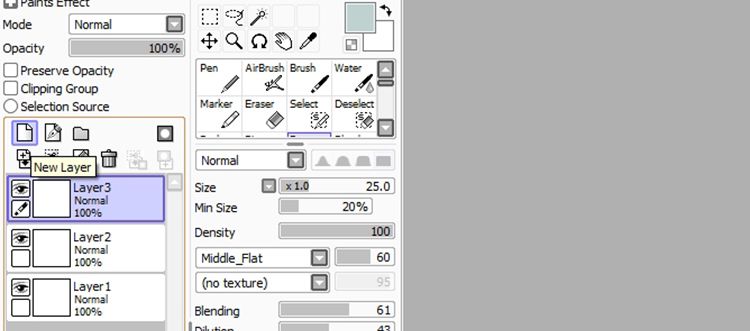
Each layer will be transparent by default. But unlike Photoshop, which represents transparency with small squares, transparency is white in PaintTool SAI. This can be confusing for beginners, especially if you use the color white while painting. You can add up to 256 layers in PaintTool SAI by clicking on New Layer.
Each layer will have the default name Layer1, Layer2, Layer3, and so on. By double-clicking on the name of the layer, you can change its name.
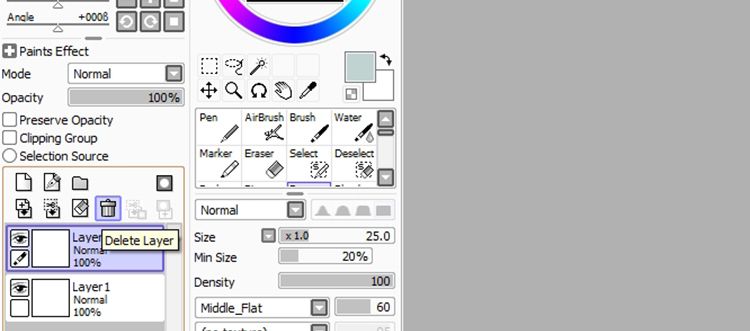
The eye icon beside the layer means that the layer is visible. Clicking on the eye will hide the layer until you choose to turn it back on. The hidden layers are not shown in your saved projects. If you want to delete a layer, you need to select the layer you want to delete and click on Delete Layer.
Making Adjustments and Applying Filters
PaintTool SAI is a tool mostly designed for those who want to paint or draw. While Photoshop and other similar programs have a lot of image editing options you can use, PaintTool SAI focuses on the painting aspect instead. Thus, you do not have that many image adjustment tools or filters to look forward to.
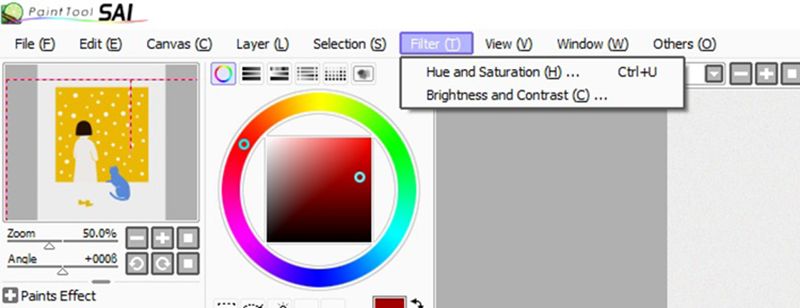
There are two main effect options you can choose from in PaintTool SAI: Hue and Saturation and Brightness and Contrast. You can find them under the Filter tab.
Saving Your File
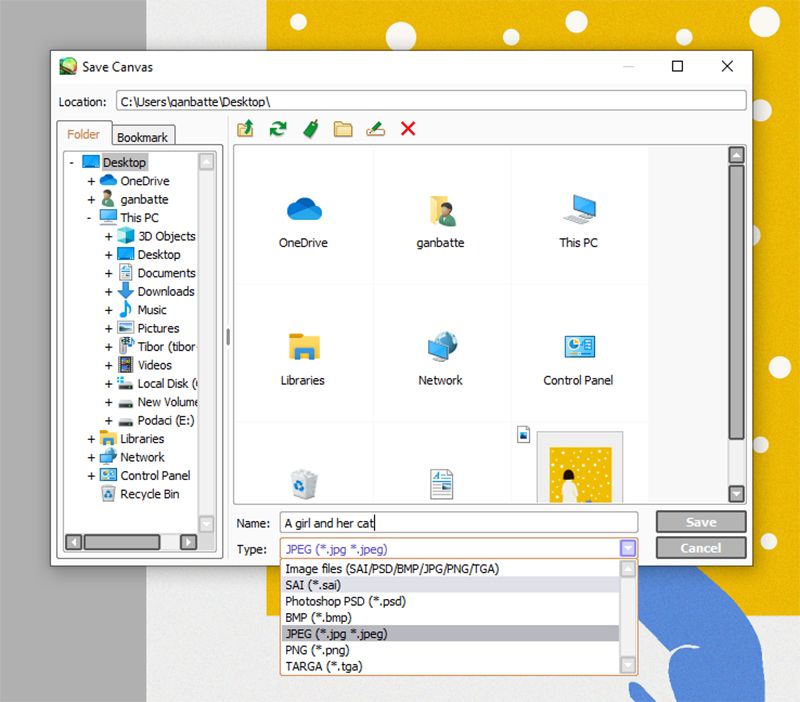
If you want to save your painting in PaintTool SAI, you can do so by going to File > Save (Ctrl + S) or File > Save as (Shift + Ctrl + S). You can save your file with an SAI file extension, which allows you to continue your project in PaintTool SAI later.
If you have nothing else to add, you can save it with some of the other extensions available in PaintTool SAI. It is always a good thing to keep a backup of your project with the SAI extension, however.
PaintTool SAI: A Great Choice for Drawing Freely!
PaintTool SAI is widely used among digital artists because it offers a lot of freedom, and closely mimics your real-life drawing experience. Whether you're a professional digital artist, or you're just getting started in the field, PaintTool SAI is a great tool for beginners and veterans alike.


