Apple’s Calendar app is a relatively easy iPhone or iPad app to use, but it still takes some time to figure out when you first get started. You can add multiple calendars, share events, set alarms, and more to keep your day-to-day activities organized.
Here’s an overview of everything you need to know to get started with Apple’s Calendar app on your iPhone and iPad.
What Different Views Can You See on the Calendar App?
Before diving into various features of the Calendar app, it is important to look at the different views availble in it. There are currently five different views you can use: Daily, Weekly, Monthly, Yearly, and List.
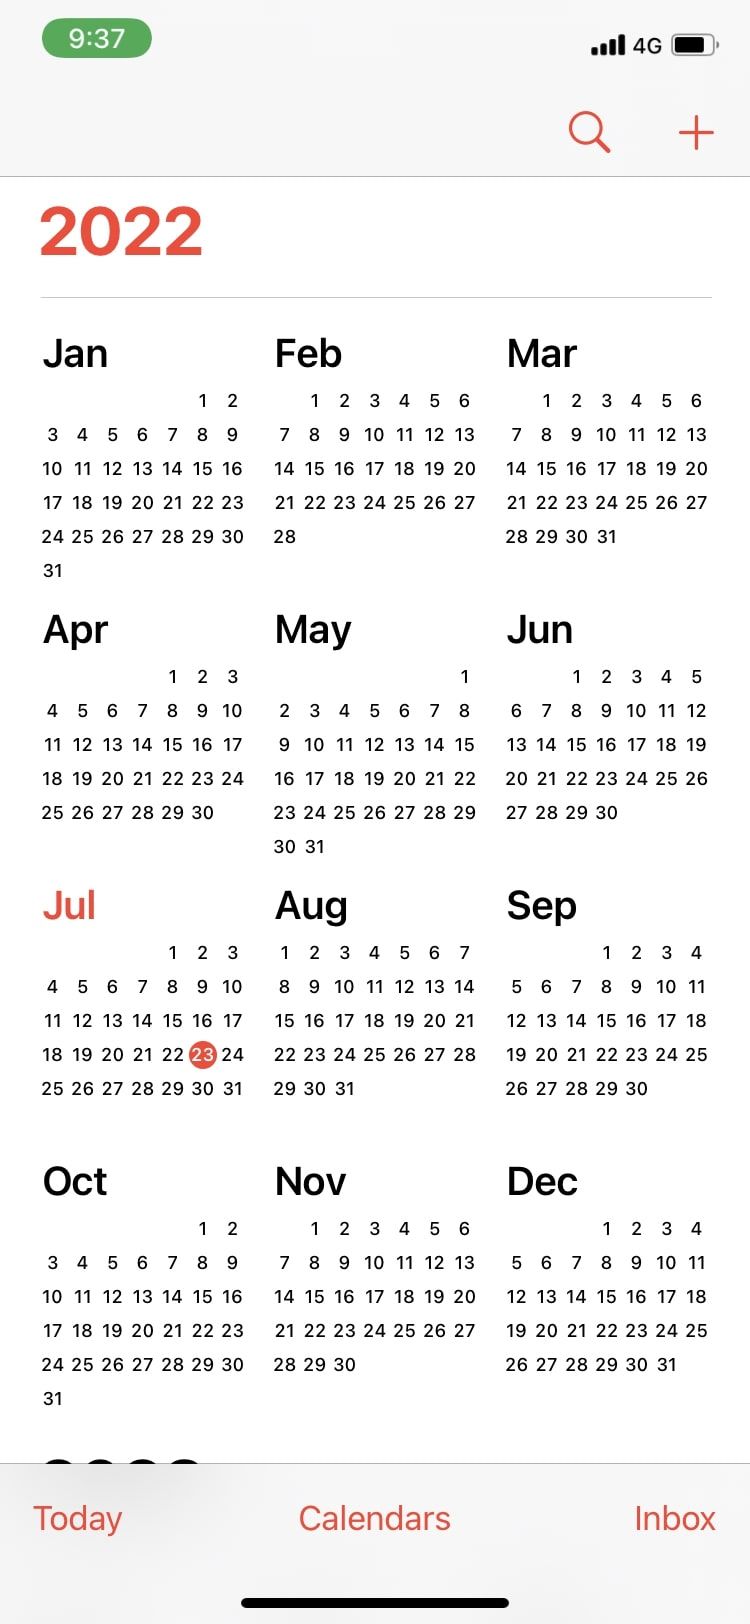
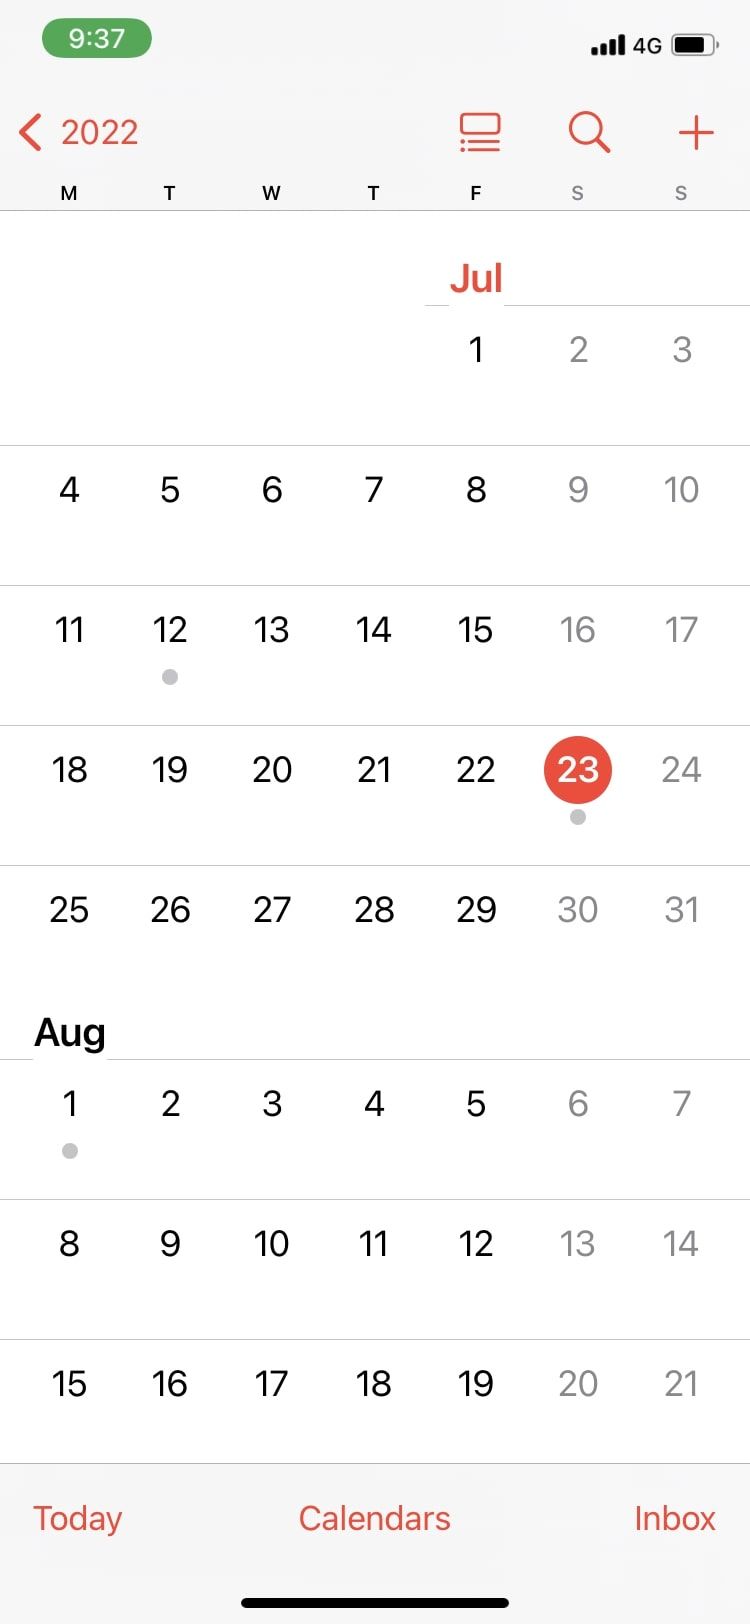
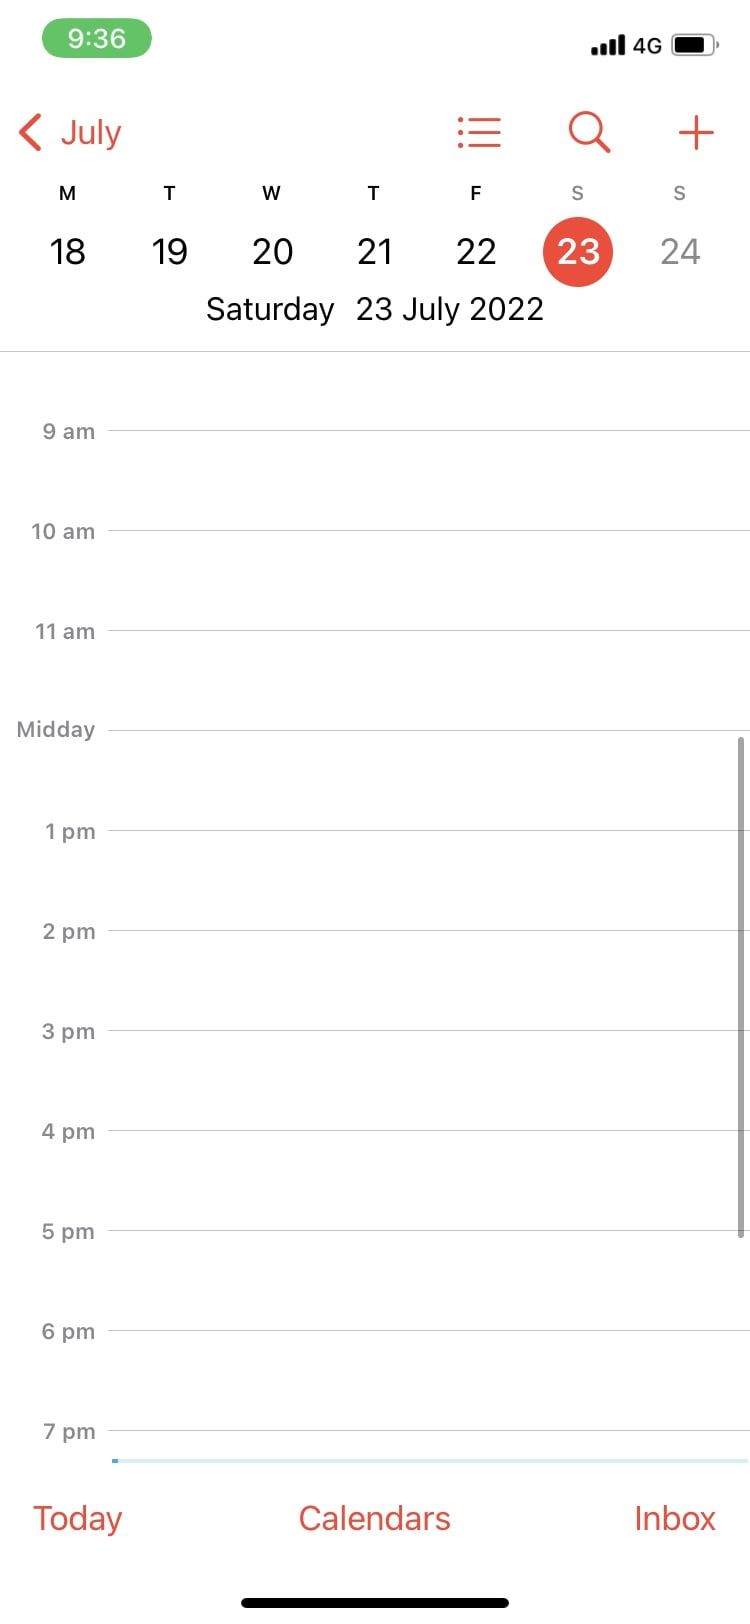
To switch between Yearly, Monthly, and Daily views, all you have to do is tap on a date to zoom in or out. Starting from the Yearly View, tap on any month to switch to Monthly View, and then a date to move on to Daily View. Similarly, you can tap the back button in the top-left corner to switch from Daily to Monthly and then to Yearly View. These views are best to keep track of dates and check out what day a particular date falls on, like what day of the week your birthday is on.
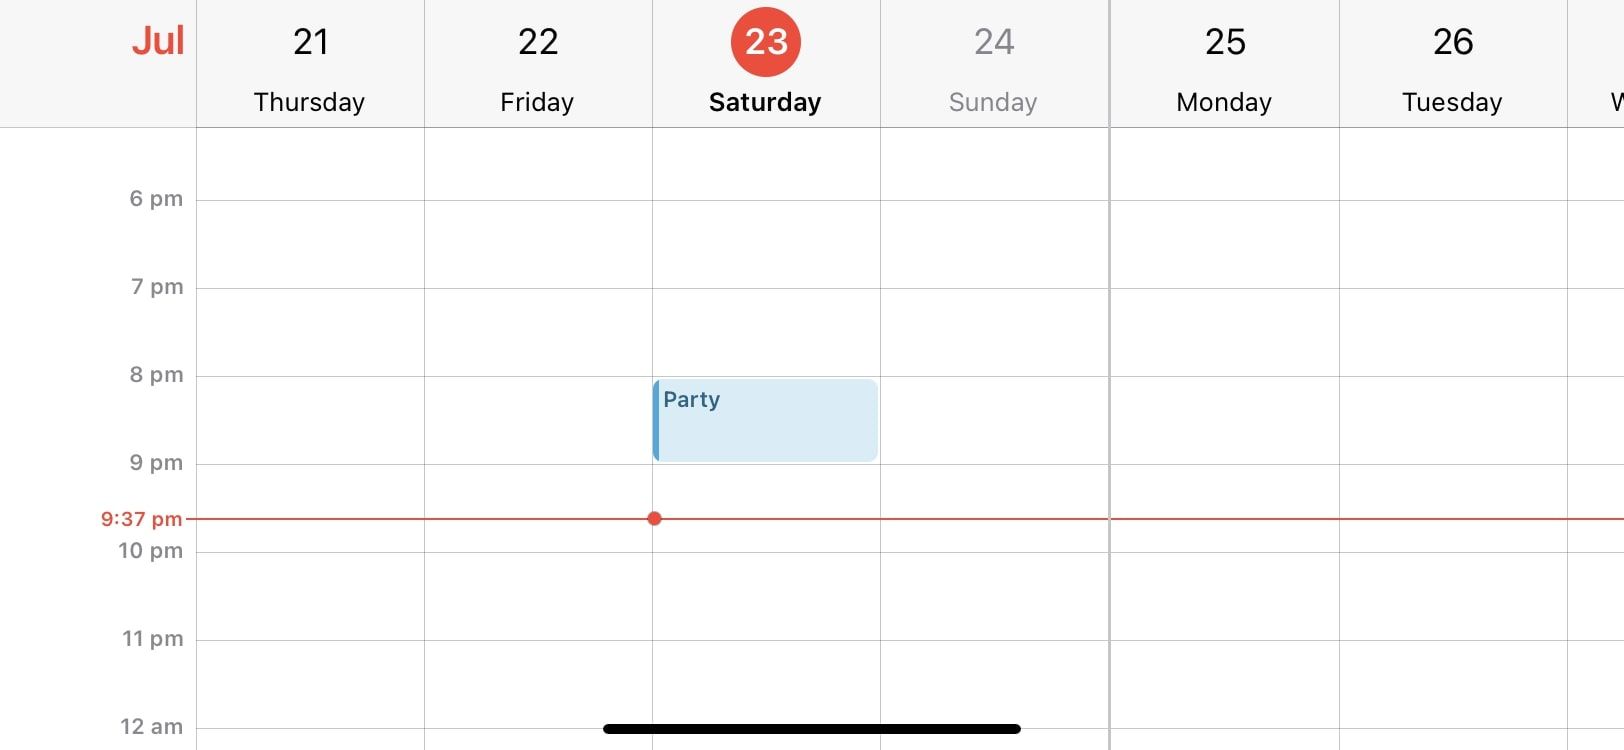
For a Weekly View of your calendar, open Daily View in the Calendar app and rotate your iPhone sideways. This will show you a view of your entire week.
Lastly comes the List View, which is a list of all your events in chronological order. You can tap on events to view their details. Switch to List View by tapping on the icon with three horizontal lines and three dots in Daily View or Weekly View.
Once you’re familiar with all the views and why each one is important, you can get started with using Apple’s Calendar app to add multiple calendars and events.
Set Up Multiple Calendars on the Calendar App
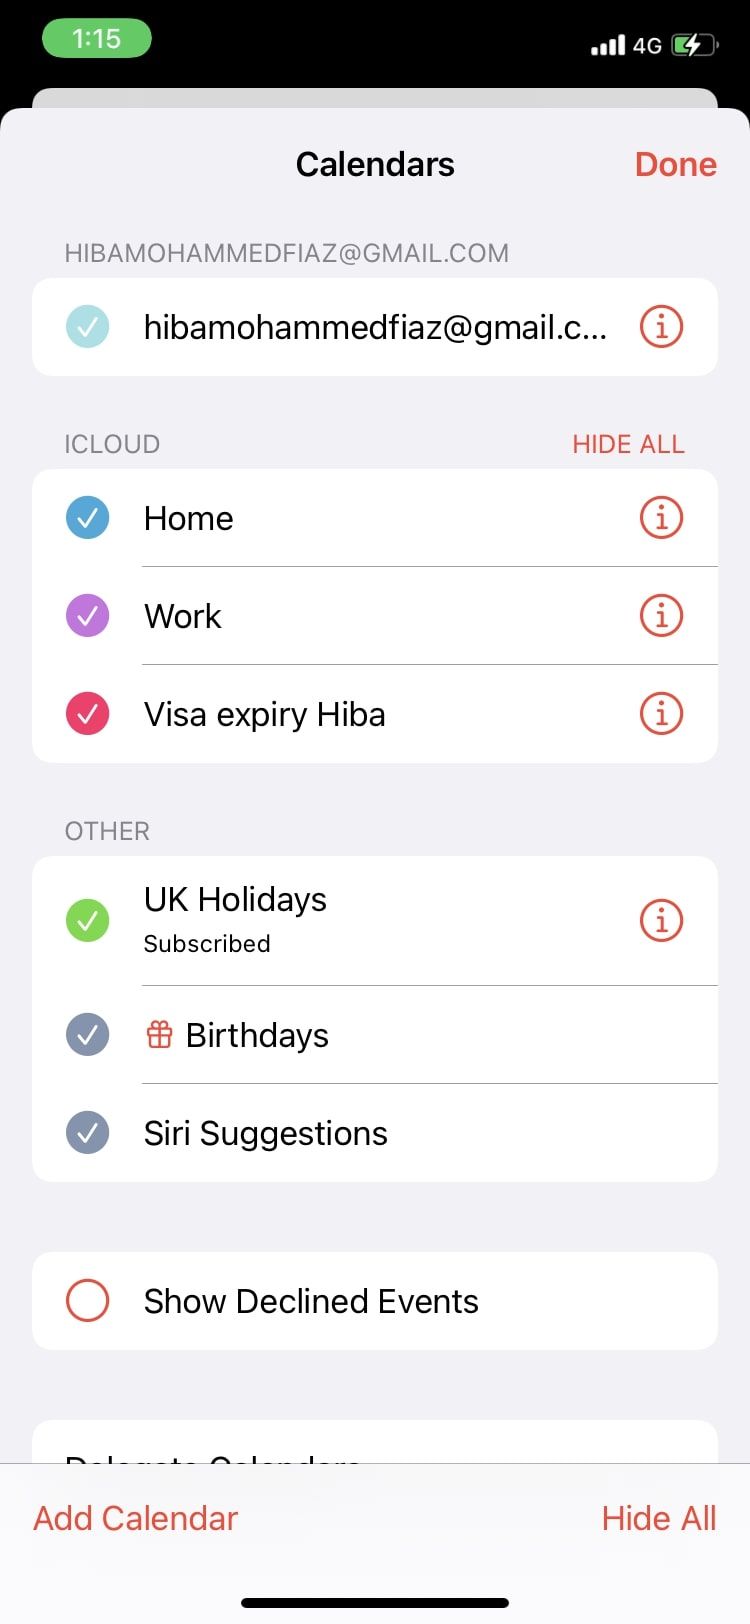
Multiple calendars will help you keep tabs on all different kinds of events. You can create one calendar for work meetings and one for social events, then customize the calendar colors to make it instantly obvious each event relates to. Here’s how to create multiple calendars:
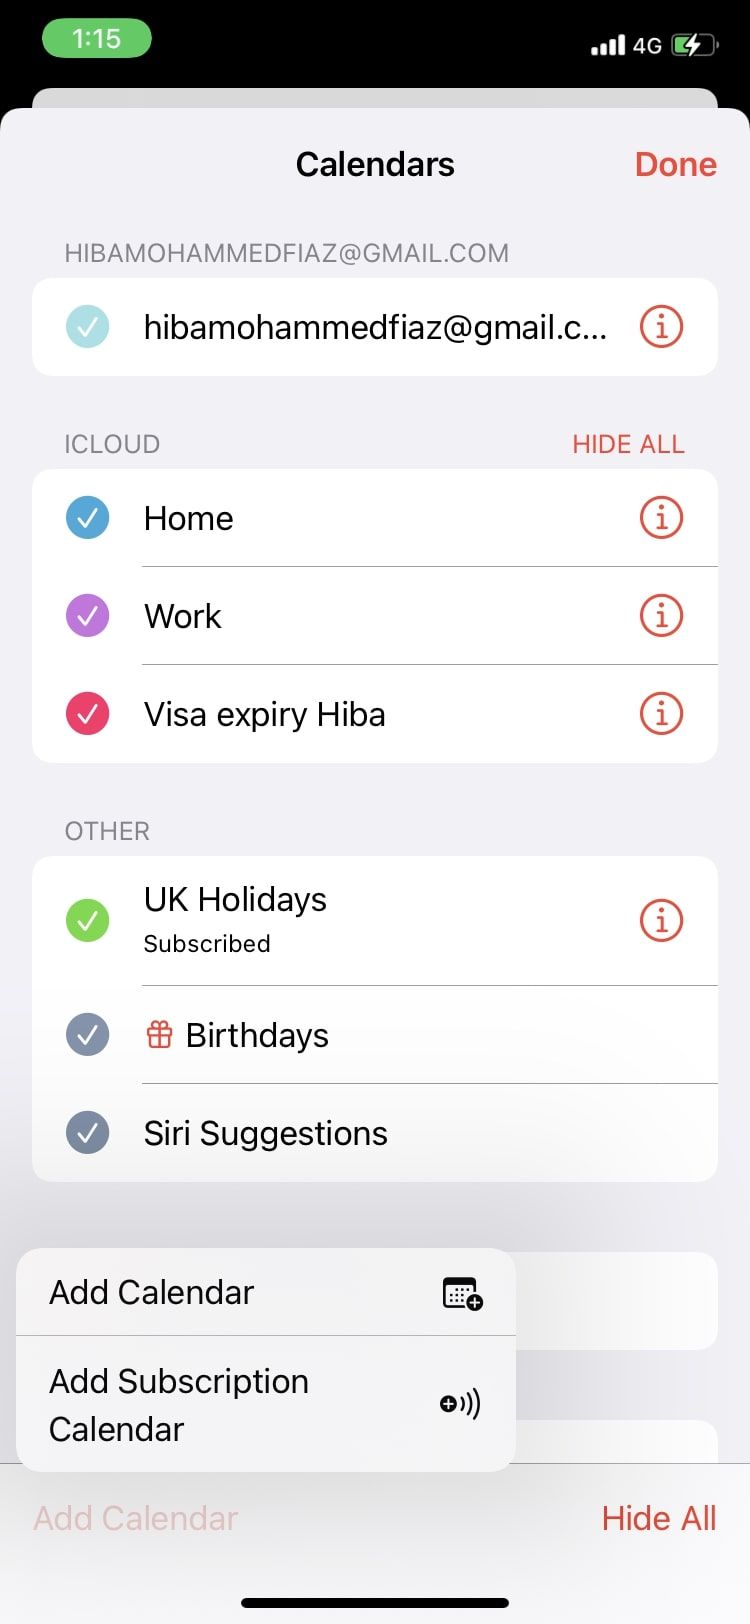
- Tap Calendars and select Add Calendar at bottom.
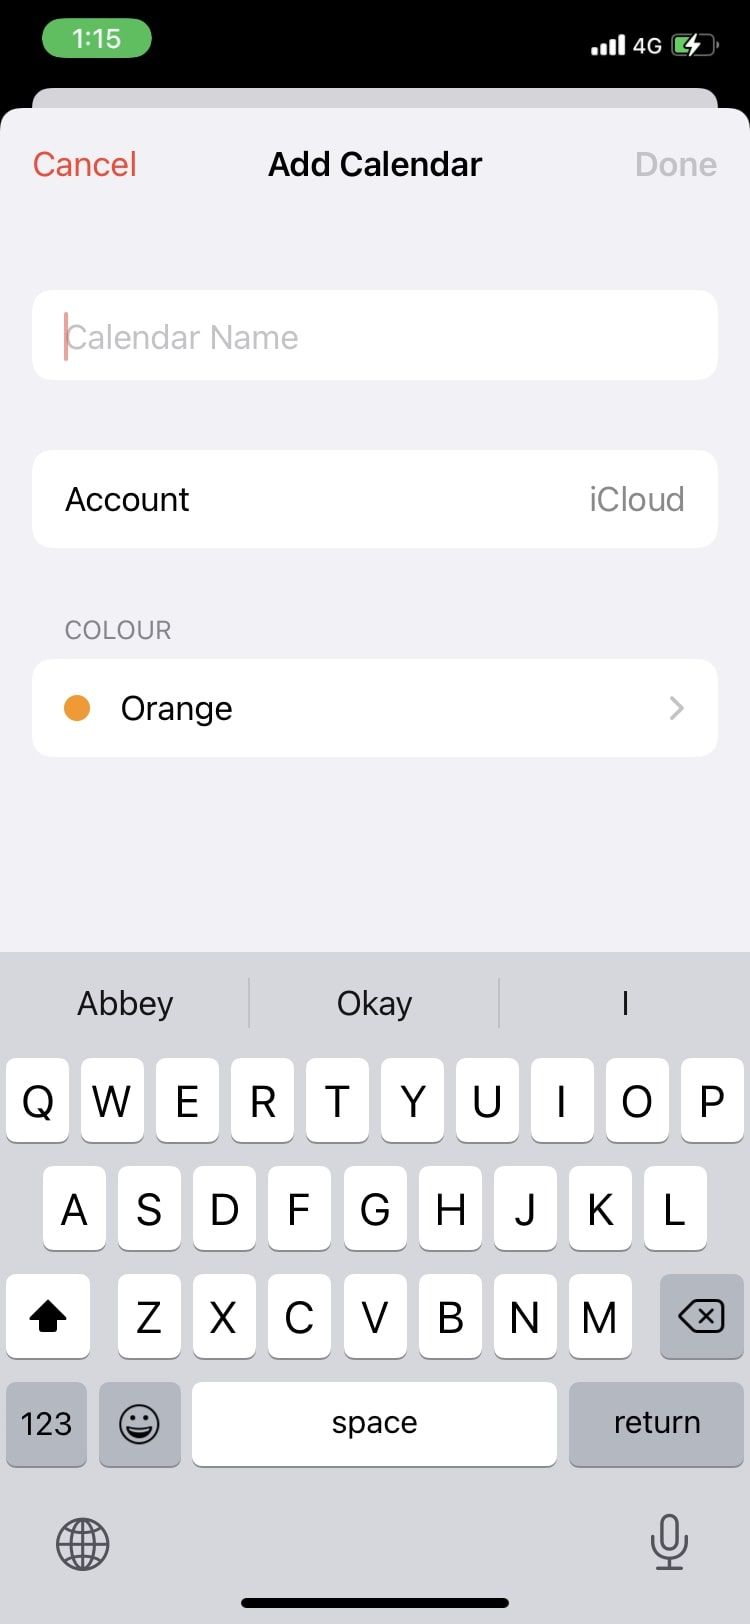
- Choose Add Calendar to create a calendar in your iCloud account. This means you can view this calendar across all devices linked with your iCloud.
- Select Add Subscription Calendar to add a read-only, external calendar by entering its URL.
Apple Calendars also has the option to add a calendar from another service, like Google, Outlook, and Yahoo, or just another iCloud account. To do this, go to Settings > Calendar > Account > Add Account.
Choose What Calendars You Can See
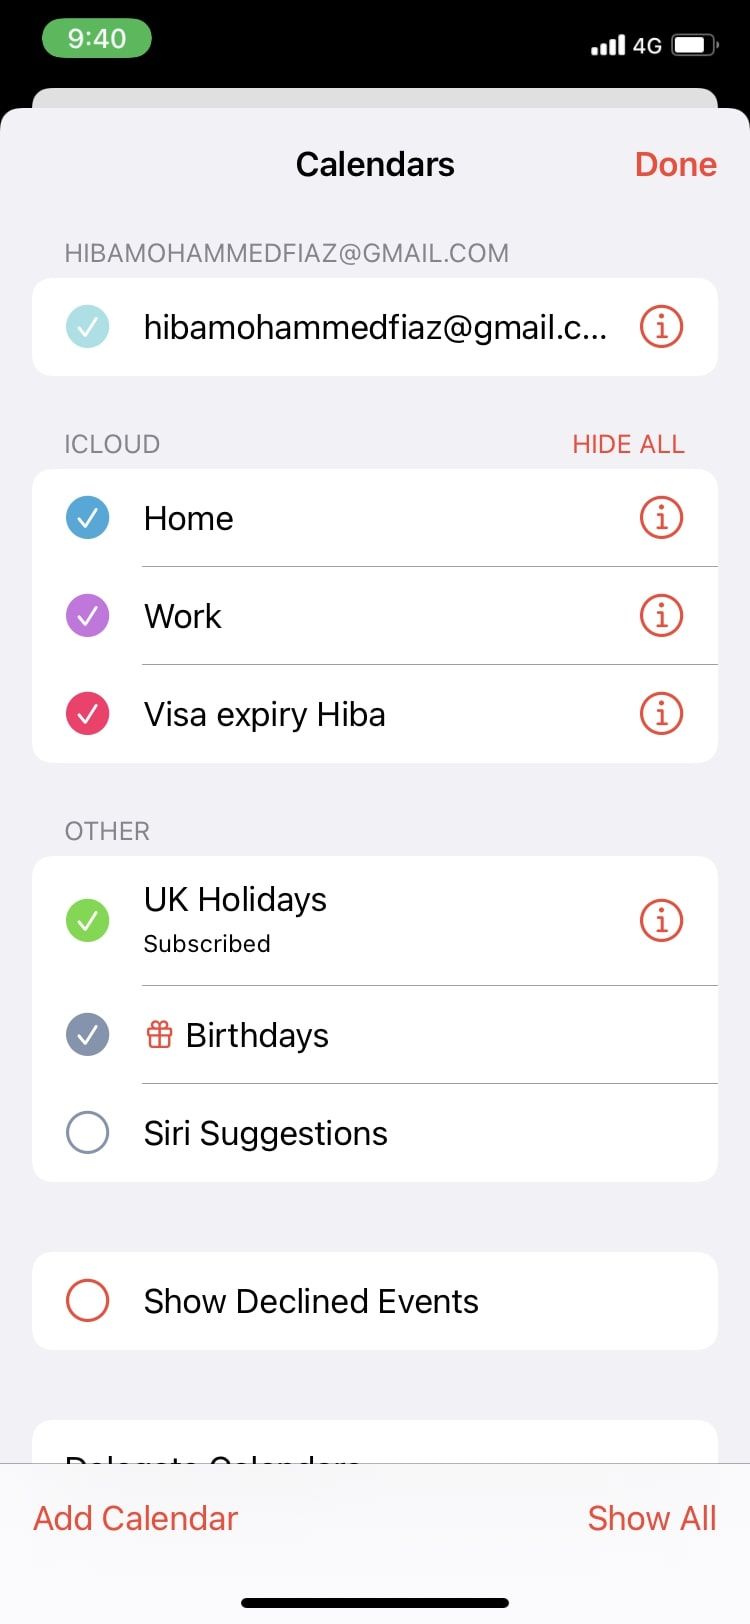
After you set up multiple calendars, you can always toggle the calendars you want to show and the ones you want to hide at any time. Going on vacation? Hide the calendar with all work-related events and unhide it when you get back. Here’s how you can do this:
- Tap Calendars.
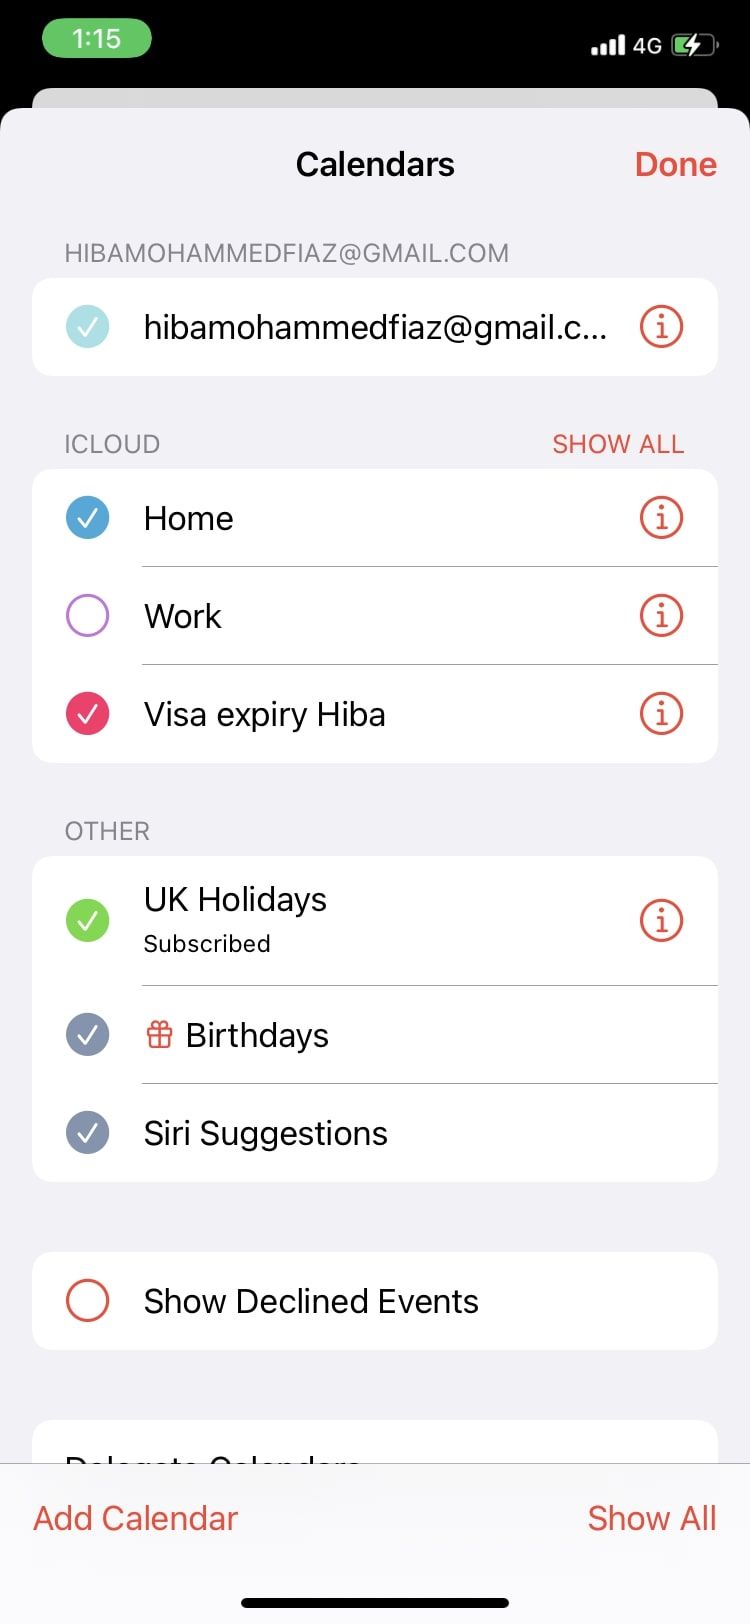
- A colored tick next to a calendar indicates a calendar is shown. Tap on the tick icon to make the tick disappear hide the calendar, and vice versa.
- If all the calendars in the app have a tick next to them, you will see Hide All at the bottom to hide all calendars at once. If one or more calendar is hidden, you will see Show All instead.

Customize the Color of Your Calendar
Another helpful step to take after adding multiple calendars is assigning colors to them to help you stay organized. Here’s how to change the color of your calendar:
- Tap Calendars at the bottom.
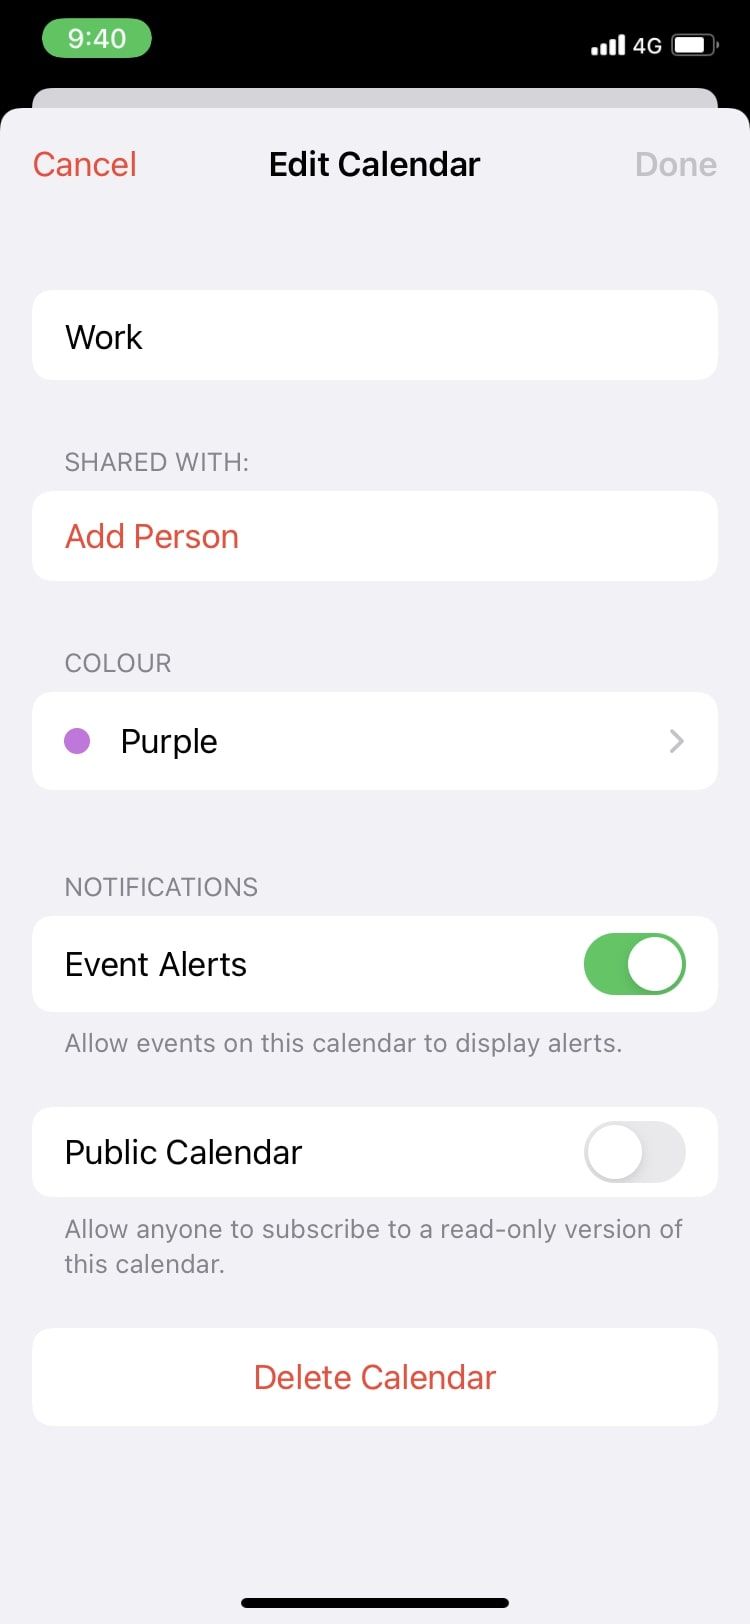
- Tap on the info (i) button next to the calendar you want to customize the color for.
- Choose the dialog box beneath Color.
- Choose from the list of options or tap Custom for more options.
- Tap Back and press Done. You will now see the selected color next to your calendar.

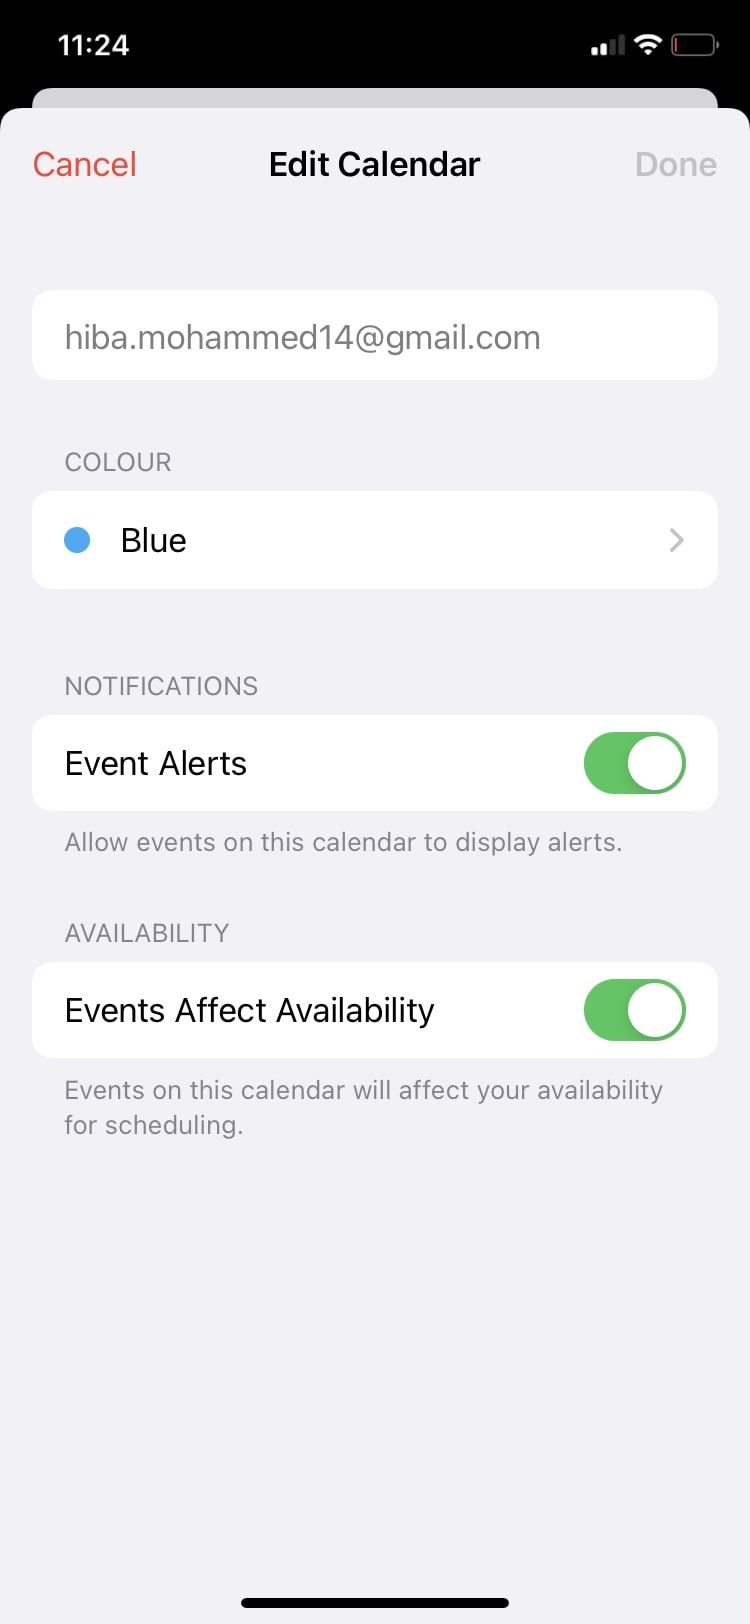
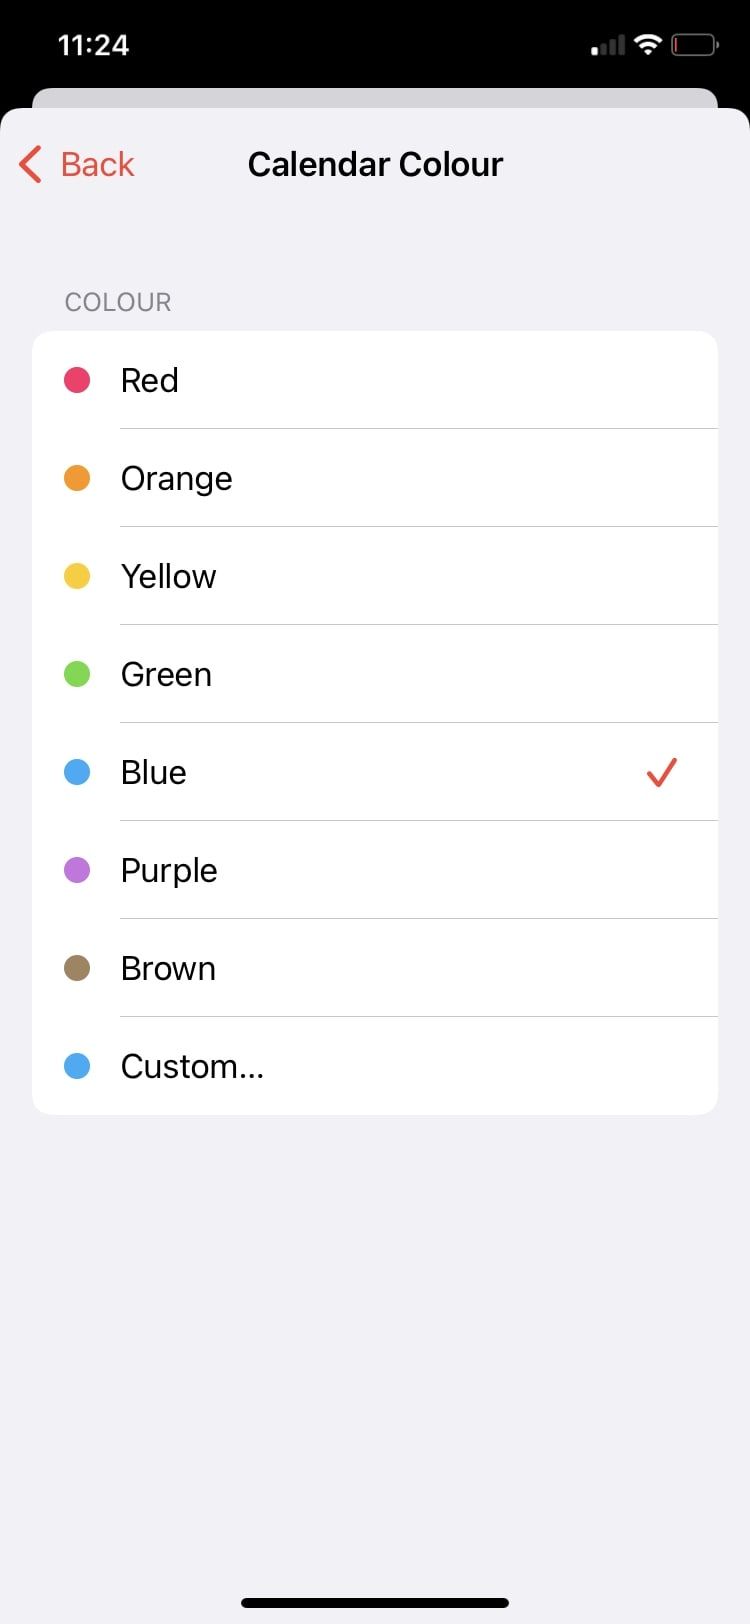
All events for a particular calendar will appear in the calendar color, so a quick glance at the colors on your calendar will tell you what kind of events are on your schedule.
Create, Delete, and Edit an Event
A birthday, anniversary, social event, or family gathering are all great examples of events you might want to add to your Calendar app. Follow these steps to create an event:
- Tap on the plus (+) sign at the top of the app.
- Enter all the required details for an event, like the title, location, and time.
- Press Add.
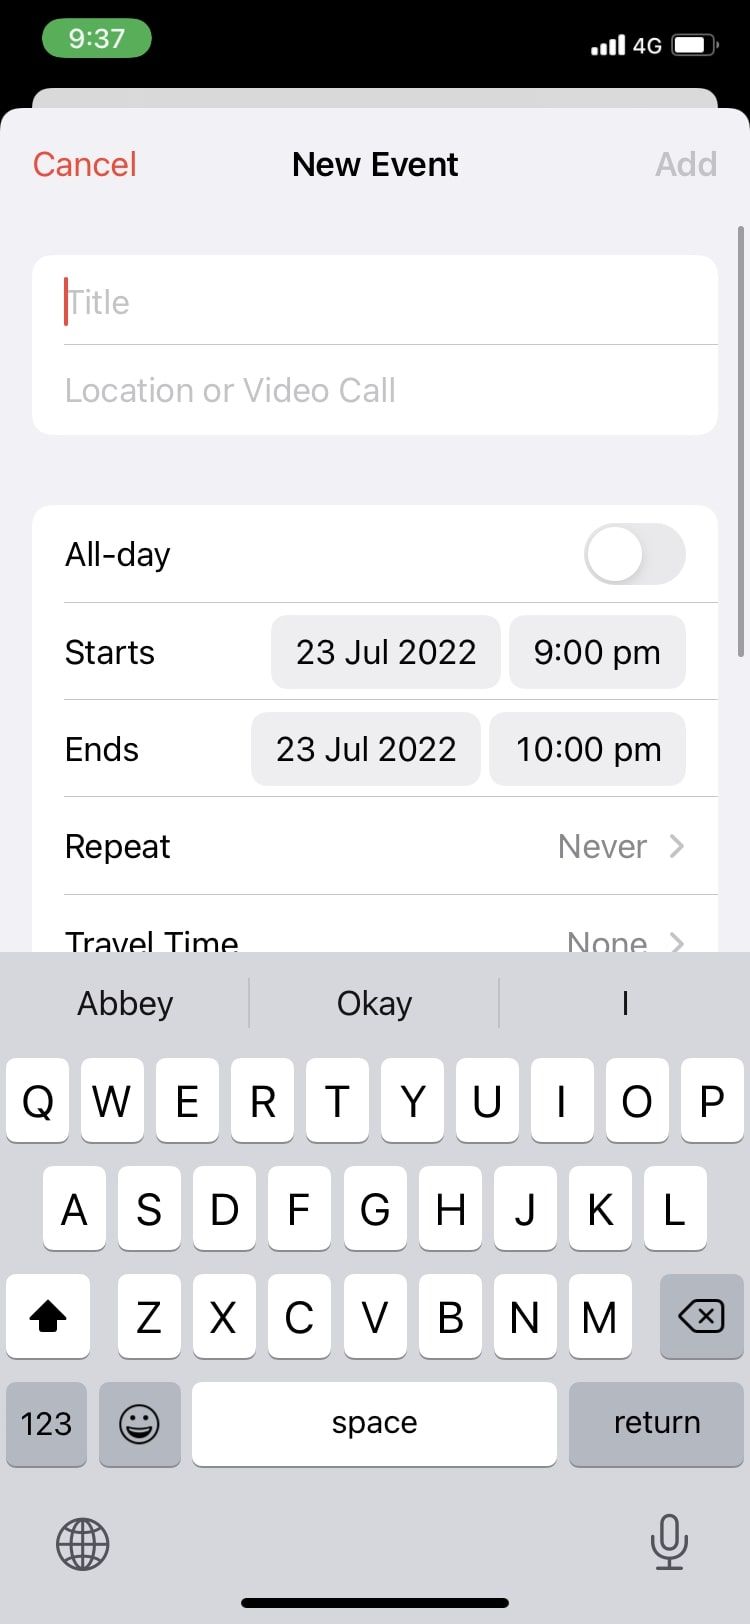
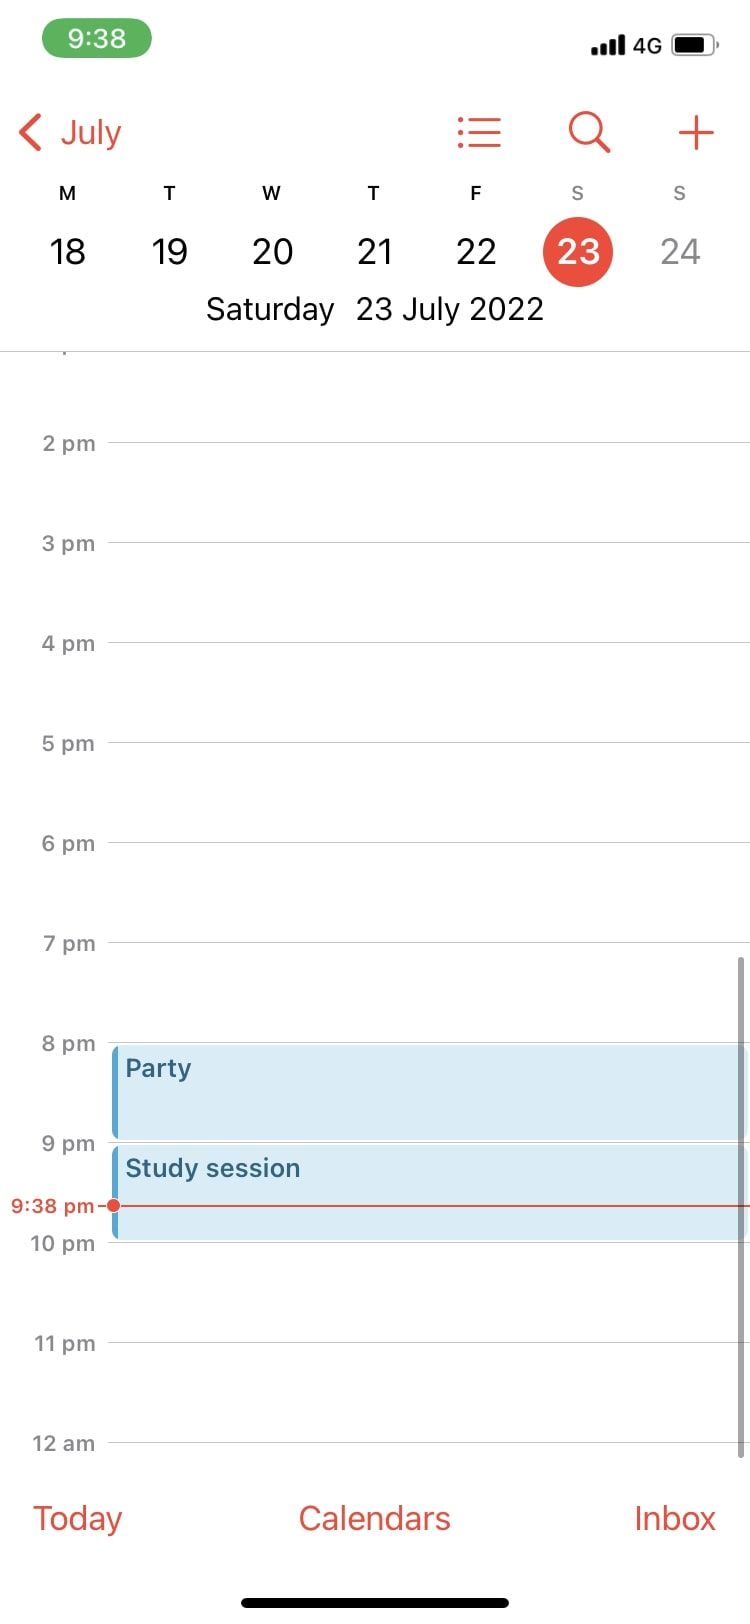
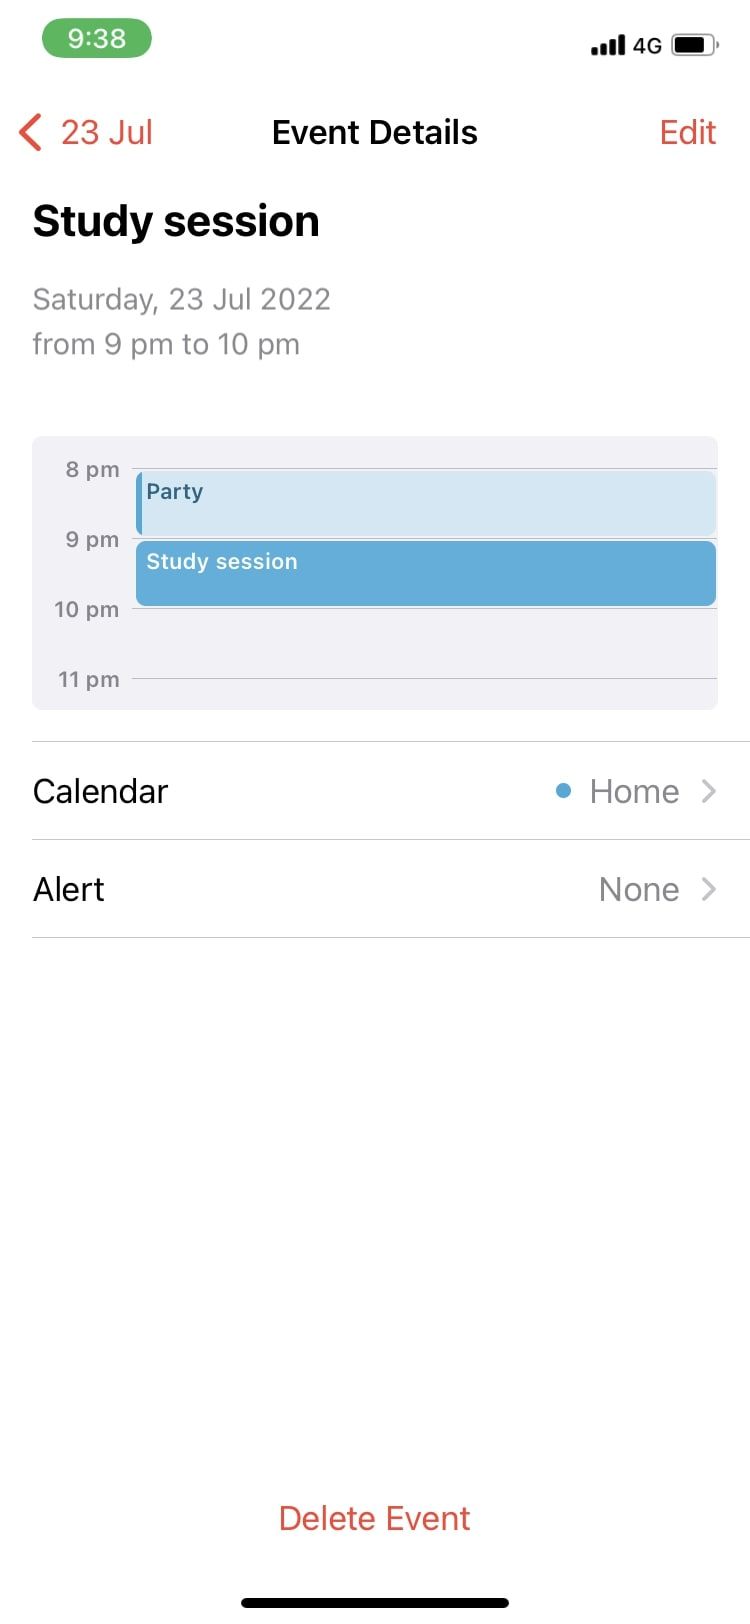
After creating a Calendar event, you can just as easily edit it by tapping on it and pressing Edit. This can be done anytime you want to change the date, time, title, or any other details. If it gets canceled, you can delete an event from the Calendar app by opening it and tapping on Delete Event to remove it from your calendar.
If you can’t seem to find a particular event or want to check out its details, you can search for it by tapping on the magnifying glass and typing the title of your event in the Search Bar.
Add Events With Siri
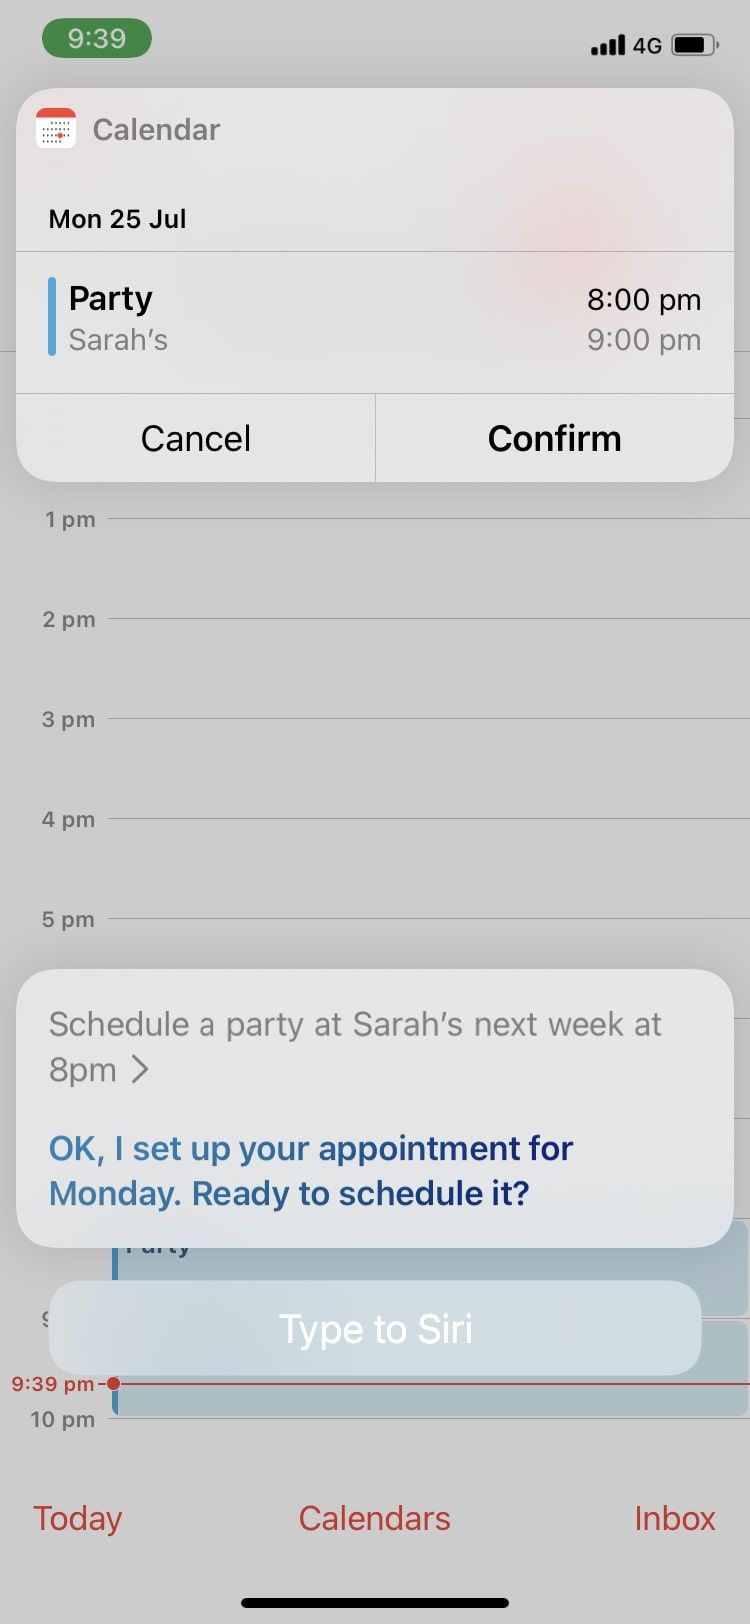
Find typing too tiresome? You can add all your events using Siri to save yourself the hassle. Follow these steps to use Siri to add an event:
- Ensure that Siri is enabled on your iPhone or iPad before you begin by going to Settings > Siri.
- Say “Hey Siri” to activate Siri, then give your command.
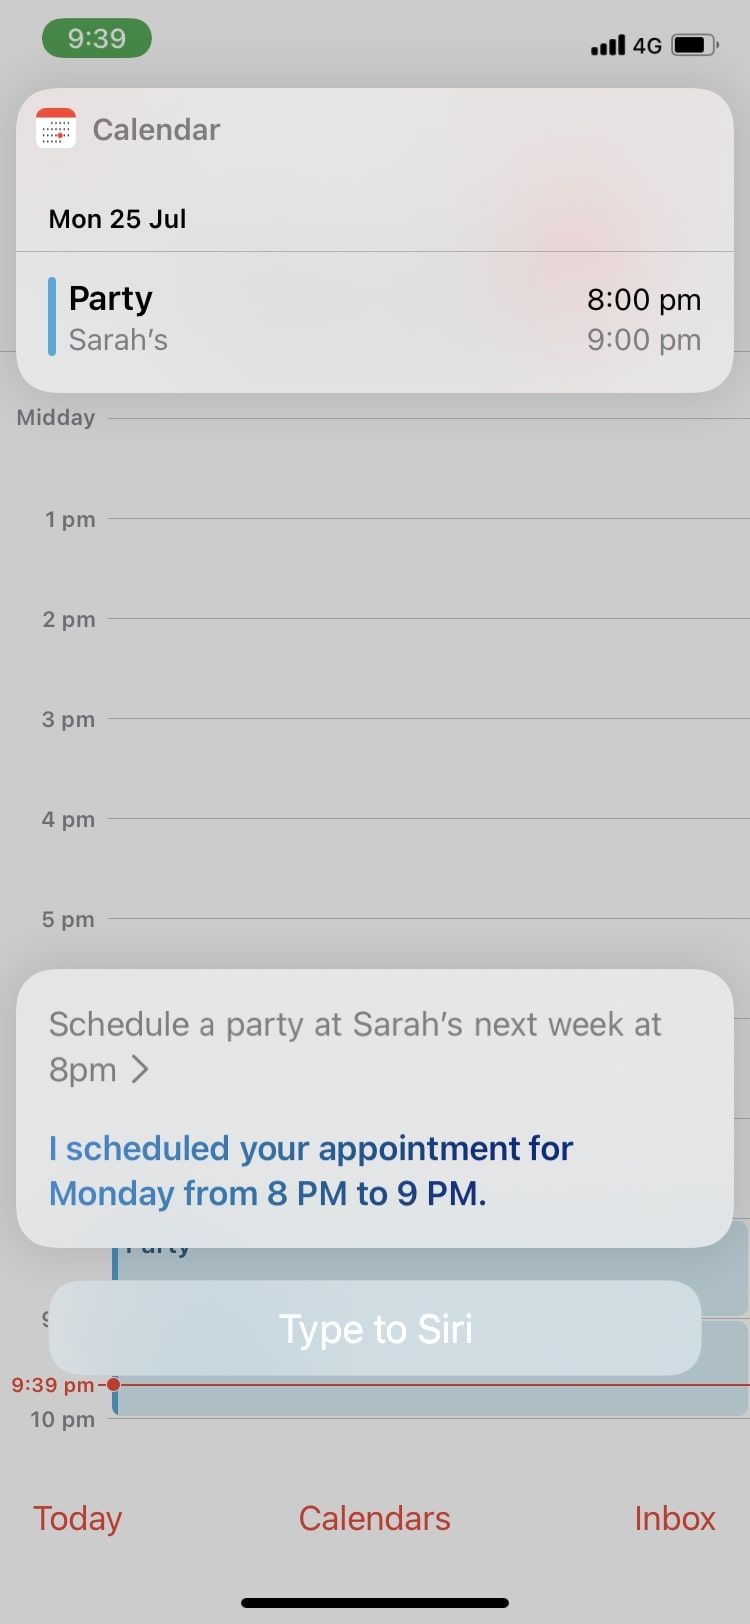
- An example of what you can say would be “Schedule a party at Sarah’s next week at 8PM.” Siri create an event based on the details you give.
- Say or press Confirm to add the event to your calendar.
Never Miss Out by Turning On Event Alerts
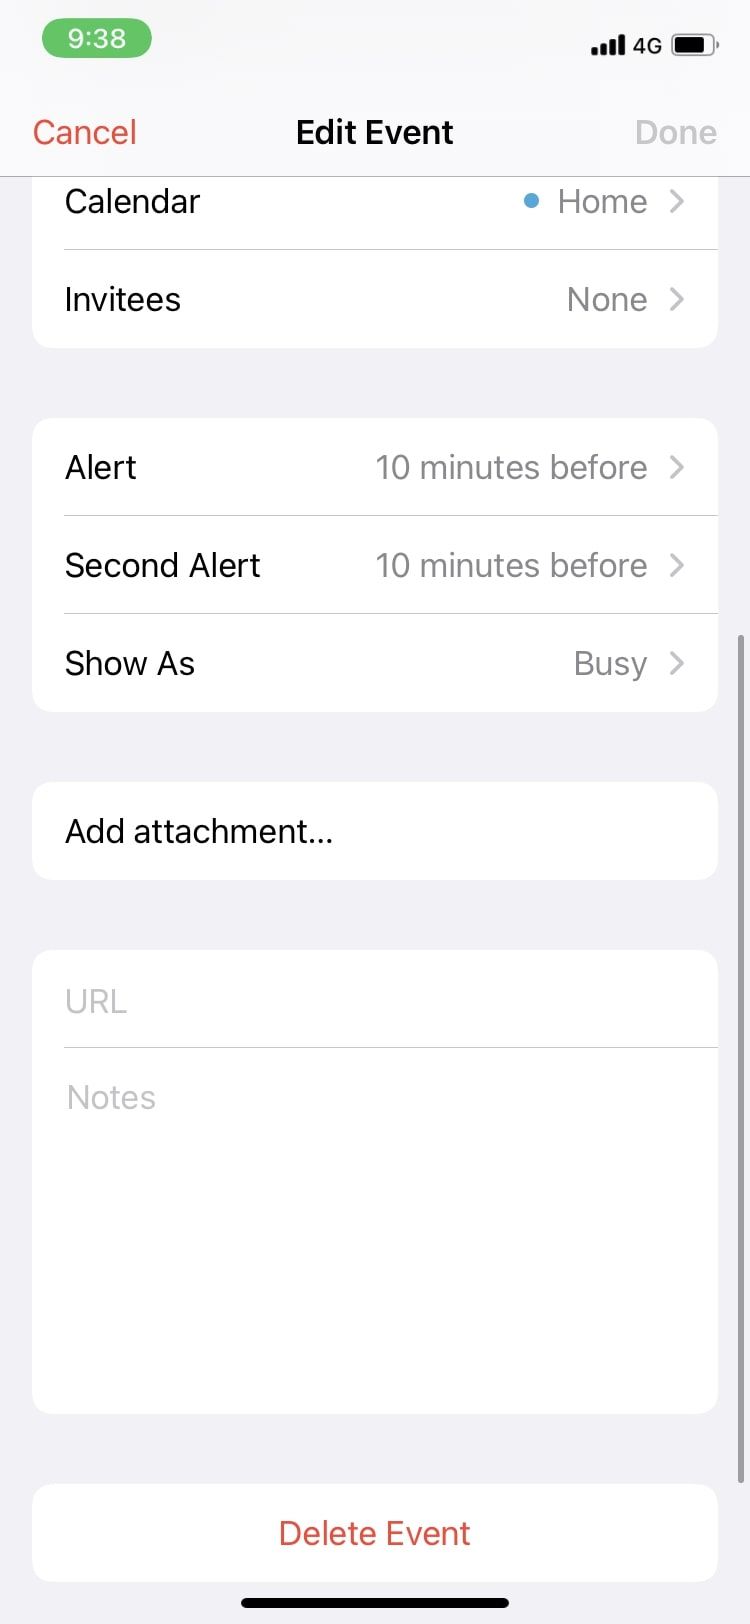
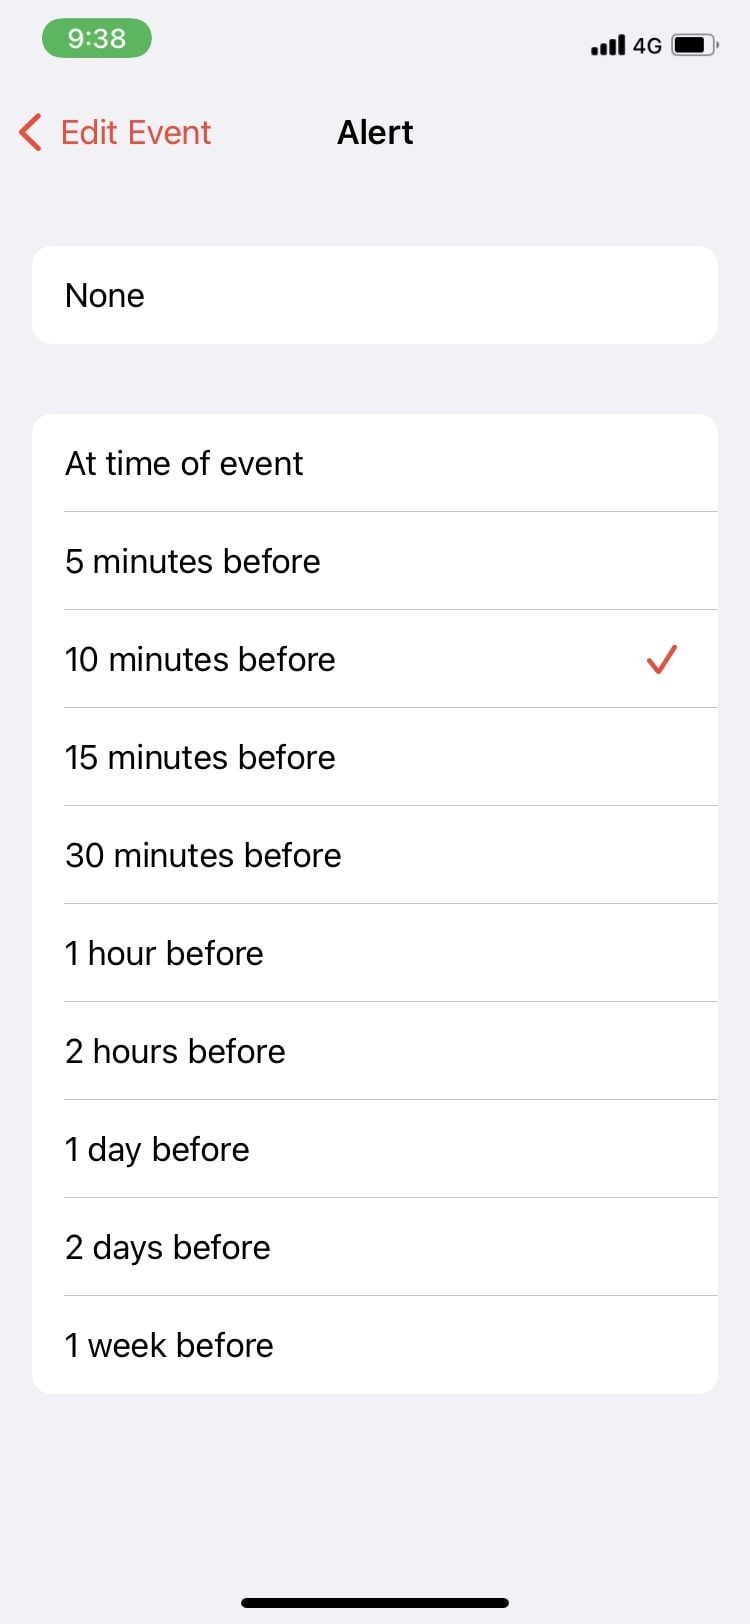
Now that you’ve set up your calendars and added events, make sure you never forget any of them by turning on event alerts. This is the best way to remember an upcoming birthday, anniversary, or other significant event. You can use alerts to remember to buy a present or make necessary preparations beforehand. Here’s how they works:
- Tap on an event and press Edit.
- Select Alert.
- You will find a range of different timings from A week before to At time of event. Take your pick.
- If you want another alert, tap Second Alert right underneath and select another time.
Share Your Calendar With Friends and Family
You’ve got your Calendar app all set up now, so you can share calendars with a family member or friend to let them know what you’re up to. Here’s how to share calendars through iCloud by entering someone’s name or email address:
- Tap Calendars at the bottom of the screen.
- Select the info (i) button next to the calendar you want to share.
- Tap on Add Person.
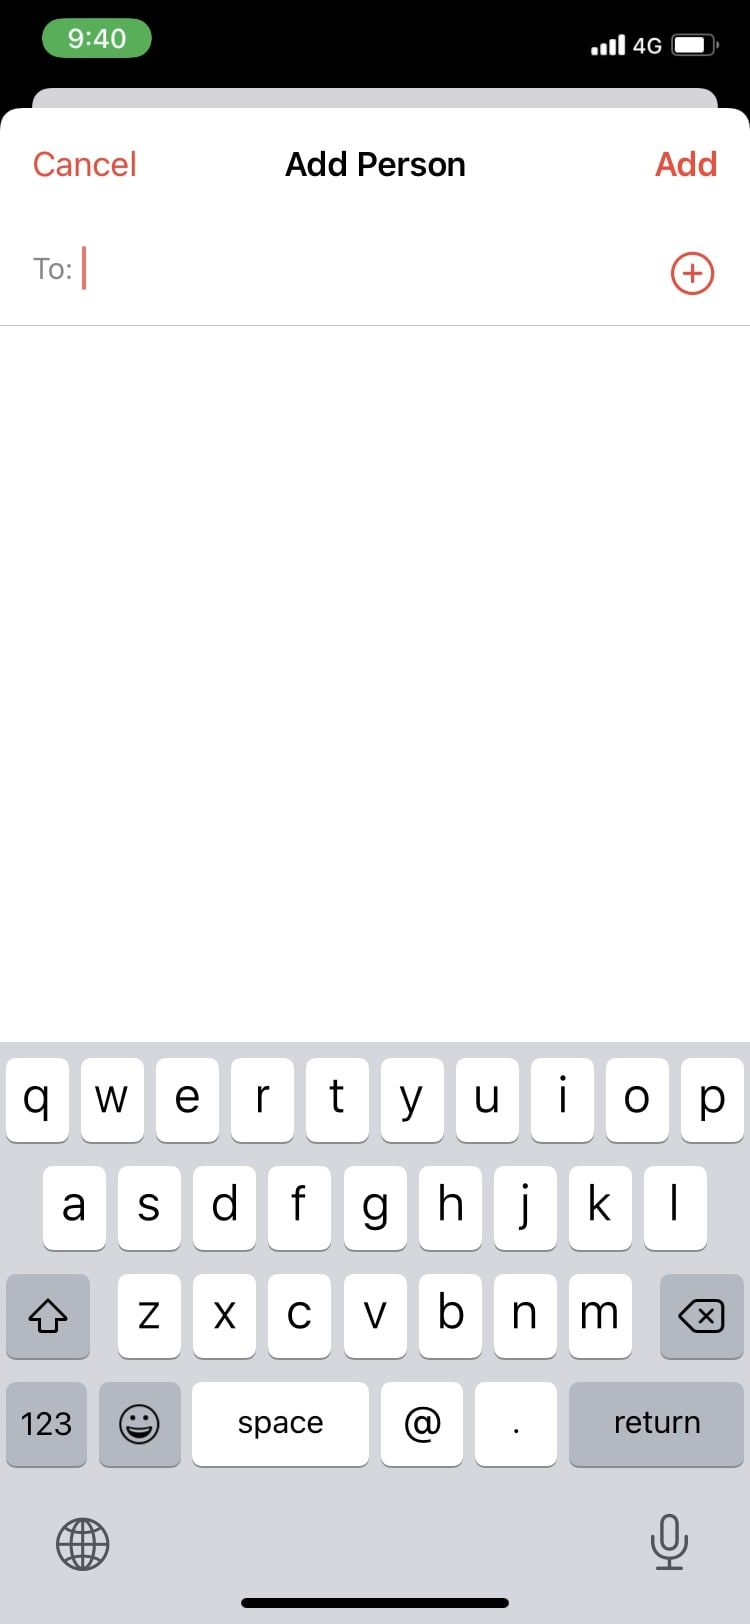
- Type in the contact name or email address or press the plus (+) button to choose a contact.
- Press Add.
The Calendar App Is Probably a Lot Easier to Use Than You Think
The Calendar app is the perfect way to stay organized and ensure you’re on top of things daily. Multiple features make the app extremely efficient and accessible to everyone, making it one of the best calendar apps on the iPhone.

.jpg)
