Microsoft Word has made printing simple and straightforward. But just because something works, doesn't mean you can't make it better.
You could tweak Word's Print settings to make printing easier and better. If printing is something you do often, these tips are a must-read for you.
1. Print Many Copies of Specific Pages
You can tell Word to print many copies of a document in Word by entering a number for the copies. However, this will print the entire document multiple times.
What if you want to print a different number of copies for different pages? This task is still surprisingly easy to do.
Once you have your document ready to print, head to the Print menu. Go to File > Print from the navigation menu or use the shortcut Shift + P.
Under Settings, there's a textbox for selecting pages to print. The trick to printing specific pages multiple times is to insert them multiple times. For instance, if you wish to print a single copy of Page 1, three copies of Page 2, and two copies of Page 3 you should insert: 1, 2, 2, 2, 3, 3.
Note that the order you enter is important as the printer will print the pages in the said order. For instance, if you put 3, 2, 1 in the textbox, your printer will print Page 3 before Page 2 and will print Page 1 last.

Click Print and your printer will print multiple copies of the pages you wanted in the order you wanted.
2. Removing Hyperlinks Before Printing
Microsoft Word tries to differentiate hyperlinks from plain text by underlining them and giving them a different color. But, hyperlinks aren't useable when they're printed on paper and also break the uniformity of the text. So, it's a good practice to remove them before printing the document.
Hyperlinks can be removed the same way they're natively made in Word. Here's how to do it:
- Select the anchor text and right-click it.
-
From the menu, select Remove Hyperlink.


This is straightforward but time-consuming if there are lots of hyperlinks in the document. Use this keyboard shortcut instead.
- Select the text with all the hyperlinks. (If this happens to be the entire document, you can use the shortcut Ctrl + A)
- Once you have the text selected, press Ctrl + Shift + F9. That should kill all of the hyperlinks in your text.
3. Print Comments With the Document
Comments make it easy to review, revise, and collaborate on each other's work. Word can also print these comments alongside the main text.
You can read our article on how to use comments in Microsoft Word if you want to utilize this tool more efficiently. Comments are considered markup and in order to have them printed, you've to check one specific box before you begin printing.
- Head to the Print menu (Ctrl + P).
- Select the first option in the Settings section. (Should say Print All Pages if you haven't changed it.)
-
From the dropdown, check the Print Markup option. You can immediately see the changes in Print Preview.
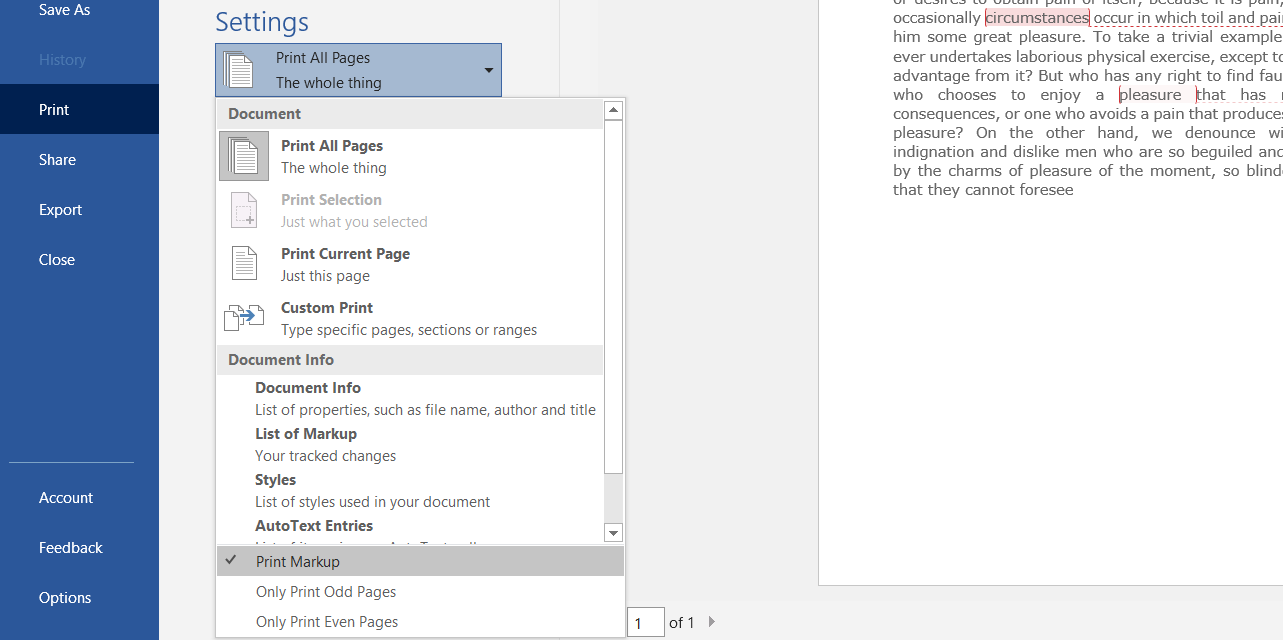
- Once you're ready, click Print.

See an example of a document printed with Print Markup enabled.

4. Set Up Printing Shortcuts
Shortcuts are made to make life easier and that applies to printing in Microsoft Word. But Microsoft Word has a limited set of keyboard shortcuts for printing with Ctrl + P (also Ctrl + Shift + F12) as the main one for the Print menu.
You can make your own time-saving keyboard shortcuts with Macros and then assign shortcuts to them. Macros are groups of commands that allow you to automate a frequently used task.
If you don't know how to use macros or need to refresh your memory, read our guide on how to use macros in Word.
Creating a Macro for Printing
Let's create a macro that prints two copies of the current page of the document. So in practice, if you run this macro when you're on page 5 of a 20-page document, it's going to print two instances of page 5.
-
Go to the Developer tab and select Record Macro. This will open the Record Macro window.
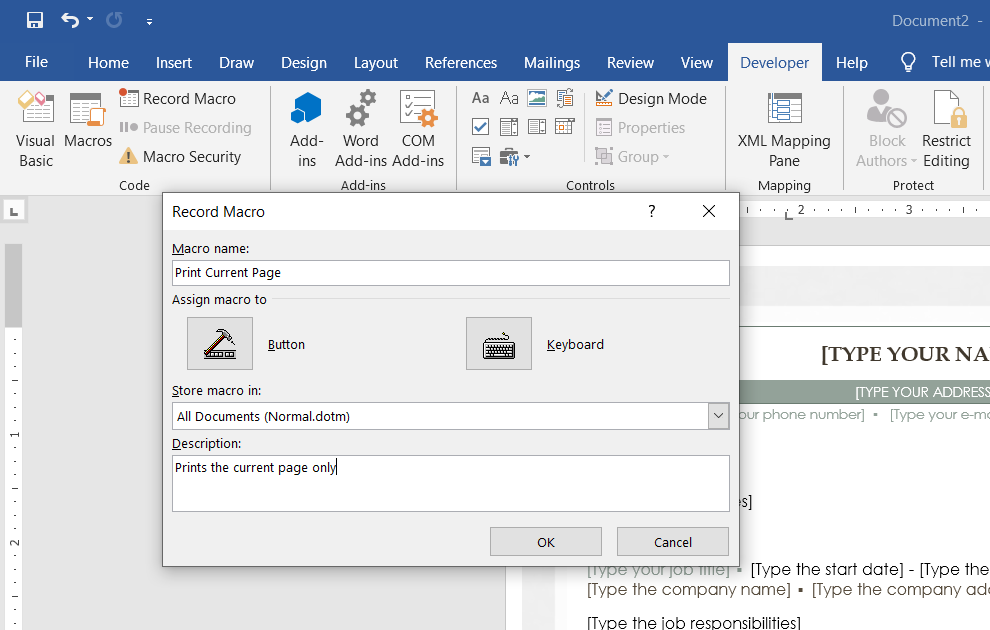
- In the dialog, enter a name and description for your macro. Leave the Store macro in setting on All Documents so that you can use this macro in all other documents.
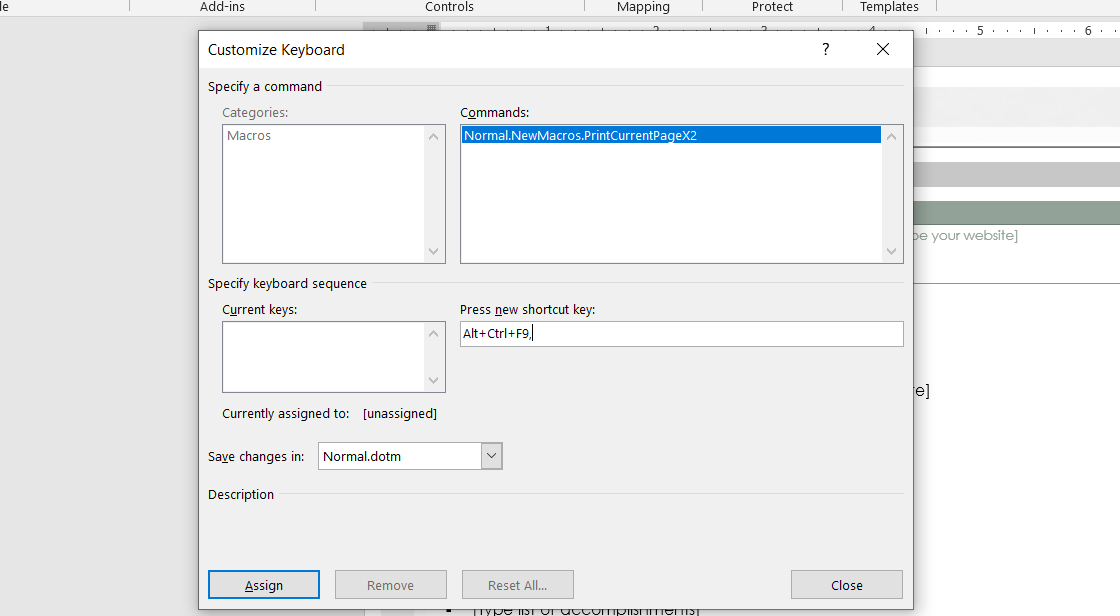
- Next, in the Assign macro to section, click on Keyboard to set a keyboard shortcut. This will open the Customize Keyboard window.
- In the Customize Keyboard window, click on the text box under the Press new shortcut key. Then, press the shortcut keyboard you want to assign to this macro on your keyboard. Microsoft Word will let you know if the shortcut you entered is already assigned to another task.
-
Click on Assign. You can always change the shortcut later, so don't worry if you're not happy with the shortcut or it clashes with another.
- Click Close. This will immediately start the recording.
- Head to the Print screen and change the number of copies to 2. Then change the setting from Print All Pages to Print Current Page. Click Print.
- In the Developer tab, click Stop Recording.
- Your macro is now recorded and saved.


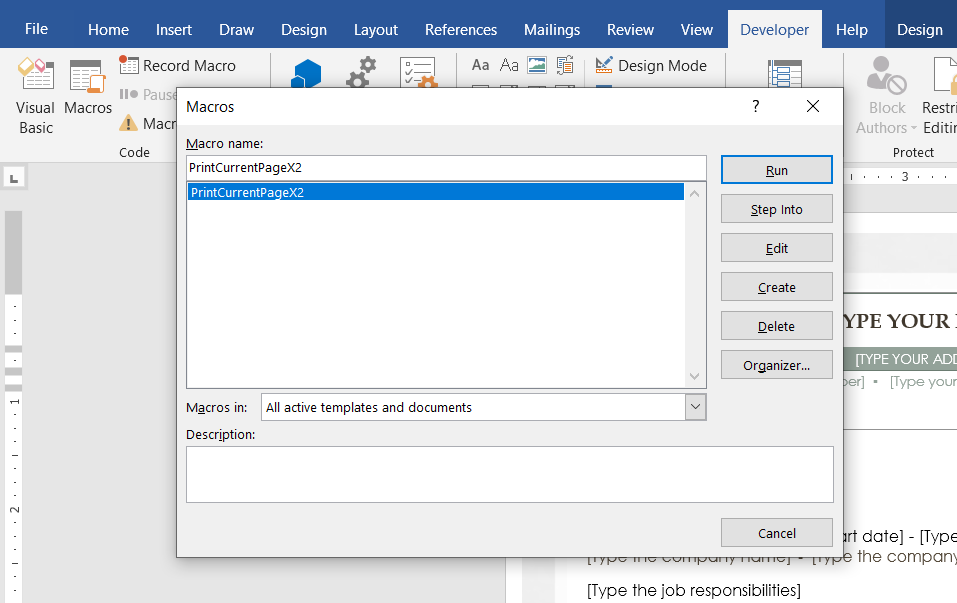
Try out your new macro by pressing the keyboard shortcut. If you haven't assigned a shortcut yet, you can also find the macro by clicking on Macros in the Developer tab. Select it then click on Run. You should get two copies of the current page of your document.
The Code Behind the Print Macro
Now that the macro is all set up, let's take a look at what you recorded.
-
From the Developer tab, click on Macros. This will open up a window containing all of your macros.
-
Select your macro, and then click on Edit. This will open Microsoft Visual Basic for Application, a platform that allows you to edit your macros. You can see the code associated with your macro in the main window.
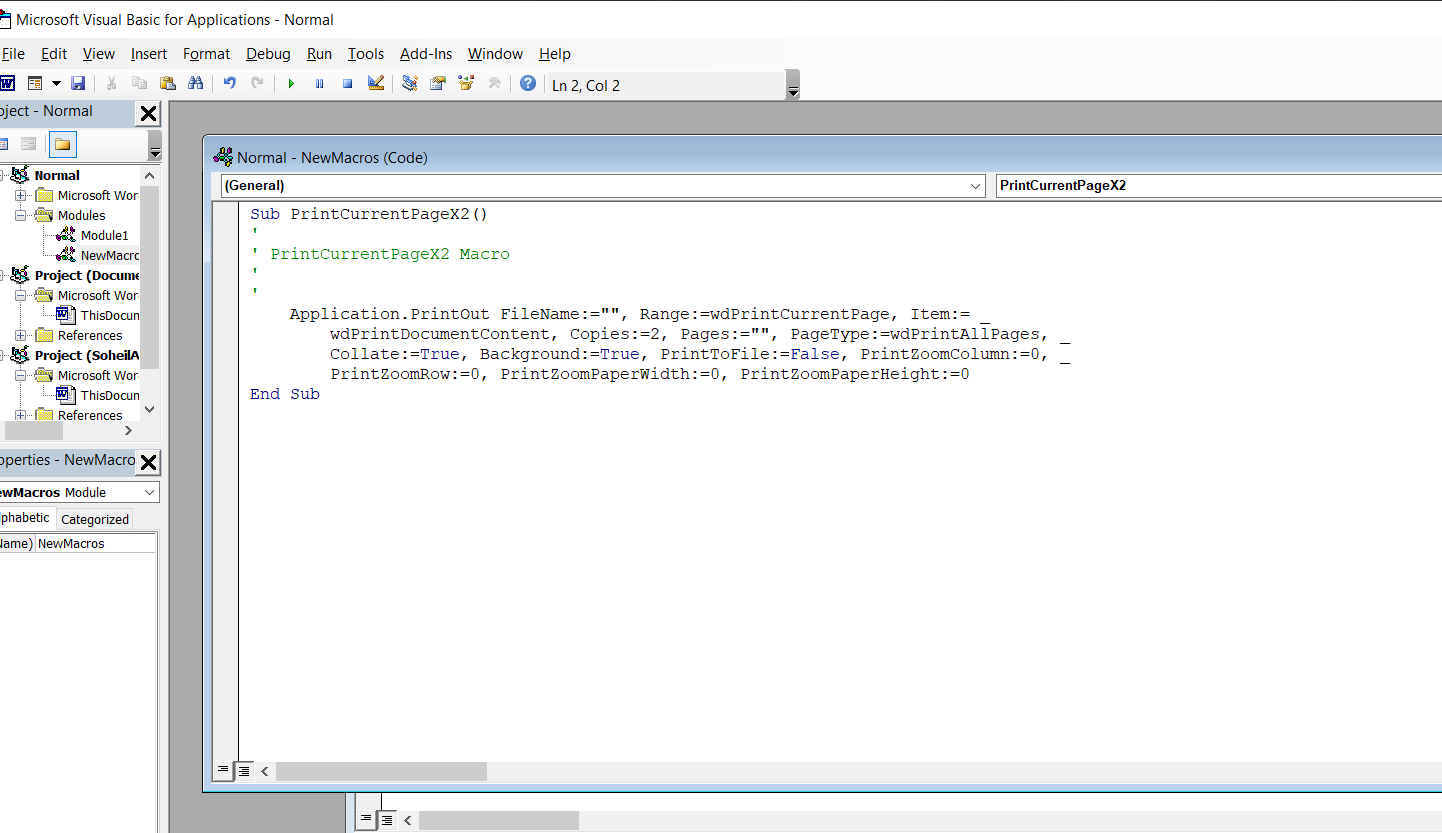


The code should be something like this:
            Sub PrintCurrentPageX2()
'
' PrintCurrentPageX2 Macro
'
'
Application.PrintOut FileName:="", Range:=wdPrintCurrentPage, Item:= _
wdPrintDocumentContent, Copies:=2, Pages:="", PageType:=wdPrintAllPages, _
Collate:=True, Background:=True, PrintToFile:=False, PrintZoomColumn:=0, _
PrintZoomRow:=0, PrintZoomPaperWidth:=0, PrintZoomPaperHeight:=0
End Sub
The main method in this code which prints the document is Application.PrintOut. All of the lines right until before End Sub are parameters for this method. Take a look at the parameters, especially the Range and Copies parameters.
You can see that the range is set on the current page and the number of copies is set to be 2 and that makes this macro do what you wanted it to do.
Create Other Macros
A macro records every action in Word until you stop recording. This allows you to make shortcuts for any action with a macro.
For instance, you can create a macro that prints the comments with the document if there are more than three comments while also shrinking the document to 75% of the actual size at the same time. By attaching a shortcut to this macro, you can tell Word to do these in a couple of key presses.
To create and modify macros, it's better to have an idea of the parameters for the method in your macro. In our case, the PrintOut method was used.
There are over a dozen parameters for the PrintOut method and you can explore them in the Microsoft Documentation. The documentation also covers some useful examples of utilizing the PrintOut method.
You Can Print Like a Pro
You can get better results out of your printer and get them faster than ever. There's still more to printing in Microsoft Word, and they are worth knowing.