Higher-end storage options for Macs can add to the final price tag while purchasing one, which is why many users find it convenient to use an external drive instead. External drives can provide more flexibility in terms of storing and transferring data between different Macs.
Most external storage drives are designed to work with Windows, so it may be necessary to format yours to get it to work properly in macOS. We've covered how to do this below.
How to Format an External Drive in macOS
When you get a new external drive, it may already be formatted specifically for Windows or Mac, meaning it may not work on the other platform. Similarly, in some cases, the external disk may be locked in a read-only format, which means you may be unable to write files to it.
The most direct solution is usually to format the drive and change it to a format that suits you. There are two primary ways to format an external drive in macOS: Disk Utility or Terminal.
Using either of these methods will permanently delete all data on your external disk, which is why it's vital you back up any data you would like to keep.
Formatting an External Drive Using Disk Utility
Disk Utility, if you didn't know, is the disk management center in macOS. You can use it to format your external drive easily. Follow these simple instructions:
- Connect your external drive to your Mac and open Disk Utility by going to Applications > Utilities in Finder.
-
You should see your external disk in the left column. Select it, and the disk details should pop up.
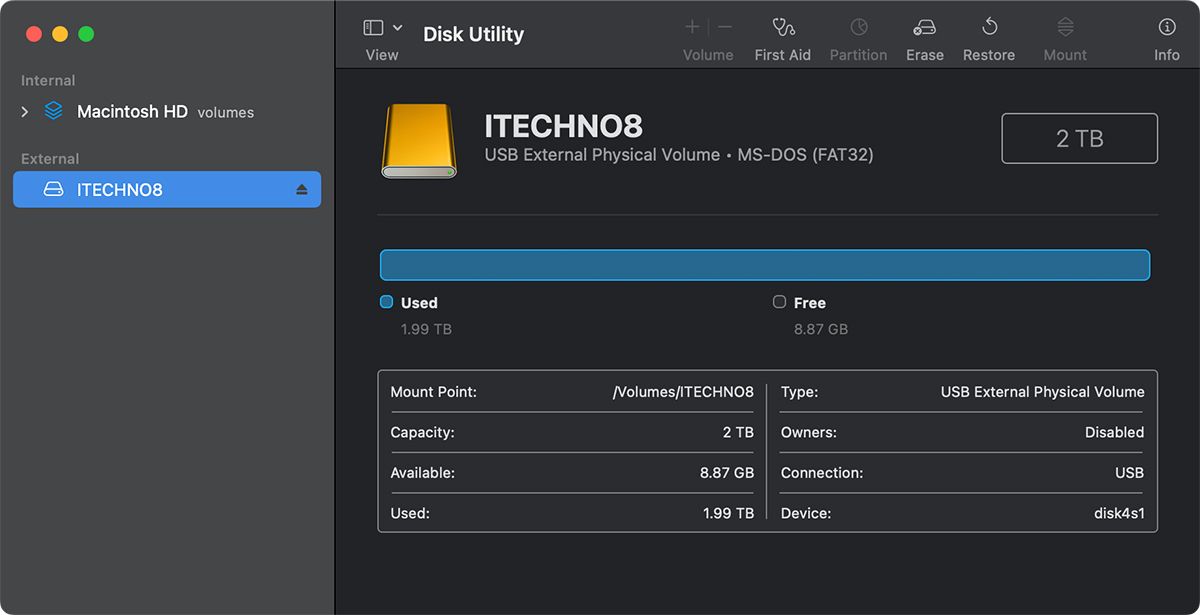
- Select the Erase button from the top. Select an appropriate file format for your drive, depending on your needs.
- Once you're ready, click on Erase. This will format the external disk for you.

You can also partition your disk in Disk Utility to store all your data more efficiently.
Formatting an External Drive Using Terminal
The second method to format your external drive in macOS is using Terminal. This method lets you format your drive directly from Mac's command line. Here's what you need to do:
- Open up Terminal on your Mac from Applications > Utilities in Finder. You can also open Terminal using Spotlight search (Command + Space).
-
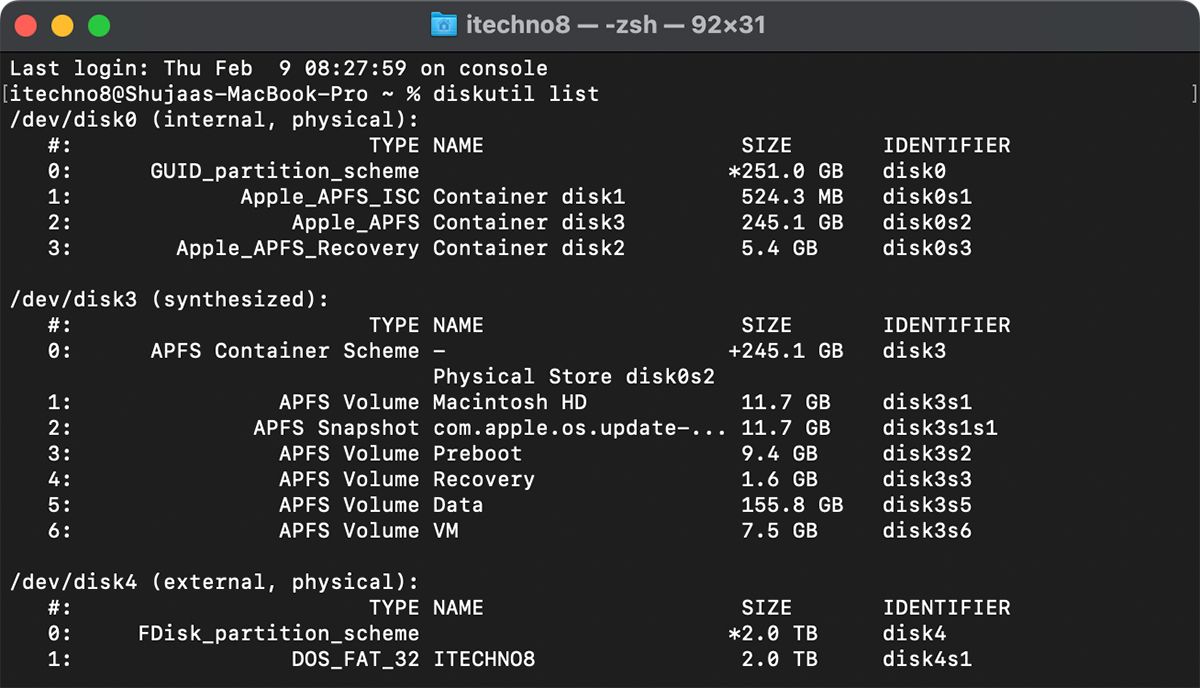
Type in diskutil list to get a list of all the external disks connected to your Mac. Locate and note the identifier of the disk you want to erase. In this case, it's disk4:
-
Now type the command below into Disk Utility to erase your drive.
diskutil eraseDisk JHFS+ CleanDrive /dev/disk1- APFS: APFS
- Mac OS Extended (Journaled): JHFS+
- Mac OS Extended: HFS+
- MS-DOS FAT32: FAT32
- ExFAT: ExFAT
- Once ready, press Enter on your keyboard and type in your password to authorize the command. Then, hit Enter, and your disk should be formatted.

Choose the Right Format for Your Drive
Hopefully, you were able to format your drive using the steps above. Remember to use use the correct format depending on your needs. If you plan to use the drive exclusively with Macs, the Mac OS Extended format might suit you better.
However, if you wish to use your external disk with both Windows and macOS, ExFAT is the way to go. You could also use FAT32, but it has a maximum file size limit of 4GB, so you may need to work around that.