Outdated or malfunctioning drivers are the root cause of many Windows 10 bluescreen errors. The PNP_DETECTED_FATAL_ERROR is no different. Usually caused by malfunctioning Plug and Play (PNP) drivers or devices, it can easily be resolved using the following methods.
So, here's how you fix the PNP_DETECTED_FATAL_ERROR in Windows 10.
1. Update or Roll Back Drivers
One of the easiest ways to resolve a plethora of blue screen errors is to ensure that your computer has the latest drivers installed.
However, if Windows 10 update your drivers recently and the error appeared right after, it's best to revert to the old version. Drivers can easily be managed using Windows in-built Device Manager.
How to Update a Driver
- Press Windows Key + R to launch the Run application. Type in devmgmt.msc in the text box and hit Enter to open the Device Manager.
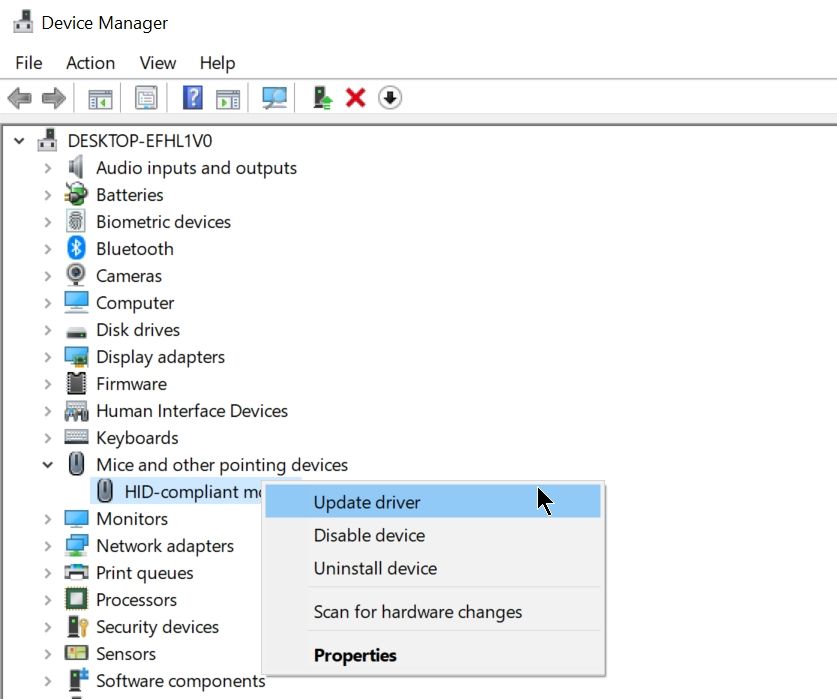
- In the Device Manager, navigate to the desired device and expand the menu. Right-click on the driver and select Update Driver. Since we're dealing with the PNP_DETECTED_FATAL_ERROR, it's best to update drivers related to devices such as keyboards, mice, headphones, etc.
- In the window that opens, click on Search automatically for updated driver software.
- Windows will automatically download and install the latest drivers.
- Reboot your computer.
How to Roll Back Drivers
- Press Windows Key + R and type devmgmt.msc in the text box, then hit Enter.
- In the Device Manager window, look for the required device and expand the menu.
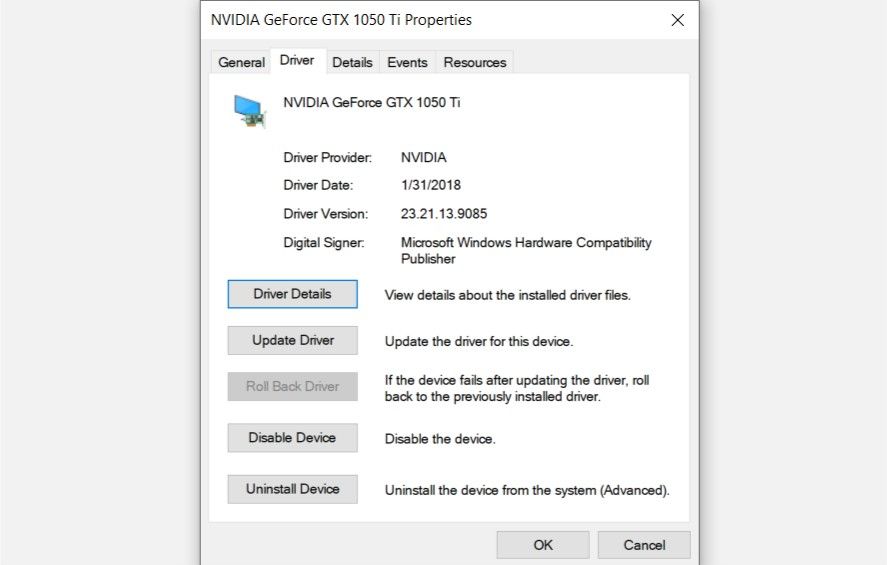
- Right-click on the desired driver and select Properties.
- Under the Driver tab, click on Roll Back Driver.
- After the driver has been installed, reboot your computer.
2. Boot the Computer in Safe Mode
Many a time, the PNP_DETECTED_FATAL_ERROR blue screen may be caused by problematic third-party software or drivers. To diagnose this issue, it's necessary to boot your computer into safe mode.
When in safe mode, Windows boots with only essential services and applications running. All third-party software and drivers will be disabled. Alternatively, users can take a look at some of the best free Windows 10 repair tools to skip going through this hassle.
How to Boot in Safe Mode
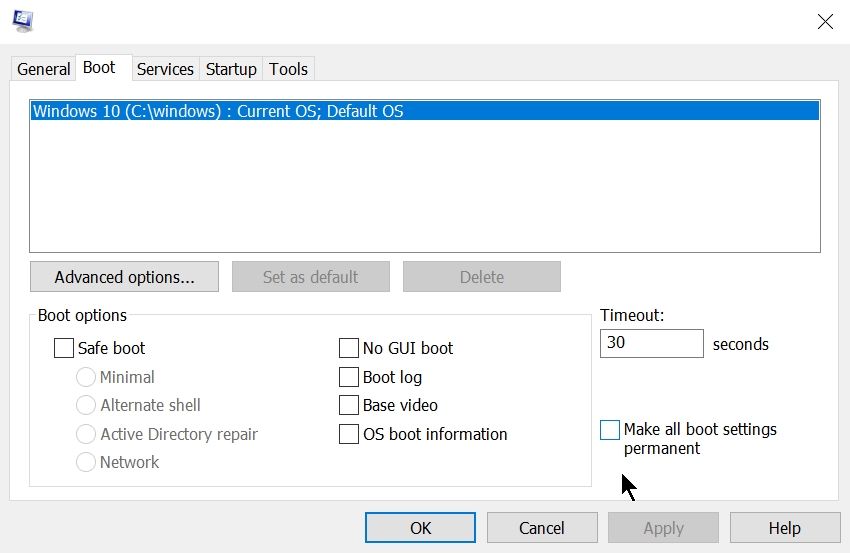
- In the Start menu search bar, type sysconfig and click on System Configuration in the search results.
- Under the Boot tab, check the Safe boot option and also select the Network sub-option under it.
- Click OK and reboot your computer.
After booting into safe mode, wait for a few minutes to see if the error pops up again. If it doesn't, then it's likely being caused by recently installed software or a driver. If you recently installed any new drivers, now is the time to uninstall them using the Device Manager.
How to Uninstall a Driver
- Press Windows Key + R and type devmgmt.msc in the Run application. Press Enter.
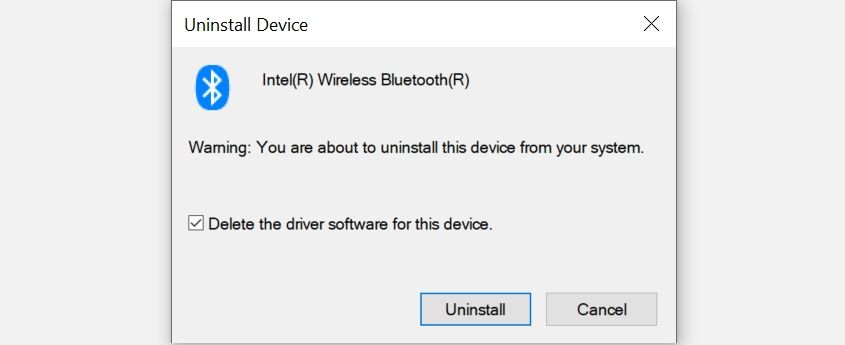
- In the Device Manager, navigate to the device type you (or Windows 10) recently installed a driver for, and expand the menu. Right-click on the specific device and click on Uninstall Device.
- On the Uninstall Device prompt, check the Delete the driver software for this device box.
- Click on OK and wait for Windows to uninstall the driver.
- Reboot your computer.
3. Use Startup Repair
For users unable to reach the lock screen, Startup Repair is the best option. To launch Startup Repair, follow these steps:
- Start your computer by pressing the power button. When the motherboard manufacturer's logo shows up, hold the power button until your computer switches off.
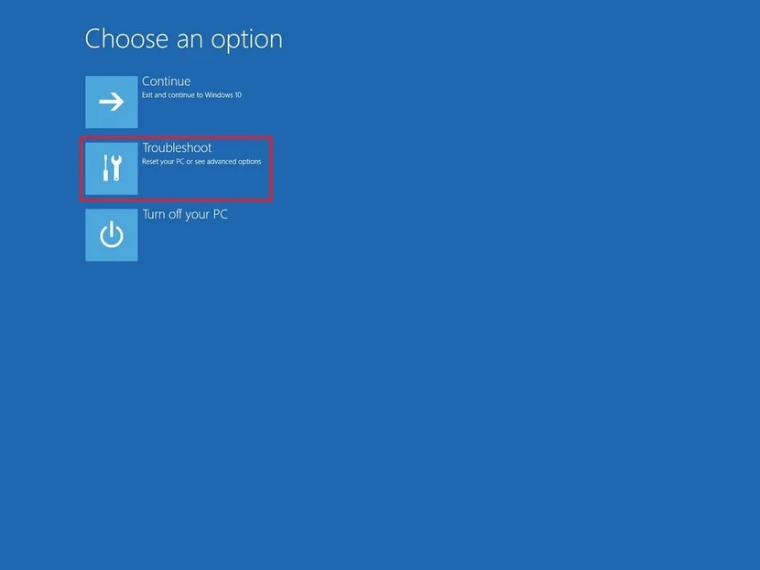
- Repeat step one at least three times until you boot into Windows Recovery Environment. It'll be a blue screen with Choose an option displayed at the top.
- From the options given on the screen, click on Troubleshoot.
- On the next screen, click on Advanced options and then click on Startup Repair.
- Wait for Windows to detect and resolve the issue automatically.
After Startup Repair, you should be able to boot into your computer and try out other fixes if the blue screen pops up again.
4. Use SFC and DISM to Check for Corrupt System Files
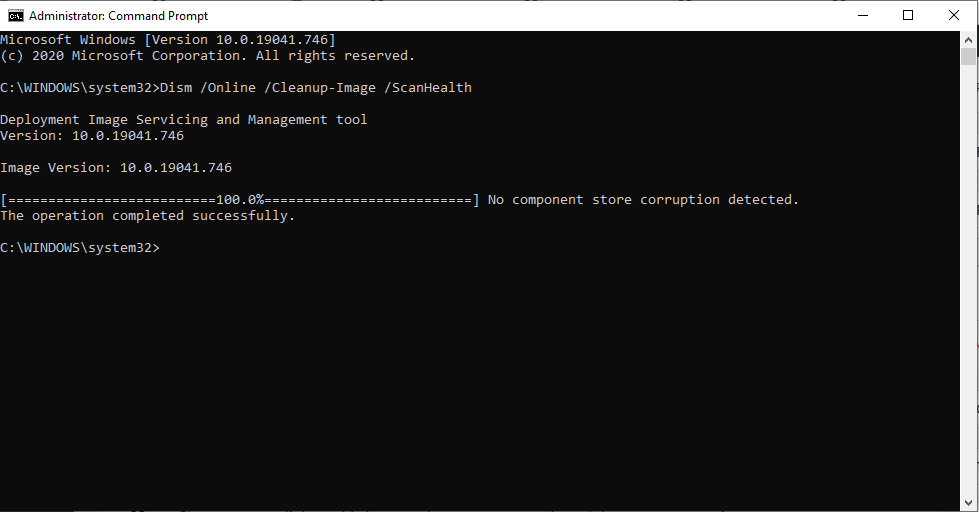
DISM stands for Deployment Image Servicing and Management, and it helps detect and fix problems in the system image. It is essential to use this utility whenever users encounter a blue screen error. Here's how to use the DISM command:
- In the Start menu search bar, type cmd, and from the search results, right-click on Command Prompt > Run as administrator.
- In the Command Prompt console, type DISM /Online /Cleanup-image /Scanhealth and press Enter.
- Wait for the process to be over, then type DISM /Online /Cleanup-image /Restorehealth and hit Enter.
- Windows will repair any problems with the system image.
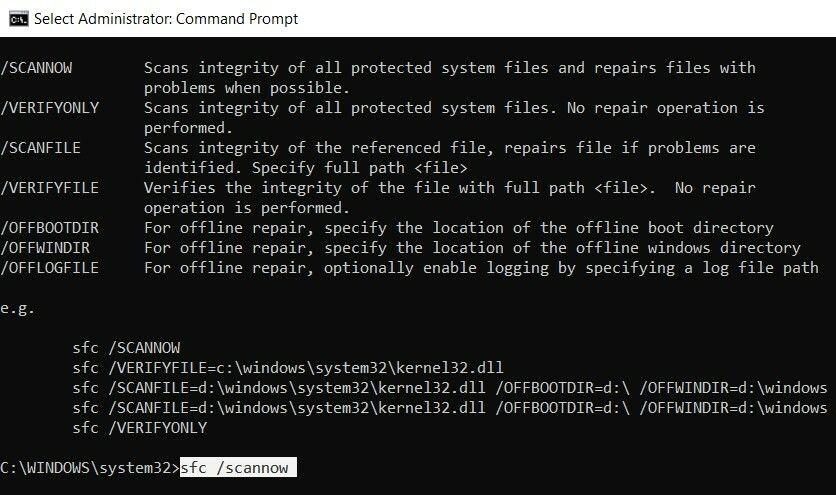
SFC is an in-built utility in Windows that checks and repairs corrupt or missing system files. It can be used to tackle a variety of common errors and BSODs in Windows. On top of that, it's easy to use:
- In the Start menu search bar, type cmd and right-click on Command Prompt > Run as administrator from the search results.
- In the console, type sfc /scannow and hit Enter.
- Wait for the procedure to be over, and close Command Prompt.
- Reboot the computer.
5. Run System Restore
Windows System Restore is a handy application that allows users to restore their computer to an earlier state when things were running smoothly. Windows automatically creates a restore point weekly and also when a new program or driver is installed. But you can create a restore point manually as well:
- In the Start menu search bar, type System Restore.
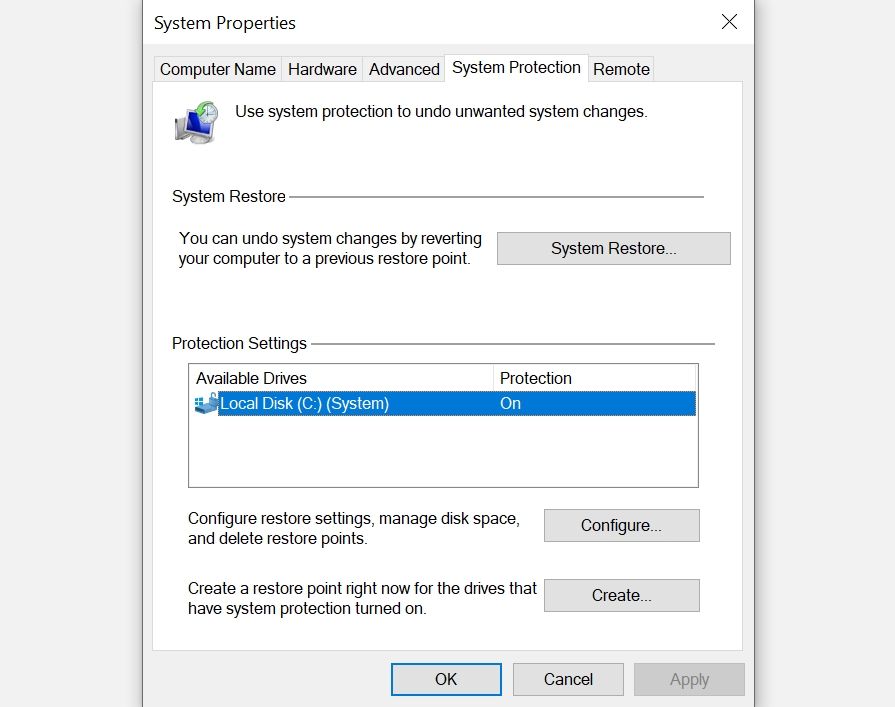
- In the search results, click on Create a system restore point.
- On the next Window, click on Create. If the option is greyed out, click on a disk partition under Protection Settings > Configure > Turn on system protection. Click on OK.
- Enter a name for the restore point and click on OK.
If the system restore utility is not working properly, then users can try these fixes to resolve the problem/
The Easy Way to Fix the PNP_DETECTED_FATAL_ERROR
Even novice users can easily fix a seemingly intimidating blue screen like the PNP_DETECTED_FATAL_ERROR by following the steps mentioned above.
It's always a good idea to ensure that your computer has the latest drivers installed. Users are also advised to create a system restore point before attempting highly technical fixes.


