When transferring files between a PC and an external hard drive, you may encounter a message that reads "error 0x800701B1: A device that does not exist was specified".
There are several reasons why this error could occur, including a USB port that lacks the required transfer rate, a power supply that isn't keeping up with power needs, disk corruption, or problems with the operating system.
If you're encountering the same error, we have listed several fixes below that can help you resolve it.
Before We Get Started…
Here are some preliminary checks you should make before beginning the troubleshooting process:
- The hard drive's connection isn't loose, and the connecting cable and port aren't damaged.
- The drive you're copying the data to has enough free space.
- The amount of data being relocated isn't too large. If you are moving large amounts of data, cut it up and relocate small pieces.
- Be sure the laptop's battery isn't too low.
- Ensure the files you're moving aren't encrypted and the hard drive doesn't have security permission restrictions.
- Your computer doesn't have any other external drives connected simultaneously.
- There isn't another data relocation process co-occurring to the same or different drives.
If the above checks were not helpful, try implementing the following fixes to find the culprit.
1. Rule Out Hardware Issues
The first step in troubleshooting the error is to rule out hardware problems. Connecting your external hard drive with another device, if you have one, is the easiest way to do so. Once you do that, attempt to transfer the same amount and type of data to or from the drive and see if you encounter the same problem.
If the error also appears on the other device, then your external hard drive is the problem, not your operating system. If it works on the other device, try applying the fixes below.
2. Connect Your External Hard Drive to a USB 3.0 Port
Compared with USB 2.0 ports, USB 3.0 ports provide more power and transfer speed. If you encounter errors when transferring files from or to a hard drive connected with a USB 2.0 port, then unplug it and connect it to a USB 3.0 port on your computer.
Doing so can eliminate the possibility of low transfer speeds or insufficient power supply from the USB port resulting in the error. If you already have the drive connected to a USB 3.0 port, switch the USB port and see if it helps. After changing the port, start transferring files again. Have the same problem? Let's move on to the next step.
3. Update the Disk Drive's Driver
Several unforeseen operating system issues can be traced to outdated system drivers. Therefore, make sure that's not the case here. You can do that by updating the disk drive's drivers. To do so, follow the below steps:
- Right-click the Windows Start button and select Device Manager.
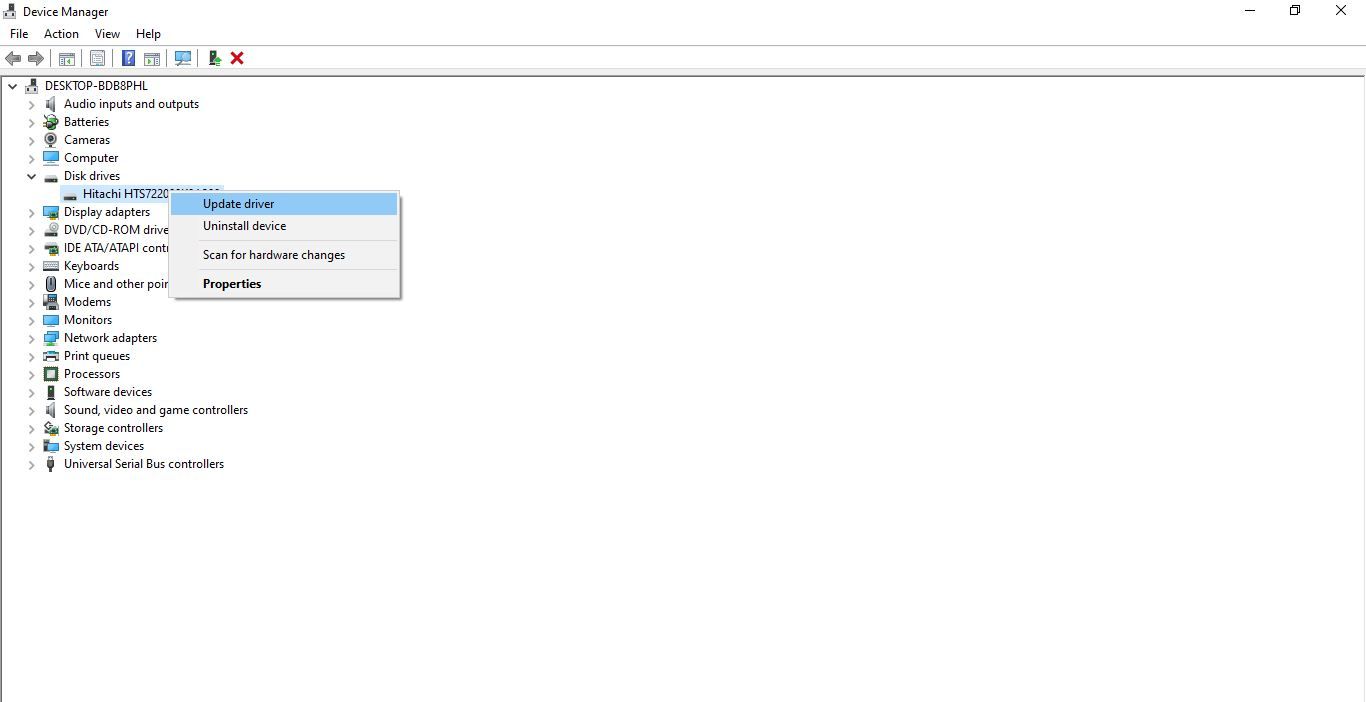
- Expand the Disk drives category.
-
To update the relevant drive's drivers, right-click the driver's name and select Update driver.

After that, follow the on-screen instructions to update your system drivers. Try the following fix if updating drivers doesn't help.
4. Rescan the Disks in Disk Management
Windows users have the option to rescan disks in Disk Management if they are not accessible despite being connected. Although less likely, rescanning your disks may also resolve the 0x800701B1 error. Follow the steps below to run the rescan:
- Right-click the Windows Start button and select Disk Management.
-
Click the Actions tab and select Rescan Disks.
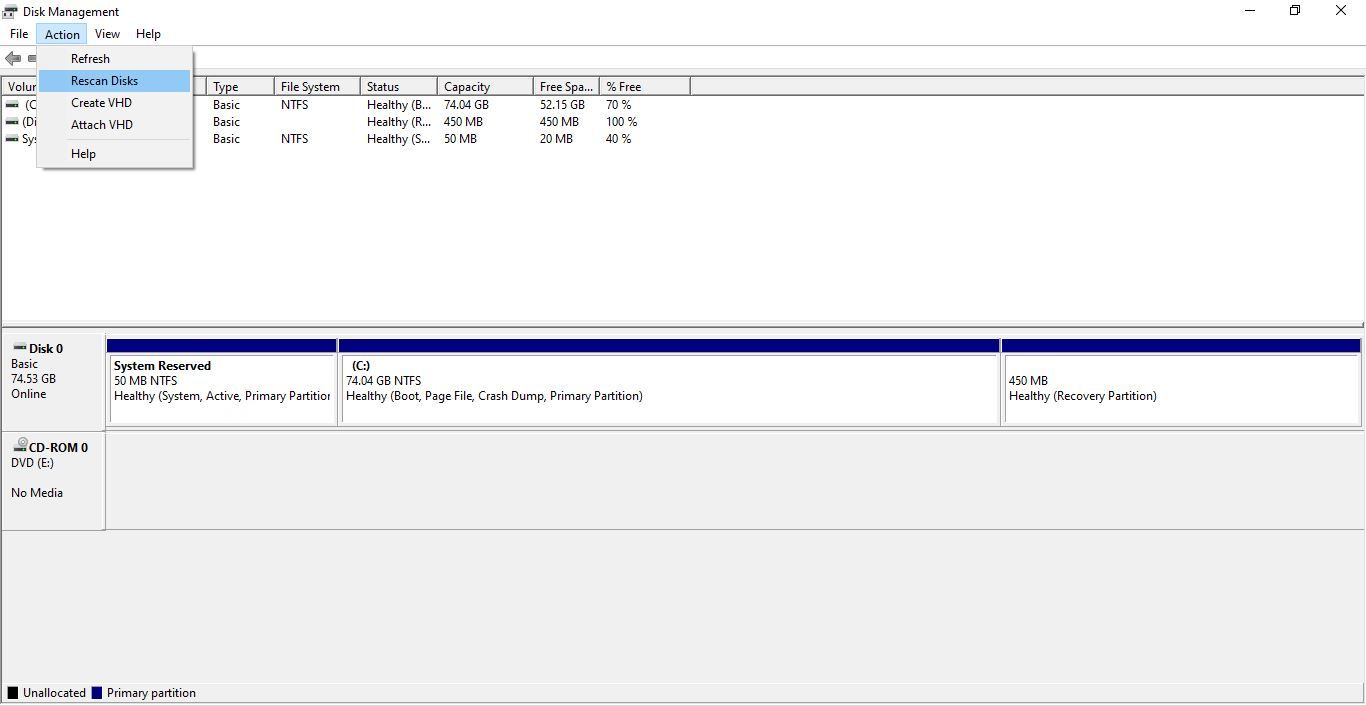

Rescanning process will only take a few seconds. Once the process is complete, transfer the data again to see if the issue has been resolved.
5. Perform a Disk Scan on the Source and Destination Drives
The disk scan utility on Windows helps users identify file system errors on their drives and helps them fix issues. If none of the fixes you have tried have worked, run the disk scan on both the source and destination drives.
Follow the below steps to run the disk scan:
- From the taskbar, open File Explorer.
- Click on This PC.
- Right-click on the external drive and select Properties.
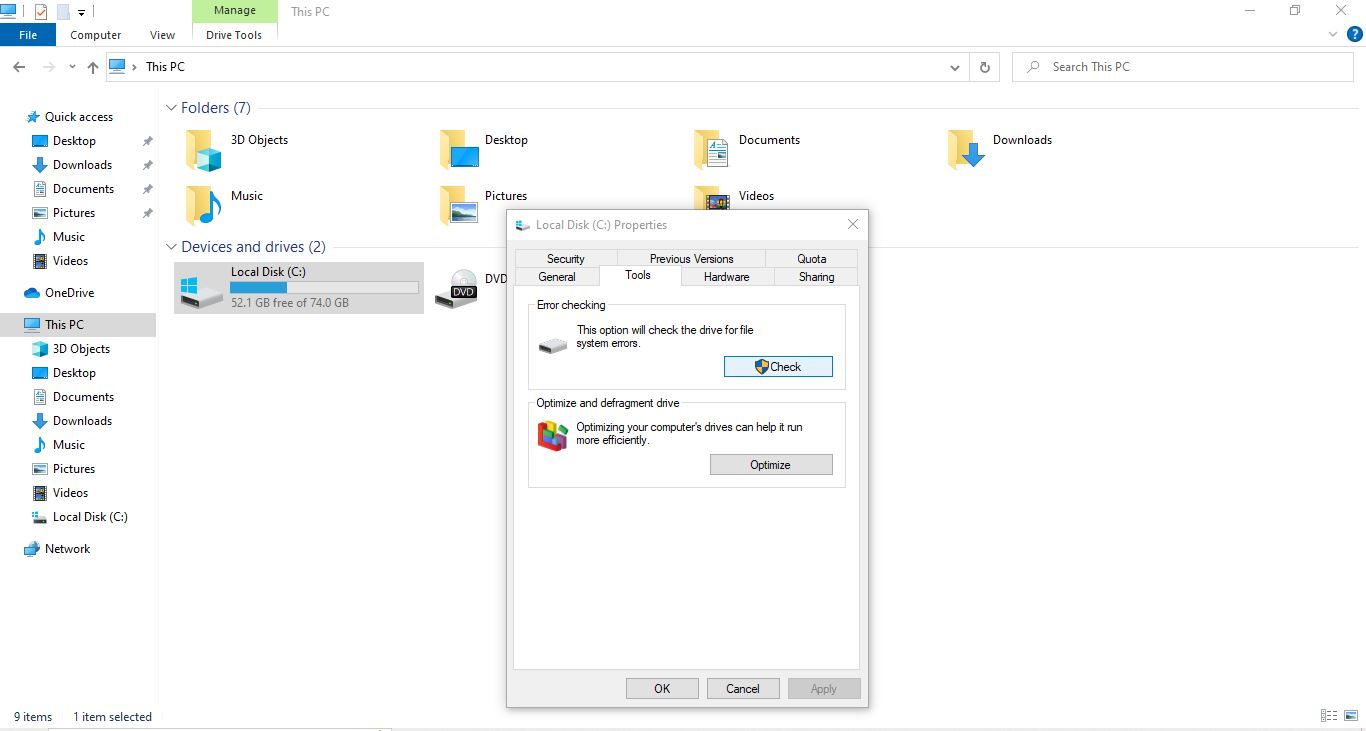
- Navigate to the Tools tab in the Properties window.
-
In the Error checking section, click the Check button.

Windows will notify you whether you need to scan the disk. Regardless of what it says, run the scan on an external drive and repeat the same procedure for the destination drive. If the scan doesn't resolve the problem, move on to the next fix.
6. Check Your Hard Drive for Corruption
The corruption of your hard drive could also cause your operating system to present you with errors. You'll likely encounter the error 0x800701B1 while attempting to relocate corrupt data files from your external drive. Therefore, you should scan your hard drive for data corruption to rule out this possibility.
The disk check scan will surely help you with that, but you should use third-party data corruption tools to hunt corrupt files with better accuracy. A third-party tool ensures that a basic disk check scan hasn't failed to repair the damage. Unless the drive is corrupt, ensure the security permissions aren't restricting file relocation.
7. Ensure Security Permissions Aren't to Blame
If the drive isn't corrupt, but you're doubtful that the device you're trying to relocate data to might be encrypted or its security permissions prevent your computer from accessing it, then you may have to adjust the drive's security permissions to take exclusive ownership. To do that, follow the below steps:
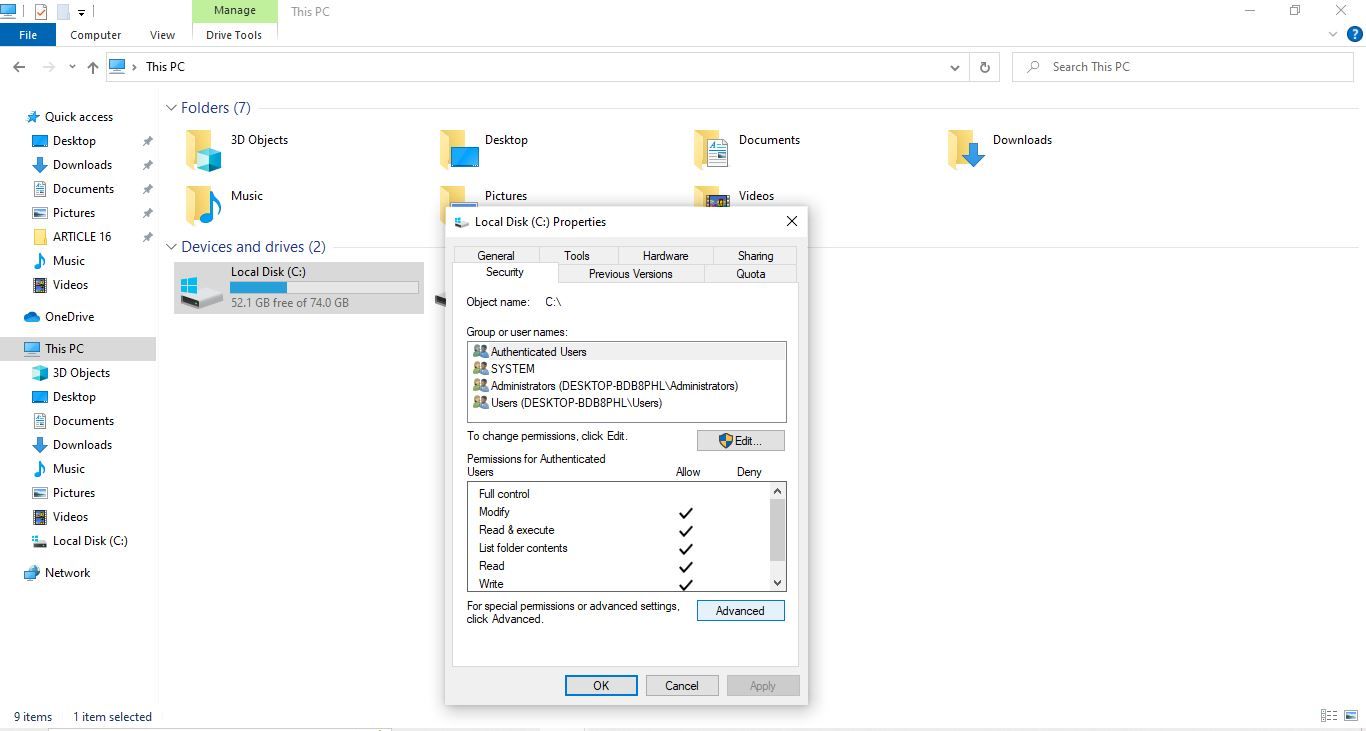
- Right-click the disk drive and select Properties.
- Navigate to the Security tab from the Properties window.
-
In the lower-right corner, click on the Advanced button.
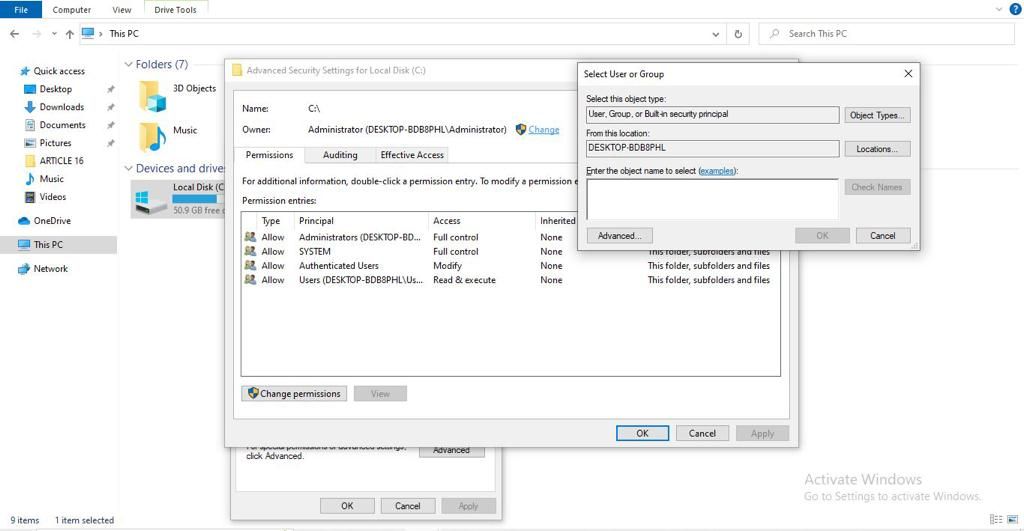
- Right next to the Owner, click on the Change link.
-
In the Select User or Group window, click the Advanced button.
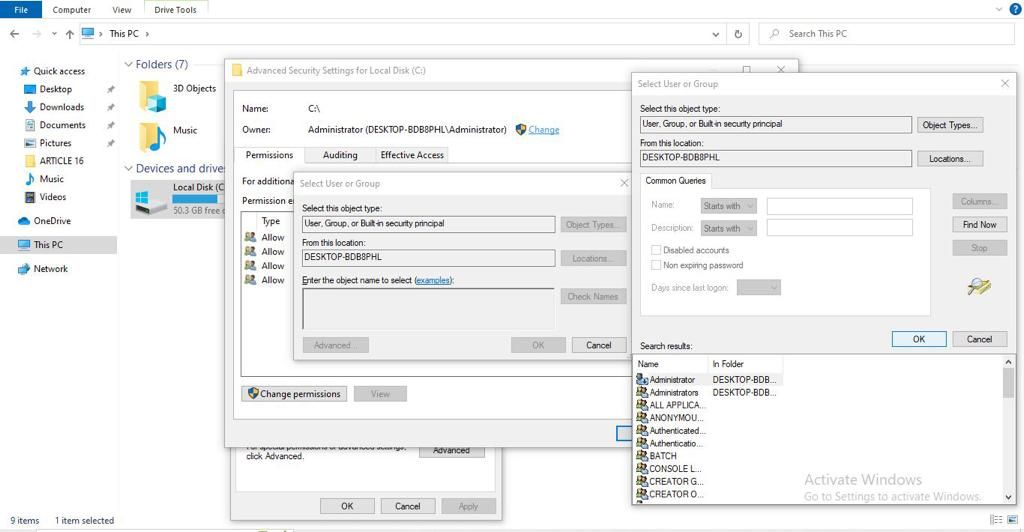
- Click the Find Now button.
-
Once your username appears in the search results, double-click it and click OK.
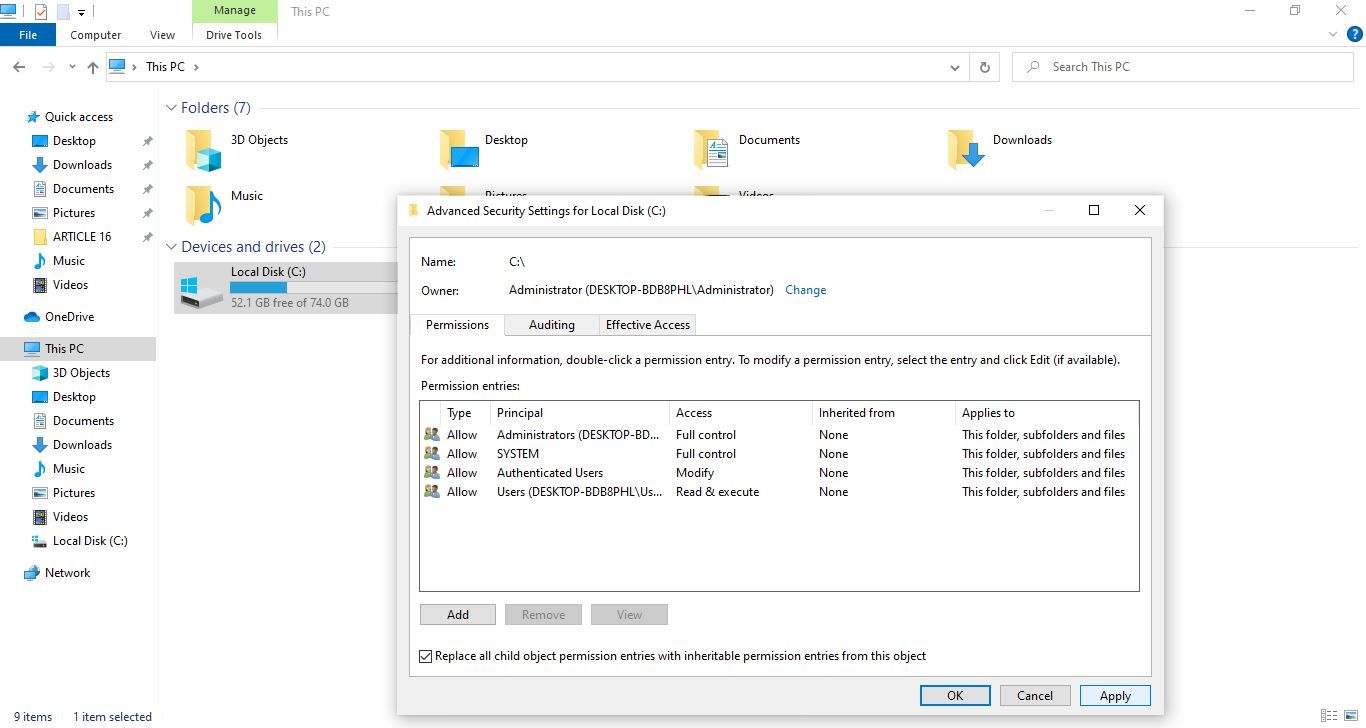
- Check the box before "Replace all child object permission entries with inheritable permission entries from this object."
-
Hit OK after pressing Apply.


Assuming that taking ownership also fails to resolve the issue, your next step should be to ensure that the problem isn't related to limited power availability.
8. Eliminate the Possibility of an Insufficient Power Supply
Unless one of the above fixes has worked, a power issue may prevent the hard drive from functioning effectively. This is more likely to happen if you have half a dozen accessories connected to your computer, and the USB ports they are connected to draw a lot of power, resulting in the disk drive's port not receiving sufficient power.
Rather than measuring the power yourself or getting it checked immediately by a technician, confirm it's an insufficient power supply issue. For that, disconnect all peripherals connected to your computer and see if it makes a difference. Did disconnecting other peripherals fix the problem? Therefore, there must be a problem with the power supply unit.
If the problem is with the power supply, either limit the number of devices connected to the computer or replace it. When you buy a new PSU, ensure it has a higher capacity than the one you currently have.
Fix the Error 0x800701B1 on Windows
By implementing the fixes mentioned above, you should be able to get rid of the error 0x800701B1. So, you can relocate your data without any worries. In case it doesn't work, format it if there are no precious documents on it and connect it again to transfer files.