You’re playing your favorite game on Windows and suddenly bump into the “Application has been blocked from accessing graphics hardware” error. Perhaps you’re encountering the same error while running other software programs on your PC. So, what’s causing this issue and how do you resolve it?
Usually, you’d encounter this error when your device has incompatible display drivers. However, there are several other causes for this issue, and we’ll explore them in detail.
1. Run Your Apps With Administrator Rights
One of the best ways to resolve this issue is to run the problematic app with administrator rights. When you do this, the program will now have access to several features, including the graphics hardware.
To run an app with administrator rights, right-click on the app and select Run as administrator. Otherwise, try the various ways of running Windows apps as an administrator.
2. Customize Graphics Performance Preferences for the Affected App
If this issue is limited to a particular game or app, then the graphics performance preference settings could help. These settings are meant to provide better app performance or extend your PC’s battery life.
So, here’s how you can customize the graphics performance preferences for the problematic app:
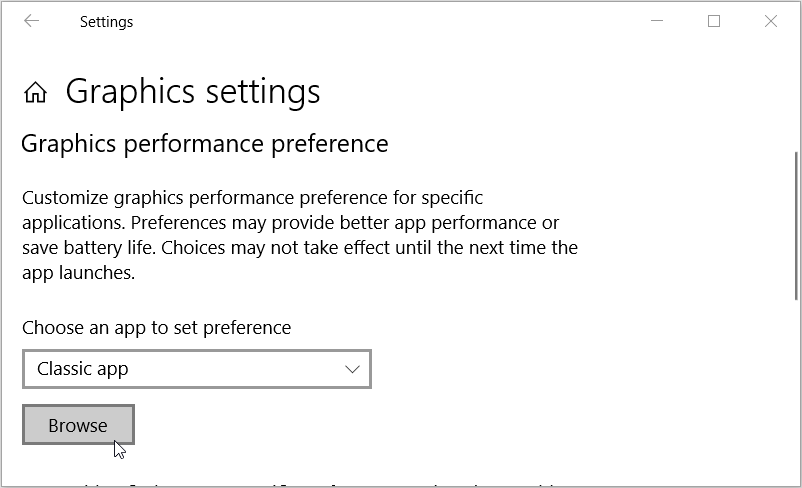
- Navigate to Win Start Menu > PC Settings > System > Display and select Graphics settings.
- Next, search for the app by pressing the Browse button under the Choose an app to set preference option.
Select the app and then press the Add button. Follow the on-screen instructions to finalize the process.
3. Configure the App’s Compatibility Mode Settings
This error is likely to pop up if the app has the wrong compatibility mode settings. In this case, you could either configure the compatibility settings or run the compatibility troubleshooter.
So, let’s first take a look at how you can configure the compatibility mode settings:
- Click the Windows search bar and type the name of the target program.
- Right-click on the program and select Open target folder.
- Next, right-click on the app’s executable (.exe) file and click Properties.
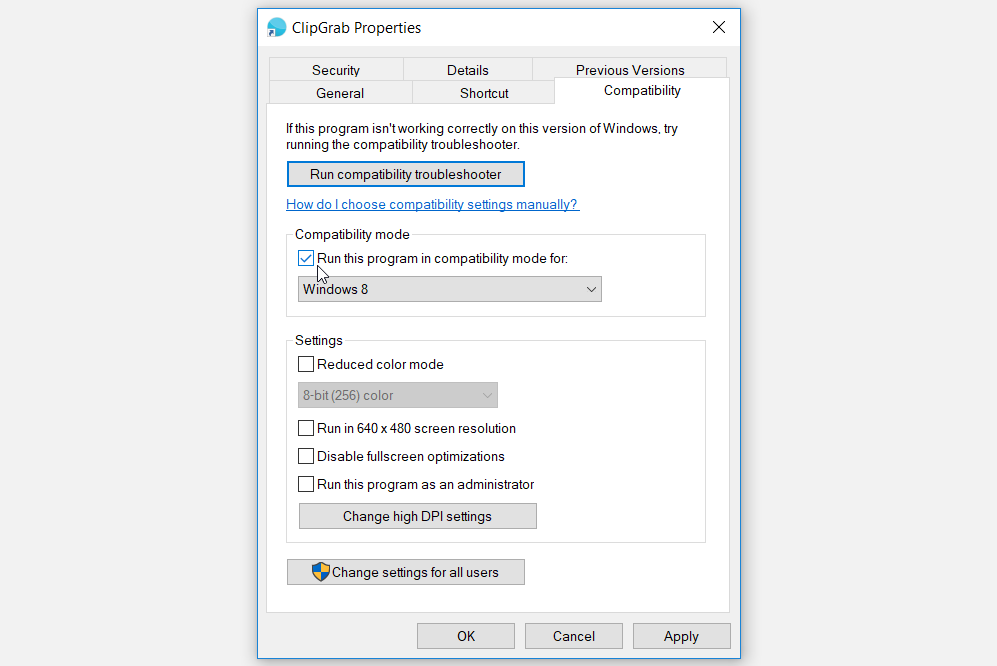
- Navigate to the Compatibility tab.
- Check the Run this program in compatibility mode for box.
Next, click the drop-down menu below this option and select a relevant option. Click Apply and then click OK when you finish.
If the issue persists, you can now try running the compatibility troubleshooter. Here’s how:
- Navigate to the Compatibility tab as per the previous steps.
- Click the Run the compatibility troubleshooter button.
- Select Troubleshoot program in the next window.
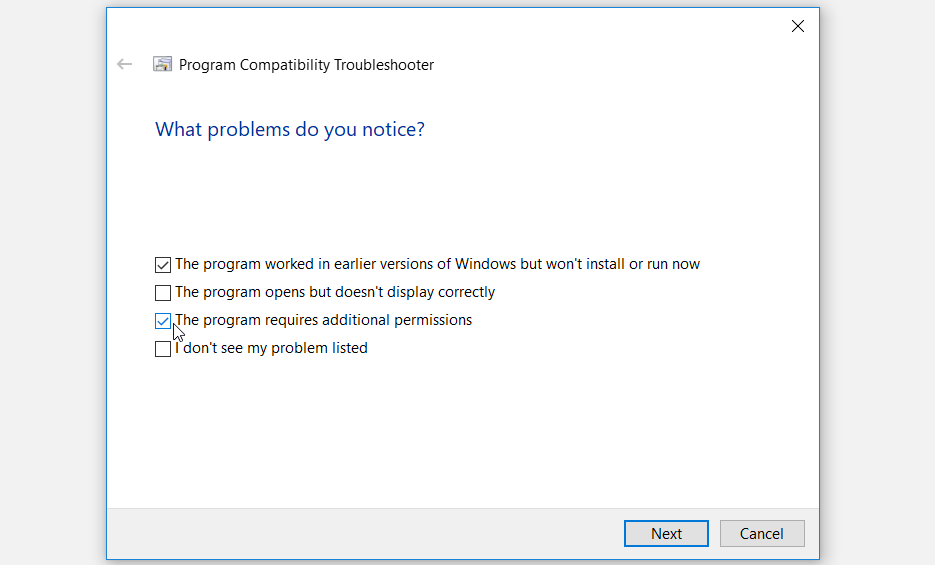
- Check the relevant boxes based on the issue you’re facing. Click Next when you finish.
Follow the on-screen instructions to finalize the process.
4. Update or Reinstall the Display Drivers
You’re likely to bump into this issue if your device has incompatible or corrupted display drivers. So, you could tackle the problem by either updating or reinstalling these drivers.
Let’s see how you can update the display drivers:
- Press Win + X and select Device Manager from the options.
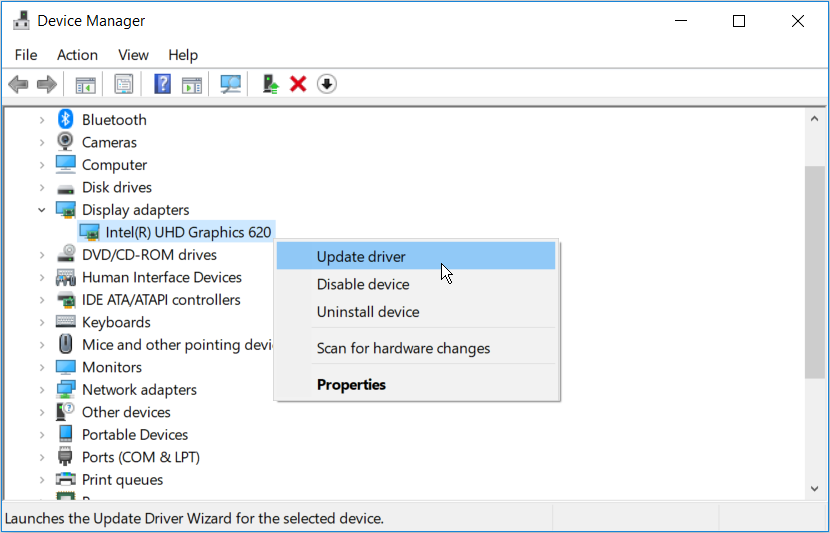
- Double-click the Display adapters option to expand it.
- Right-click your PC’s display adapter and select Update driver.
Select Search automatically for updated driver software in the next window. Finally, follow the on-screen instructions to complete the process.
In case the issue persists, reinstall the Display adapters by following these steps:
- Open the Device Manager and the Display adapters as per the previous steps.
- Right-click the Display adapter and select Uninstall device.
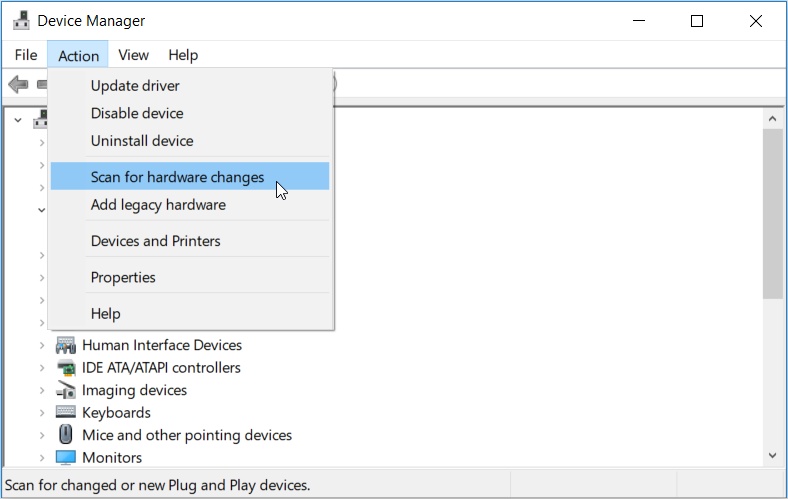
- Finally, navigate to the Action tab and select Scan for hardware changes.
When the scan is complete, restart your PC to save these changes.
5. Run the Windows Hardware and Devices Troubleshooter
Windows has a couple of troubleshooting tools that can help you resolve system-related issues. In this case, using the Hardware and Devices troubleshooter could help.
So, here’s how you can run the Hardware and Devices troubleshooter:
- Navigate to Win Start Menu > PC Settings > Update & Security and select Troubleshoot on the left-hand side pane.
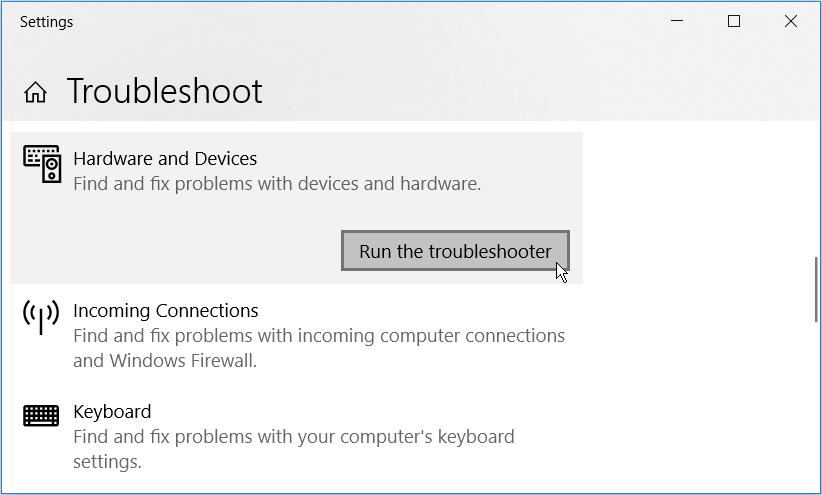
- Scroll down on the right-hand side pane, click the Hardware and Devices option, and click Run the troubleshooter. Follow the on-screen instructions to complete the process.
6. Use a System Restore Point
If this error started popping up recently, then a System Restore point could help. In this case, the System Restore will return your PC to its previous state and get rid of any issues.
So, if you’ve created a restore point on your PC, here’s how you can use it to tackle this error:
- Type Create a Restore Point in the Windows search bar and select the Best match.
- Navigate to the System Protection tab.
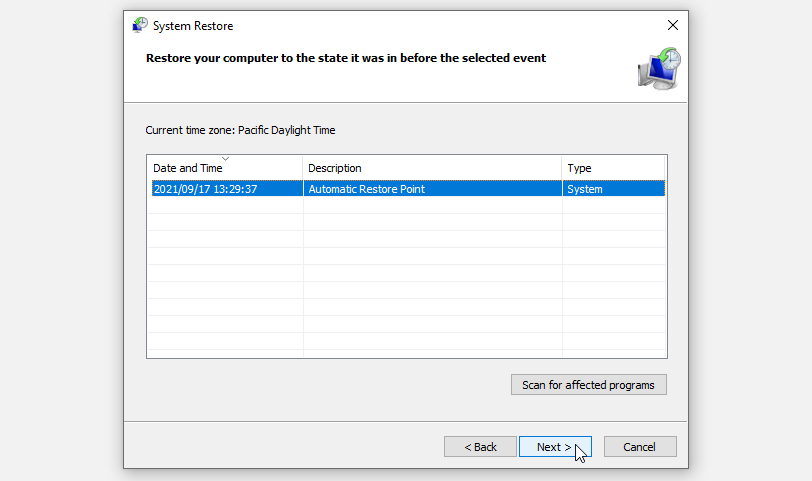
- Click System Restore and press Next.
- Select Show more restore points.
- Select your preferred restore point and click Next.
Click Finish and wait for the process to complete.
7. Configure Settings in the Registry Editor
Configuring a few settings in the Registry Editor is one of the best ways to tackle this issue. However, be careful not to tweak or delete the wrong keys in the process. To avoid any issues, start by backing up the Registry.
Now, to resolve this issue, we’ll configure the TDR (Timeout Detection and Recovery) key. The TDR feature detects response problems from the graphics card and resolves them by resetting the card. If there’s no response from a graphics card within a specified period, then the device will automatically reset the graphics card.
Now, let’s use the Registry Editor to set the TDR (Timeout Detection and Recovery) value:
- Press Win + R to launch the Run command dialog box.
- Type Regedit and press Enter to open the Registry Editor.
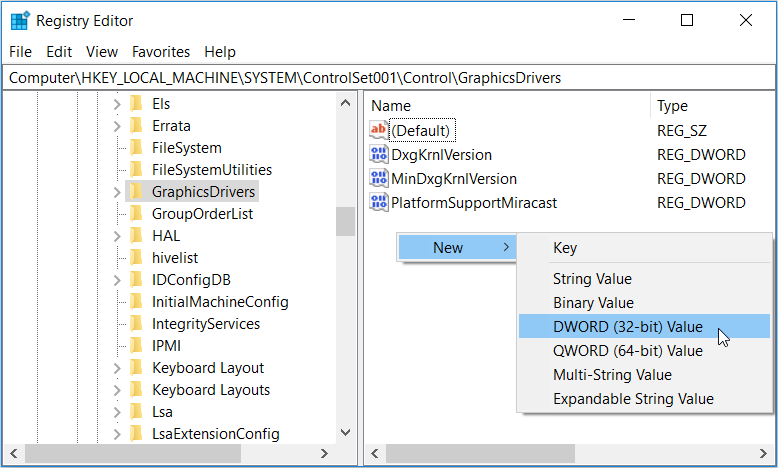
- Navigate to HKEY_LOCAL_MACHINE > SYSTEM > ControlSet001 > Control > GraphicsDrivers.
- Right-click anywhere on the right-hand side pane and select New > DWORD (32-bit) Value.
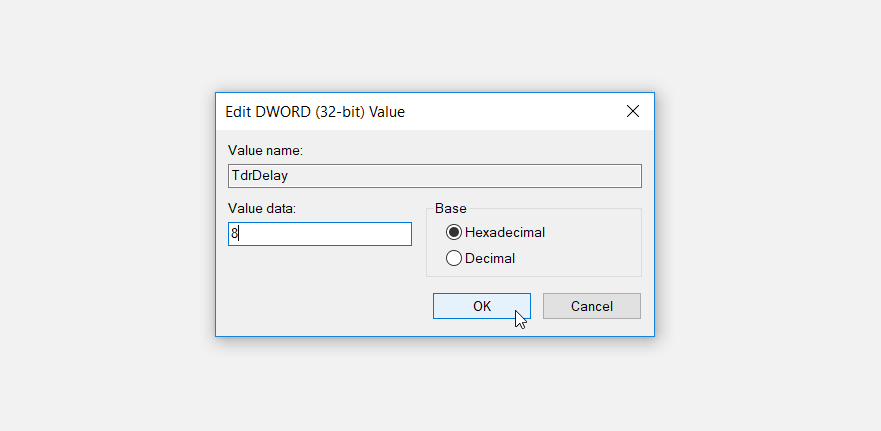
Name the new value as TdrDelay and press Enter. Next, double-click the TdrDelay value and change its Value data to 8.
Restart your PC to save these changes. If the issue lies with the graphics card, then the TDR feature should resolve the problem by resetting the card.
8. Update Your Device
If all else fails, you might have to update your PC. Once the device is up to date, you should be able to tackle this problem and any other system issues.
Here’s how you can update your Windows device:
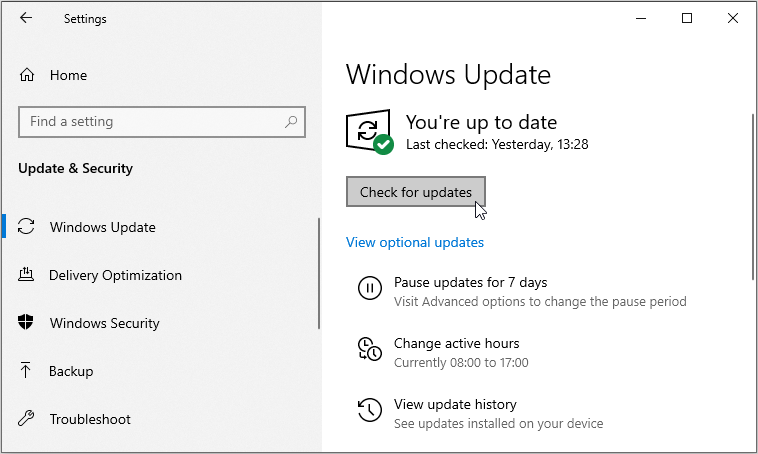
- Navigate to Win Start Menu > PC Settings > Update and Security and select the Windows Update option.
- Next, click the Check for updates button and follow the on-screen instructions to complete the process.
Run Your Games and Apps Without a Hassle
It’s really irritating when you randomly bump into the “Application has been blocked from accessing graphics hardware” error. However, getting rid of the issue is quite easy—simply apply any of the fixes we’ve recommended.


