
Resource Monitor is a Windows utility that monitors the use and performance of your computer's hardware resources. Unfortunately, it sometimes stops working or encounters issues, making it difficult to track system performance and manage resource usage.
So, if you're having trouble getting the Resource Monitor tool working on your computer, check out the steps below to troubleshoot any issues and get it up and running again.
What Causes the Resource Monitor App to Stop Working?
Before we dive into solving the problem, let's first check what causes the Resource Monitor app to stop working correctly. There are a few potential causes you should consider.
The most common cause of Resource Monitor not working is corrupted or outdated drivers. Outdated or incorrect drivers can prevent the software from running properly and cause functionality errors. Additionally, if there are hardware issues with your computer, such as a faulty power supply or RAM, problems with Resource Monitor could also arise.
Finally, if you have recently installed new antivirus software on your computer, it could block access to the Resource Monitor program.
So, let's move on to the solution and fix this problem.
1. Restart the Computer

When troubleshooting software-related issues, a computer restart can often resolve them without resorting to complex solutions. Doing so refreshes all running programs and services while also clearing out any temporary files that might be causing problems.
In most cases, this can get things back up and running without requiring extra effort. Plus, this solution is usually quick and easy since you only need to shut down your PC and wait for it to boot back up again. If you're having trouble restarting your PC, you can check out our guide on the different ways you can restart Windows.
2. Change the DPI Settings
Another possible fix for Resource Monitor not working on Windows is to change your DPI settings. Changing the scaling from 100% to 125% or higher on some computers can cause issues with Resource Monitor. Therefore, try adjusting it back to its original setting and check if the tool works again.
To change the DPI scale to its default settings, follow these steps:
- Press Win + I on your keyboard to open the Settings menu.
- From the left pane, select System.
- Then click Display on the right.
-
Under the Scale & layout section, click the drop-down menu next to the Scale option.

- Choose the recommended value.

Once you have made the changes, close the Settings window and run the Resource Monitor app to see if the problem is resolved.
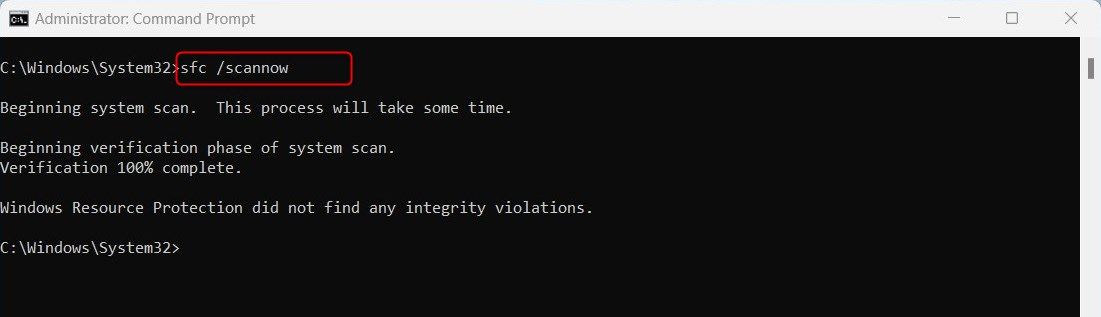
3. Run the System File Checker
If restarting your computer and changing the DPI settings didn't work, running an SFC scan can often detect and repair any corrupted system files that might be causing problems.
To do this, follow these steps:
- Right-click on Start and select Run from the menu list.
- Type cmd in the text box and press Ctrl + Shift + Enter on your keyboard.
-
When the UAC popup appears on the screen, click Yes to open Command Prompt with admin access. If you want in-depth information, read our guide on running the command prompt as an administrator.
-
Now in the elevated Command Prompt window, type in the command below and press Enter:
sfc /scannow
- Wait for the process to complete, then restart your PC.

4. Check for Windows Updates
It is also possible for an outdated version of Windows to cause this issue, so manually check for any pending Windows updates and install them.
Microsoft regularly releases new versions of Windows that fix bugs and improve performance, which makes updating worthwhile. Here's how to do it:
- Press Win + I on your keyboard to launch the System Settings.
- From the left side of the Settings menu, click Windows Update.
-
When Windows Update opens, click the Check for updates button.
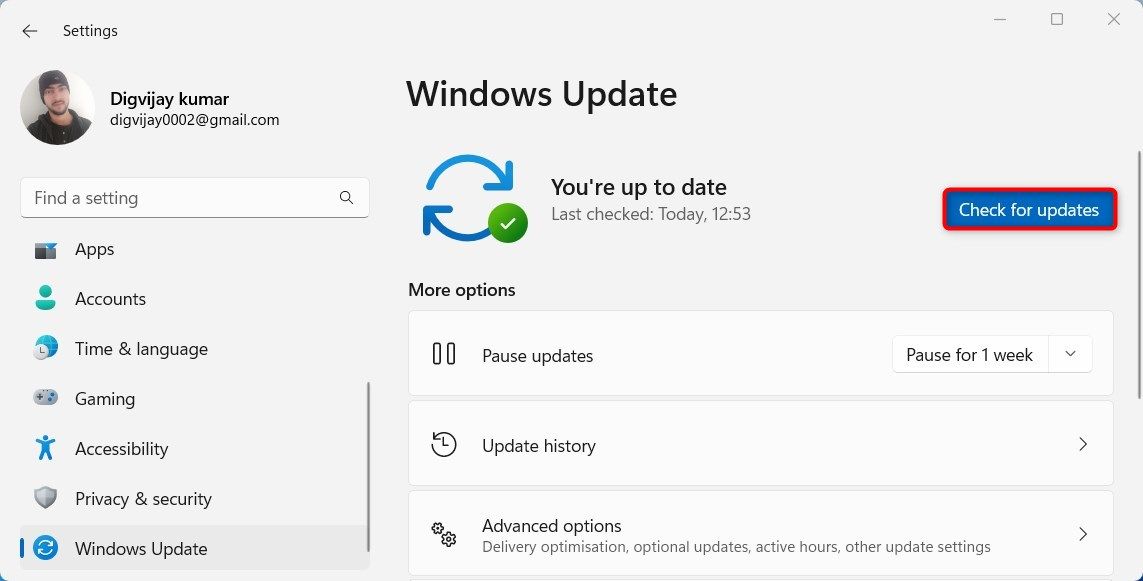

If there are any updates available, it will download and install them automatically. After the download completes, install the updates and restart your computer. After that, check to see if Resource Monitor is working.
5. Uninstall the Latest Windows Updates
If you recently updated your OS and there are no newer updates for it, the last update might have caused the issue. So, try uninstalling any recent update you may have installed, which could help resolve conflicts between the updates and existing system files that are causing problems with Resource Monitor.
- Press Win + I on your keyboard to open the Settings menu
- Select Windows Update from the left pane
-
Now go to the right and click on Update history.

-
Scroll down to Related settings and click Uninstall updates.
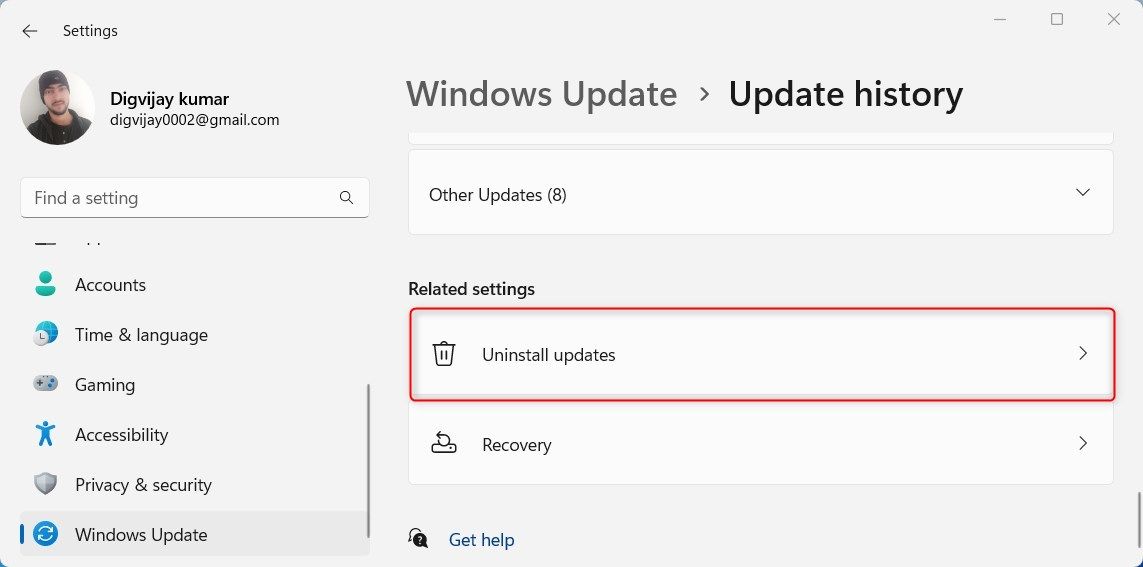


Then select any recent updates that you want to uninstall. After that, restart your computer and check if Resource Monitor is now working properly.
6. Create a New User Account
If you're still having issues, try creating a new local user account and see if that fixes the issue. This can be helpful if corrupted user profile data or settings cause the problem. To do so, follow the steps below:
- Open the Settings app on your computer.
- From the left, select Accounts.
- Click Other users under Account settings.
-
Next to Add other users, click Add account.
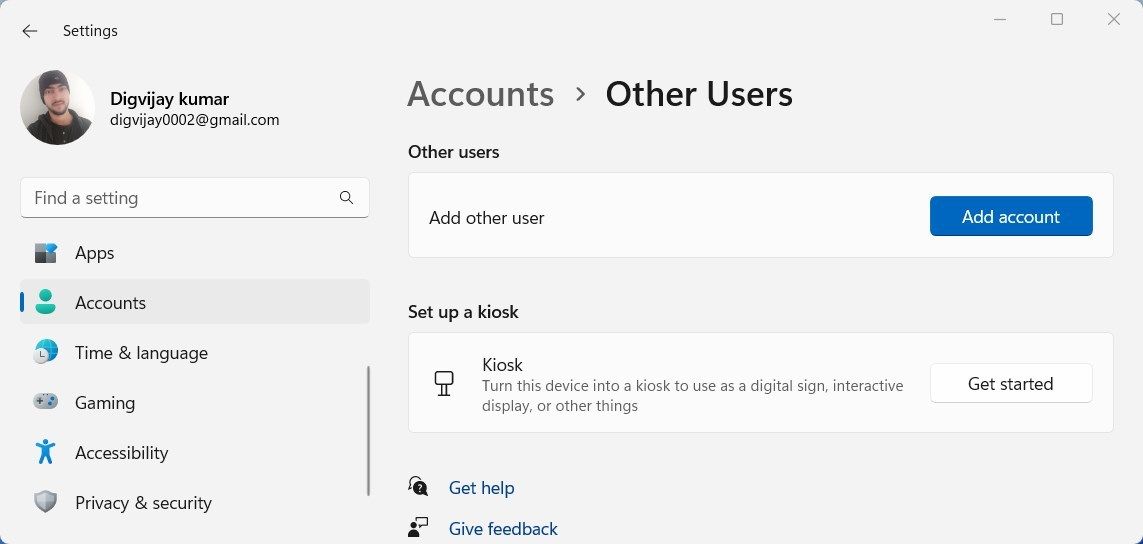
- On the Microsoft account page, click I don't have this person's sign-in information.

Then follow the instructions to add a new user account and then sign in with that account. Now open Resource Monitor and see if it's working properly.
7. Troubleshoot in Clean Boot State
When all else fails, try starting your computer in safe mode and see if the problem persists. If it does not, then background services and applications are possibly conflicting with startup items and causing this error to occur.
In such a case, you need to perform a clean boot as instructed below:
- Open the Run dialog box.
- Type MSConfig in the text box and hit Enter.
-
Check the Selective startup box on the General tab.
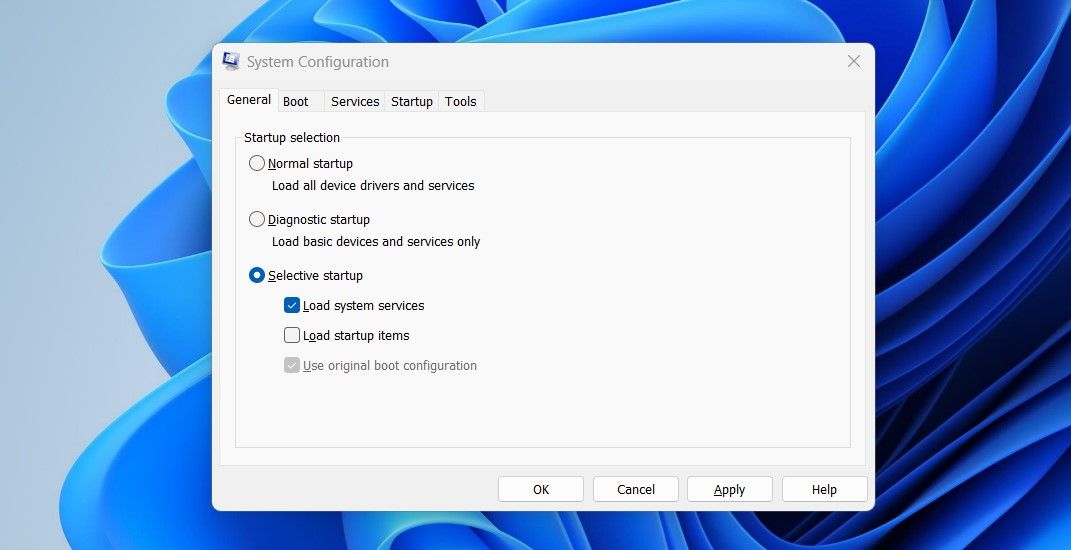
- Uncheck the Load startup items box.
-
Switch to the Services tab and check the Hide all Microsoft services box.
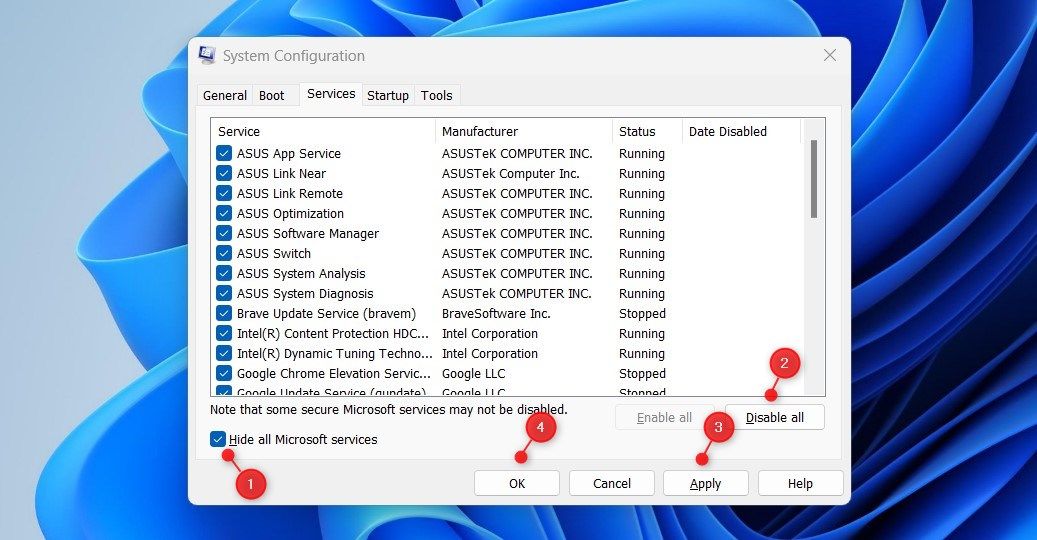
- Then click Disable All.
- Go to the Startup tab and click the Open Task Manager link
- Disable any services or programs that are active in Startup apps.


Once you have done this, close Task Manager, then click OK on the MSConfig window to save these changes. Now restart your computer for them to take effect, then try using Resource Monitor to see if they work now.
Resolve Resource Monitor Issues in Windows 11
Resource Monitor helps you monitor the performance and usage of your system's resources, including memory, disk, and network activity. If you're having trouble accessing this tool, this guide may help.