Heat is the enemy of computer parts, especially when it comes to longevity and performance. While a certain amount of heat is generated when your computer is under load, overheating can irreversibly damage its components.
It's essential that you make sure your device remains adequately cooled. Here's how you can stop your computer from overheating.
How to Monitor Your Computer's Temperature
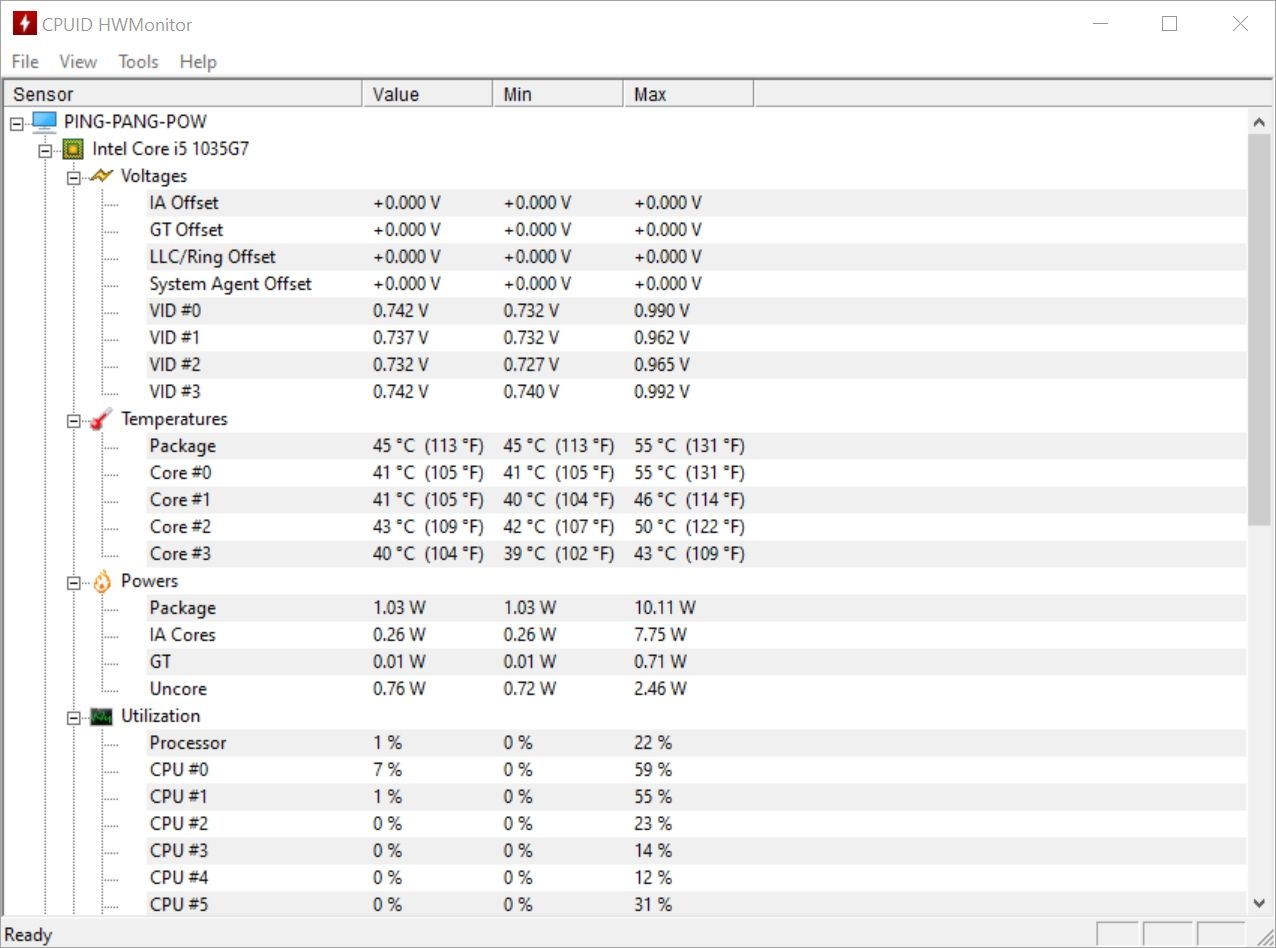
Before you begin diagnosing overheating issues on your computer, you need to check the temperature levels. This can be done using tools such as HWMONITOR or SpeedFan. Some laptops and motherboards also come with an in-built utility for doing the same.
Checking the temperature of your computer is easy. All you need to do is follow the steps below.
- Download one of the computer temperature-monitoring apps we mentioned above.
- Make sure you run the setup as administrator and subsequently, the app as well.
- If you don't immediately see the temperature, go to Sensors > Temperature. Most apps will have this option.
It's also a good idea to check the temperatures when gaming or performing any other resource intensive task.
The ideal operating temperature for your computer processing unit (CPU) should be around 120ºF (48ºC) under normal usage. But during heavy tasks, such as gaming, your device can reach up to 176ºF (80ºC).
Temperature ranges can vary depending on your room temperature. But in general, it's a bad sign if your CPU exceeds these temperatures.
If your CPU and gaming processing unit (GPU) temperatures are too hot, you can follow the steps below to address the issue.
1. Clean the Dust
Accumulated dust is one of the primary reasons for overheating. Dust can settle on your fans, cables, and other components, interfering with the airflow. Excessive dust will also indirectly impact your computer's performance because of the heat it generates.
If you live in a relatively dust-free environment, it's still a good idea to deep clean your computer cabinet once every few months. For other users, a monthly cleanup is a good idea.
Before you get down to cleaning your PC, ensure to detach all cables from the power sockets.
How to Get Rid of Dust in Your PC Cabinet
Below are three ways you can remove dust that has settled inside of your computer.
- Vacuuming: For users who are short on time, vacuuming is the quickest way to clean out your cabinet. It's a good idea to keep the cabinet shut when using a powerful vacuum, as it can cause damage. Place the vacuum near the vents located on the top, front, and back of the cabinet.
- Brushing: Brushing is the best way to clean out hard to reach areas in your computer. You can use a thin paintbrush to clean out the ventilation outlets and fans. Combine brushing with a microfiber cloth to clean the surface of your motherboard, as hard bristles on the brush may damage it.
- Complete Cleaning: The best way to clean out the dust is to first vacuum your cabinet, and then use brushing to get rid of the remaining dust. Be sure to detach components, such GPUs and RAM modules, to clean out the slots and contact points.
If you own an Apple device instead, don't worry. There are many ways to clean out dust from your MacBook or iMac as well.
2. Check Your Computer's Fans
The fans attached to your cabinet help in dissipating heat generated by the components. The fan speed automatically adjusts itself depending on the temperature, but can sometimes malfunction.
Start your computer and check that all fans are working. Additionally, run a resource intensive task and see whether the fans speed up after a few minutes. Ideally, the fans should get faster because more heat is being generated. If the fans keep spinning at the same speed, but the temperature is high, you might need to take a closer look at these.
To fix this, you will need to change the fan settings using your motherboard's BIOS menu. Unfortunately, the process of doing so is different for all manufacturers, so it's best to check on the motherboard's official website. While software such as SpeedFan can help you manage fan speed within Windows itself, it doesn't support all motherboards.
How to Boot Your Computer Into the BIOS Menu
To access the BIOS menu, follow these steps.
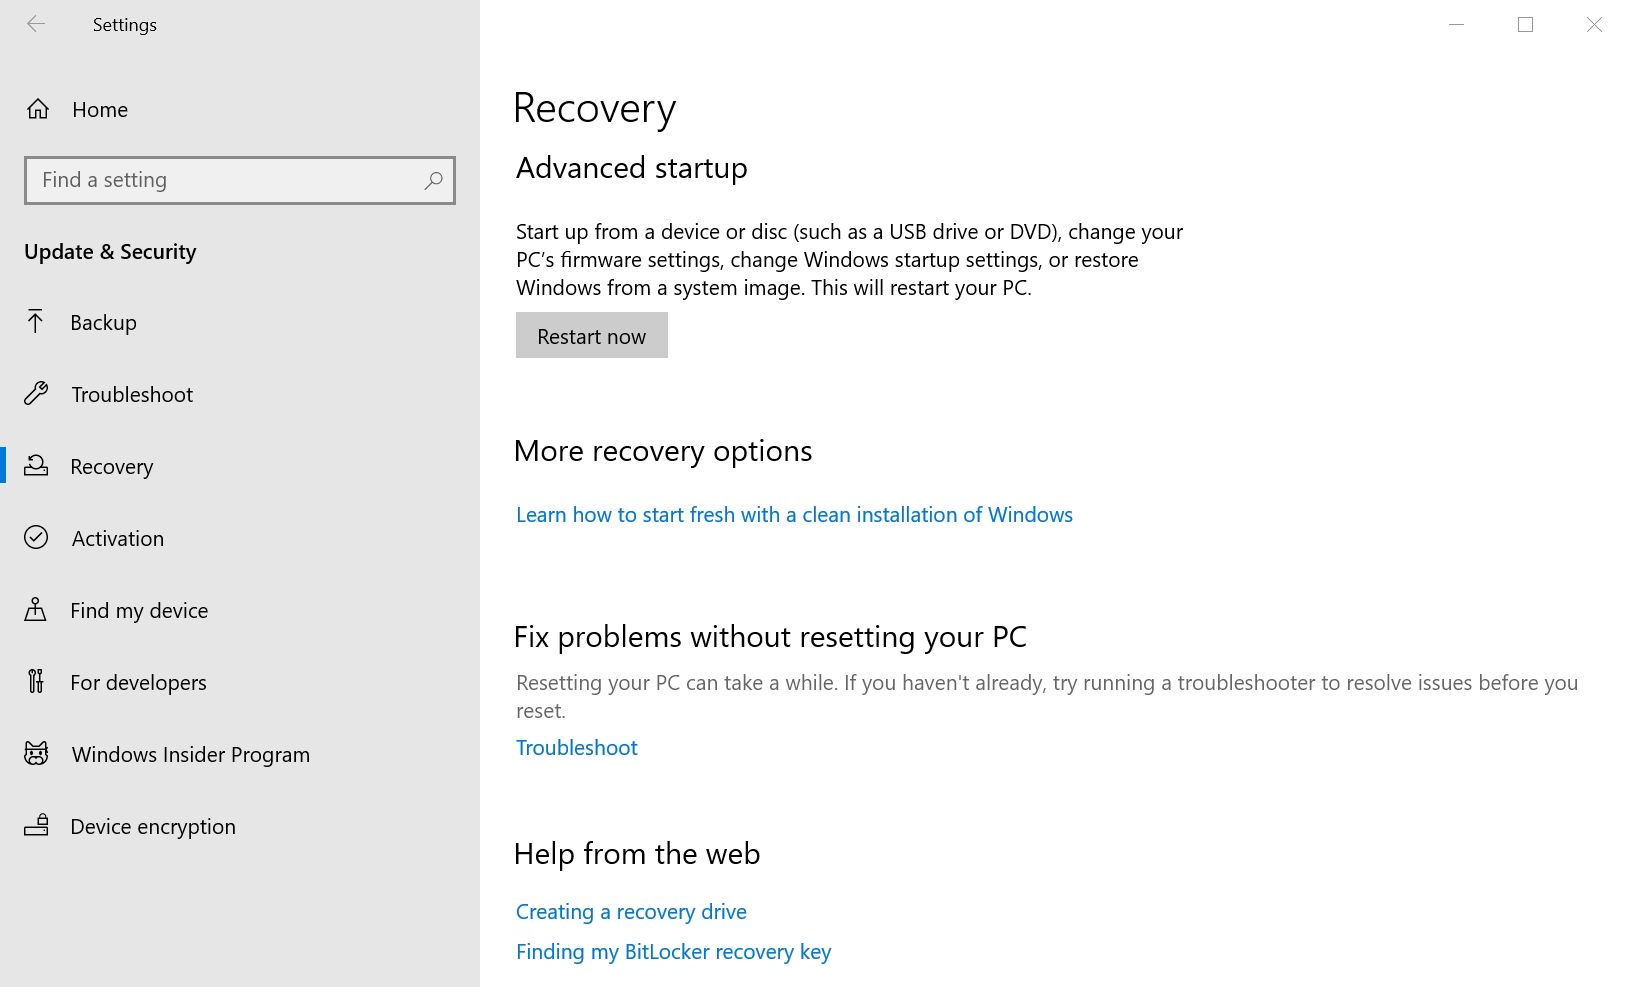
- Click on Start > Settings.
- On the Settings dashboard, click on Update & Security.
- Click on the Recovery Section on the navigation bar towards the left.
- Under Advanced Startup, click Restart now.
- Windows will boot into a blue screen with various options. Here, click on Troubleshoot > Advanced options > UEFI Firmware Settings.
3. Modify Your Computer's Settings
Sometimes, your power settings may be incorrectly configured. This results in higher CPU usage and, subsequently, overheating.
It's also a good idea to limit the frames per second (FPS) when gaming. For example, gaming at 100 FPS on a 60 hertz (Hz) monitor will not provide any noticeable improvement to the human eye. So, you can limit the FPS to 60.
Not only will this give you a stable FPS, but it will also reduce the load on your GPU without any trade off in visual quality. There are multiple ways to accurately measure the FPS in your video games.
Changing your CPU usage settings in the Power Options menu might help. Follow the steps below to achieve this.
- Right-click on the Start button and click on Power Options.
- Scroll down and under Related settings, click on Additional power settings.
- In the window that opens, click Change plan settings next to the selected power plan.
- On the next window, click on Change advanced power settings.
- In the window that opens, expand the Processor section.
- Change the value for your maximum processor state to 70.
- Close the window and save the settings.
- Reboot your computer.
Other Measures to Prevent Computer Overheating
While the sections above are the primary reasons why overheating occurs, there are several other steps you can take. We've listed four possible options below.
- Cable Management: Bad cable management can obstruct the airflow in your cabinet. Make sure to properly route your cables so that they're not in the path of the airflow.
- Changing the Ambient Temperature: If you live in a hot climate, chances are your computer will heat up more than usual. That's why it's best to place your computer in an air-conditioned room where the ambient temperature is low.
- Reapplying Thermal Paste: If your CPU is old and is the only component that's overheating, chances are that the thermal paste has dried, and it may be time to reapply it. It's best to get this done from an expert since the CPU is a delicate part.
- Installing Extra Fans: If your PC cabinet supports extra fans, it may be worth it to invest in them. They will improve the airflow and make your cabinet more visually appealing as well.
Make Sure Your Computer Doesn’t Overheat
Computer overheating is a common issue. But if you catch it early, you can resolve the problem without damaging any of your hardware.
At least one of the above tips should work in making sure that your device doesn't get too hot, even if you live in a warmer country. If you're still suffering issues after giving each of these a try, it might be time to get a new computer.

