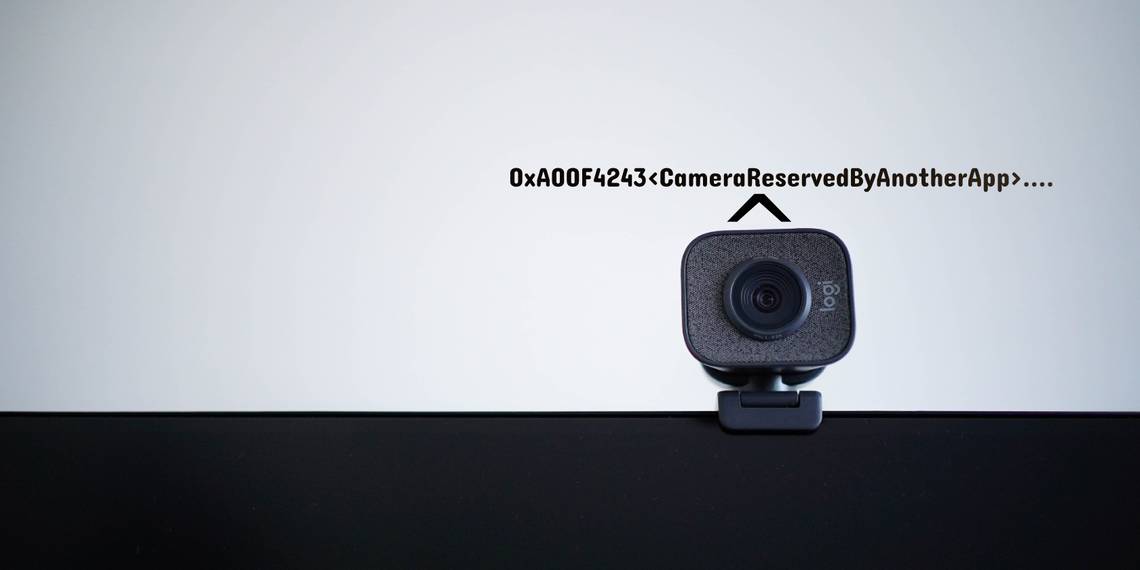
When you try to use the camera on your computer, you may sometimes encounter the "Close other apps. It looks like another app is using the camera already" error. It's also accompanied by the 0xA00F4243<CameraReservedByAnotherApp> 0xC00D3704 error code.
This issue is inconvenient, especially if you're not actively running another app that's using your webcam and you have an important meeting or stream coming up soon. So, how do you fix this? Check out the steps below and see how to get your webcam working again.
1. Check Your Camera Access History
Windows 11 keeps track of apps that have tried to access your camera recently. In the Recent activity section of the Settings app, you can view which apps have accessed your camera in the last seven days.
Most webcams feature an integrated LED to indicate if the camera is in use. If the light is on, it is likely a background app triggering the error. If the error occurs without the camera light, the issue could be with the camera driver or hardware.
To view your camera's recent activity:
- Press Win + I to open the Settings app.
-
In the left pane, open the Privacy & security tab.
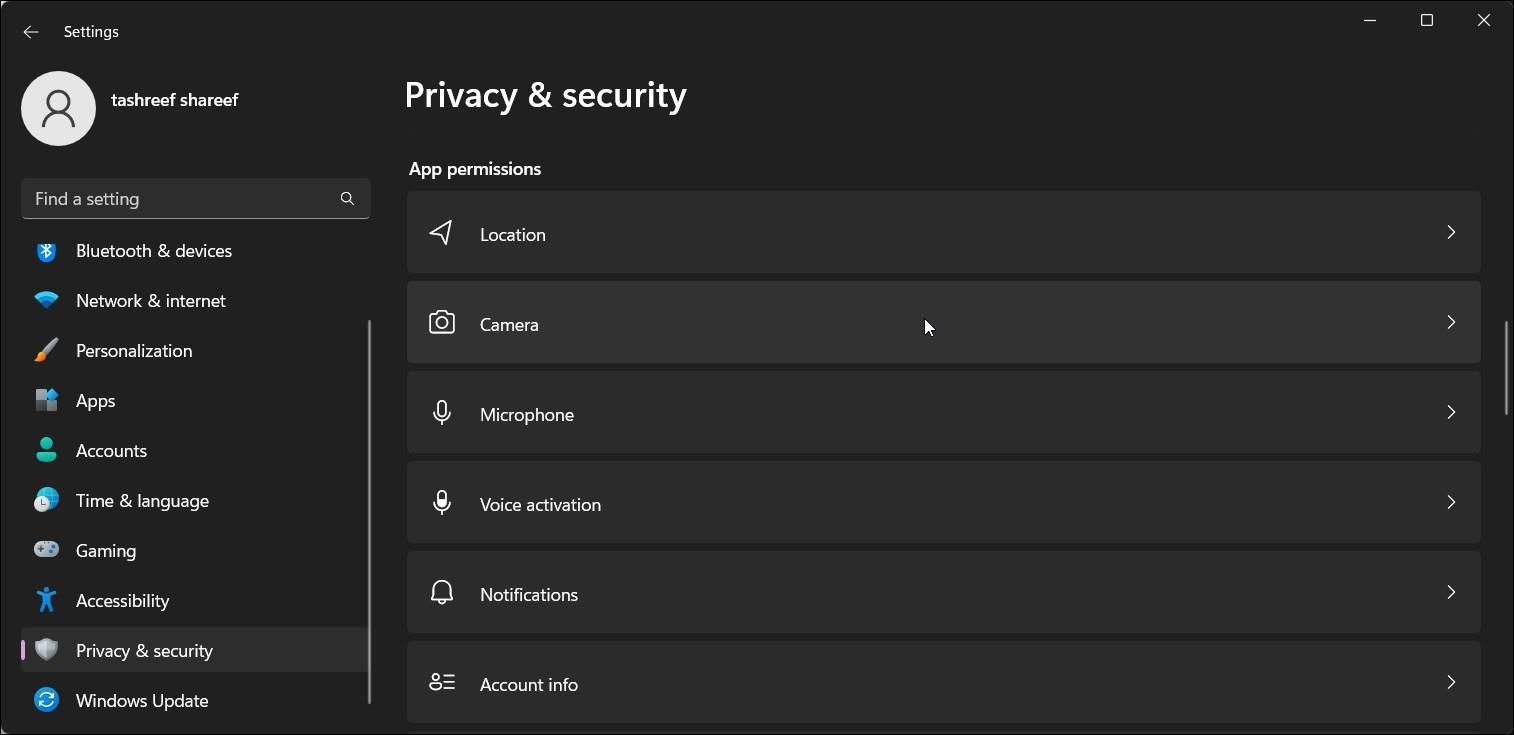
- Next, scroll down to the App permissions section.
-
Click on the Camera option to view more options.
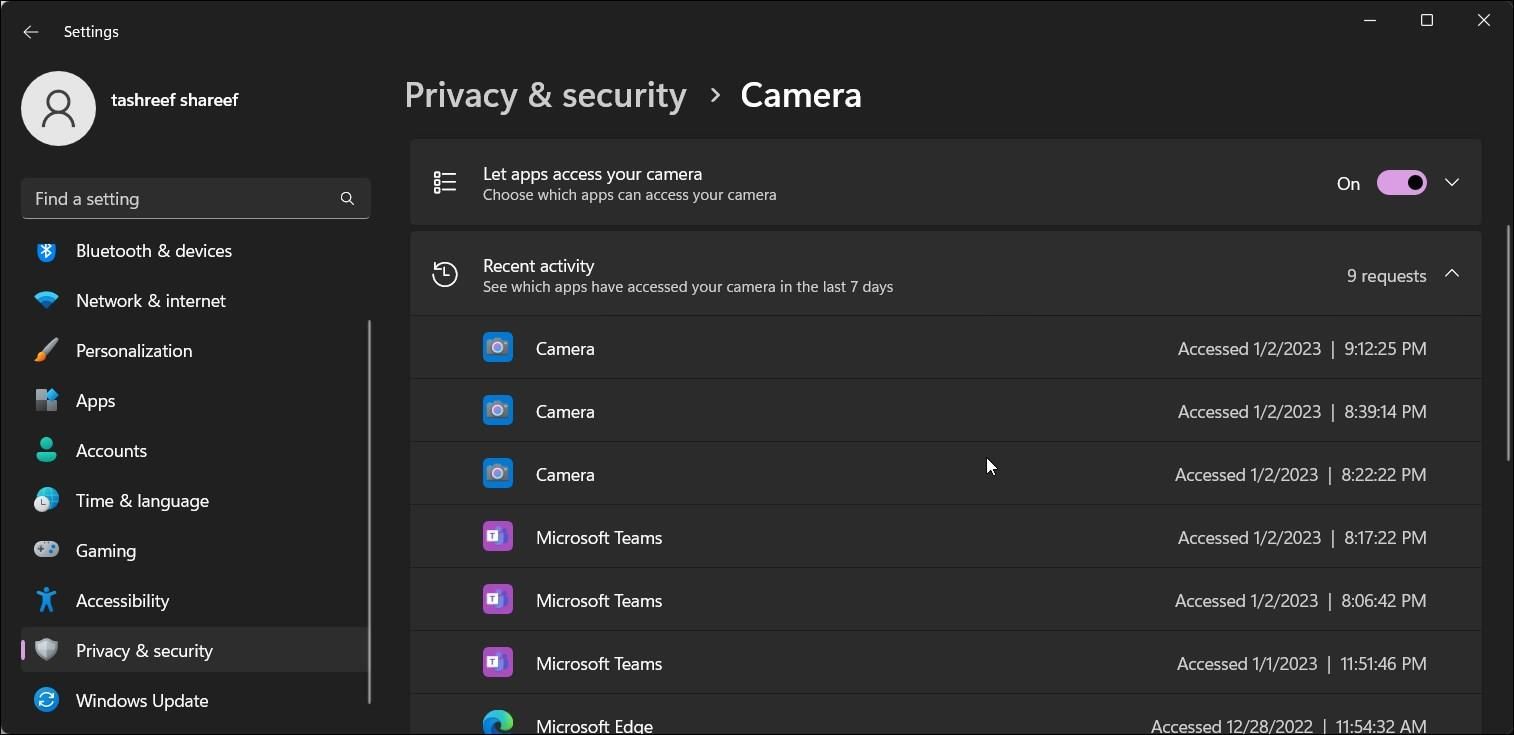
- Click on Recent activity to view a full list of apps that have accessed your camera in the past seven days. It shows the app's name with the date and time.


If there is no suspicious app in the list, close Settings. If yes, check if the suspected app runs in the background and quit it to fix the issue.

To close a background app, click the Up-arrow icon in the system tray. Next, right-click on the app name and select Exit, Quit, or Close.
You can also end the app using the camera from the Task Manager. Check out our guide to learn how to use the Windows Task Manager. But if you need to fix the issue quickly, here's how to end background apps using it:
- Right-click on Start and select Task Manager.
-
In Task Manager, open the Process tab.
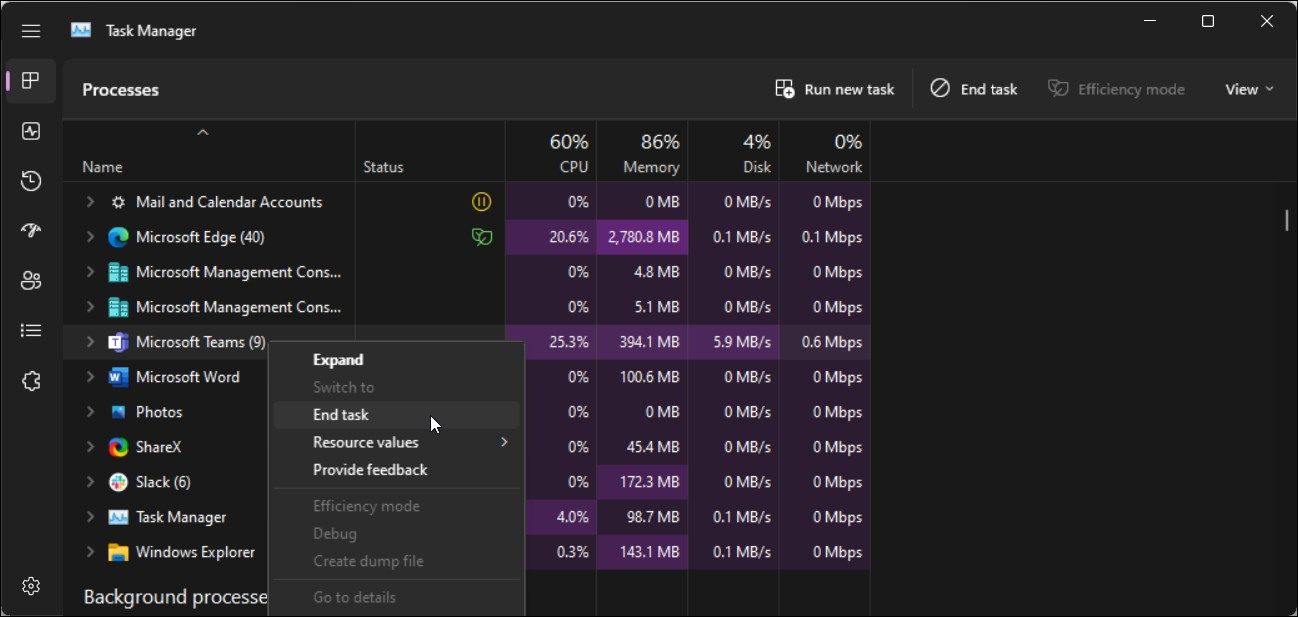
- Next, locate and select any app that may have access to your camera. Often meeting apps such as Teams are what causes the issue.
- Click on End Task to close the app and release the camera access.

If the issue persists, perform a quick restart of your Windows computer to force close any glitchy apps and process to fix the error. If the app continues to hijack your camera, you can restrict the camera permission for the app. Here's how to do it.
- Open the Settings app and click on Privacy & security.
-
Scroll down and click on Camera.
-
Expand the Let apps access your camera option.
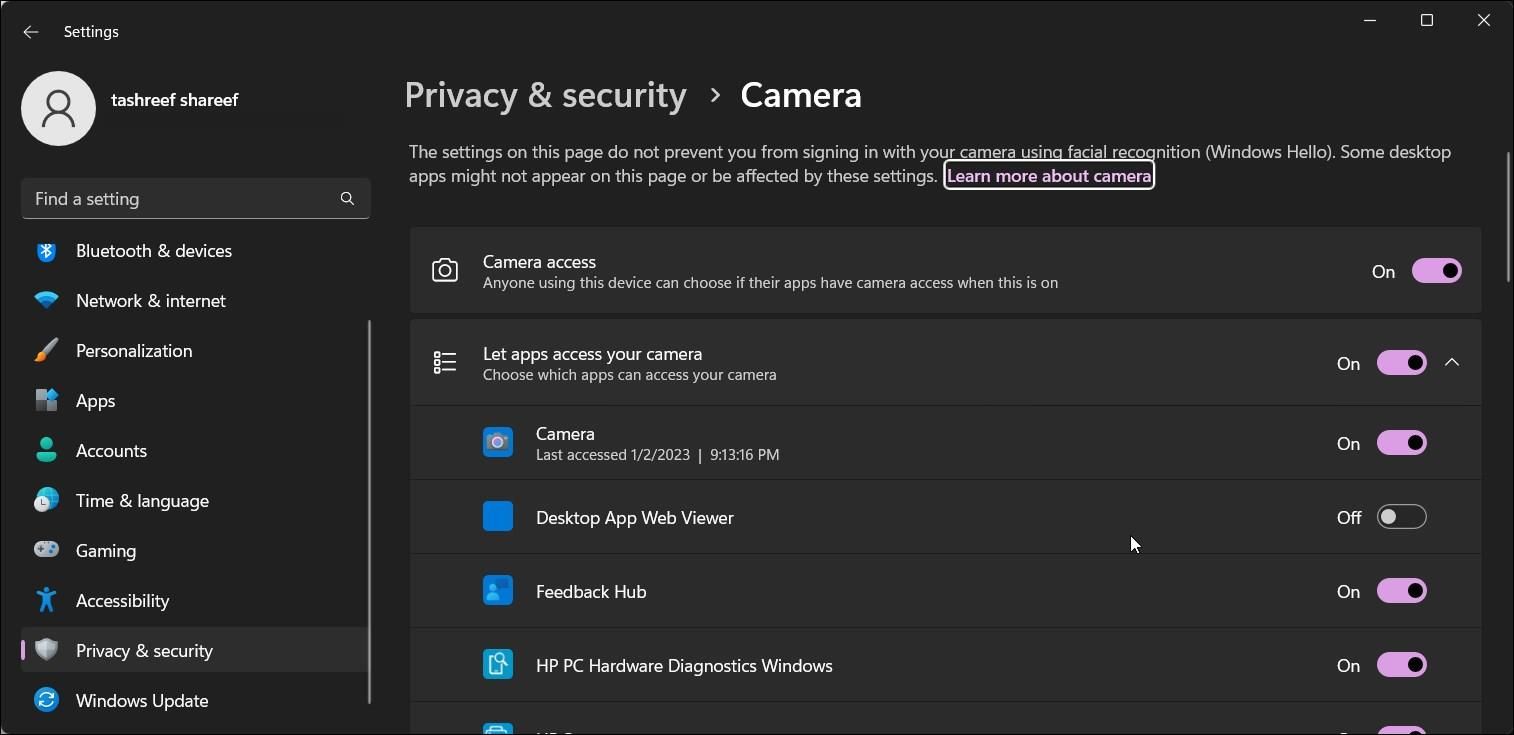
- Next, locate the app and toggle the switch to restrict the app from accessing your webcam.

2. Restart the Camera Service (CamSvc)
The Capability Access Manager Service (CamSvc) is an essential Windows service required to access your camera and microphone. If it isn't running, it can cause the "It looks like another app is using the camera already" error.
To fix the issue, you can manually restart the service. While the service Startup type for this service, by default, is set to Manual, you can set it to Automatic if the error continues to occur after every system restart.
To restart the Capability Access Manager Service (CamSvc):
- Press Win + R to open Run.
- Type services.msc and click OK.
- In the Service snap-in, locate the Capabilities Access Manager Service.
-
Next, right-click on the Capabilities Access Manager Service and select Restart.
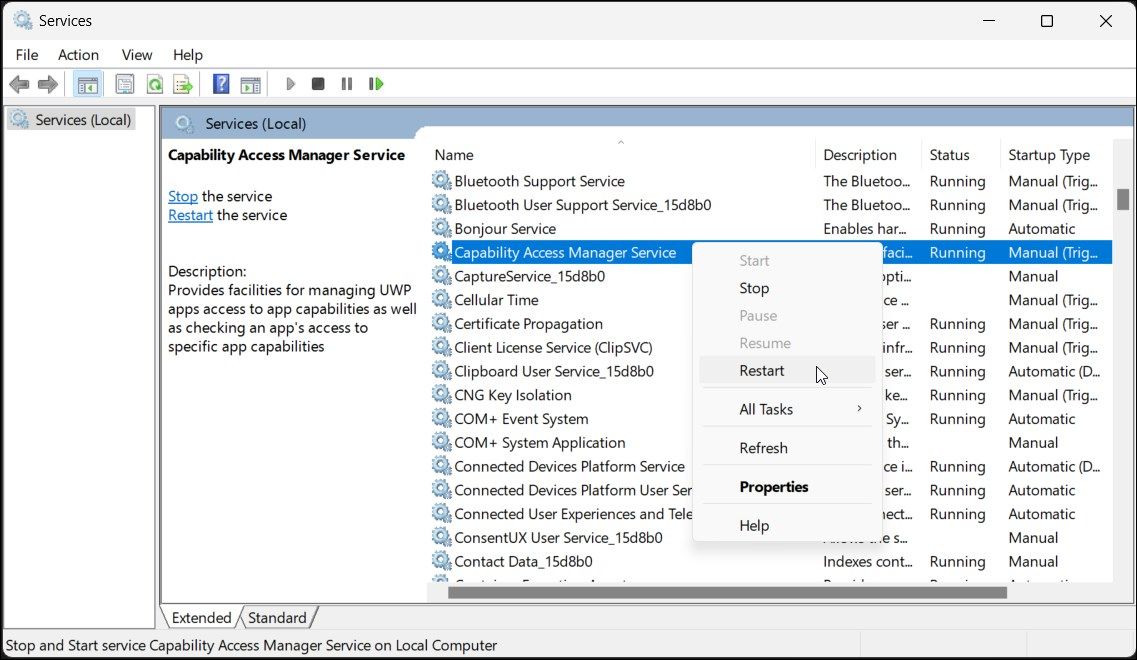
- As the service restarts, relaunch your Camera and check for any improvements.
-
If the error returns after a system restart, right-click on Capabilities Access Manager Service and select Properties.
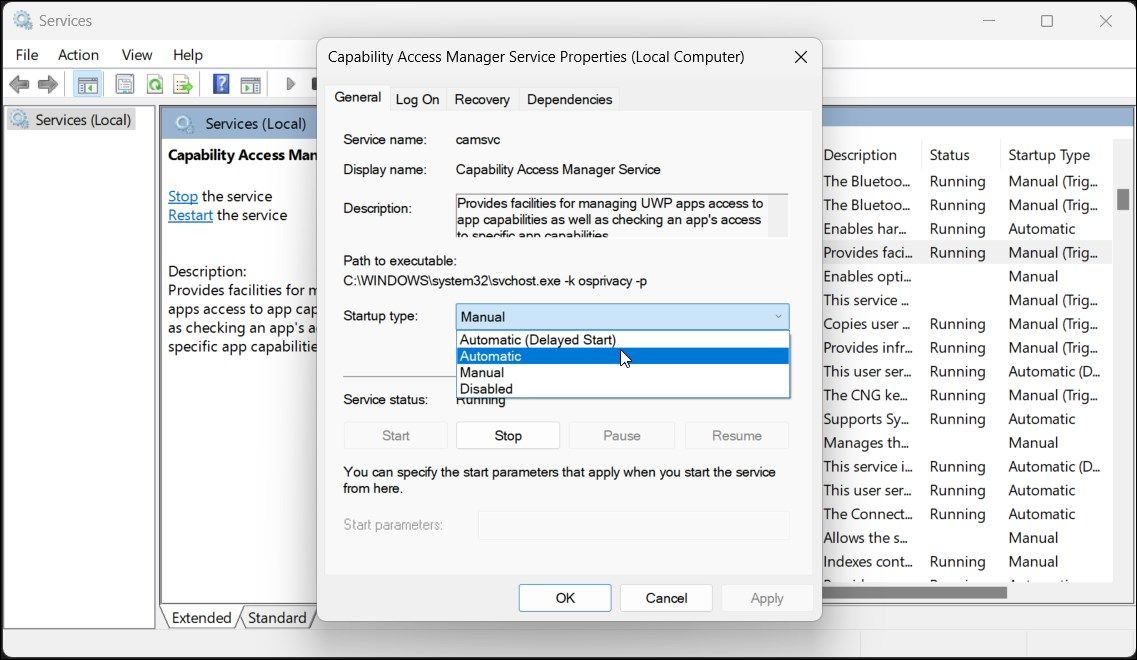
- Click the Startup type drop-down and select Automatic.
- Click Apply and OK to save the changes.


3. Install Windows and System Updates
If the error occurred after a recent Windows update, your camera might be missing necessary drivers resulting in the error. To fix the problem, check if a new update is available for your camera. Also, install any firmware updates from your computer manufacturer to see if that helps resolve the error.
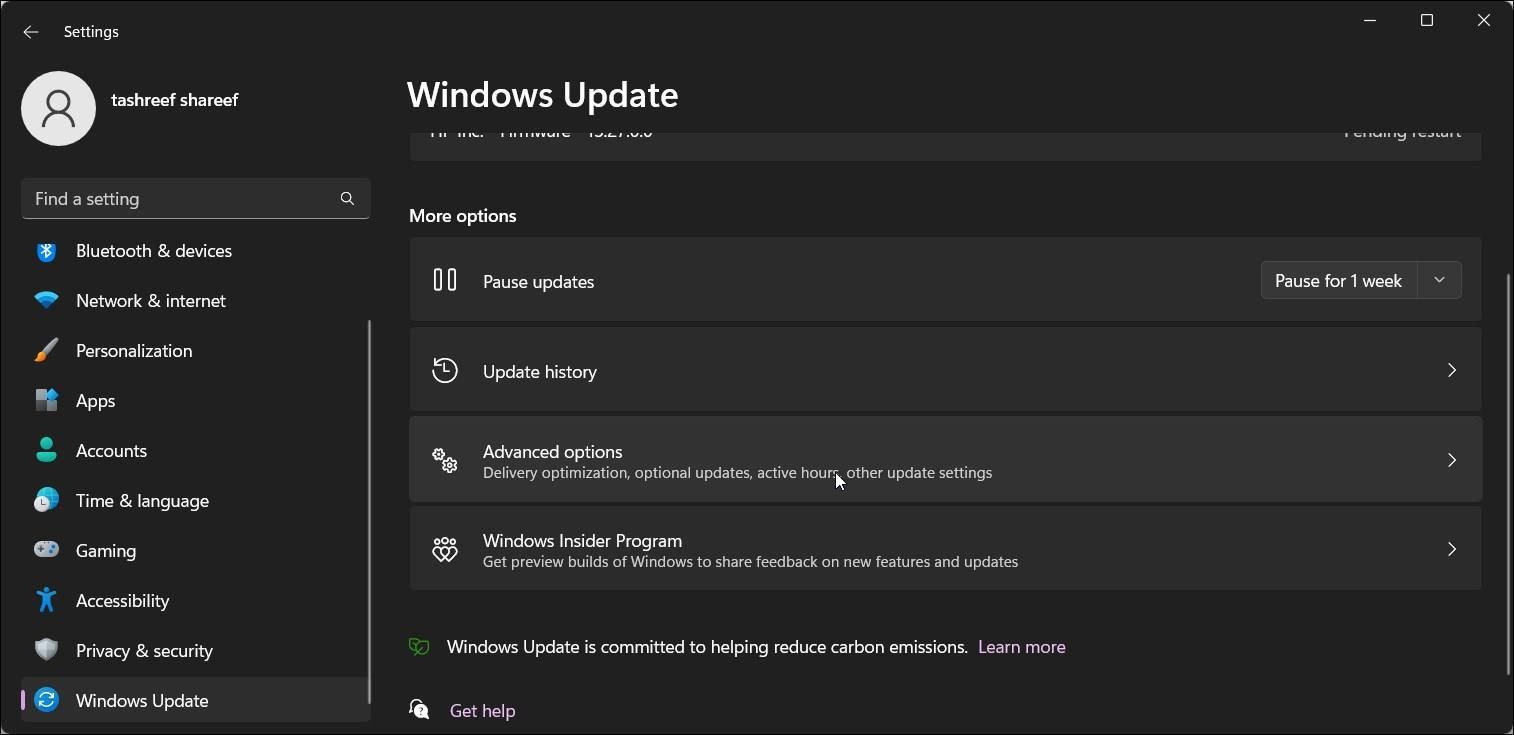
To install Windows updates:
- Click on Start and select Settings.
-
Scroll down and open the Windows Update tab.
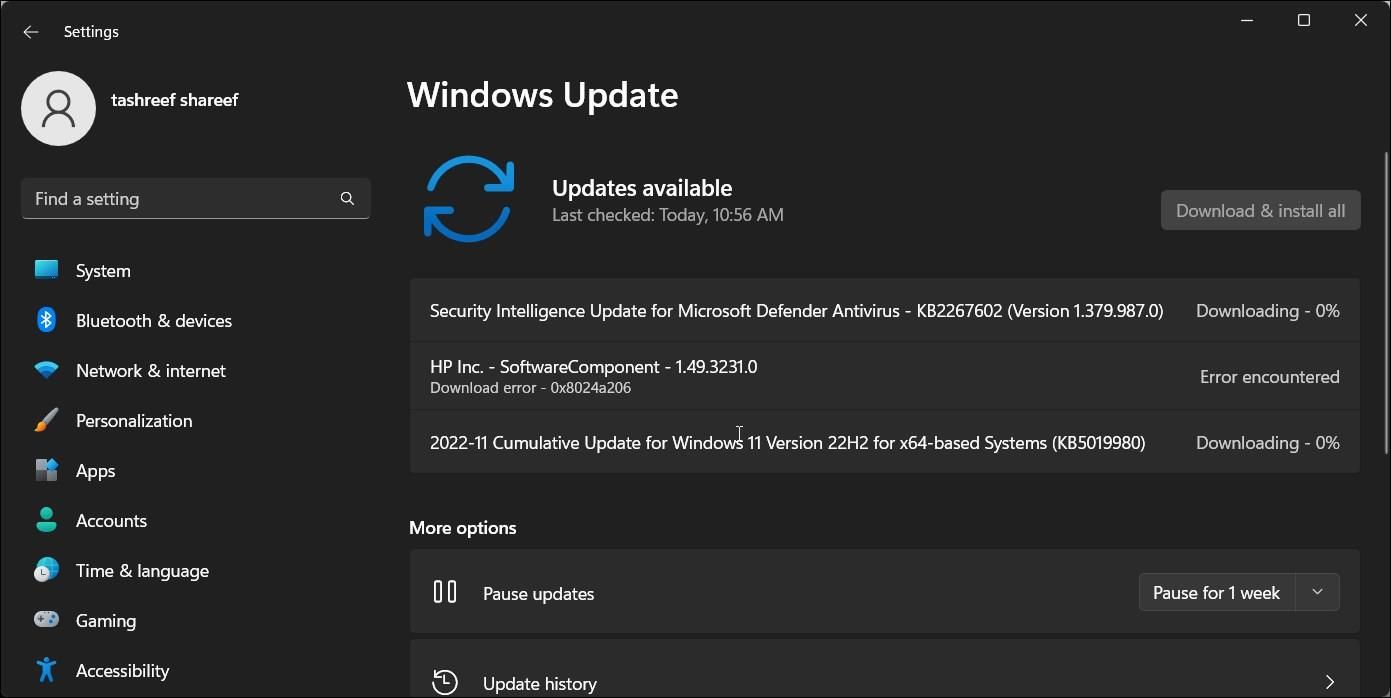
- Next, click on Check for updates. Windows will scan for new updates and list them accordingly.
- Check if any update for the camera is available. Also, look for firmware updates from your manufacturer. If yes, download and install all the updates and restart your PC.
-
If not, click on Advanced Options.
-
Next, open Optional updates.
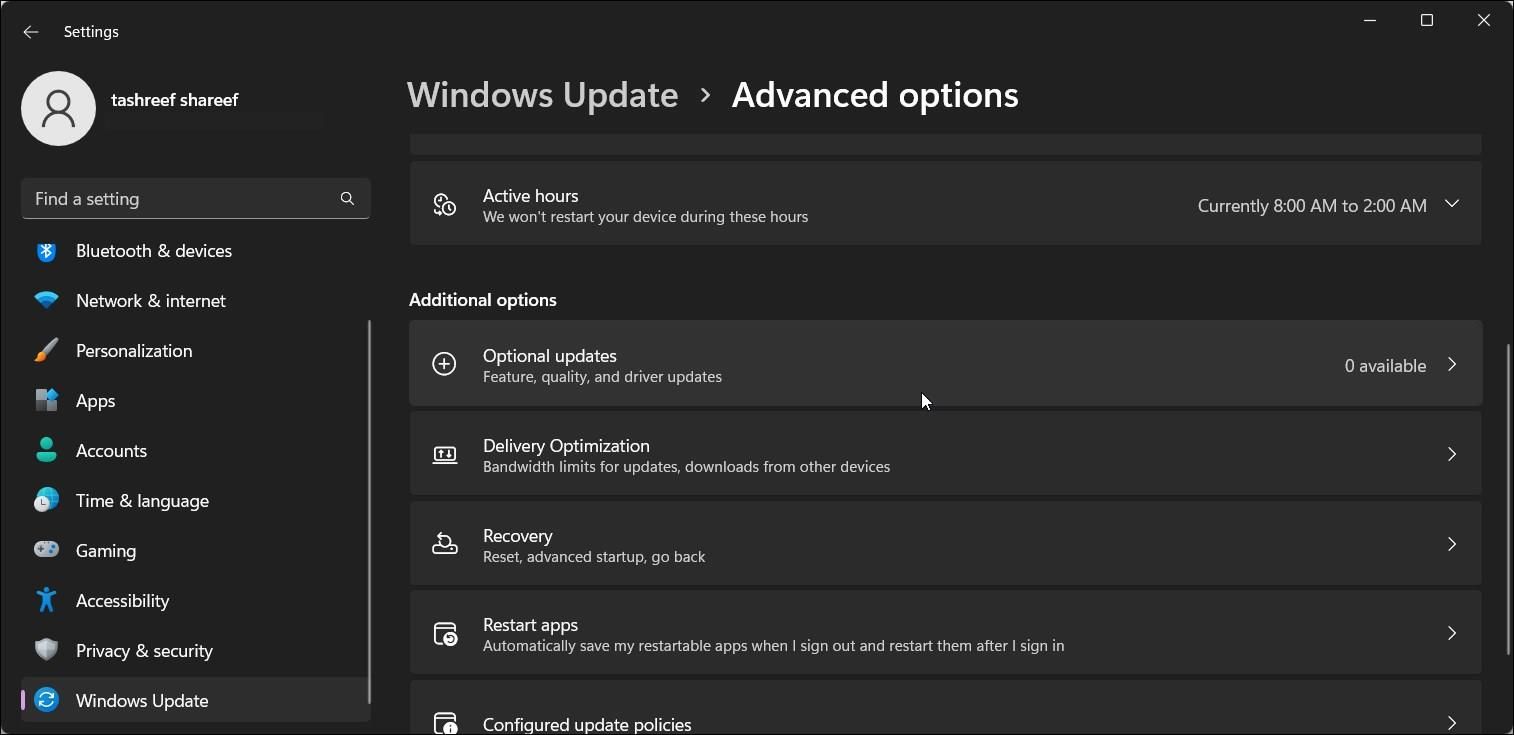
- Check for any driver updates for the camera to install. Install all the updates and restart your PC.


You can also find new updates on the computer manufacturer's website. For example, if you use an HP computer, go to the HP Support Driver page. Next, select your product type, select your product model, and provide other necessary information.

Next, expand the All drivers section and look if new drivers are available for your BIOS-System Firmware and the camera. Download and install the drivers and check for any improvements.
4. Switch the USB Port Where Your Camera Is Connected
If you're using an external camera connected to a USB hub, try connecting it directly to a different USB port on your computer. External devices connected to a USB hub can sometimes stop working due to insufficient power and compatibility issues.
Connect your external camera to a different USB port on your computer and check if it helps resolve the error. If yes, connect the camera to a spare USB hub to rule out any issues with your current USB hub.
5. Reinstall the Camera Drivers

You can fix the 0xA00F4243 error by reinstalling the camera drivers from Device Manager. Alternatively, perform a driver rollback to resolve issues that occurred after a recent update.
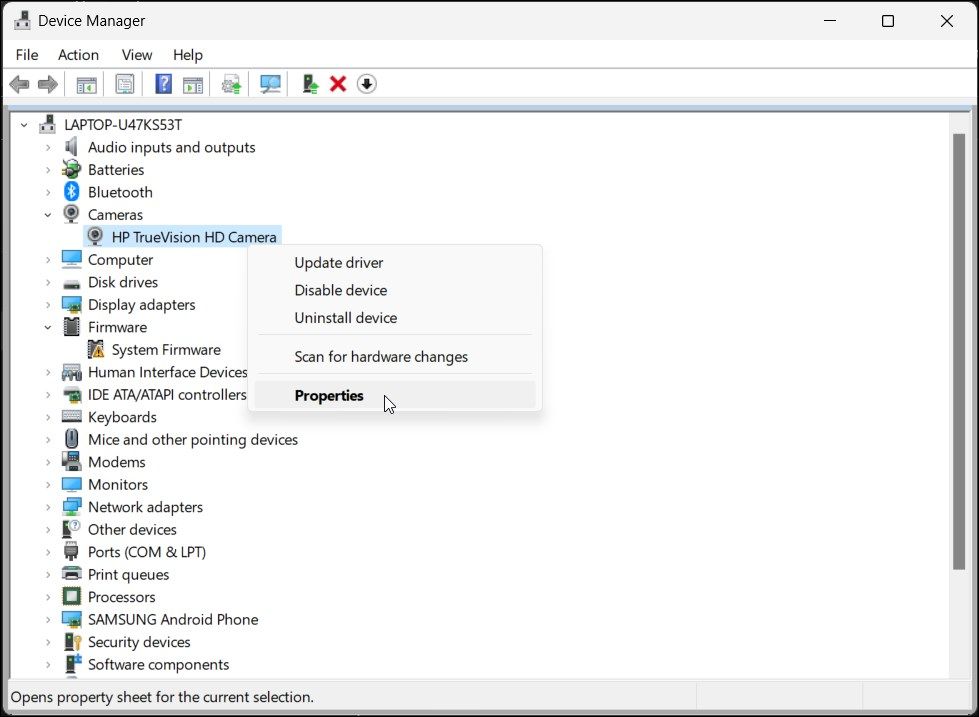
To uninstall the camera driver using Device Manager:
- Press Win + R to open Run.
- Type devmgmt.msc and click OK to open Device Manager.
- In Device Manager, expand the Camera section.
- Next, right-click on your installed camera and select Uninstall device.
- Click Uninstall to confirm the action. Once done, restart your computer to apply the changes.
- After restart, Windows will automatically detect the connected devices and install the necessary drivers for your camera.
To roll back the camera driver:
-
In Device Manager, right-click on your camera device and select Properties.
-
Open the Driver tab in the Properties dialog.
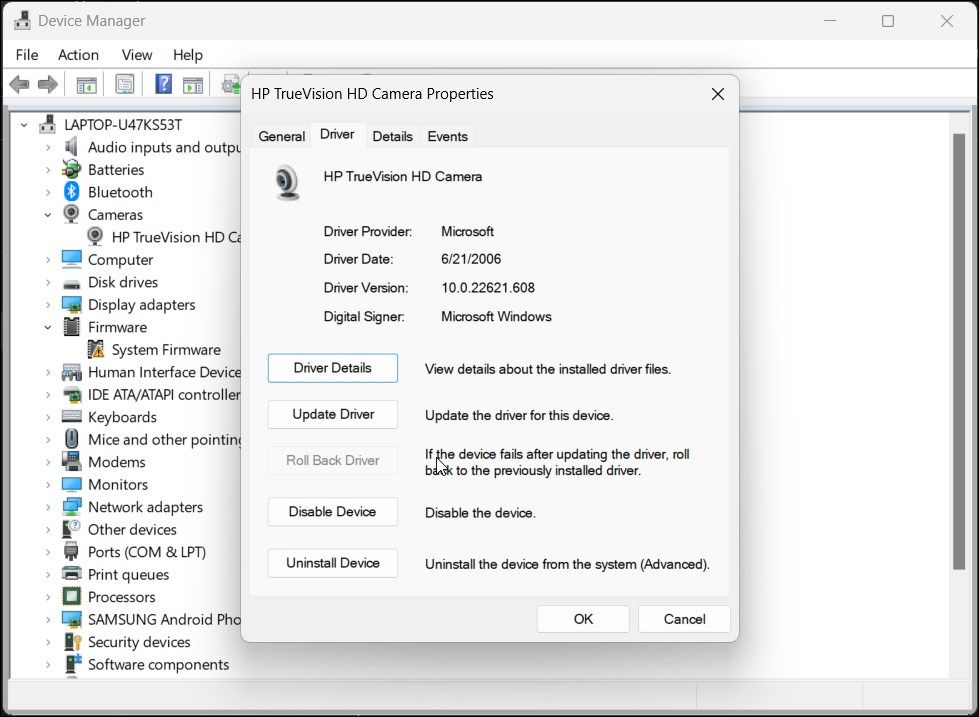
- Next, click on Roll Back Driver and confirm the action. If the option is grayed out, you don't have any older drivers to restore.


Get Your Webcam Working Again
Getting the "It looks like another app is using the camera already." error can be pretty inconvenient, especially if you find out about it just as you need it. If you still have time, you can follow some of the above steps to fix the issue. Most of these troubleshooting options will only take a few minutes to execute, assuming you don't encounter other problems.
But if you don't have the time to do any of these and need a quick substitute for your webcam, why not try using your smartphone? You only need a couple of apps and a cellphone stand to use your phone as a camera.