If you have an iPhone and use the Lightning charger, you know it's easy to plug in, and breaking it is easier too. When the charger tip breaks, you know how frustrating it can be, and you might think it's time to look for a new charger, but it's something that can be fixed easily. Before we look at how to fix a broken charger tip, let’s look at what you need to do the job.
What You Need to Fix a Broken Charger Tip

Below are some items you need to fix the broken iPhone charger tip:
- Cutting nippers: For removing the plastic casing.
- Glue: For attaching the two broken pieces together.
- Brush and soft cloth: For cleaning the charger tip before joining the pieces together.
- Soldering gun: For fixing the wires that might have detached or broken.
- Hair dryer (optional): For applying heat to the area attached with glue to make it dry.
How to Fix an iPhone Charger Tip

You can use a superglue to fit the broken parts of the Lightning cable together. To do this, put a thin layer of glue onto both sides of the break and then press them firmly until they stick together again.
You can also use a flat tool such as a butter knife to hold the parts together and keep them in place while the glue is drying. You can use a hair dryer to help dry the glue so that it can stick well. Make sure to keep the dryer moving so that it doesn't overheat the area and cause more damage. You may need to apply heat for a few minutes to get the job done. Once it is dry, check to make sure that the connection between the two pieces is secure.
If the damage to your charger cable tip is not visible, however, you can instead follow the steps below.
Step 1: Remove the Outer Plastic Covering
If you can't see where the damage is, you need to start by removing the plastic cover so that you can inspect the tip of the charger appropriately. The plastic cover protects the charging tip from damage, and it also guards against you getting an electric shock from the wires on the charger.
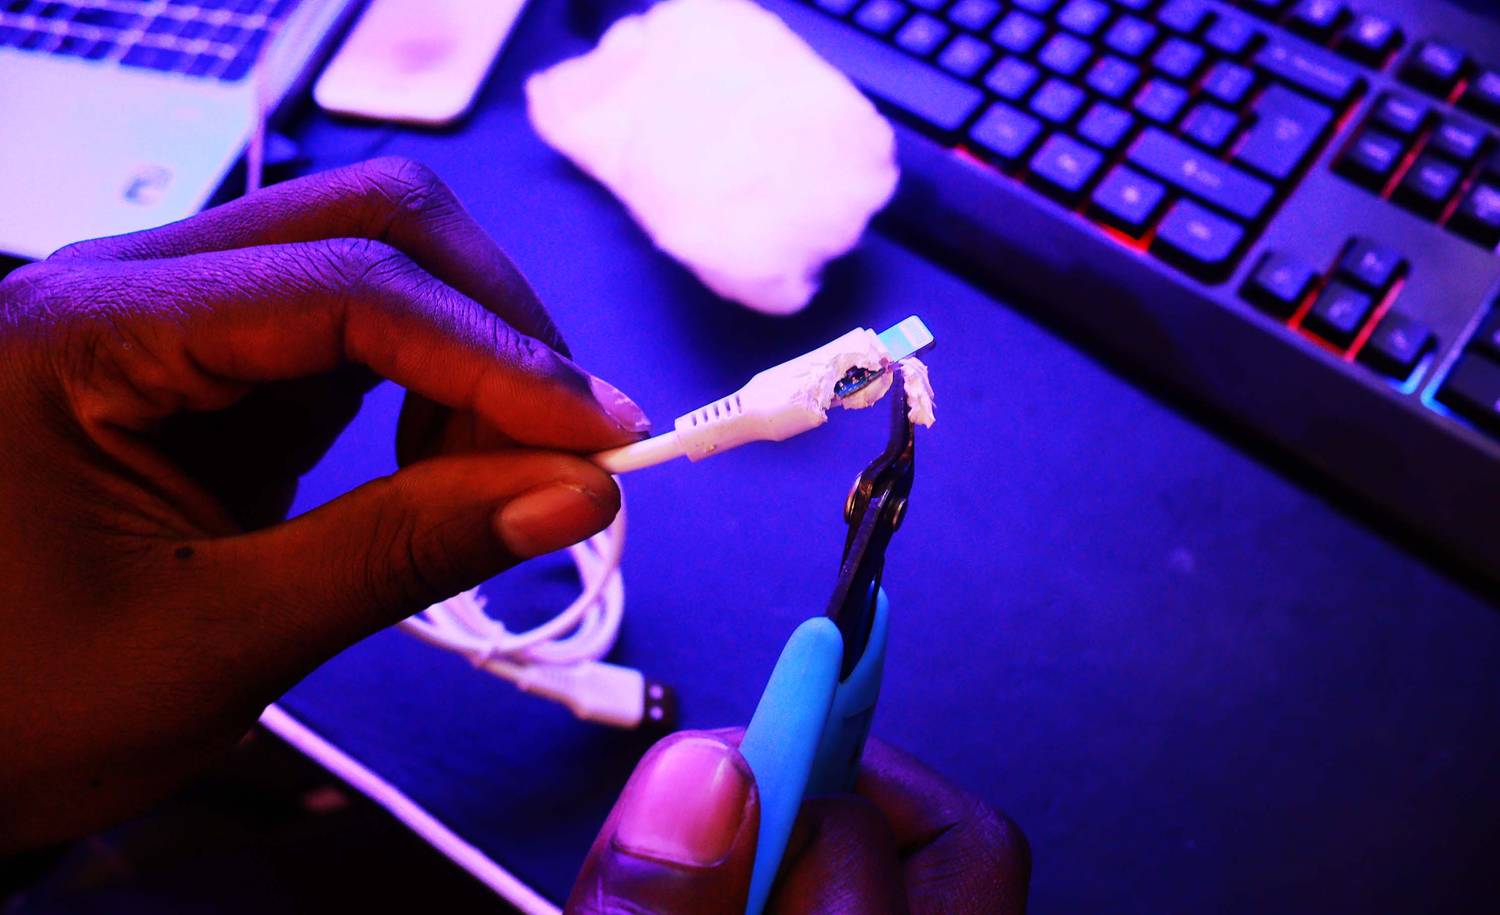
To remove the covering, gently use cutting nippers. Once you remove the plastic covering, you should now be able to see the Lightning charger tip well, and you will also see two power cables.
Step 2: Clean and Check for Possible Damage
To clean the charger tip, wipe it down with a soft cloth. Inspect it for any obstructions that may prevent it from charging, like cracks or bends—see the reasons why your charger isn't charging your phone. Even small tears or nicks in the cable can prevent it from carrying electricity properly. Make sure you clean away all dust, dirt, and debris. If you find any damage, it's time to start fixing it.
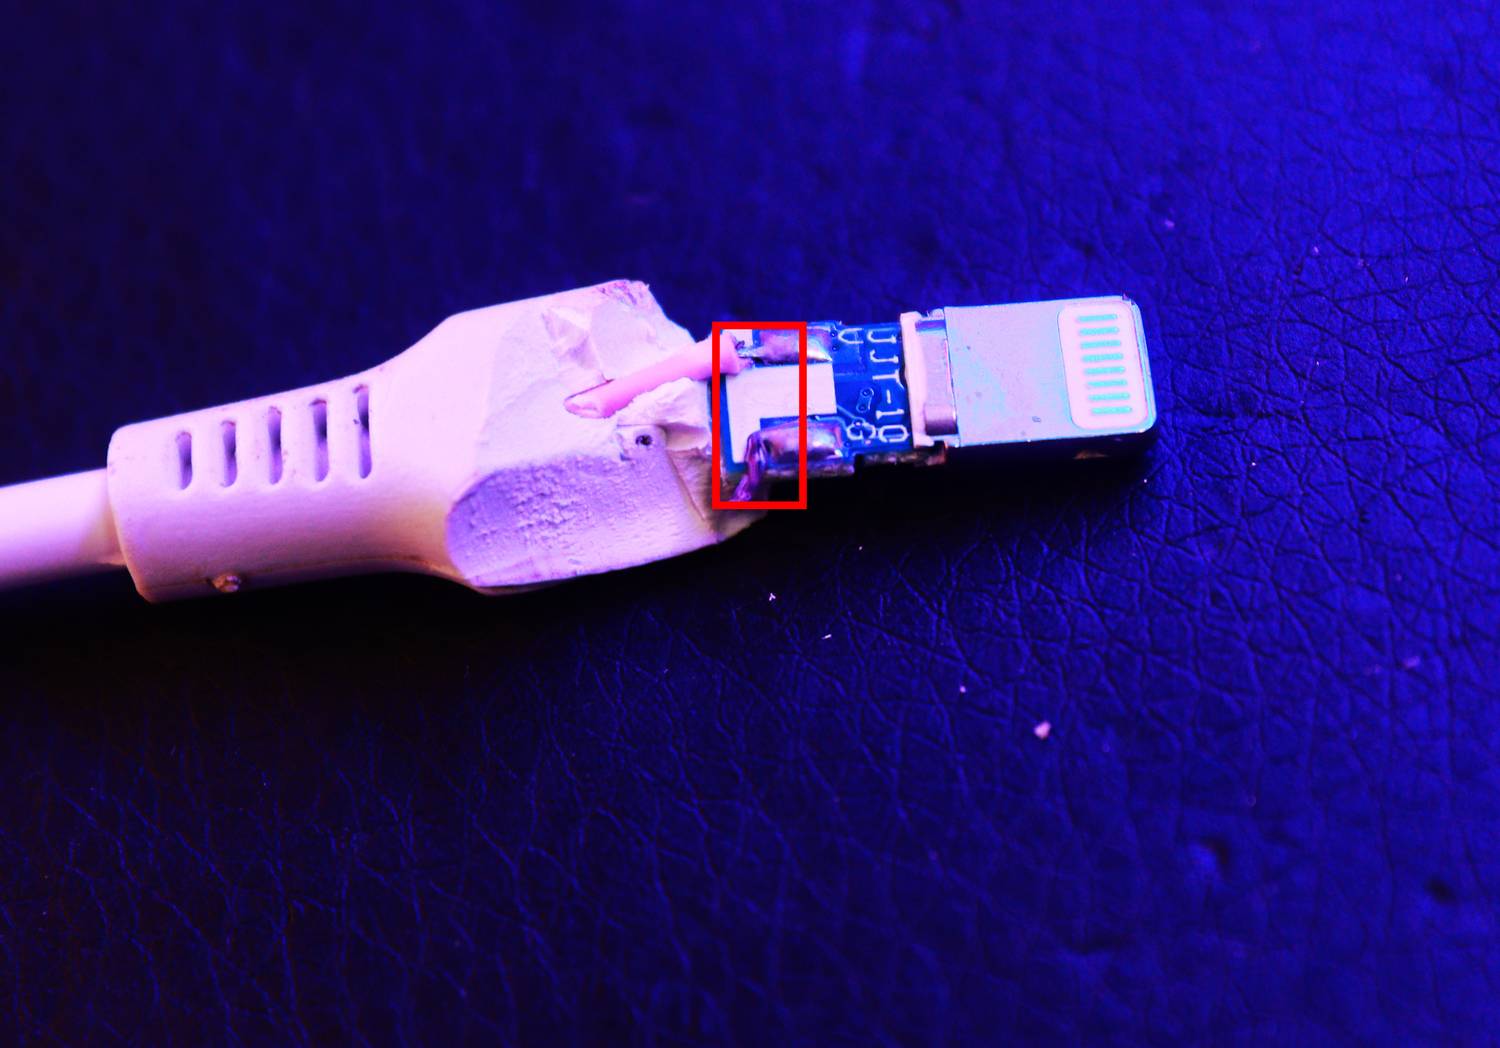
Check the two power cables to ensure they are correctly connected to the terminals. The two cables attached to the charger tip are shown below.
If you find that they are loose or detached, you can use the soldering gun to put them back together correctly. It is essential only to apply a little pressure in the process as the wires are fragile and can easily break or even damage other components of the charger tip.
Step 3: Fix the Metal Clips in the Charger Tip
If everything else is okay, check the metal clips in the black casing to ensure they are good. Use a Phillips head screwdriver to fit them to ensure they are all in place.
You can also use a pair of pliers or tweezers to extract them carefully and fix them if needed. A soldering iron can help in fixing the cables together to the charger tip.
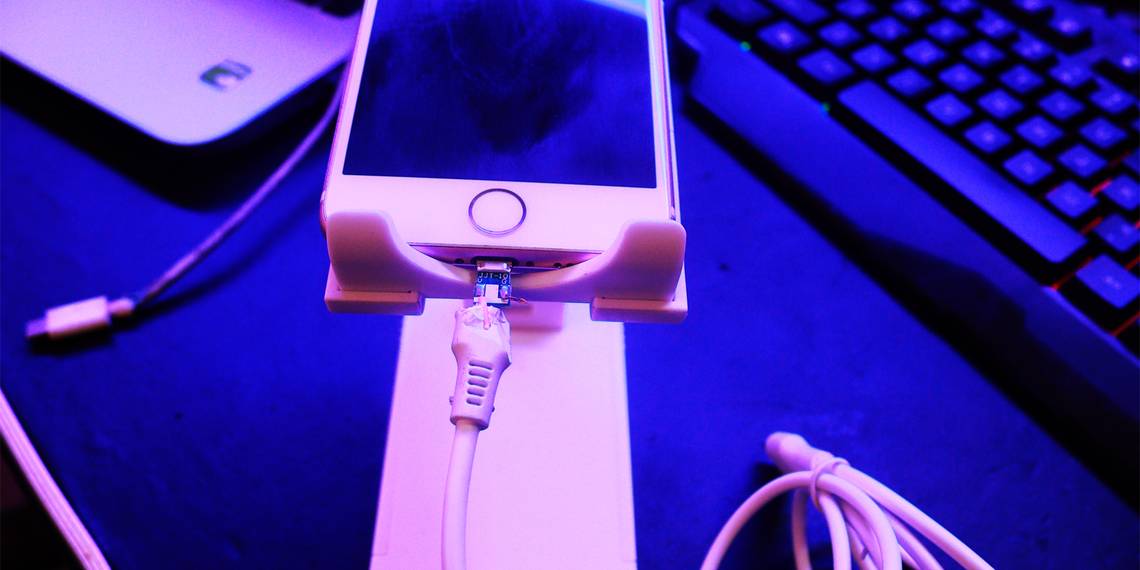
Once everything is fixed, you can use insulating tape in place of the plastic covering that we removed earlier on to ensure that you protect the wires and the charger tip, as well as yourself when charging your phone. You can now plug your Lightning charger tip into your device and see if it's working correctly.
Broken Lightning Charger Tip Fix: Success
By following these simple steps, you can fix a broken Lightning charger tip for your iPhone easily. Just remember to turn off your phone before attempting any repairs, and make sure you correctly place the plastic cover removed before you start using the charger. If you follow these instructions carefully, you should have a working charger tip in no time.