
Want to find all the screenshots that you’ve ever taken on your Mac? There’s a quick command that helps you retrieve all the screenshots saved on your Mac machine.
When you take a screenshot, macOS assigns it a tag. Searching for this tag lets you easily find all your screenshots.
You can also easily find all of your Mac screenshots using the Terminal, Finder, and Spotlight utilities. Here we'll show how to find your screenshots each of these tools.
1. Using the Finder to Find All Mac Screenshots
Finder is a great tool to find files on your Mac, and you can use it to retrieve all your screenshots as well. All you need to do is use the search function to search for the screenshot tag to instantly find all your screenshots.
A benefit of using the Finder to search for screenshots is that you can save a custom search. The next time you want to view your screenshots, simply click on the saved search in the sidebar and you are good to go.
Here’s how to find screenshots using macOS Finder:
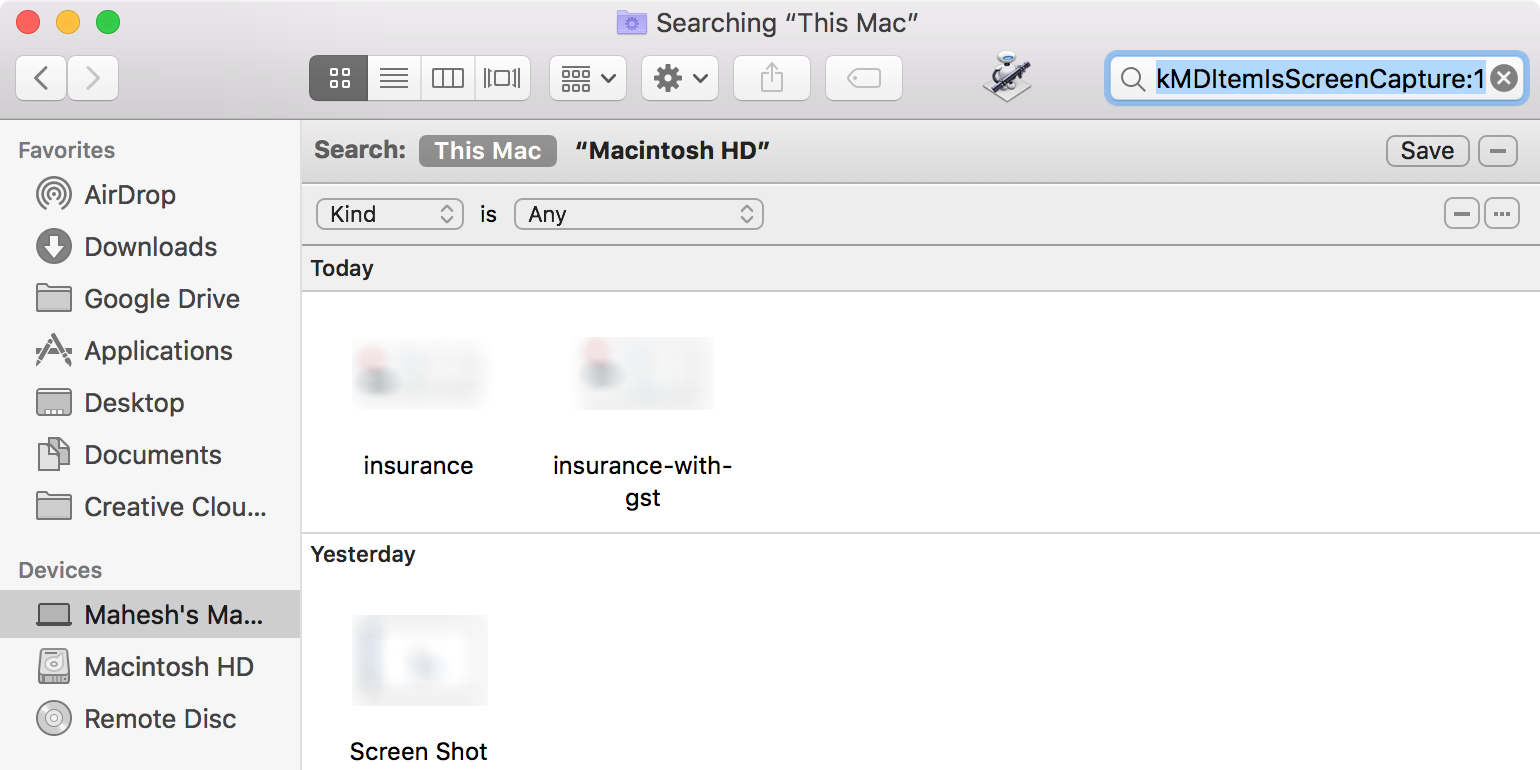
- Open a Finder window. Click the File menu in the menu bar and select Find. You can also use the Cmd + F keyboard shortcut.
- Ensure This Mac is selected for the Search option.
- Put your cursor in the search field, type kMDItemIsScreenCapture:1, and hit Enter.
-
Your screenshots will appear in the search results.
- To view your screenshots’ thumbnails, right-click anywhere within the window and select View > as Icons.
- To save this search for future use, click the Save button in the top-right corner of your window.
- Enter a name for your custom search, tick Add To Sidebar, and hit Save.
- From now on, you can click the custom search in your sidebar to find any screenshots.

2. Using Spotlight to Access All Your Mac’s Screenshots
If you prefer Spotlight to find items on your Mac, you can use it to find your screenshots as well. Unlike Finder, though, you won’t be able to save your search. You will need to type the search term each time.
One good aspect about using Spotlight to find out where your screenshots are located is that you get a larger and better view of your screenshot files. You don’t get this with Finder or Terminal.
You can use Spotlight as follows to fetch all your screenshots:
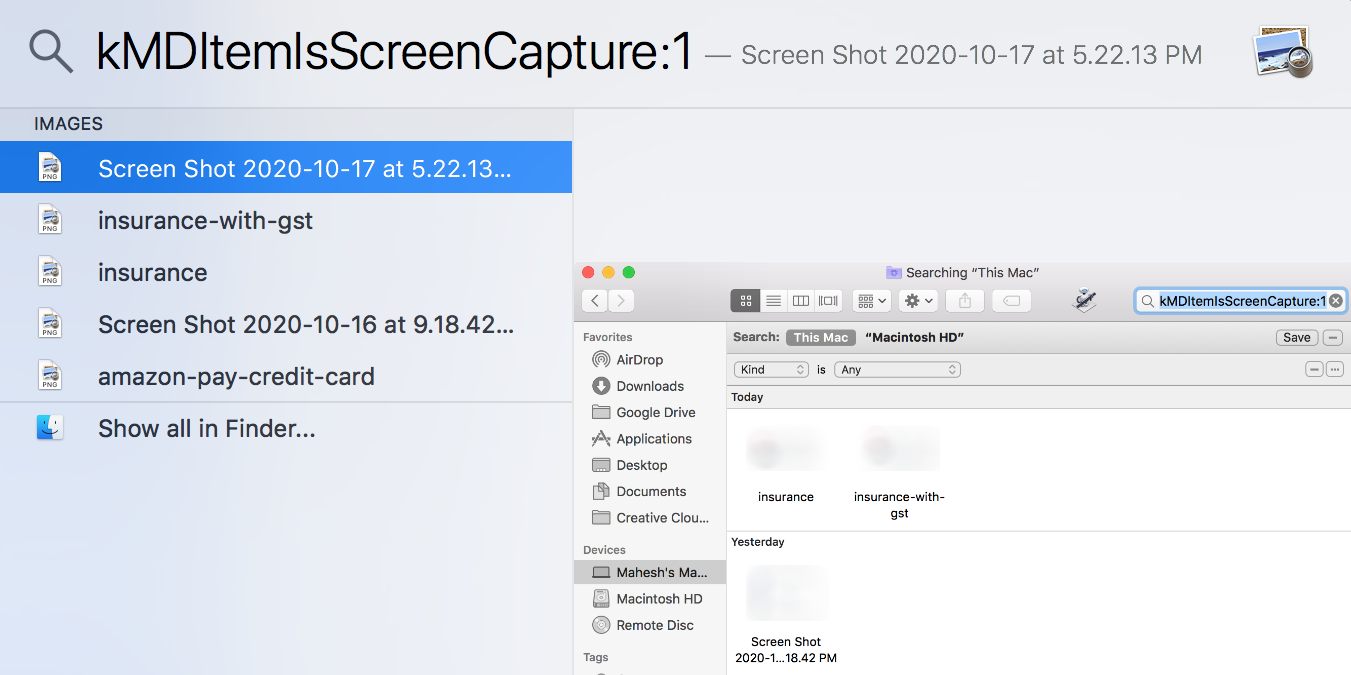
- Press the Cmd + Space keyboard shortcut to launch Spotlight.
- Type kMDItemIsScreenCapture:1 in the search box and press Enter.
-
You will see all your screenshots listed on the left. Select them with your arrow keys and their previews will appear on the right pane.
- To access the folder where a screenshot is saved, highlight that screenshot and press the Cmd + Enter keyboard shortcut. This will open the folder containing your screenshots.

3. Using the Terminal to Get a List of All Your Mac’s Screenshots
You can use the Terminal to find screenshots; however, unlike using Finder or Spotlight, the Terminal won’t let you preview your screenshots. It only prints the full paths to your screenshots. You’ll then need to use Finder to view those images.
If you’re looking to get a full list of your Mac’s screenshots, this method is ideal for you:
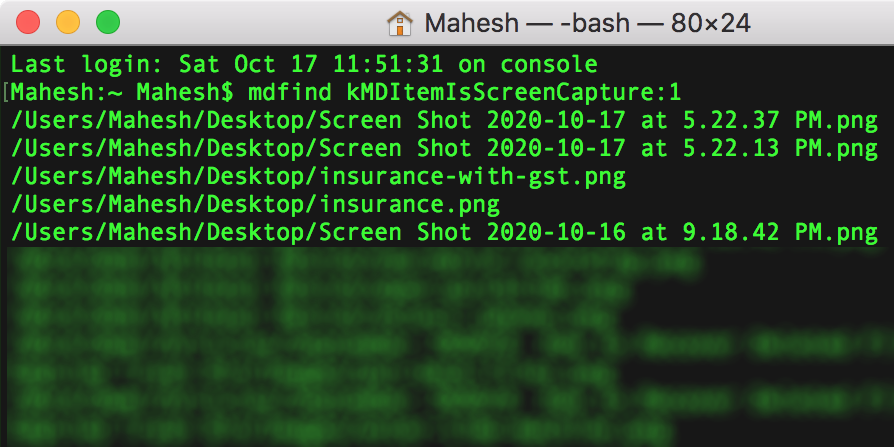
- Open the Terminal on your Mac.
- Type mdfind kMDItemIsScreenCapture:1 in the Terminal and hit Enter.
-
The Terminal will display a list of all of your screenshots.
- If you want to view these screenshots, note the path of the screenshots and use the Finder to access that directory.

Say Goodbye to Manually Searching for Your Mac Screenshots
Why waste your precious time manually looking for your screenshots where a single command can do that for you? Use one of the above methods to find all the screenshots that you’ve ever taken and saved on your Mac computer.
Your Mac lets you change the default screenshot folder as well, if you’d like to do that. This way, you can save your future screenshots in your chosen folder rather than the default location, which is generally your desktop.