
Unless you produce a podcast as your pastime, you may not know how to cut a particular segment, enhance audio, and more. Something as simple as making the audio fade in and out might feel like an impossible task. Luckily, we’re here to help.
What Does It Mean to Fade Audio In or Out?
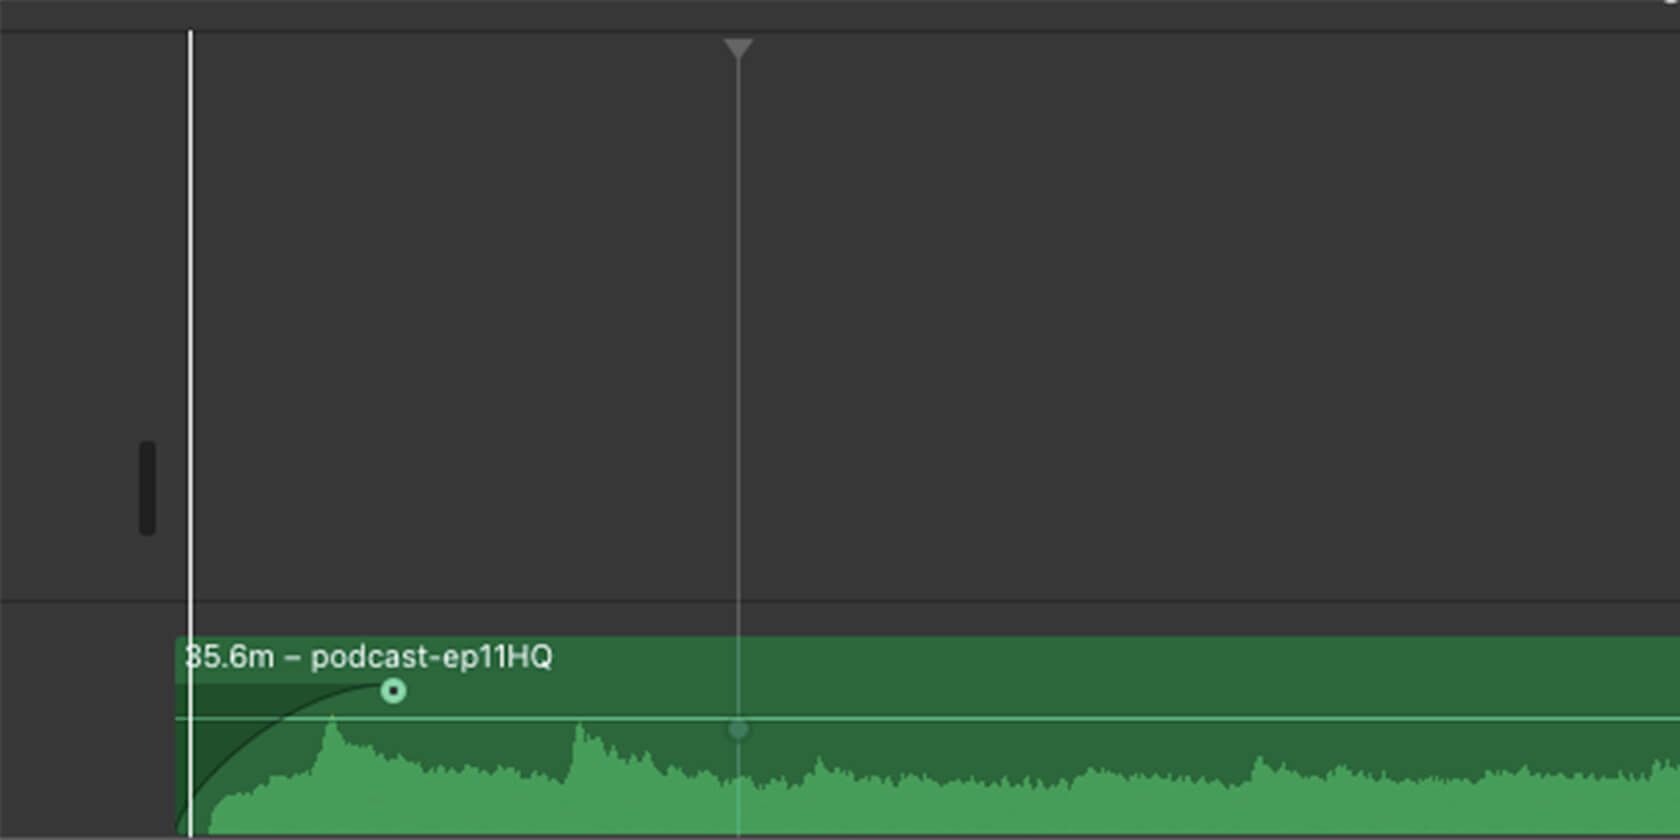
When you make a piece of music (or ambient noise, or even a dialog) fade in, it won’t start in full blast once you hit play. Instead, the sound will become gradually louder over several seconds until it reaches a steady volume.
Fading out works the same way, but just at the end of the track. Instead of being abrupt, it slowly becomes quieter until you can no longer hear it. It’s often used in songs with a repeating chorus at the end.
Let’s explain the easiest ways for you to do this.
1. How to Fade Audio In and Out With iMovie (Mac)
If you’re a Mac user, the easiest way for you to fade audio is with the built-in iMovie. While the name suggests that this software is strictly a movie editor, it works with audio just as well. Even better, if you want to rip an audio track from a video to edit, you can simply upload it here, and save it as audio-only. So it’s a win-win.
To fade audio in and out with iMovie:
- Click the plus (+) to create a new project and pick Movie.
- Press the down arrow (↓) at the top of the screen to upload the audio file from your computer.
- Find the file and click Import Selected.
- Drag the file from the library and drop it into the timeline at the bottom of the screen.
- Press Cmd+ to zoom into the audio, so you see the beginning clearly.
- Hover your cursor above the dot at the beginning of the track until the cursor turns into two arrows pointing horizontally.
-
Drag the dot until you reach the spot in the audio where you want it to stop fading. The longer you drag it, the longer the fade-in section will be.
- To fade out, go to the end of the audio, and drag that dot to the left.
- Navigate to File > Share > File.
-
Under Format, pick Audio Only, and under File Format, select the type of audio file you want. Click Next and save the finished file to your computer.


If you want to have the option to come back to this audio file in the future, and make more adjustments, learn how to save an iMovie project. iMovie is also free on iOS, so if you want to edit audio on your phone instead, this is a good choice.
2. How to Fade Audio In and Out With Audacity (Mac and Windows)
Audacity is free, open-source software that works both on Windows and Mac. Unlike iMovie, it only deals with audio and does so extremely well. You can reduce background noise with it, add silence, adjust the tone, and even produce whole tracks. You can also use Audacity to record sound.
Follow these steps to add a fade-in or fade-out to your track with Audacity:
- Go to File > Open to upload your audio.
- With your cursor, highlight the part at the beginning of the audio that you want to fade in.
-
Navigate to Effects > Fade In.
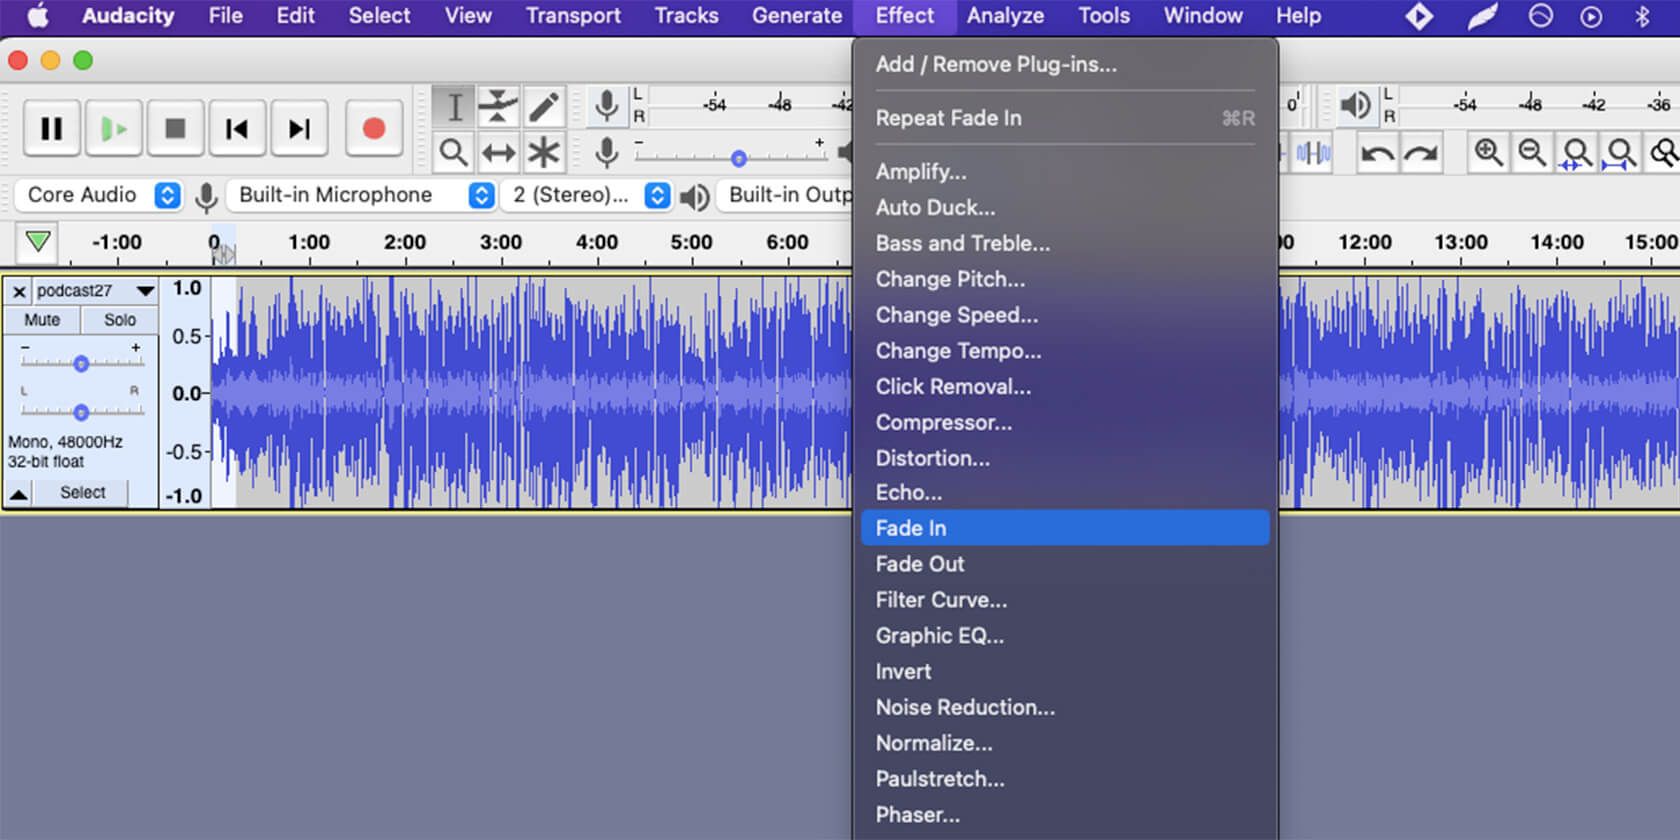
- To fade out, highlight the portion at the end of the track and select Effects > Fade Out.
-
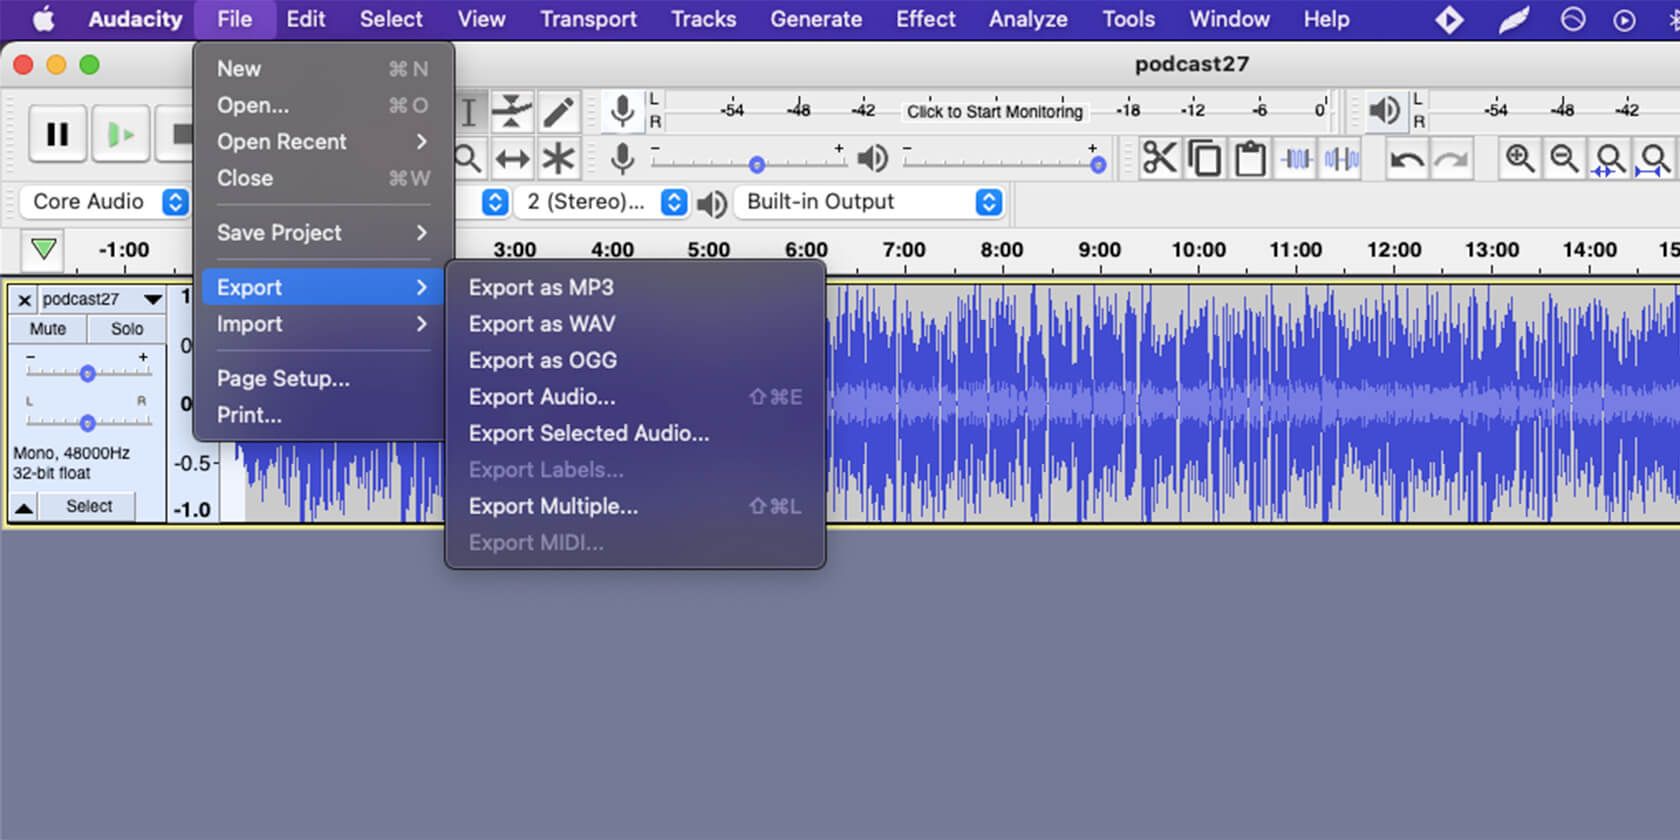
Go to File > Export and select the file type.


Similar to iMovie, you can control the length of the fade. If you want it to take more time, simply select a larger portion of the audio.
3. How to Fade Audio In and Out With AudioTrimmer (Browser)

iMovie and Audacity are great tools if you want to make significant edits to your audio. However, if all you’re after is a fade-in and fade-out, and you don’t need any customization, Audio Trimmer is the tool for you.
As it’s an online tool, you can use it from any computer and don’t have to install anything. It is free and has a user-friendly interface. Here is how you can fade in and fade out audio with AudioTrimmer:
- Click Choose File to find the track on your computer, and then click Open.
- If you want to keep the original length of the track, simply toggle the two buttons next to Fade, so that Fade In and Fade Out appear in green.
- Click Crop, and you’re done. Hit Download to save the file to your computer.
- If you only want to use a small portion of the audio, you can crop it with the two markers. Then, the fade will be applied only for that section.
4. How to Fade Audio In and Out With Super Sound (Android)
As we’ve mentioned, iMovie is also available for free on iPhone. However, if you’re an Android user, we wanted to give you an option to edit your audio on the go as well. Super Sound is the best app to help you do that. It’s free and has various features, such as cropping, splitting, equalizer, and more.


The fade features are also quite easy to use, just follow the steps below:
- Tap Edit Audio on the home screen.
- Pick the audio file from your phone’s storage.
- Tap Fade In.
- Select the length of time you want for the fade by scrolling to the right or left. The bar at the bottom will indicate the length in seconds.
- Tap Confirm.
- If you want to add a fade-out, repeat the same after pressing the Fade Out icon.
- Press the disk symbol on the top right to save your work.
Download: Super Sound for Android (Free, in-app purchases available)
Easily Fade Your Audio Tracks
Hopefully, we managed to answer your question about how to fade your audio in and out with this guide. The tools that we discussed are all excellent options. It’s just a matter of picking the one that fits you the most.
In addition, these tools are a good place to start if you want to dive further into the world of audio editing and perfect your tracks.