Time Machine’s best aspect is its “set-and-forget” approach to backing up files and folders on your Mac. But do you want it to spend time making copies of files and folders that aren’t important? If you want to stop Time Machine from backing up a file or folder, you need to add it to Time Machine’s exclusions list.
Time Machine Might Already Be Excluding the Files
By default, when you use Time Machine to back up your Mac, it automatically excludes specific items, such as system-related data. If you want to be sure that you aren’t about to omit the same file or folder twice, you should view the hidden exclusions file:
- Open the Time Machine drive and double-click the latest snapshot.
- Press Shift + Cmd + Comma to unhide hidden files.
- Select the exclusions.plist file and press Space to view it in Quick Look. You should see a list of excluded directories at the top of the list.
Add Files or Folders to Time Machine’s Exclusions List
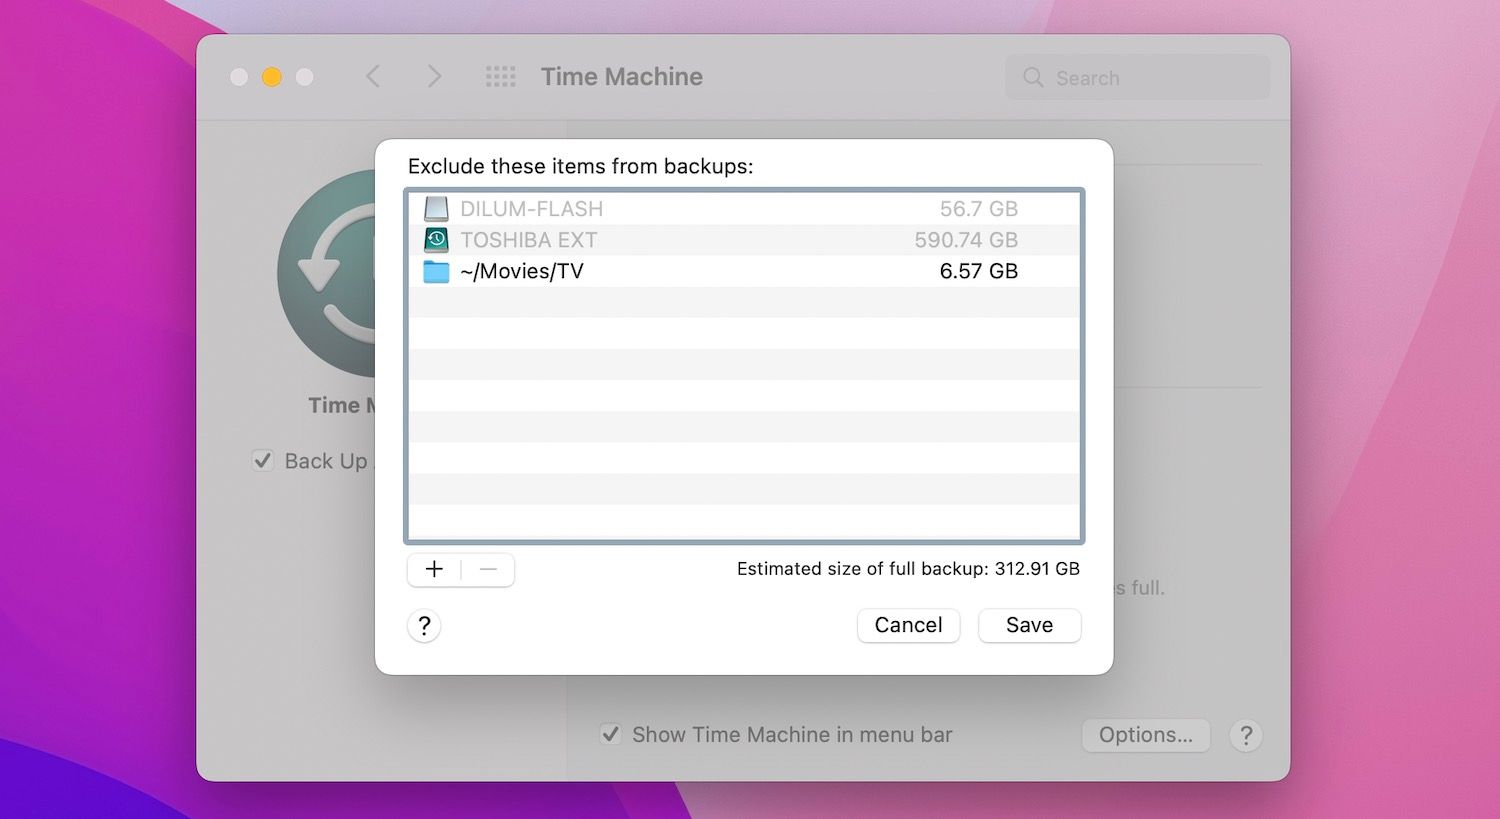
To exclude files and folders in Time Machine, you must add the items to Time Machine’s exemptions list. Here’s how:
- Click the Time Machine icon on your Mac’s menu bar and choose Time Machine Preferences. If you don’t see this icon, open the Apple menu and go to System Preferences > Time Machine.
- Click Options, then click the plus (+) button.
- Select the file or folder—such as TV—you want to exclude and select Exclude.
- Click Save.
Remove Files and Folders From Time Machine’s Exclusions List
If you want to remove a file or folder from the exclusions list, to make sure Time Machine does back it up, here’s how:
- Revisit Time Machine Preferences and select Options.
- Select the file or folder you want to remove.
- Select the minus (–) button.
Manage Your Backups in Time Machine
Excluding files and folders in Time Machine shortens the time between Time Machine backups and helps retain more snapshots on the internal storage. You can also take this a step further by deleting unwanted Time Machine backups on your Mac.


