CorelDRAW is a professional graphic design software that offers a lot of freedom to its users. With so much flexibility, you have a lot of room to be creative. This means that you can easily design a poster, flyer, or sign to promote an event or advertise a business.
You can make a poster from scratch or use one of the many pre-made templates that CorelDRAW offers. Here, we'll show you how to do both.
How to Create a Poster Using a Template
You don't have to know a lot about graphic design to create an eye-catching poster in CorelDRAW. CorelDRAW's templates give you a good starting point, especially if you're looking to quickly create a design.
Choosing a Template
When you open CorelDRAW, you can simply click on the New From Template option in the Welcome Screen. A new window will appear with all the templates that CorelDRAW has to offer.

There, you can filter the templates by type, and in this case, you should select Posters/Signs. You can select whichever template you like, and you will be able to edit it in CorelDRAW.
Editing the Template
When you choose a template, you will have full freedom when editing it. Thus, if there is anything you don't like in the template, such as the page size, font, color, or other details, you can simply edit it.
Don't forget to replace any text and images to match the subject of your poster!

How to Create a Poster From Scratch
If none of CorelDRAW's templates suit your needs, you can always create a poster from scratch. It may take a bit longer, but it's a great way to get the exact design you want.
Creating Your Document
The first thing you need to do is create a blank document. You can do this by clicking on the New Document option on the Welcome Screen, by holding Ctrl + N on your keyboard, or by clicking the New Document icon on the main toolbar.

A new window will pop up where you can customize your document. For example, you can give it a different name, select the preferred size, set the primary color mode, and more.
Adding a Simple Background
Since you will be making a poster, the orientation should be set to Portrait and the resolution should be set to 300dpi. These are CorelDRAW's default settings.
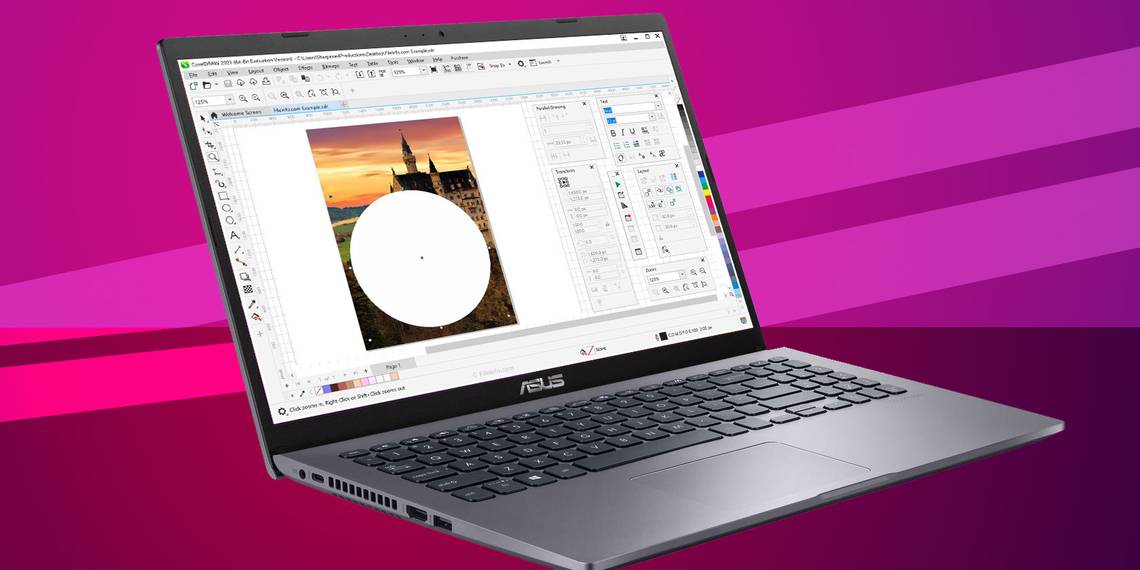
For the background in this example, we will use a picture of a castle to create a poster for a play. You're free to replace this with any picture of your choice.
You can insert a picture by simply dragging it into CorelDRAW, or you can click on File > Import and choose the image that you want to use. You can press Ctrl + I to import an image as well.
Once the picture is imported, press P on your keyboard to center it. Clicking on the image allows you to change its size.

When you're ready, draw a circle by clicking on the Ellipse tool (F7). In order to draw a proportionate circle, hold down Ctrl and click and hold the left mouse button. Then, drag across your screen to create a perfect circle.

From the color palette on the right side of the screen, select white. Left-clicking the circle will fill it with the color you selected, while right-clicking it will only outline the circle with your selected color.
Once you do that, place the circle where you want your text to be. Select the circle and click on the Transparency tool. From the Transparency slider on the Property bar, you can adjust the shape's opacity.

Adding Simple Text
If you wish to add text, all you have to do is click on the Text tool (F8) on the left toolbar. Here, you are free to write whatever you want, depending on what kind of poster you want to create.
You will also see different formatting options for your text in the Property bar. In case you need more formatting options, you can click on Text > Table Properties, and you will get options to format the characters, paragraphs, and frames.

Keep in mind that the same rules for coloring the circle also apply to coloring text in CorelDRAW.
Adding a Pattern Background
If you don't want to use an image as your background, you can play around with the patterns in CorelDRAW. CorelDRAW has an array of premade patterns that you can use instead.
Start by double-clicking the Rectangle tool (F6), which will create a rectangle the size of your document. From here, click on the Transparency tool, and then use the Transparency picker on the Property bar to view the different kinds of patterns.
By clicking and dragging the bottom square, you can choose the pattern's size and path.

In case you want to add something extra, you can also add some eye-catching effects. To do this, double-click the Rectangle tool (F6) and select a color that would go well with your poster.
Then, click on the Transparency tool. Select Fountain transparency, which is represented by the third icon from the left on the Property bar. Choose your desired fill from the selection, and your design will become even more unique.

Adding Decorative Text
If you would like to add decorative text to your poster, CorelDRAW has plenty of options.
Adding a drop shadow to your text makes a subtle statement. To use it, select your text, and click on the Drop Shadow tool as shown in the screenshot below. On the Property bar, you will have a couple of additional options you can use to further customize the shadow.

In case you want to align your text differently, click on the Envelope tool. This lets you move your text around however you want.

If you would like to create a 3D look instead, select the Extrude tool. You can adjust the way the text looks by dragging the arrow.

Of course, you can combine as many effects as you want to get the best-looking text for your poster. Just keep in mind that it's best to keep things simple—combining all of the effects doesn't necessarily mean that your text will look better.
Outputting Your File
Once you are happy with the poster you created, it is time to save it. This is a rather simple process. All you have to do is click on File > Save, or you can press Ctrl + S on your keyboard.
A window will pop up, asking you where you want to save the file. Make sure to choose the appropriate output type from the dropdown menu.

Your Poster Is Finished
Remember, CorelDRAW gives you a lot of freedom. Take the above suggestions and try to get creative in your own way!
CorelDRAW can do a lot more than just help you create a cool poster, so don't limit yourself. You can create professional documents, logos, vector drawings, and much more with CorelDRAW's great vector features.