Business cards might seem old-fashioned, but they're still effective for professionals building their network. A well-designed business card leaves a positive and lasting impression on your potential partners and clients.
Thankfully, you don't have to be a graphic design expert or use complex tools like Adobe Photoshop or InDesign to design a card—all you need is Microsoft PowerPoint. With that and our guide, you can create a unique and remarkable business card.
So, follow this step-by-step tutorial, and start creating your business card today.
Understanding the Basics of Business Card Design
To create a professional-looking business card, it's essential to understand these three design elements:
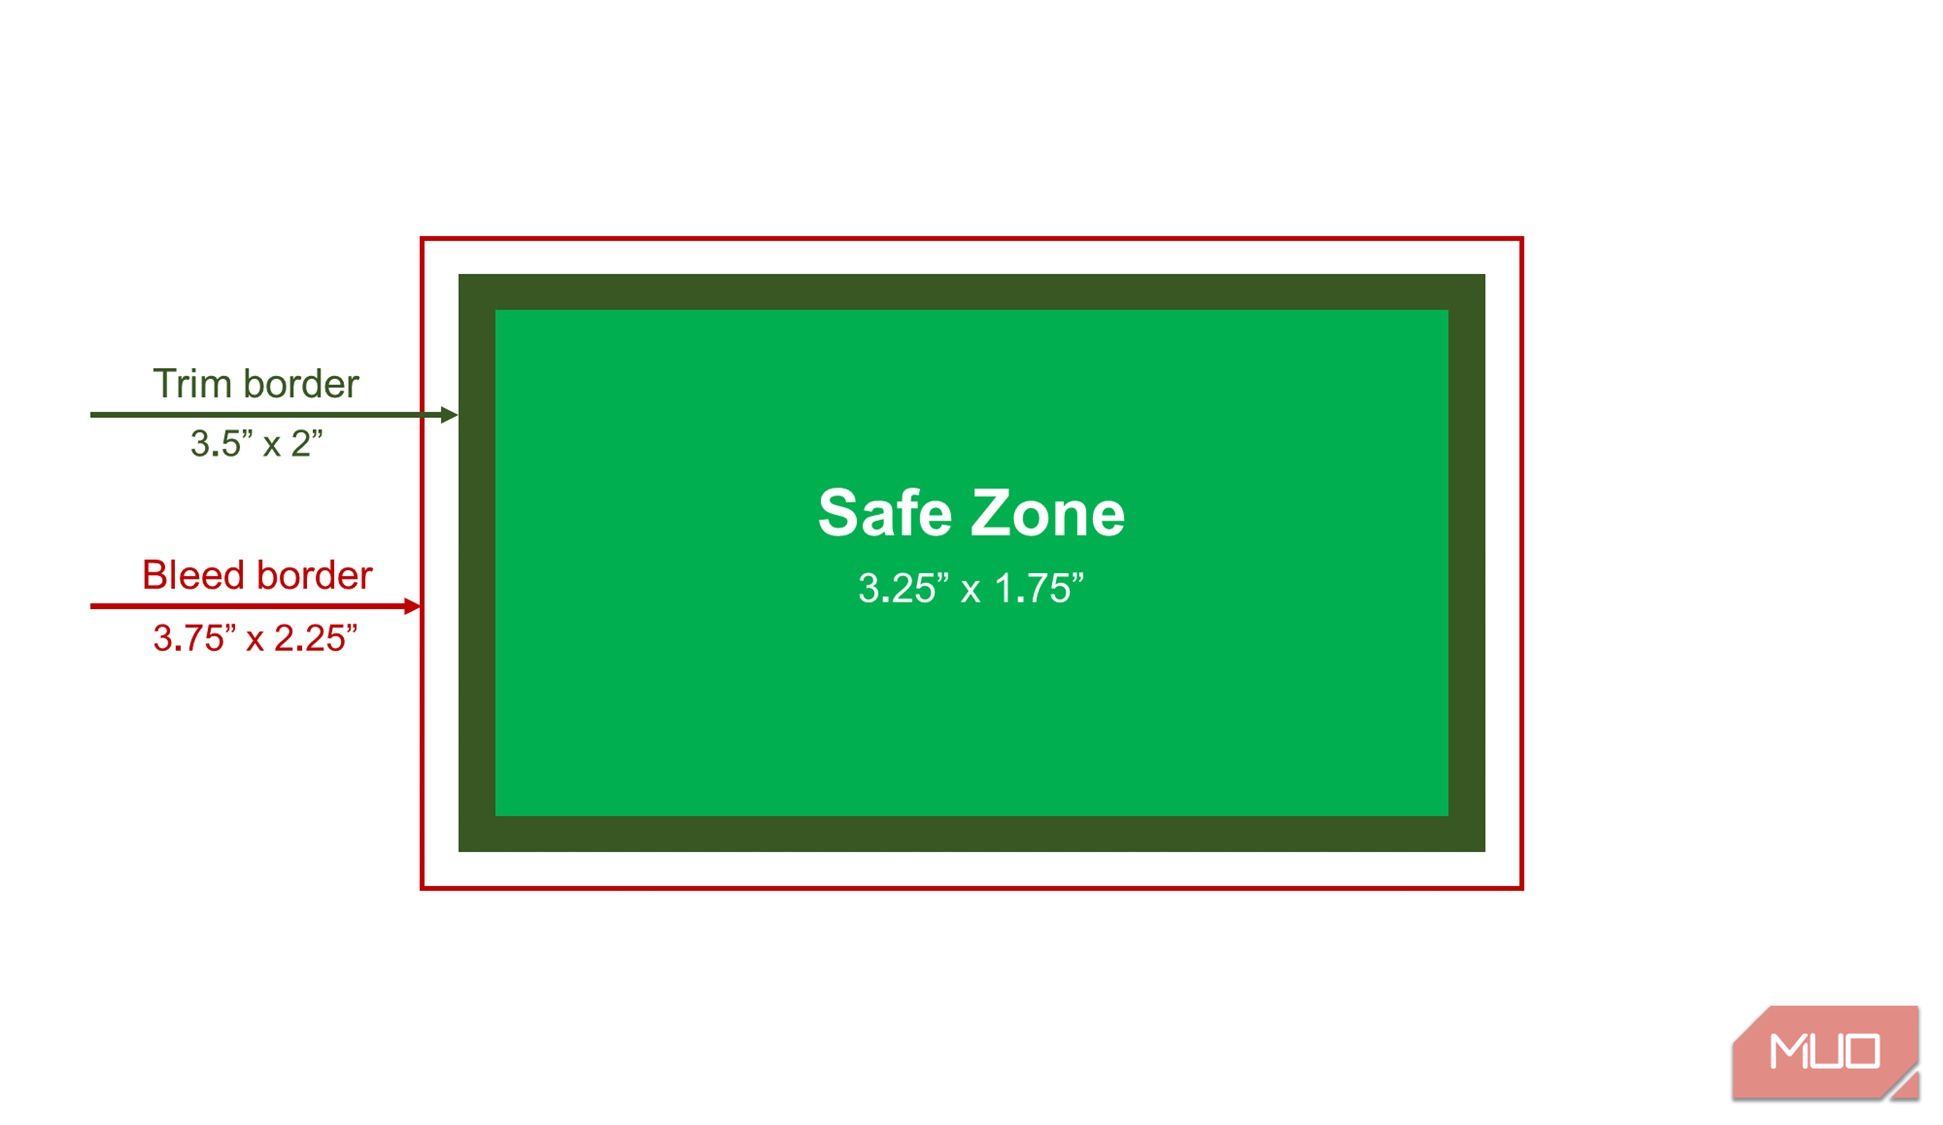
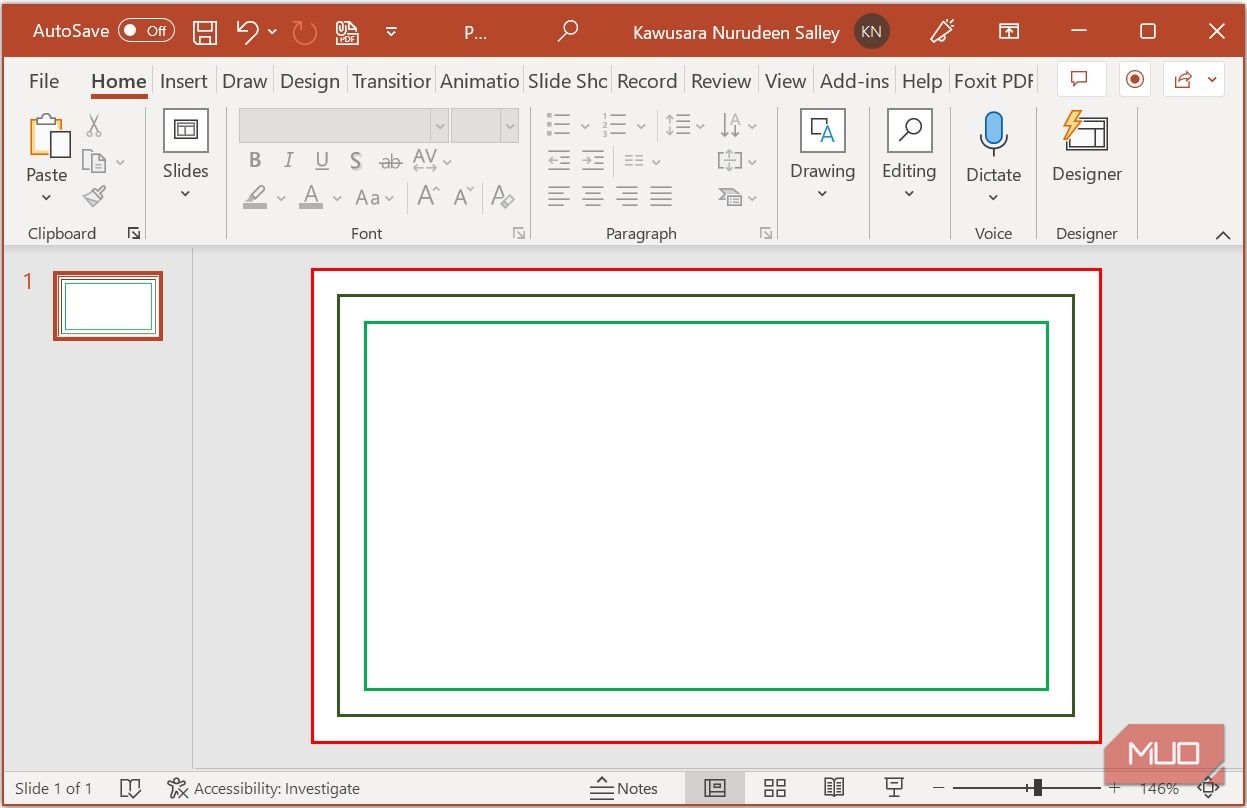
- The trim border. It's the exact size of your finished business card. In this case, that is 3.5" x 2", the standard card size in the US. This size is 85mm x 55mm for the UK and most of Europe. After printing, the card will be trimmed down to this size, and any content beyond this border will be removed.
- The bleed border. It's the area around the trim border that will be removed. The background design of your card should extend to this area so that if the printer doesn't cut precisely around the trim border, there's no white space around your finished card.
- The safe zone. It's the area that holds your personal and business information. This region ensures that these details are not too close to the trim border and will not be removed in the final card cut-out.
With this understanding, let's dive into creating a business card in nine easy steps.
1. Create a Blank Document in Microsoft PowerPoint
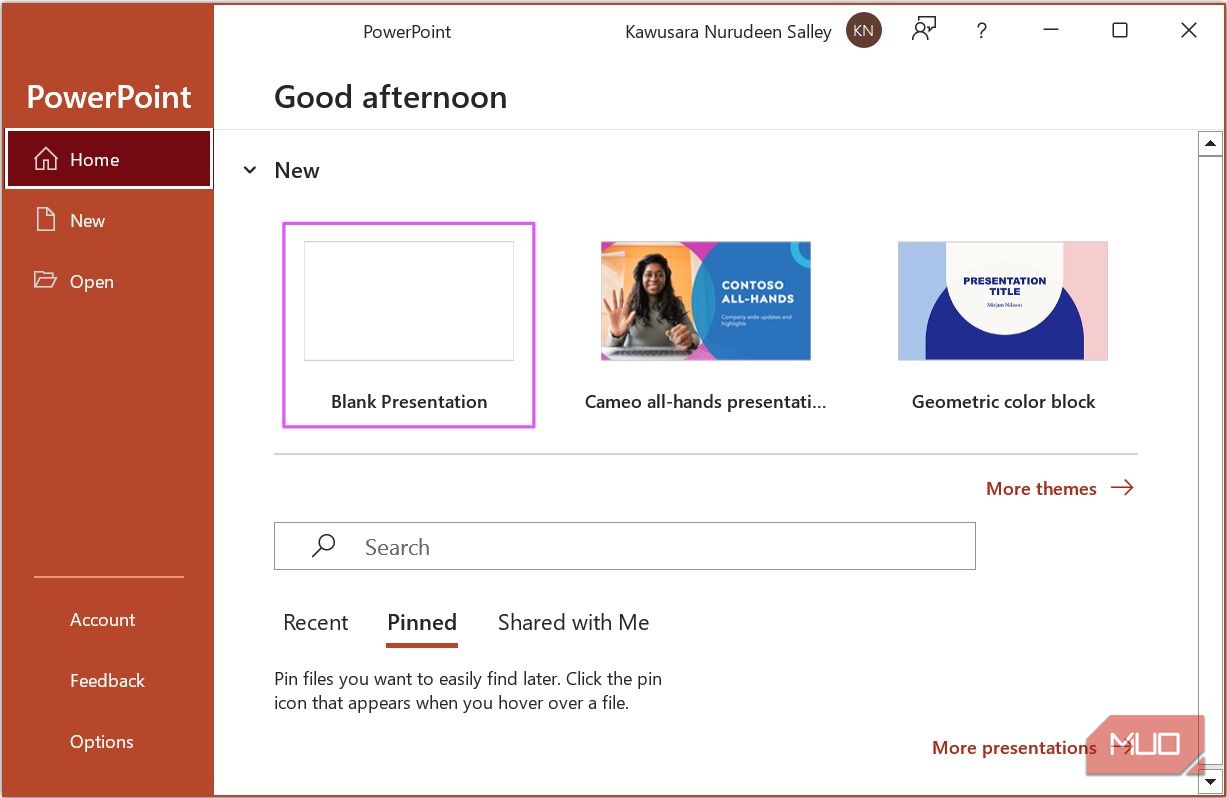
Open PowerPoint on your computer and select Blank Presentation.
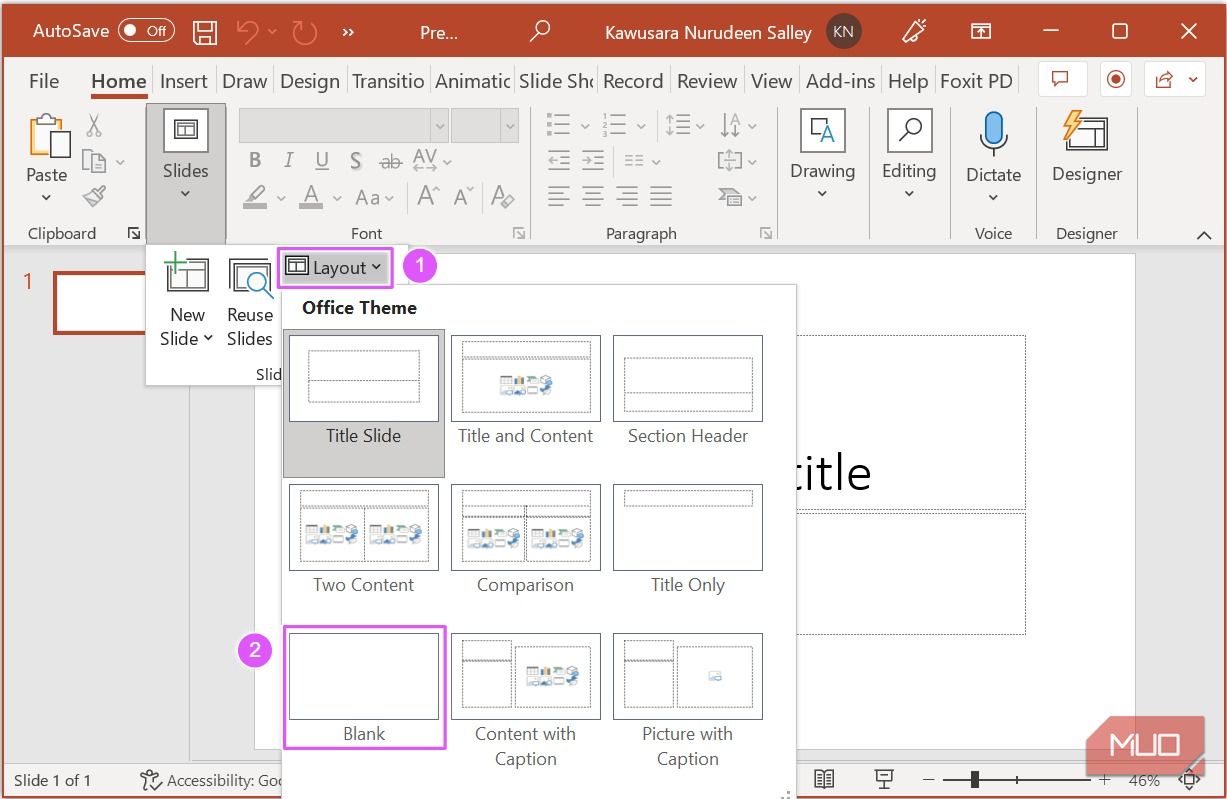
To start creating the card, you should have a completely blank canvas. So from the Home tab, click Layout and select Blank from the drop-down options.
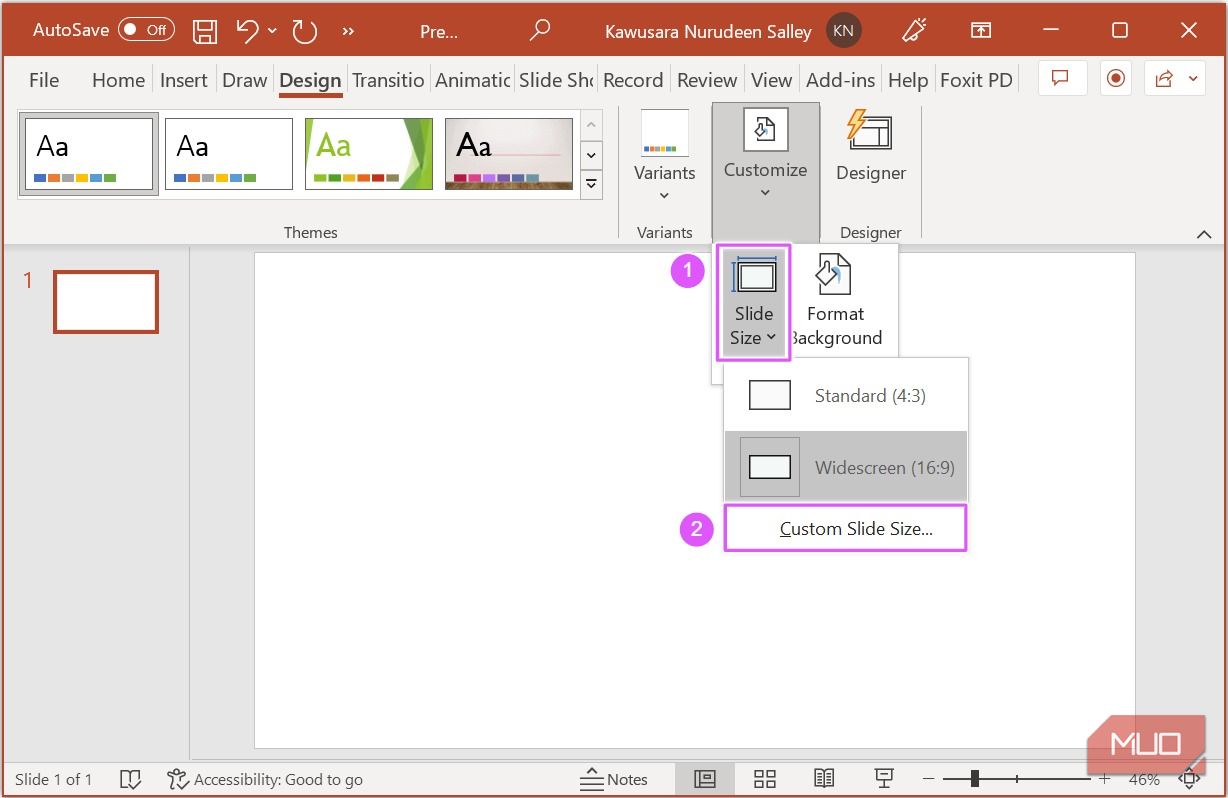
2. Set the Slide Size for a Business CardUnder the Design tab, click Slide Size and select Custom Slide Size.
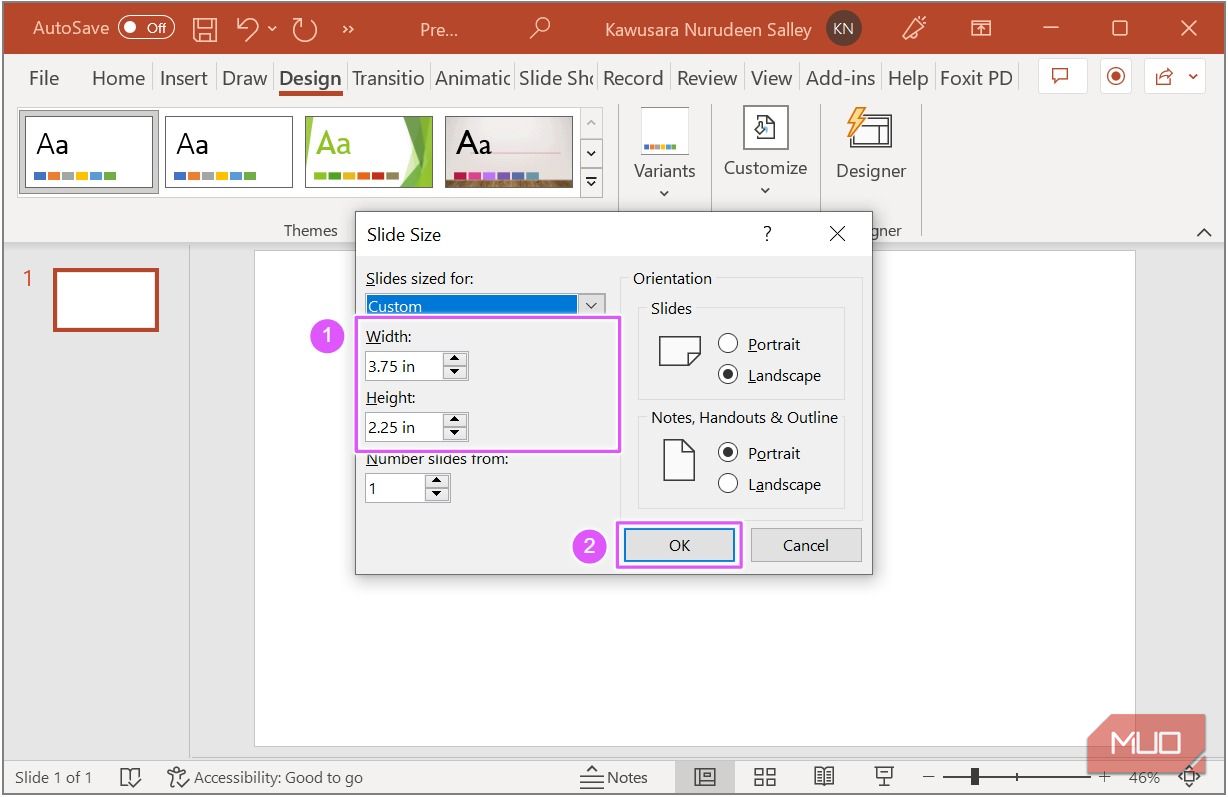
Set the Width of the slide to 3.75 inches and the Height to 2.25 inches. When you're done, click OK.
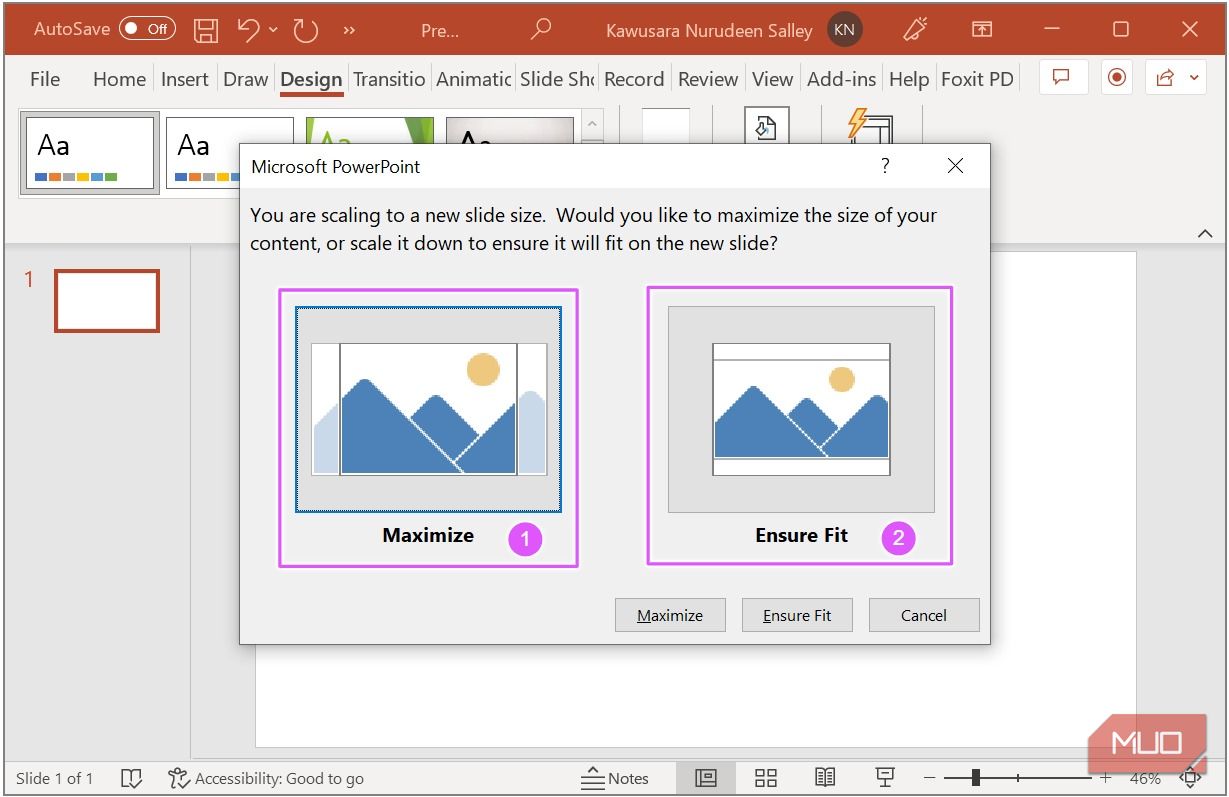
You can select Maximize or Ensure Fit in the dialog box that pops up; both will work fine in this case.
3. Add the Bleed, Trim, and Safe Borders
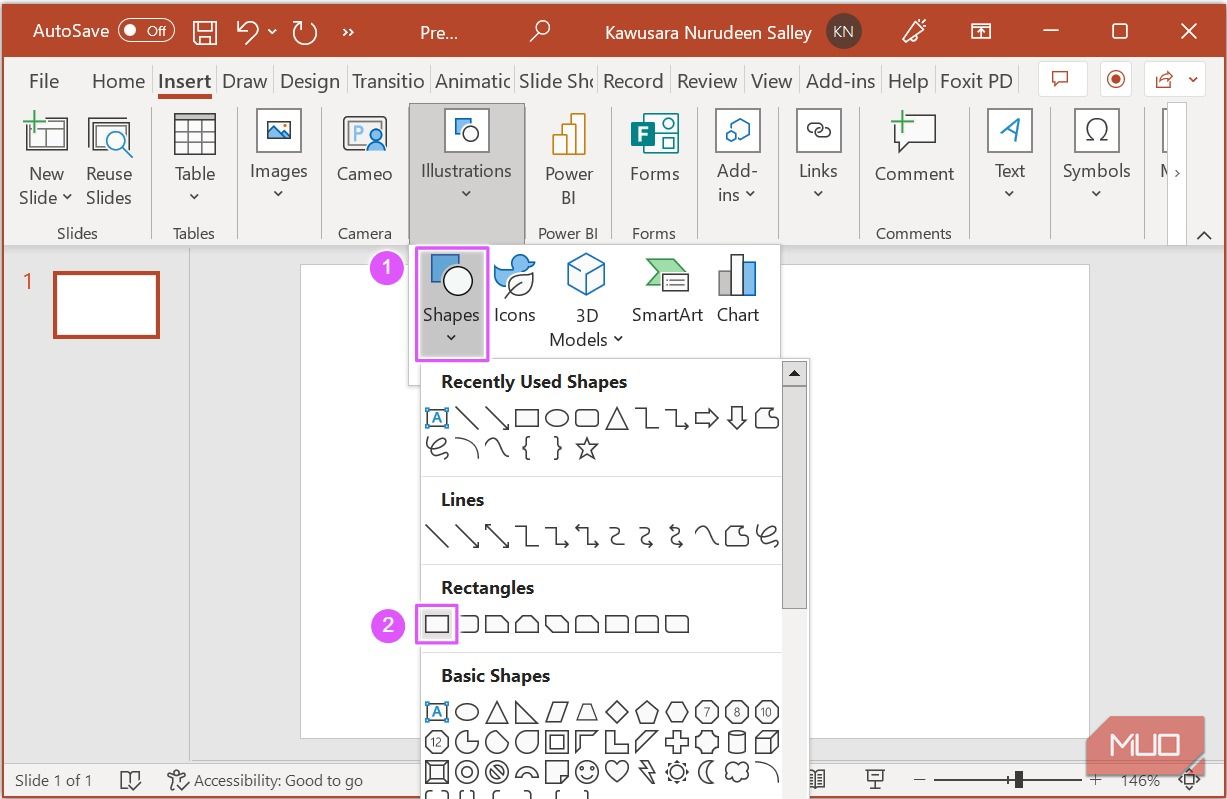
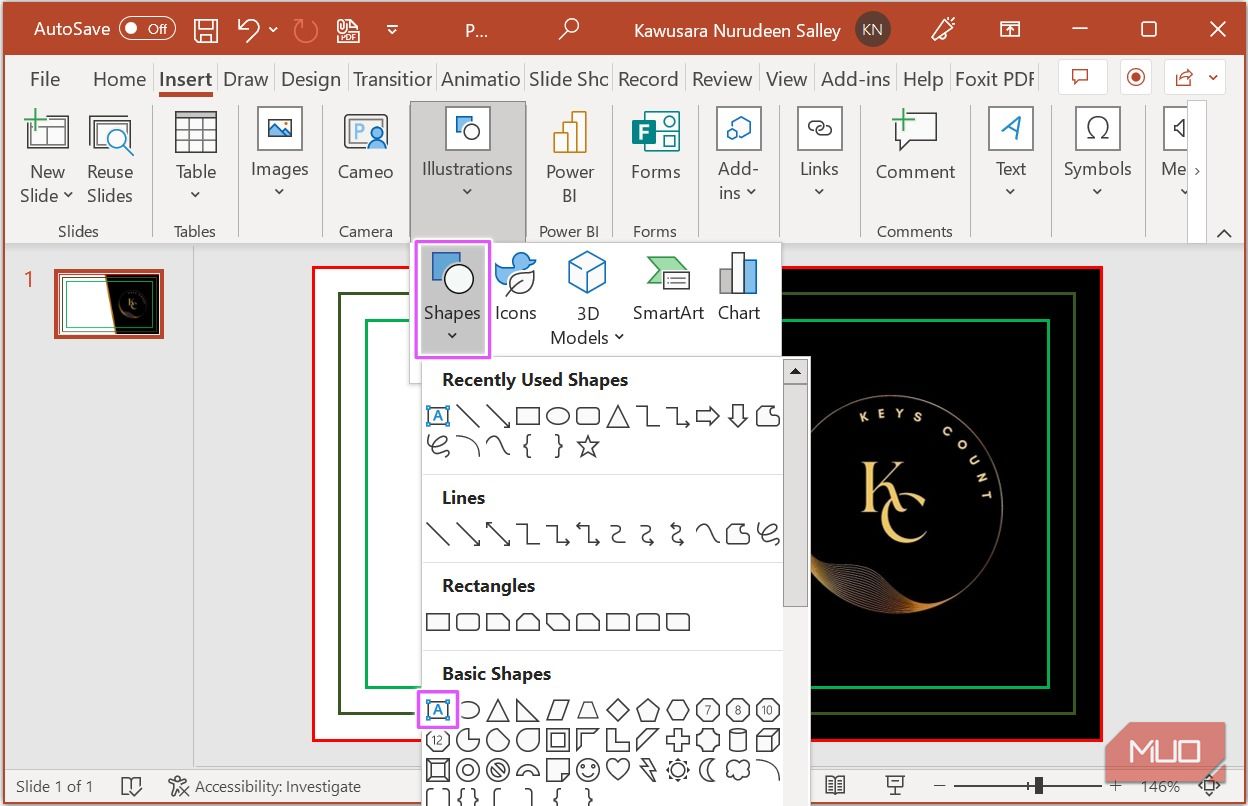
You can use rectangles to add the bleed, trim, and safe borders. To add the bleed border, navigate to the Insert tab. Click on Shapes, and select a rectangle.
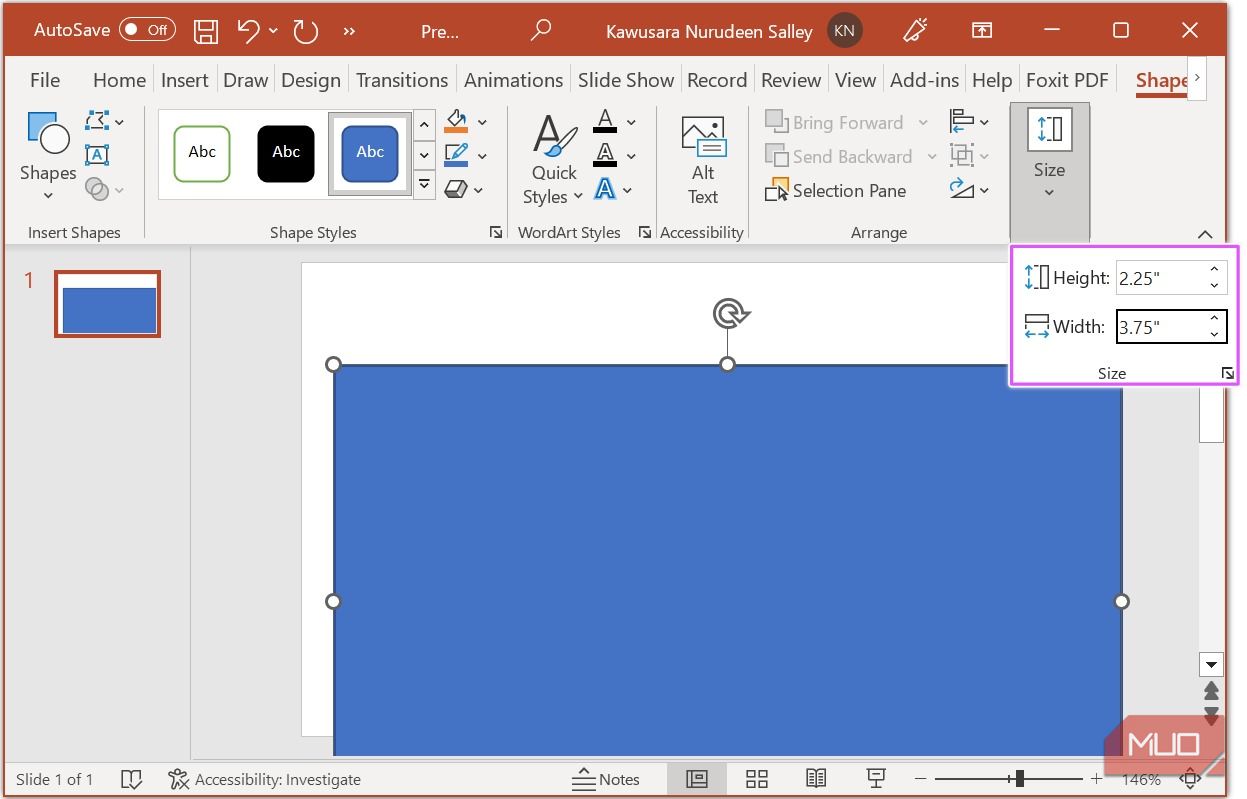
When you draw the rectangle, the Shape Format tab opens up. Set the rectangle's Height to 2.25 inches and Width to 3.75 inches.
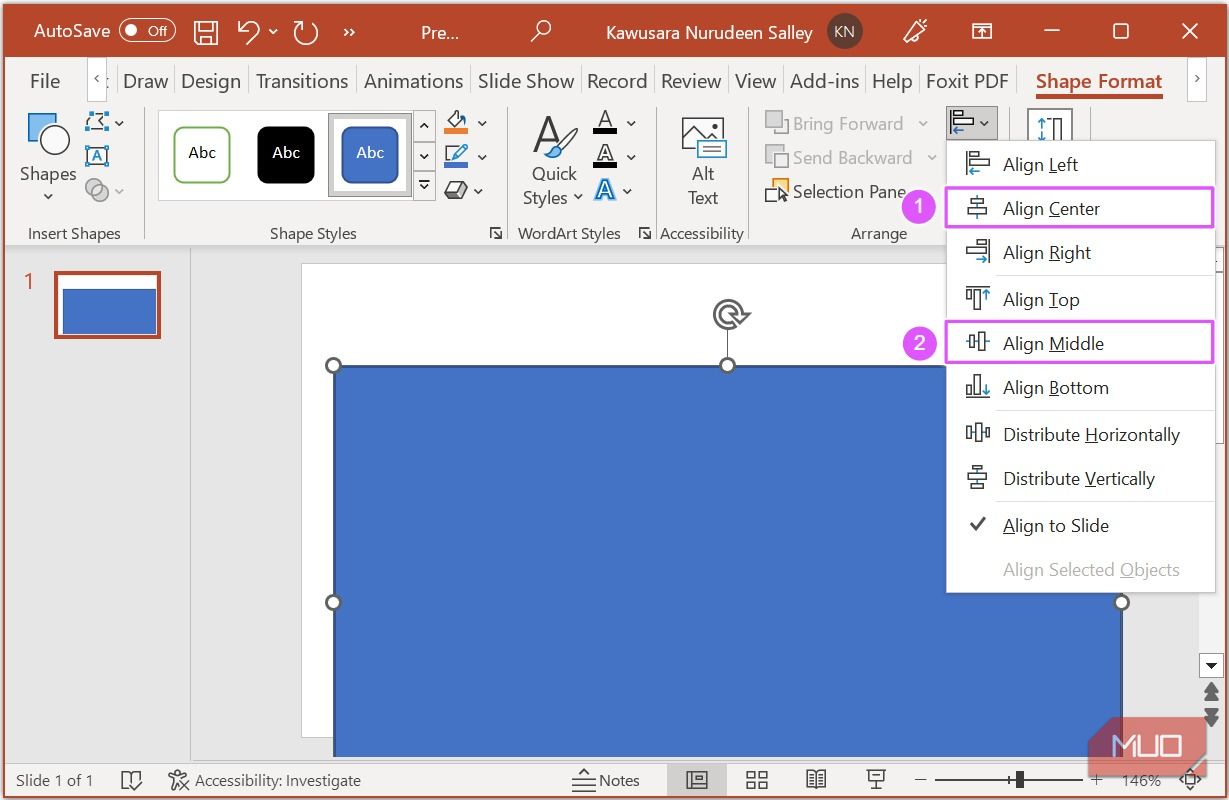
Click Align, then select Align Center and Align Middle.
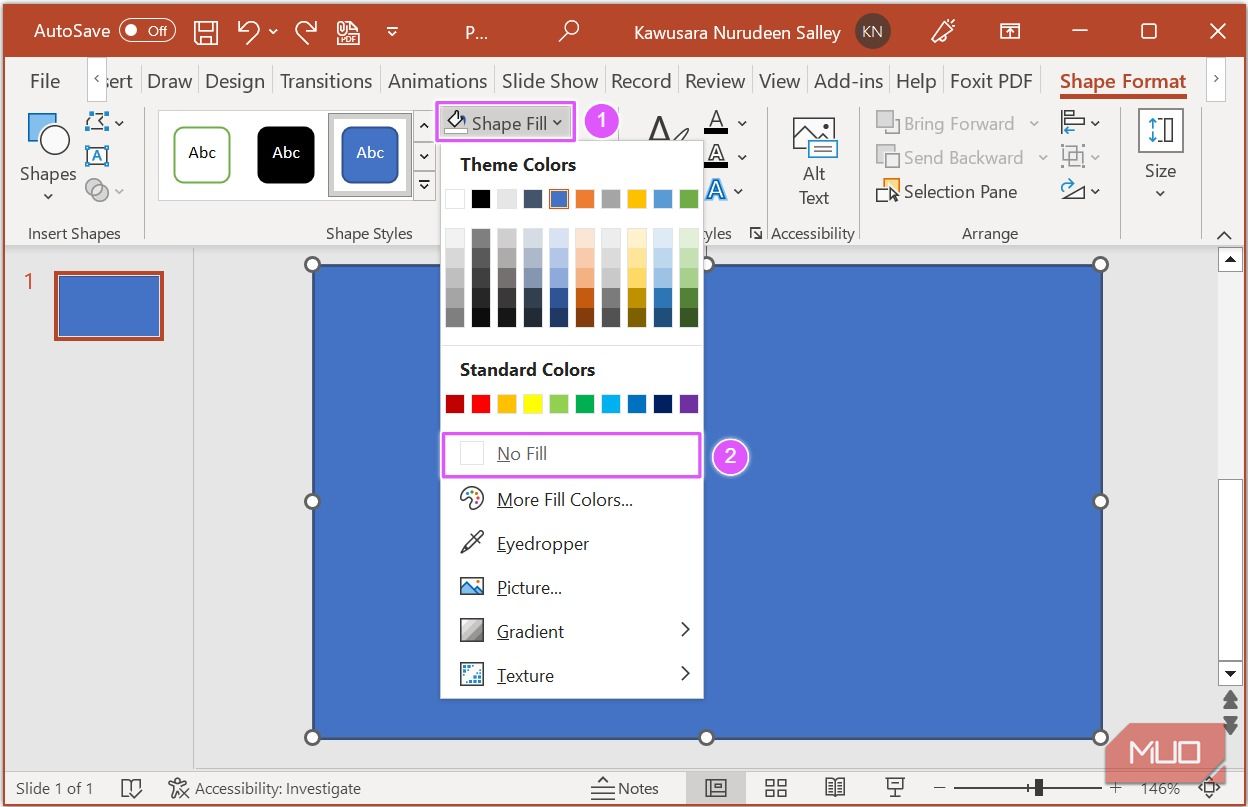
Ensure the rectangle is selected, click on Shape Fill, and set it to No Fill.
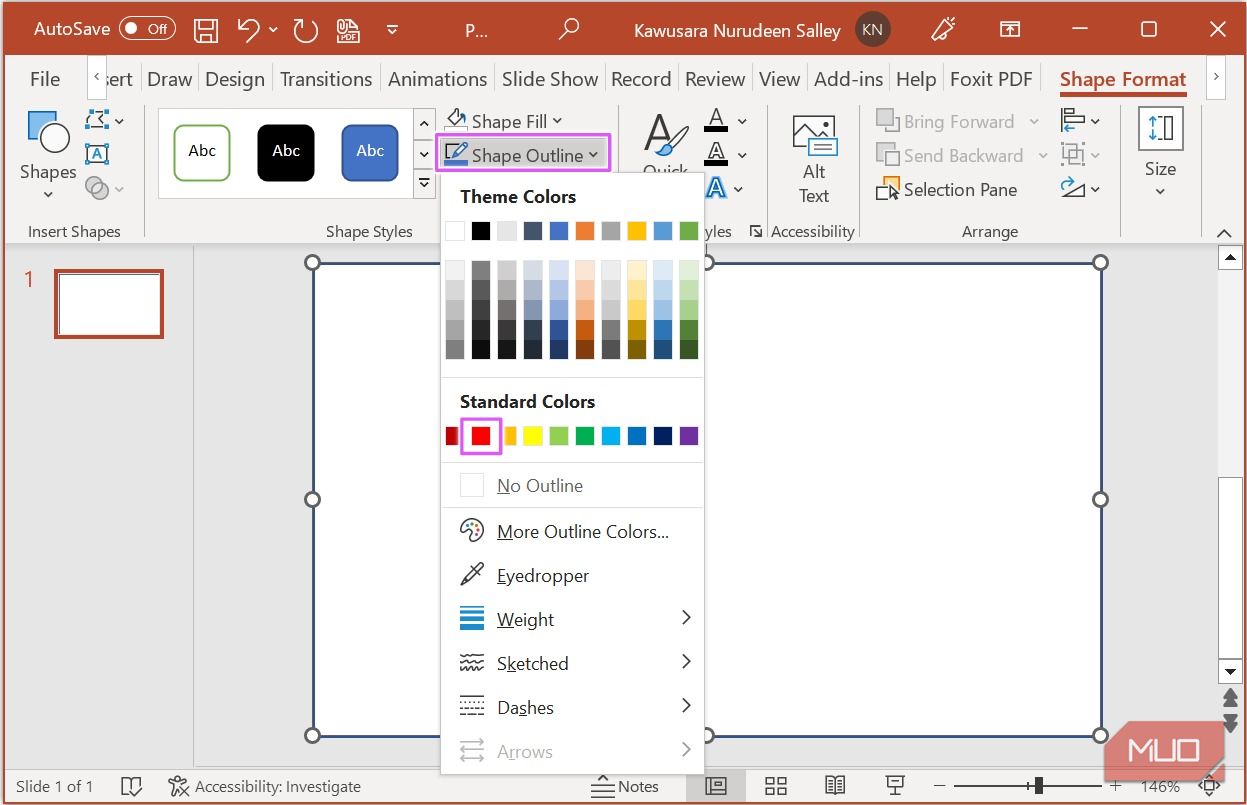
With the rectangle still selected, click on Shape Outline and set it to Red.
Use the same process for adding the bleed border to add the trim and safe borders using the following dimensions respectively: 3.5" x 2" and 3.25" x 1.75".
4. Add Images
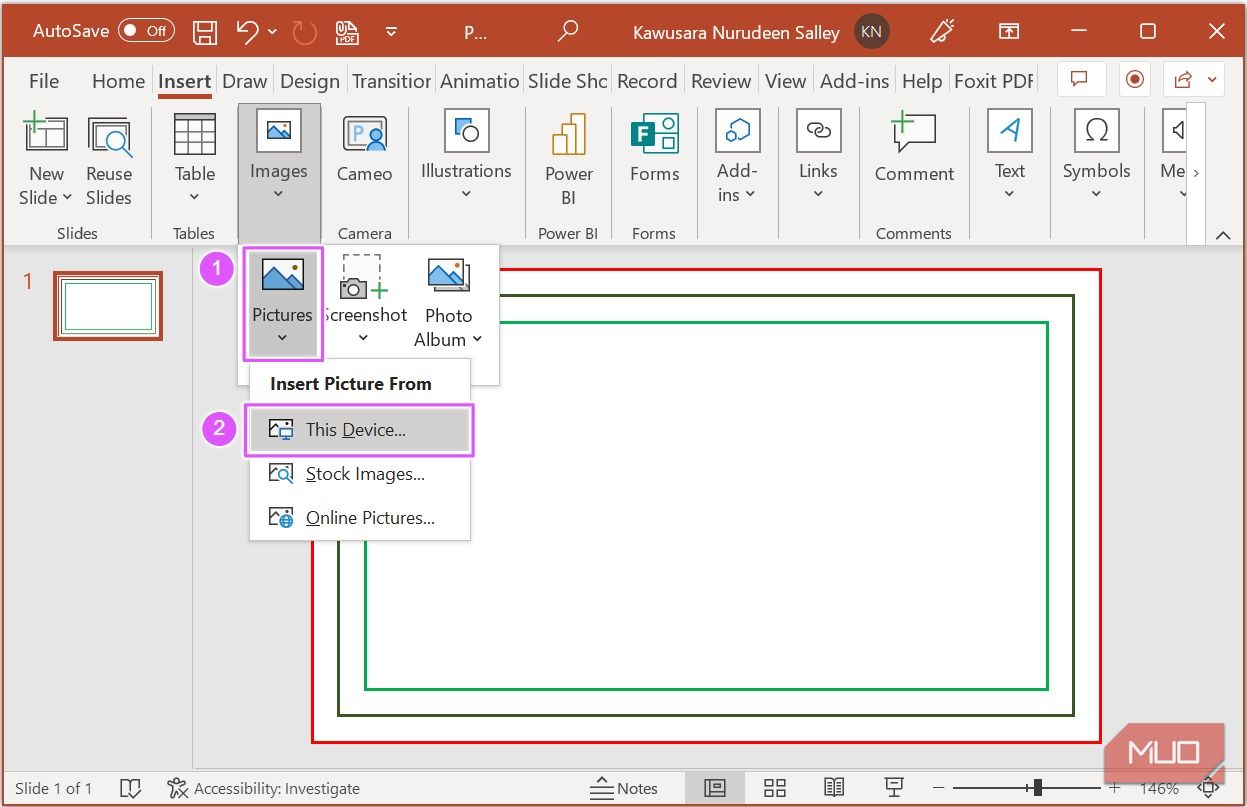
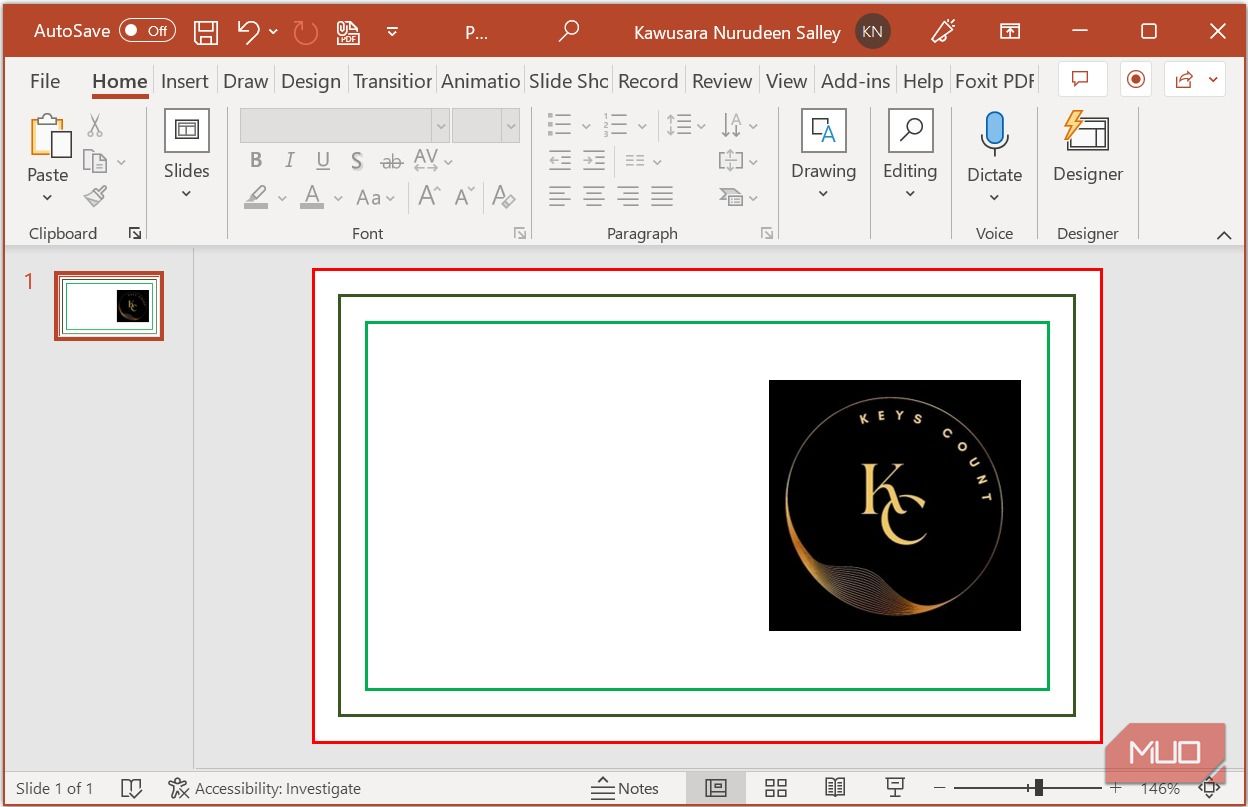
Now that the slide is set up, you can add images (e.g., background image, logo, and profile photo) to the card. So, if you want to add an image, navigate to the Insert tab. Click on Pictures and select This Device if the image is saved on your computer.
After adding the image, resize and position it as you see fit inside the safe zone.
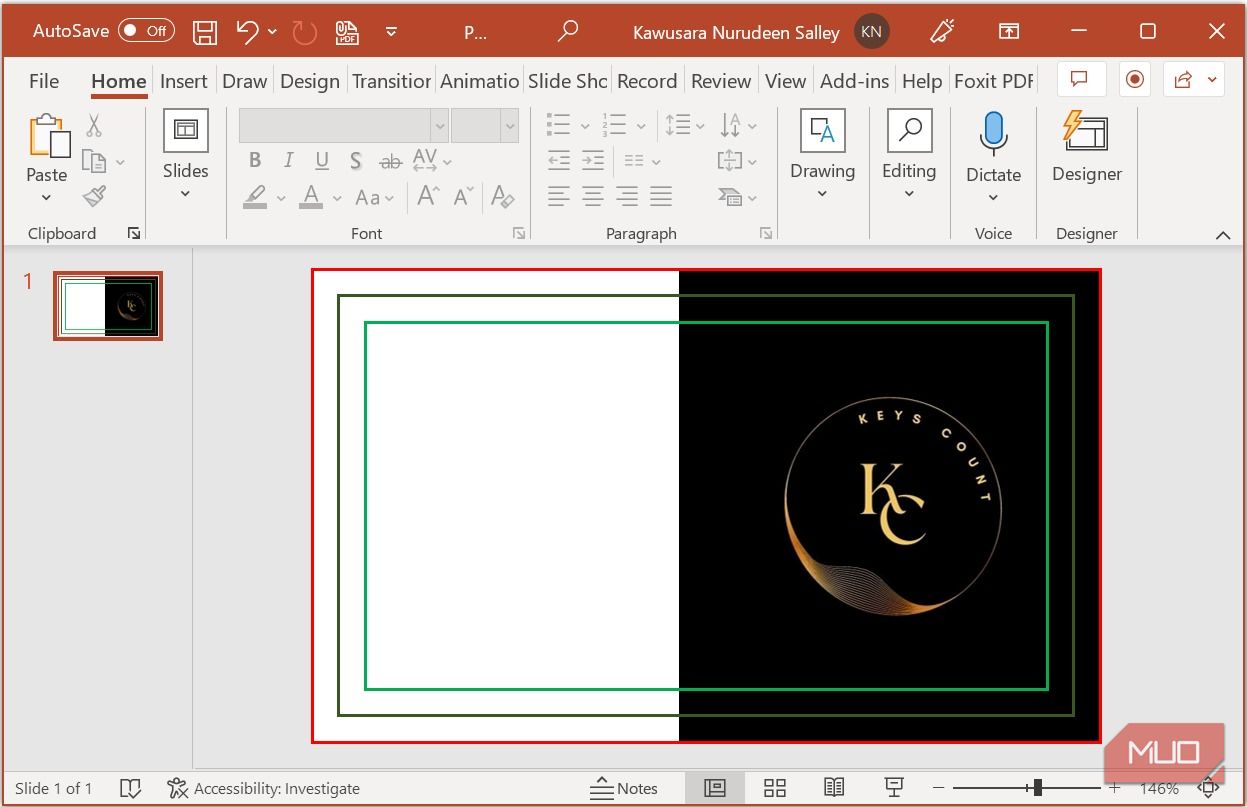
Note: For this design, we are sticking with a white background. If you want to add a background image or gradient to your card, extend it beyond the safe zone to the bleed border.
5. Add Shapes
Shapes are design elements you can use to elevate your design. You can also edit the points of any shape to create custom ones — let's look at an example.
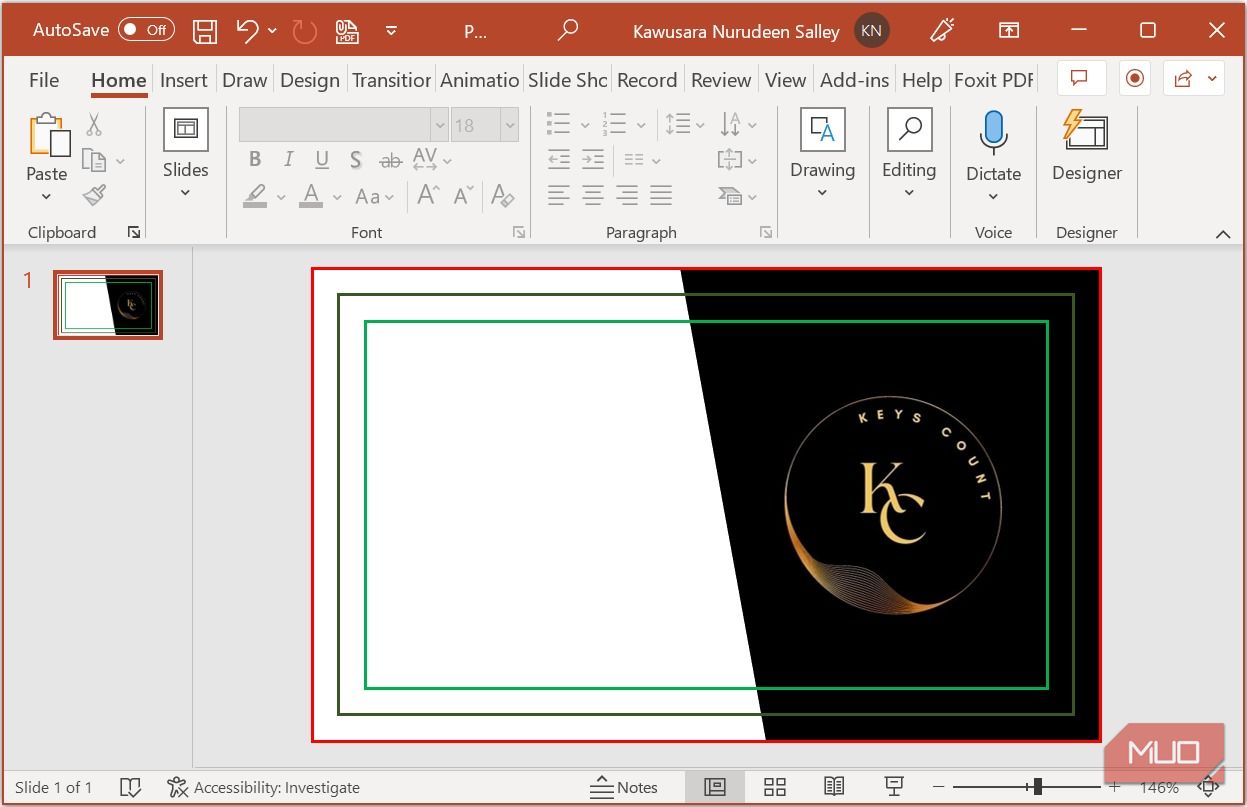
After adding a rectangle to the slide, right-click on it and select Send to Back to place it behind all the elements.
Right-click on the rectangle again, and select Edit Points. Move the point on the bottom left of the rectangle to the right or left to create a new shape.
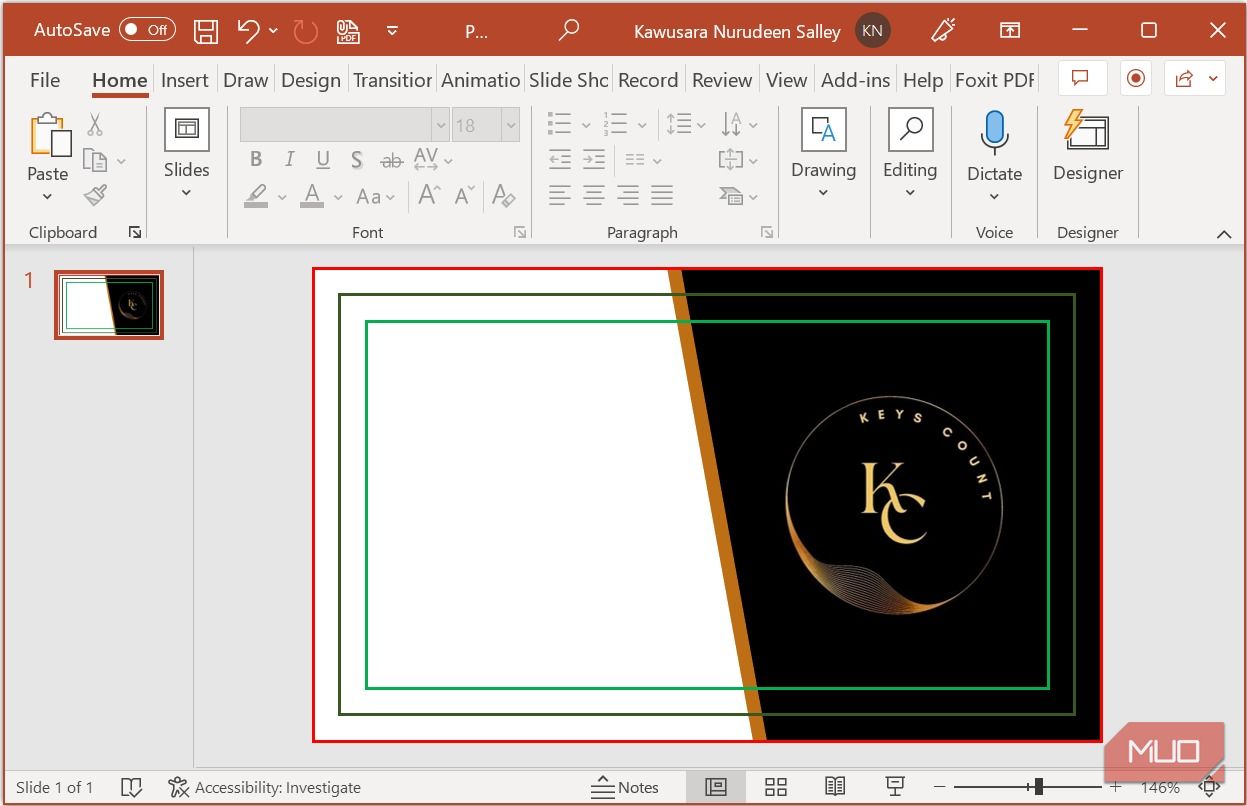
Click on the new custom shape, and hit Ctrl+D on your keyboard to duplicate the shape. Right-click on the duplicated shape and select Send to Back.
With the duplicated shape selected, click on Shape Fill under the Shape Format tab. If you want to give it a color from your logo design (or any other image you have on the slide), select the Eyedropper tool, and click on the color you want to select. Now position the duplicate shape to suit your preference.
6. Add Text
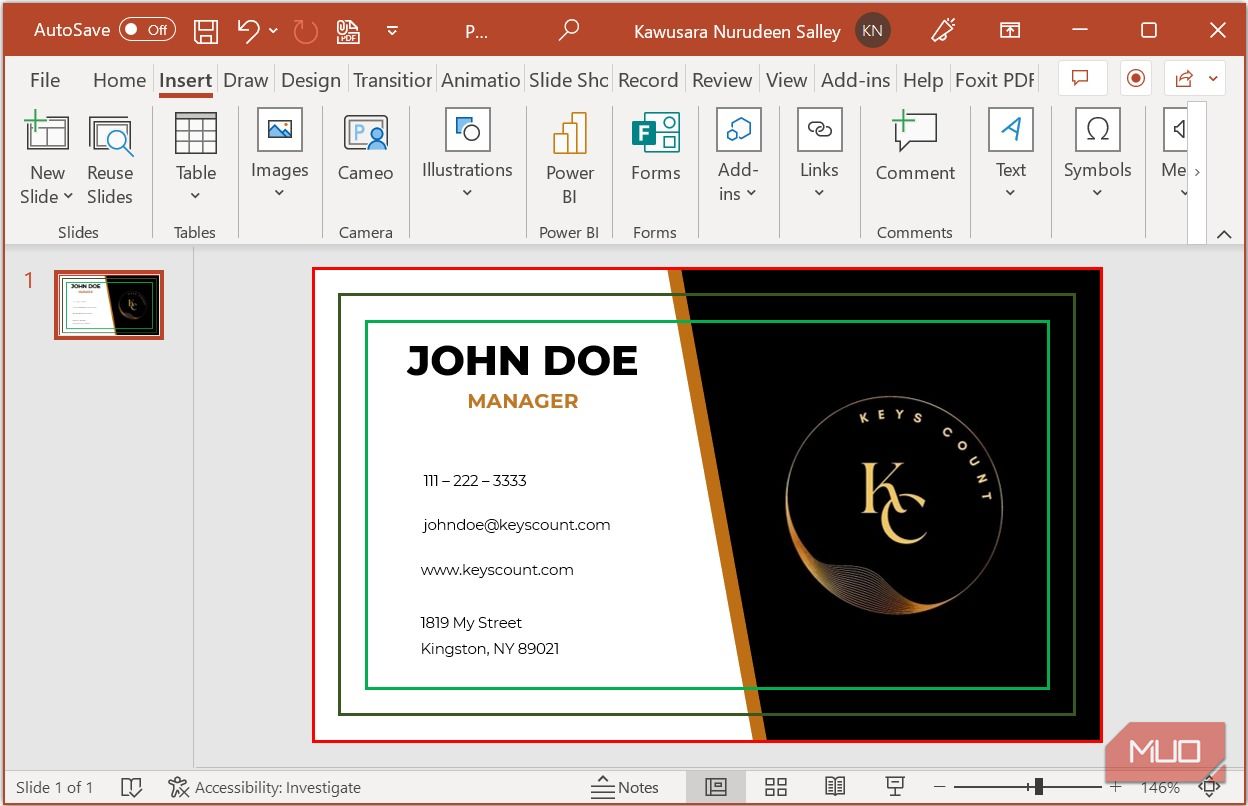
It's time to add your personal and business details to the business card. To add text, navigate to the Insert tab. Click Shapes, select Text box, and type the text you want to display.
Some of the most common details you would want to add to your business card include:
- Name and title
- Social media handles
- Phone number, Email, etc.
- Company name, address, website, etc.
You can create really cool effects with your design by rotating the text and images you've added, but remember not to overdo it.
All text containing important information should be placed inside the safe zone to avoid being close to the trim border and avoid being cut out in the finished printout.
7. Add Icons
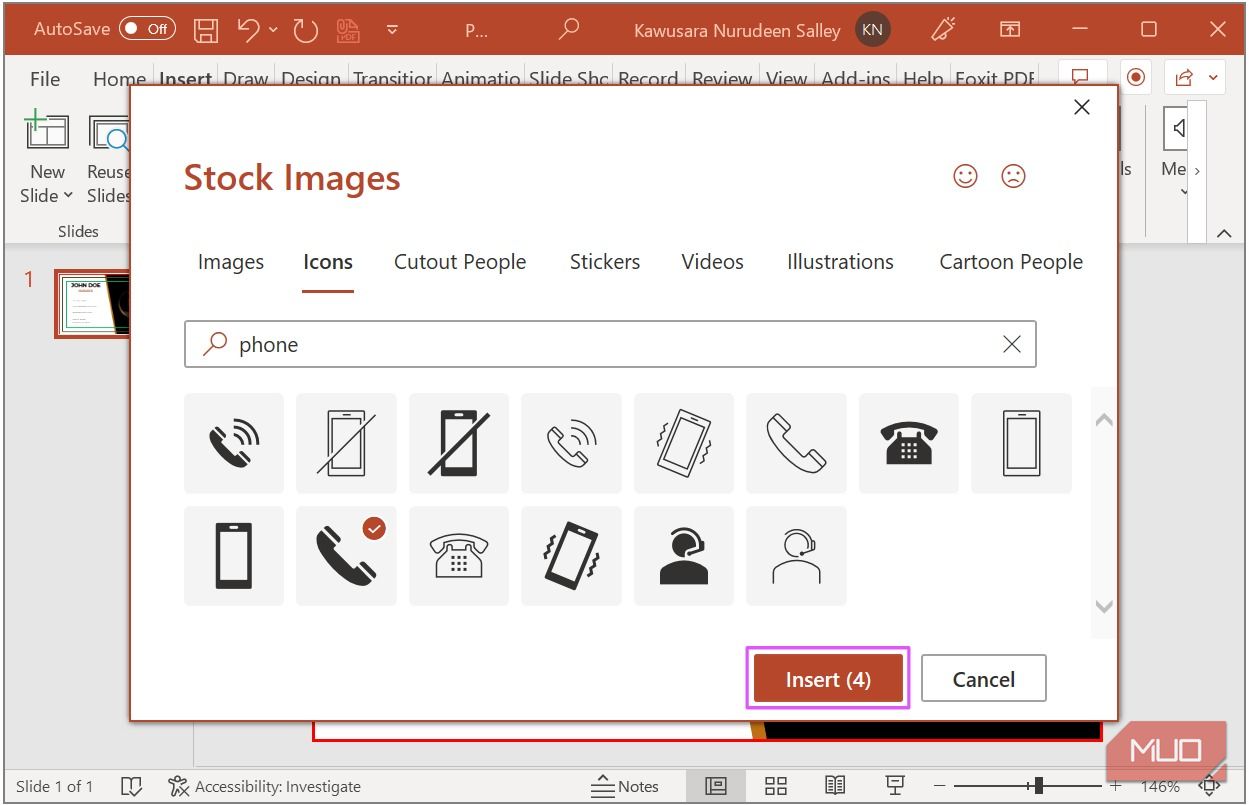
Icons help to highlight the details you have on your business card and add to its overall aesthetic. To add an icon, navigate to the Insert tab and click Icons. From the library that opens up, select the icons you want to add and click Insert.
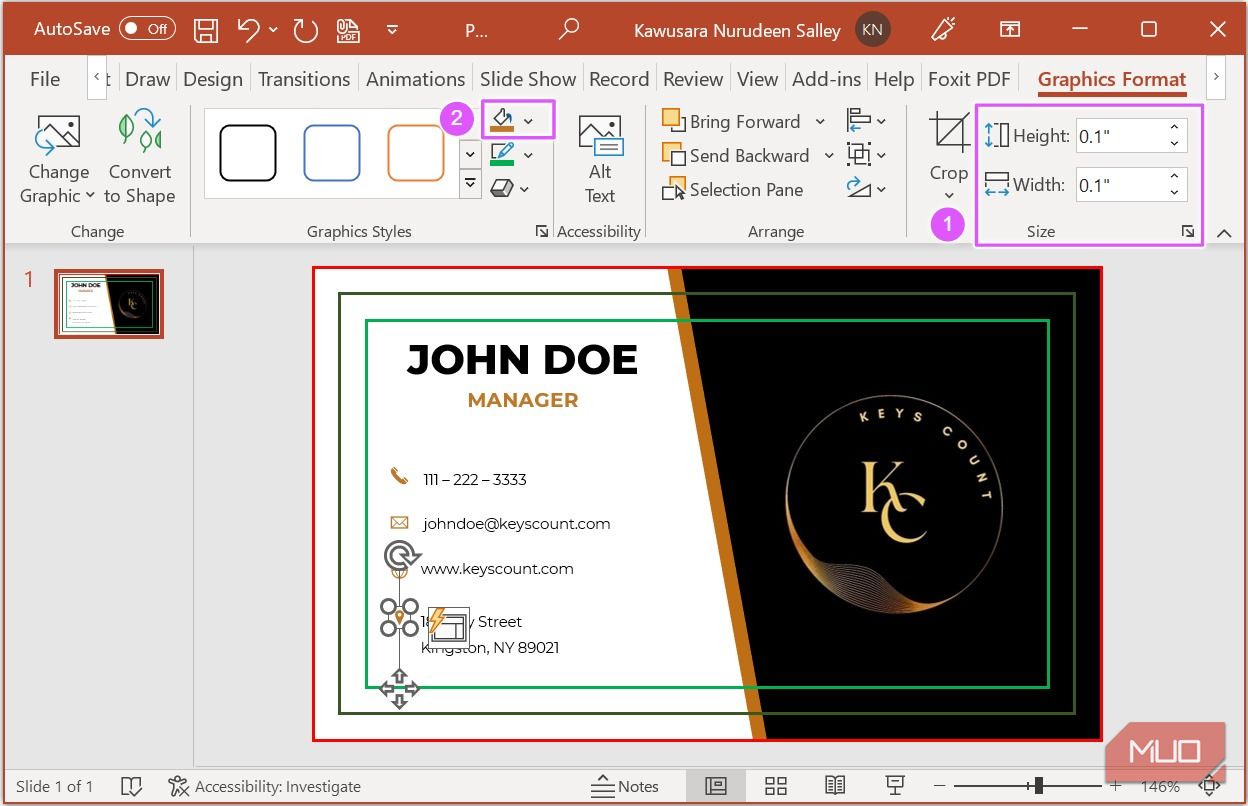
When the icons are added to the slide, the Graphics Format tab opens up. Under this tab, you can resize, re-color, and position your icons to suit your taste.
You can elevate your design by adding a drop shadow to the graphics you've used, which include icons, shapes, images, and text.
8. Clean Up and Save for Printing
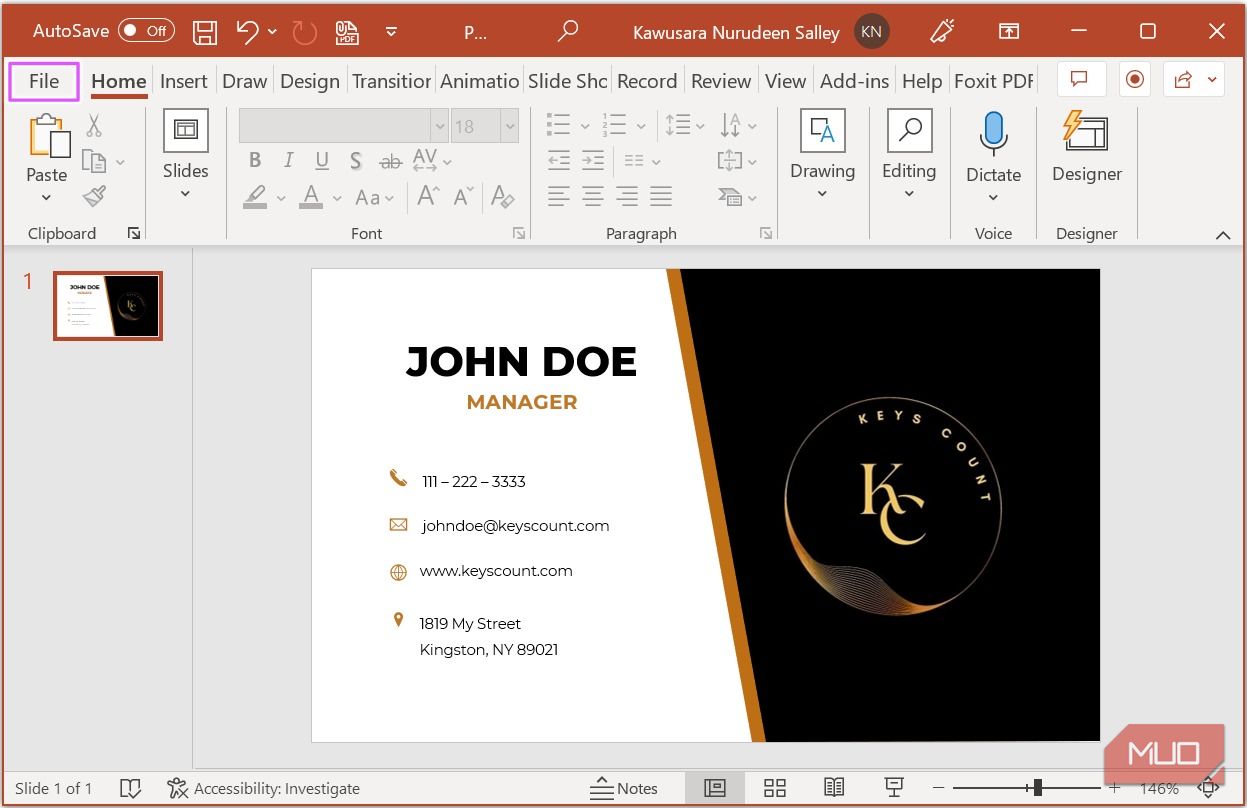
When you're done designing your card, remove the safe, trim, and bleed rectangles to clean up the design. From here, you can save it for printing. The PDF file format is best in this case. To save the design as a PDF file, navigate to the File tab.
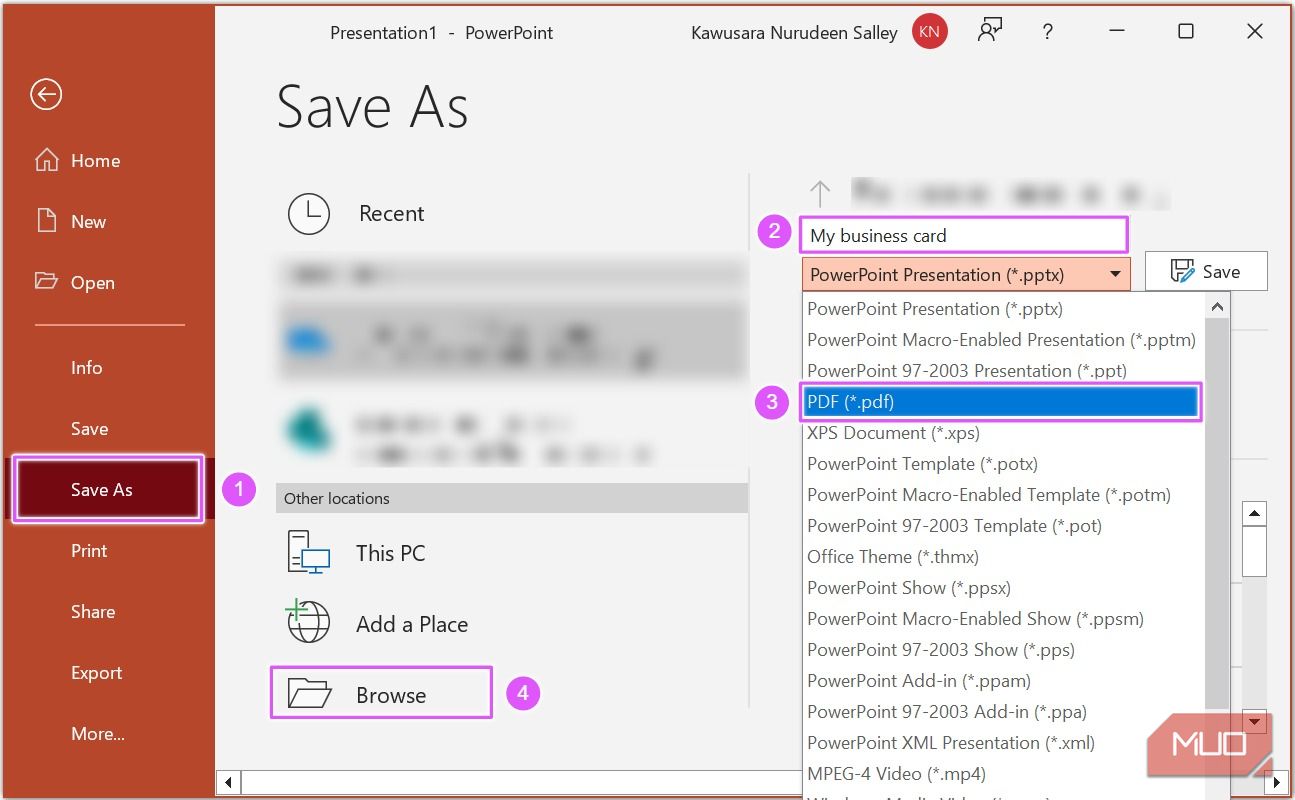
Click the Save As option. Enter a name for your design and select PDF from the drop-down list. Click Browse to pick a folder location on your computer to save the file. When you're done, click Save.
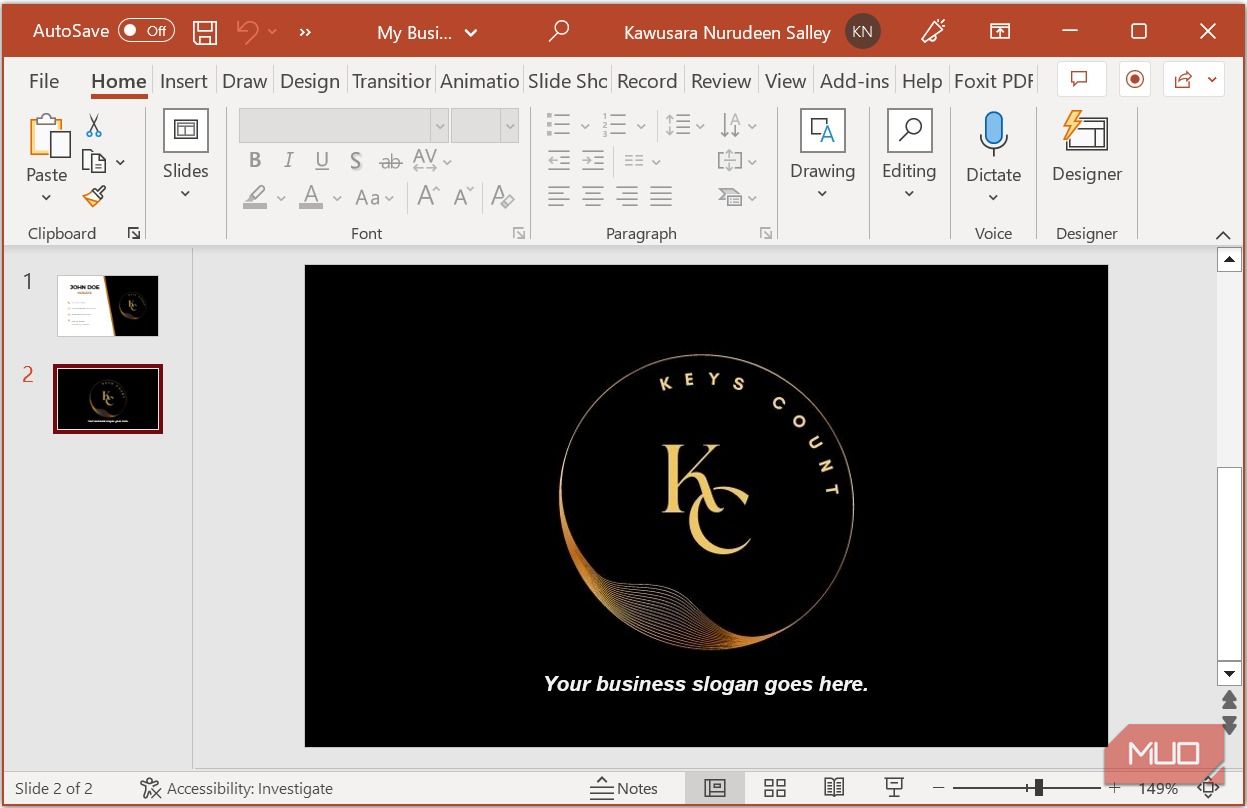
9. Design the Back of Your Card
Now that you've designed the front of your business card, you can go through the same process to design the back of the card. This should be much easier since only a few elements go here.
With your card's front and back designs saved in PDF, you can send them to your local print house for hard copies to hand out at future networking events.
Design Your Business Card With Microsoft PowerPoint
Microsoft PowerPoint can be used as a simple and cost-effective method to design professional-looking cards for your business or personal brand. By following the steps outlined in this article, you can easily create a unique and polished business card that accurately reflects your brand identity. If you want to take this to the next level and potentially land your dream job, consider designing your career portfolio in PowerPoint.

