Adobe Character Animator is full of endless opportunities to create and animate any art created in Adobe Illustrator or Photoshop. Character Animator is one of the easier animation programs to use, as it combines live motion-capture with a multi-track recording system to control layered 2D puppets.
This step-by-step guide will walk you through the basics of creating your own custom character using a blank template.
1. Finding a Blank Template
The easiest way to create your first custom character for Character Animator is to take advantage of the free Blank puppet template provided by Adobe. This template will allow you to layer custom character artwork over the template using Photoshop.
The template ensures that all of the required naming conventions for Character Animator are in place, enabling your character to move without any custom configuration.
Get started by downloading and extracting the Blank character from Adobe's website.

You can create your custom character from scratch; however, this requires some advanced knowledge of the Character Animator requirements, such as required layer organization and naming conventions.
2. Importing Your Puppet Into Character Animator
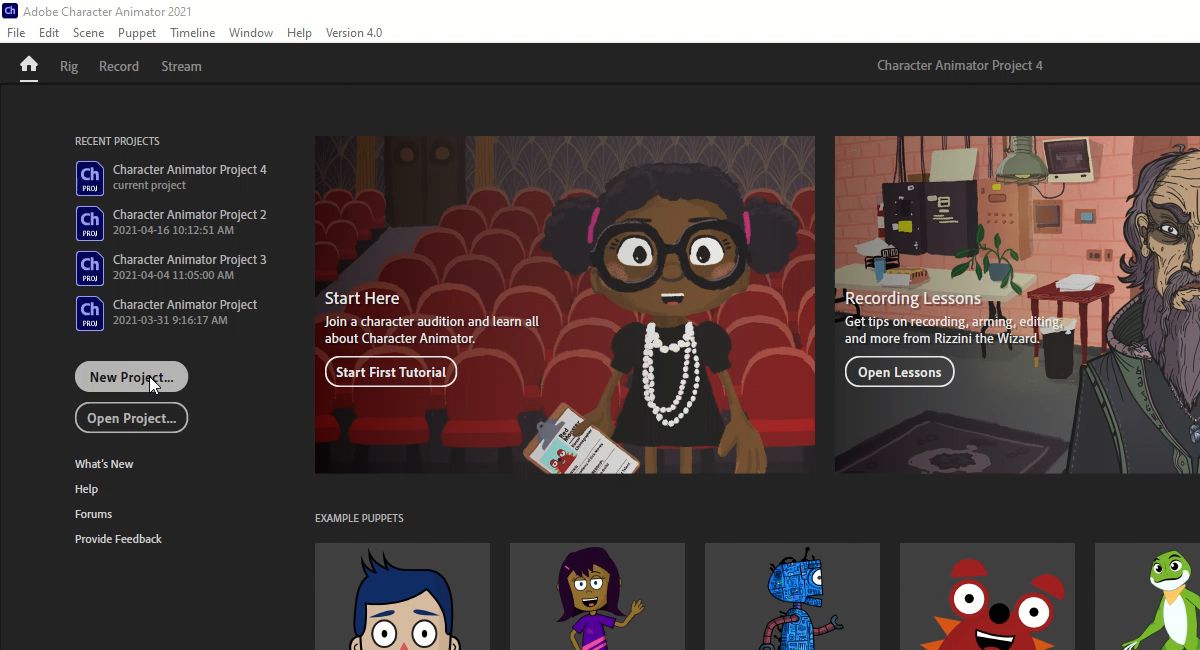
Once you have your Blank character, it is time to get your new Character Animator project started.
- Open Adobe Character Animator.
-
Select New Project.
- Select the location and name for your new project, and then click Save.
-
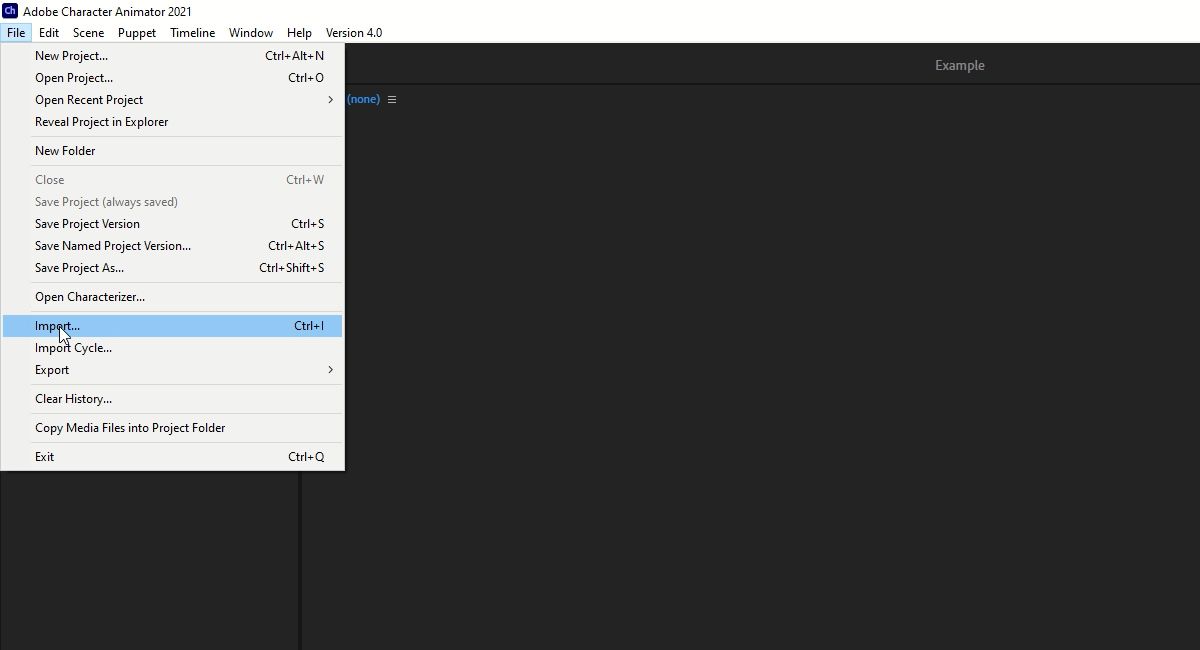
Select File > Import from the menu.
-
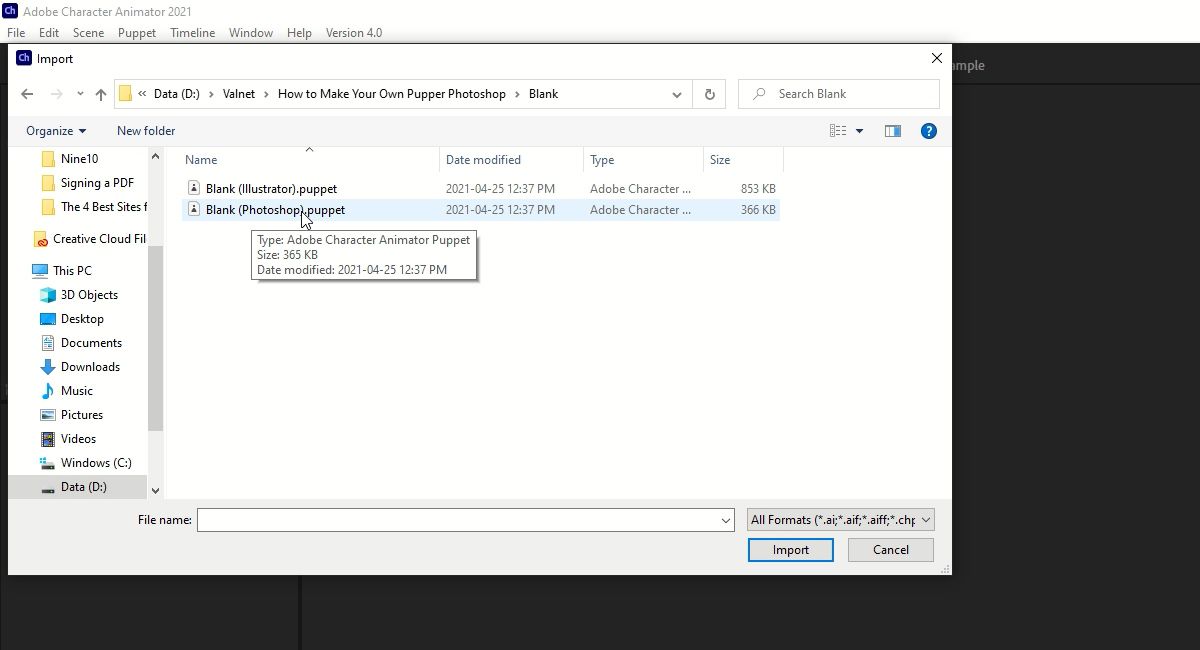
Browse to the location of your extracted character from Adobe. You will see two files available for import. Select the Blank (Photoshop).puppet file, and click Import.
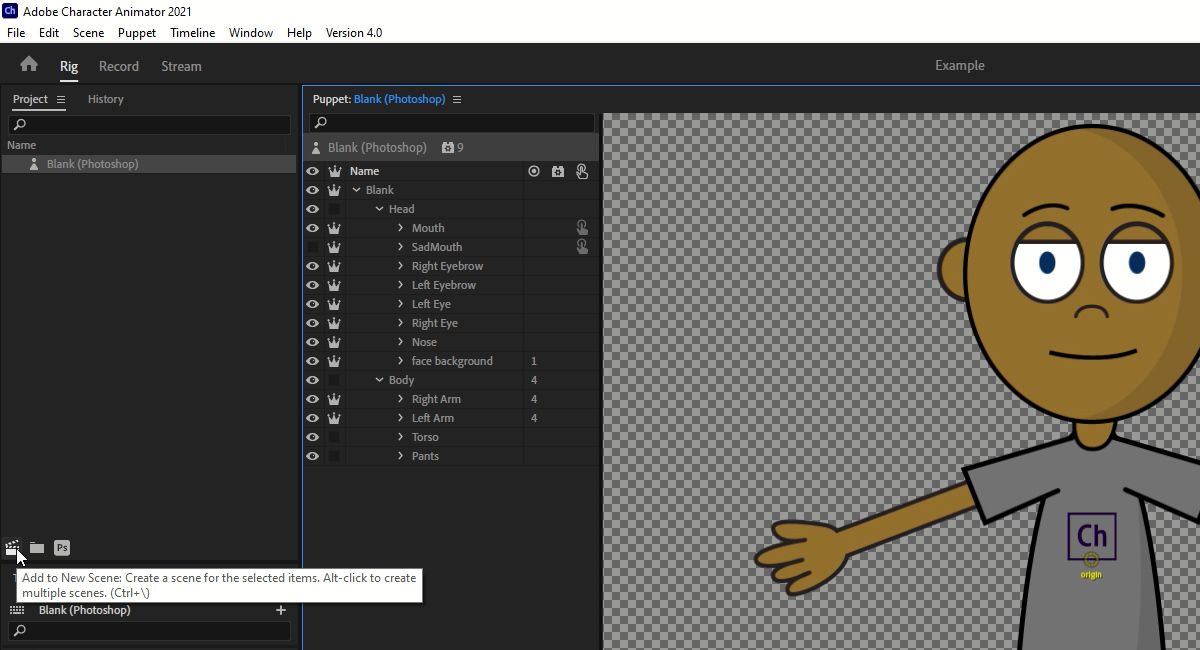
- At this point, if you wish to preview your puppet in a scene, select your Blank character, found under Name to the left of your workspace.
-
Once your puppet name is highlighted, select the Add to New Scene icon located just below the Name window.


Now that your template is imported and placed in a scene, it is a good time to familiarize yourself with the different functions available in the template.
Check out the preconfigured draggers, and using your webcam, review the facial recognition features. Don't forget to make sure your camera and microphone settings are configured properly as well.
3. Editing Your Puppet's Appearance in Photoshop
Now, you can make many different adjustments to your character while still taking advantage of all the animations and functions that the template provides. Following the steps below, you will see just how easy it is to customize your character.
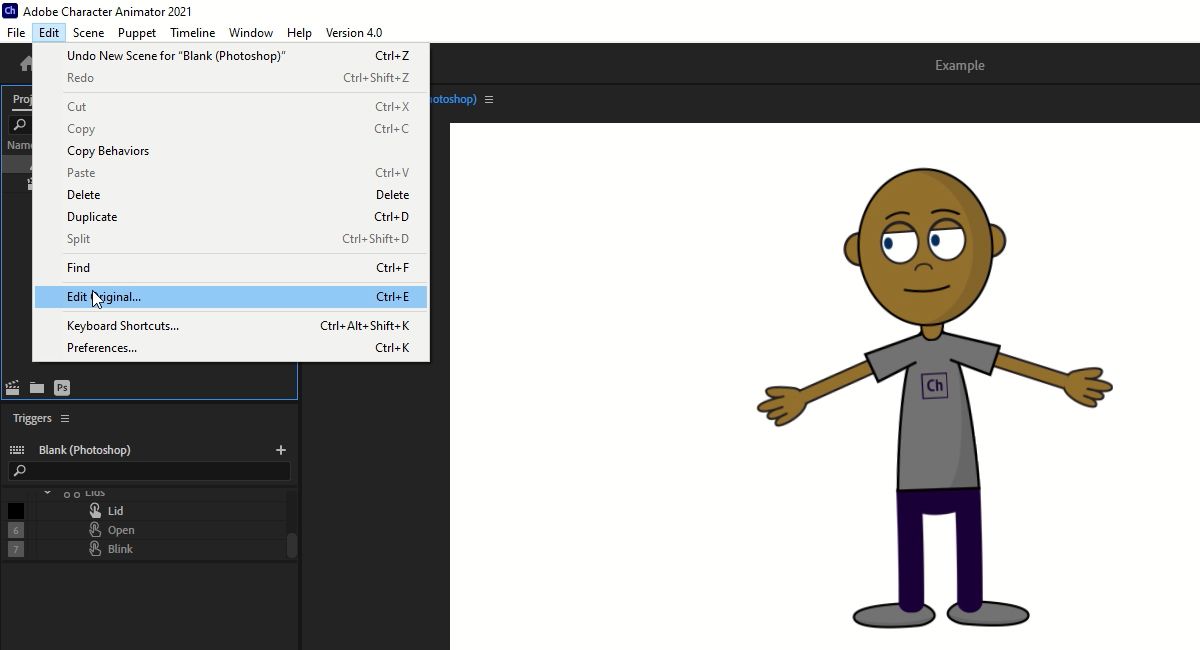
- Select the Blank character, found under the Name tab to the left of your workspace.
-
Select Edit > Edit Original from the menu. This will open your puppet in Adobe Photoshop.
- To replace a facial feature such as the nose, navigate to +Blank > Head > Nose in the Layers menu.
-
With the Nose folder selected, click the Create a new layer icon.
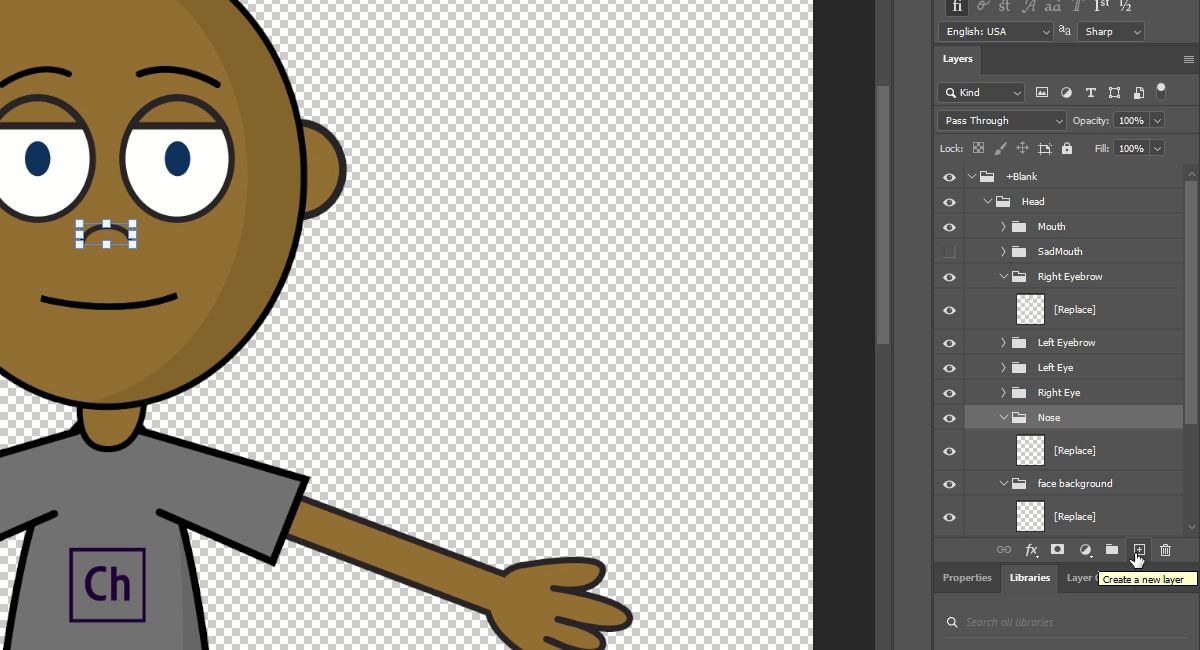
- Turn off or delete the layer named [Replace] in the Nose folder.
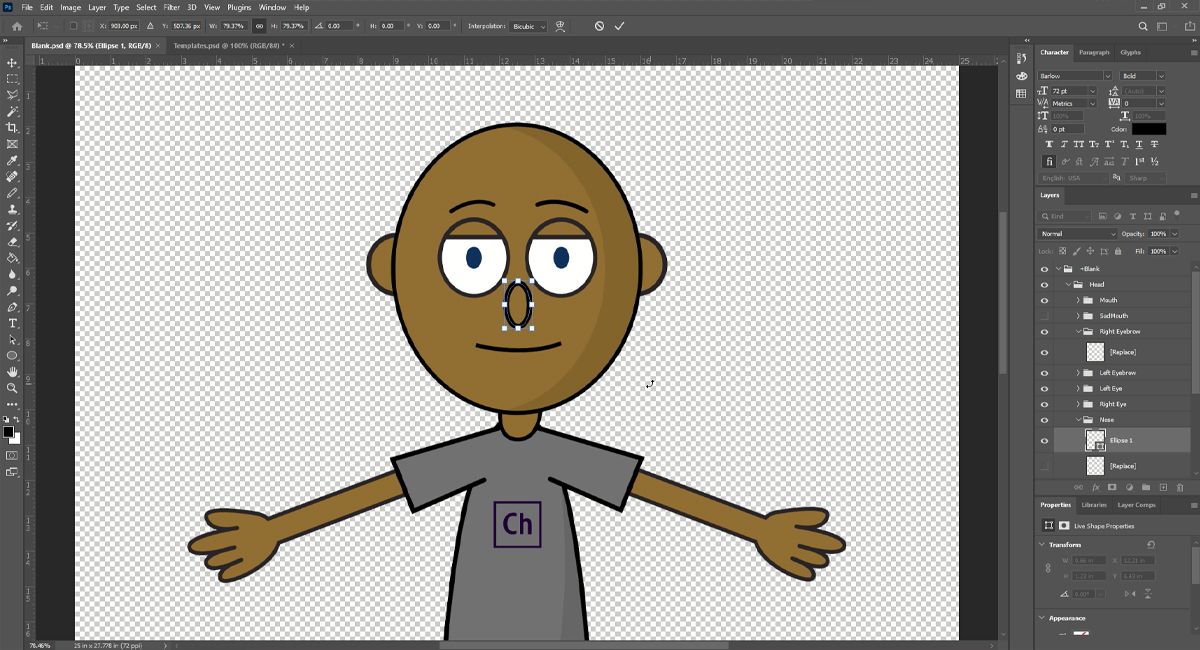
-
Highlight your newly created layer, and draw in the new nose using your tool of choice. In this example, we used the Circle tool with no fill and a black outline.
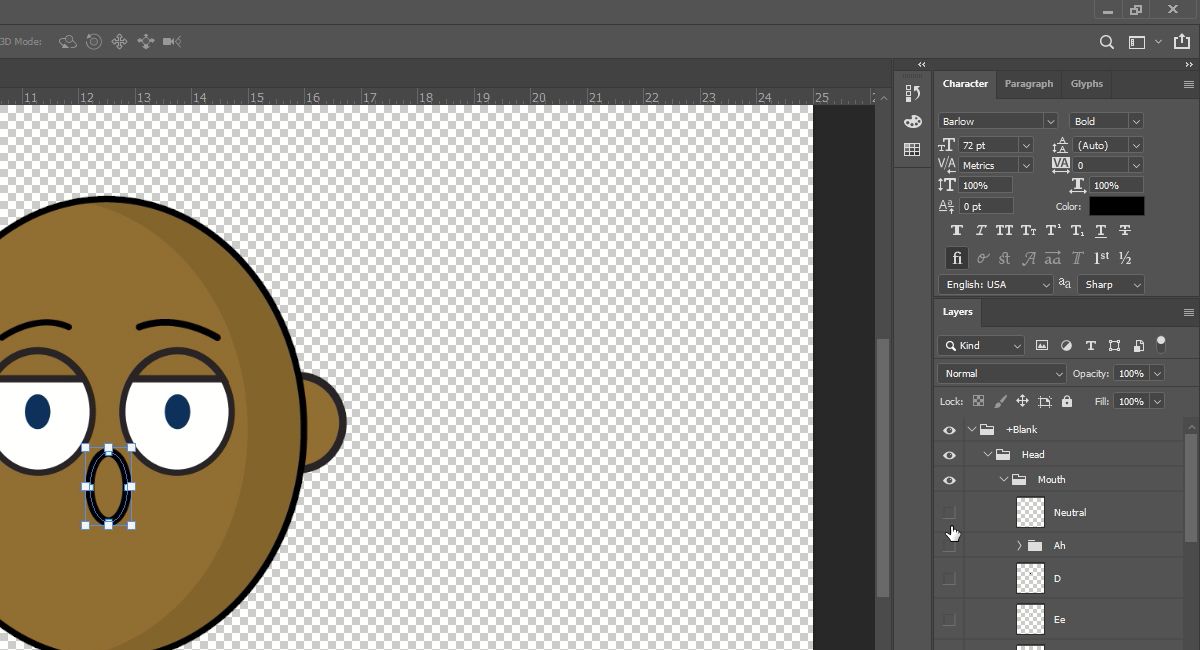
- To edit a feature, such as changing the color of the tongue for certain mouth positions, navigate to +Blank > Head > Mouth in the Layers window.
-
By default, the Neutral mouth position will be set to visible. Turn off the visibility for the Neutral position by selecting the visibility icon.
-
Now, turn on the visibility of the L layer. Then, highlight the L layer by clicking it once.
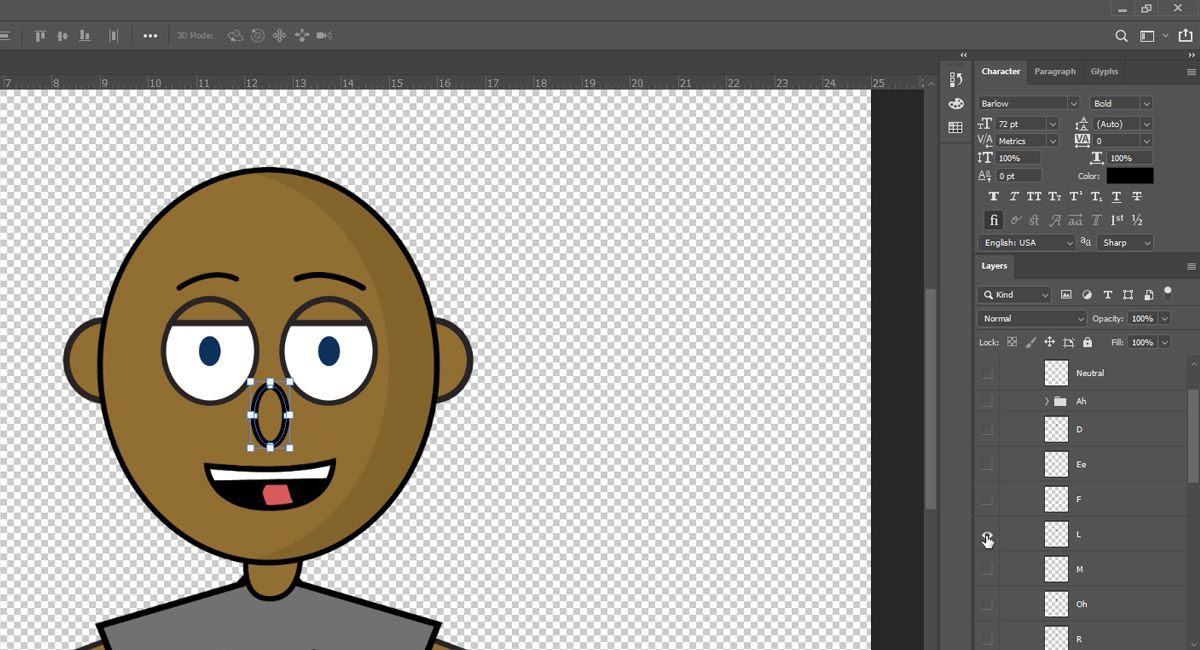
- Select the Fill bucket from your toolbox.
- Select the color you wish to change the tongue to, and then click OK.
-
Click the tongue to fill it in with the desired color.
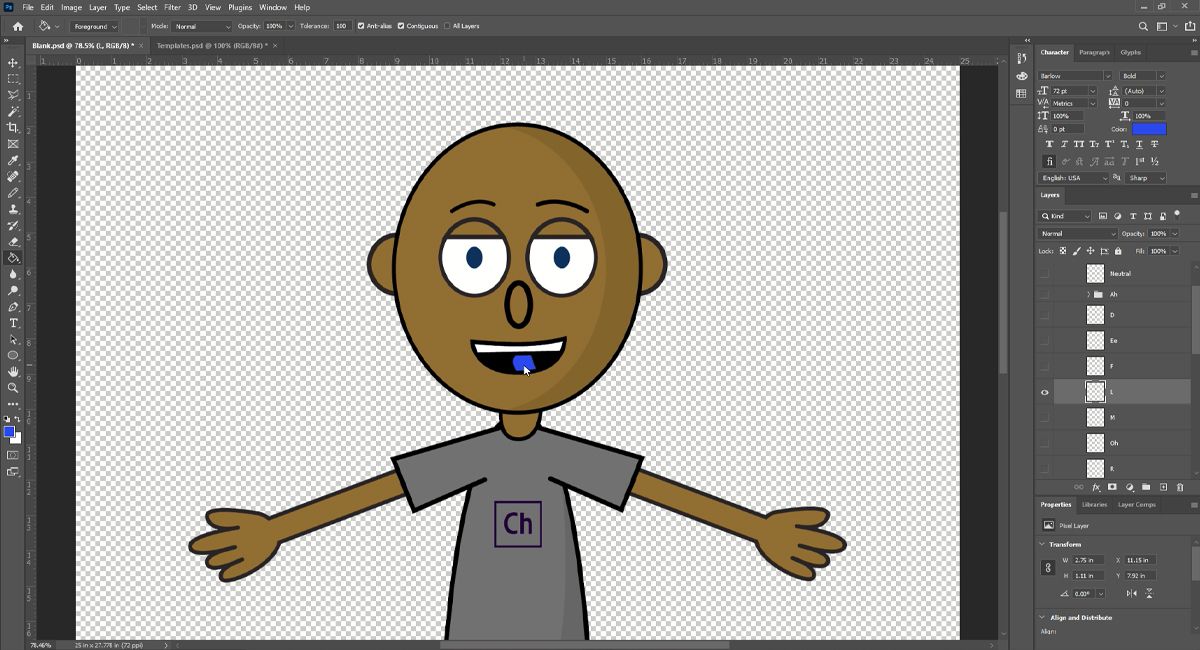
- Select File > Save. Your changes will not show up until you save your work.
-
Switch back to Adobe Character Animator, and it will automatically update. Your changes will now appear.


As you can see, the changes to this character template can be extensive. You can definitely have some fun with this—add in funny teeth, new outfits, or big hairdos.
4. Editing Your Puppet’s Movement Range in Character Animator
Now that you have made these changes to your new puppet, you may wish to adjust how its different features move. Fortunately, you can easily adjust your character's range of motion for different features.
The steps below will guide you through adjusting your puppet's eyebrows. By getting to know how to adjust your character's eyebrows, you'll be able to easily adjust your character's movements for other features as well.
- Open your character in Character Animator.
-
When in Record Mode, you will see a Properties window to the right.
- Select the dropdown arrow next to Face to view all of the feature adjustments for your character's face.
-
Adjust Eyebrow Strength from 75 percent to 150 percent. Now, use your webcam and move your eyebrows up and down. You can see at 75 percent, the eyebrows remain on your puppet. However, at 150 percent, they jump off the puppet's face, creating an even more cartoonish look.
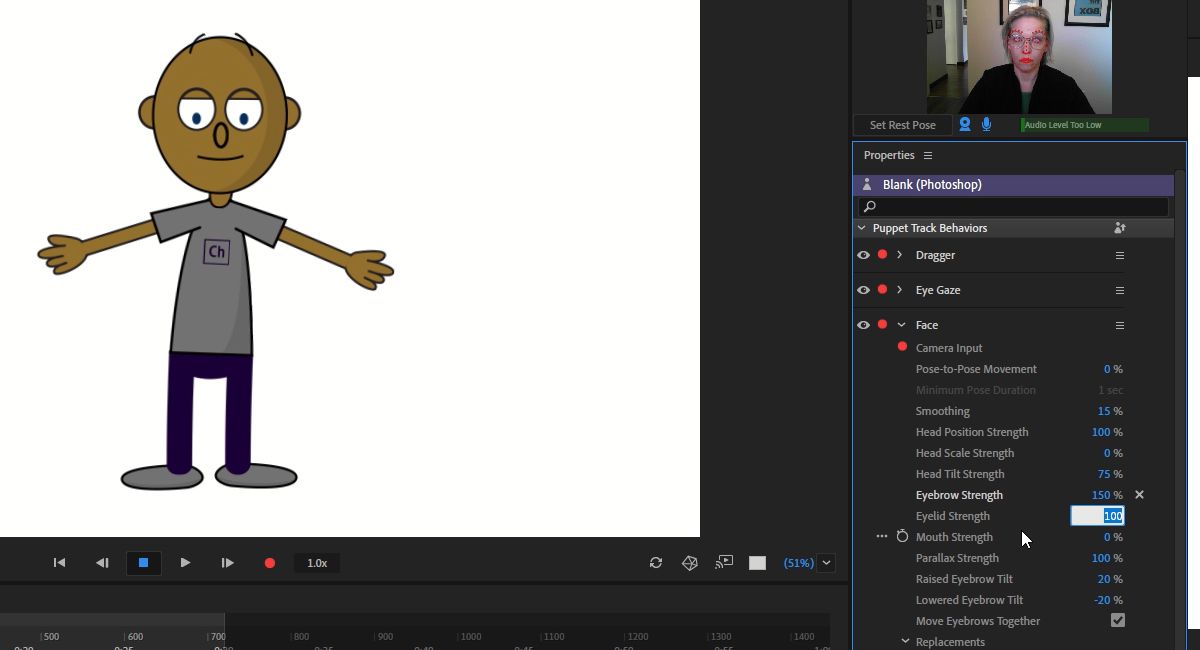
- Browse through each option to customize your puppet as you go. Another great adjustment to try is the Raised Eyebrow Tilt, which gives your puppet a more expressive angry face.


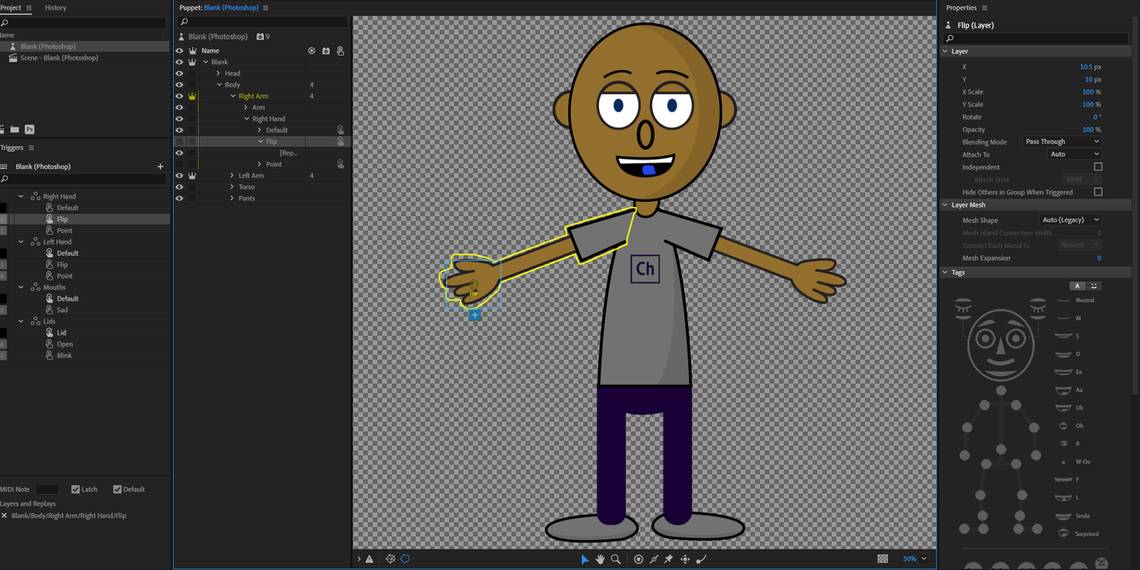
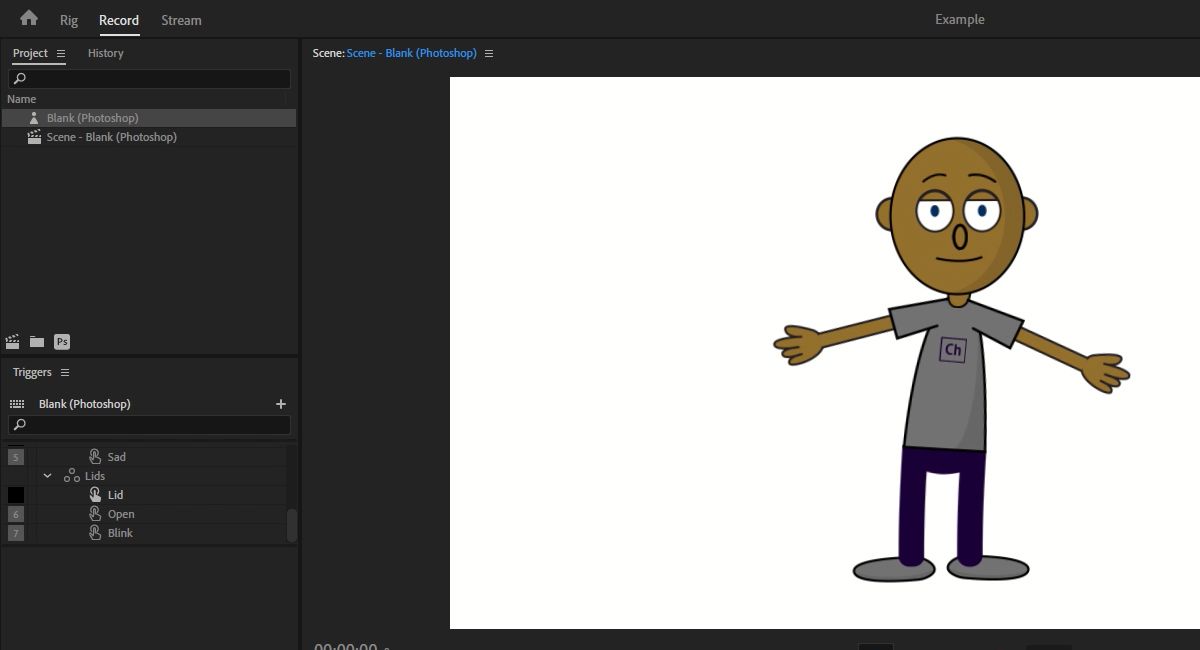
5. Adjusting Your Puppet's Triggers and Draggers
Triggers and draggers are what make your puppet come to life. Triggers are assigned motions that are "triggered" by hitting a selected key on your keyboard.
Draggers are points that are assigned to your puppet, allowing you to click and drag a specific body part with your mouse, creating your desired motion.
With the blank puppet template, there are several triggers and draggers already in place. Following the steps below, you will be able to review these settings and adjust them to fit your custom puppet.
-
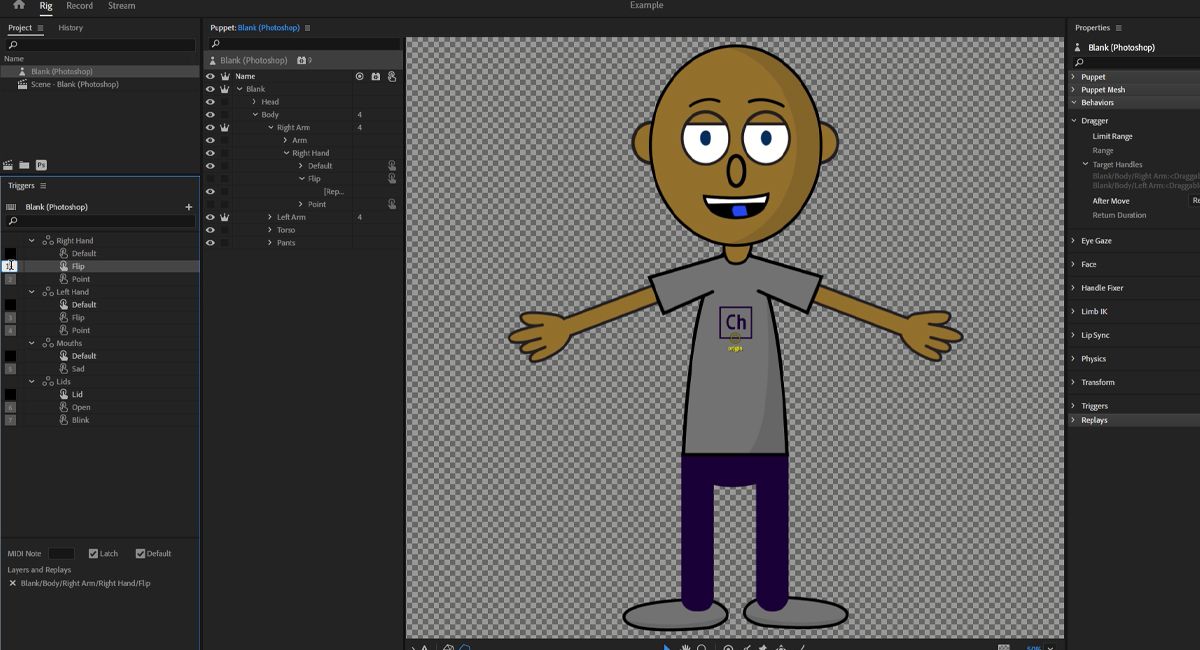
In Character Animator, open your custom puppet in Rig Mode.
- To review the draggers that are already available, select your puppet from the puppet menu to the left of your character.
-
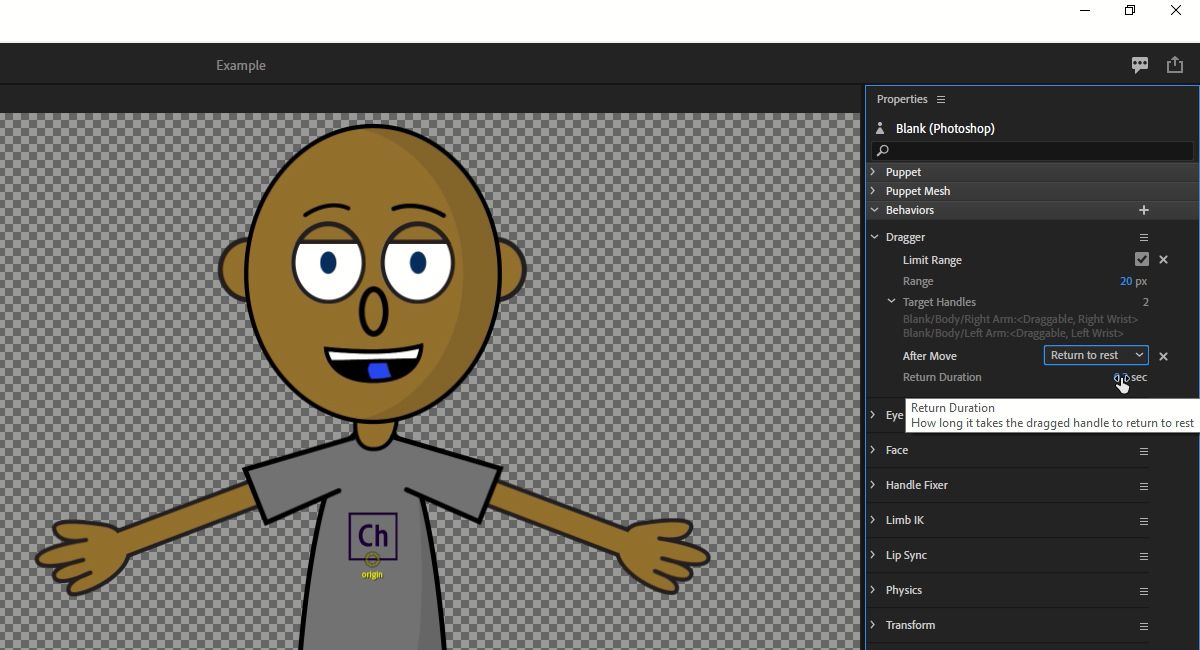
To the right-hand side, in the Properties window, you will see a Dragger dropdown. Select the arrow to show the draggers set up in your puppet.

-
Here, you can adjust the range of motion of your dragger by selecting the Limit Range checkbox. Enter your preferred range in the box provided.

-
Adjust your dragger to Hold in place or to Return to rest in its original position, by using the After Move dropdown. If you select Return to rest, you can also adjust the duration before it returns to the resting position.
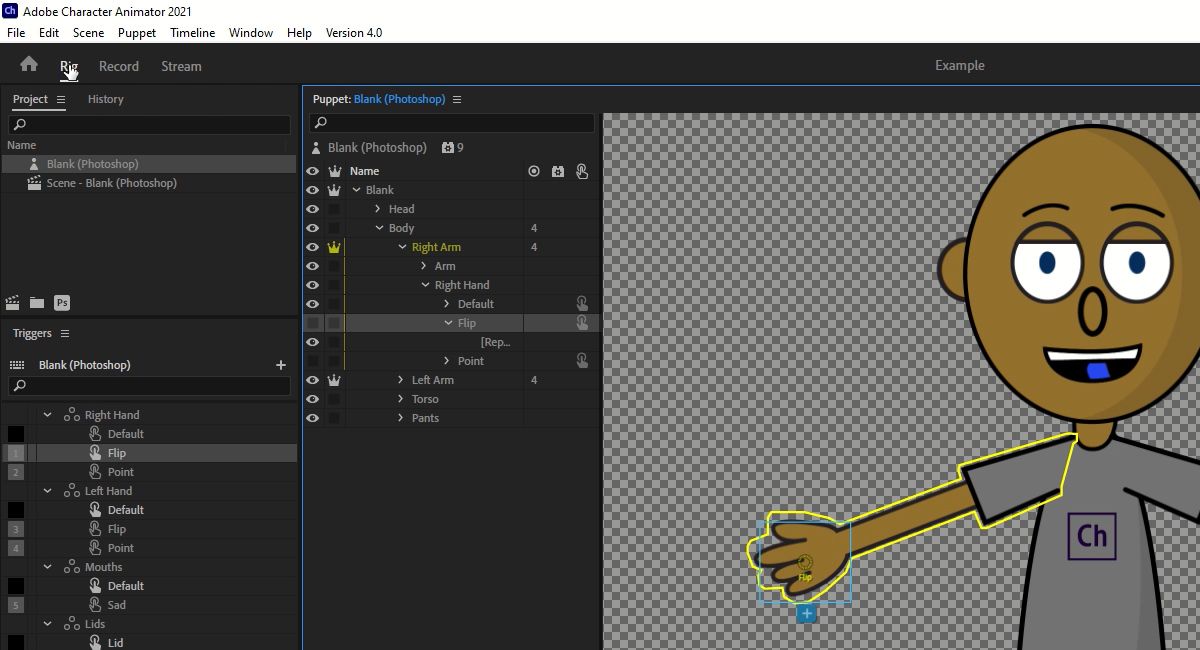
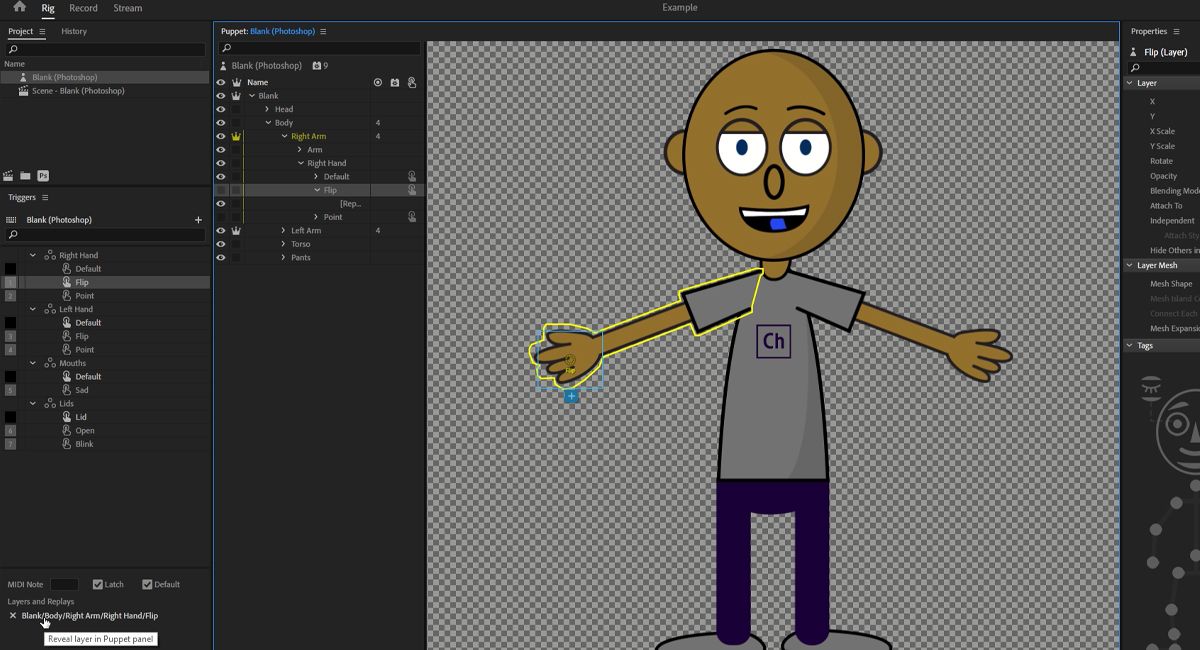
- Review and adjust your puppet's triggers through the Trigger window found to the far left of your puppet. The blank puppet template has seven built-in triggers.
-
The number at the start of the Trigger item is the keyboard command to activate it. To change this, simply double-click the number and change it to the key you want to use instead.
-
Finally, to review which body parts the selected trigger impact, click the related Layers and Replays item found below the Triggers window.


Adobe Character Animator Offers Many Fun Options
As you have probably realized, Adobe Character Animator has many different features and functions to dig into. If you don't want to create your own character from scratch, using blank puppet templates or even taking advantage of other available puppet templates online can have you producing custom animations in no time.