Writing music for a video game will almost always require loops. It doesn't matter if it's a big-budget AAA title or a small indie production, music loops are used in every single game. One way to do this is with the tail-to-front method, and you can use any audio editing software from Audacity to Logic to achieve it.
This technique is just about bulletproof and pretty easy to achieve too, so let's look at how to do it.
The Secret to Video Game Music
In video games, it's common for music sections to loop so that players can spend as long as they need in an area of a game. When listening to good loop music, you will barely notice the transition between the end of the tune and the start.
Composing great loop music that you never get sick of hearing, even after listening to it over and over again, takes a lot of skill. But luckily, technically producing a seamless loop in a DAW is really easy!
The tail-to-front method is one way to achieve smooth loops in video game music. In a nutshell, this method involves copying the last few seconds of music and pasting it at the beginning. After that, smooth the transition with a small fade and bounce out the new audio track. And that's it, it couldn't be easier.
We will use Logic Pro X to demonstrate how to do the tail-to-front method, but bear in mind that any DAW will work. If you don't have paid audio editing software, there are plenty of free music production software you can try.
1. Record or Bounce the Track
Start by recording the music you want to loop, or if you are working in MIDI, begin by bouncing your music into a new audio track. If you're already working in audio then you can skip this step.
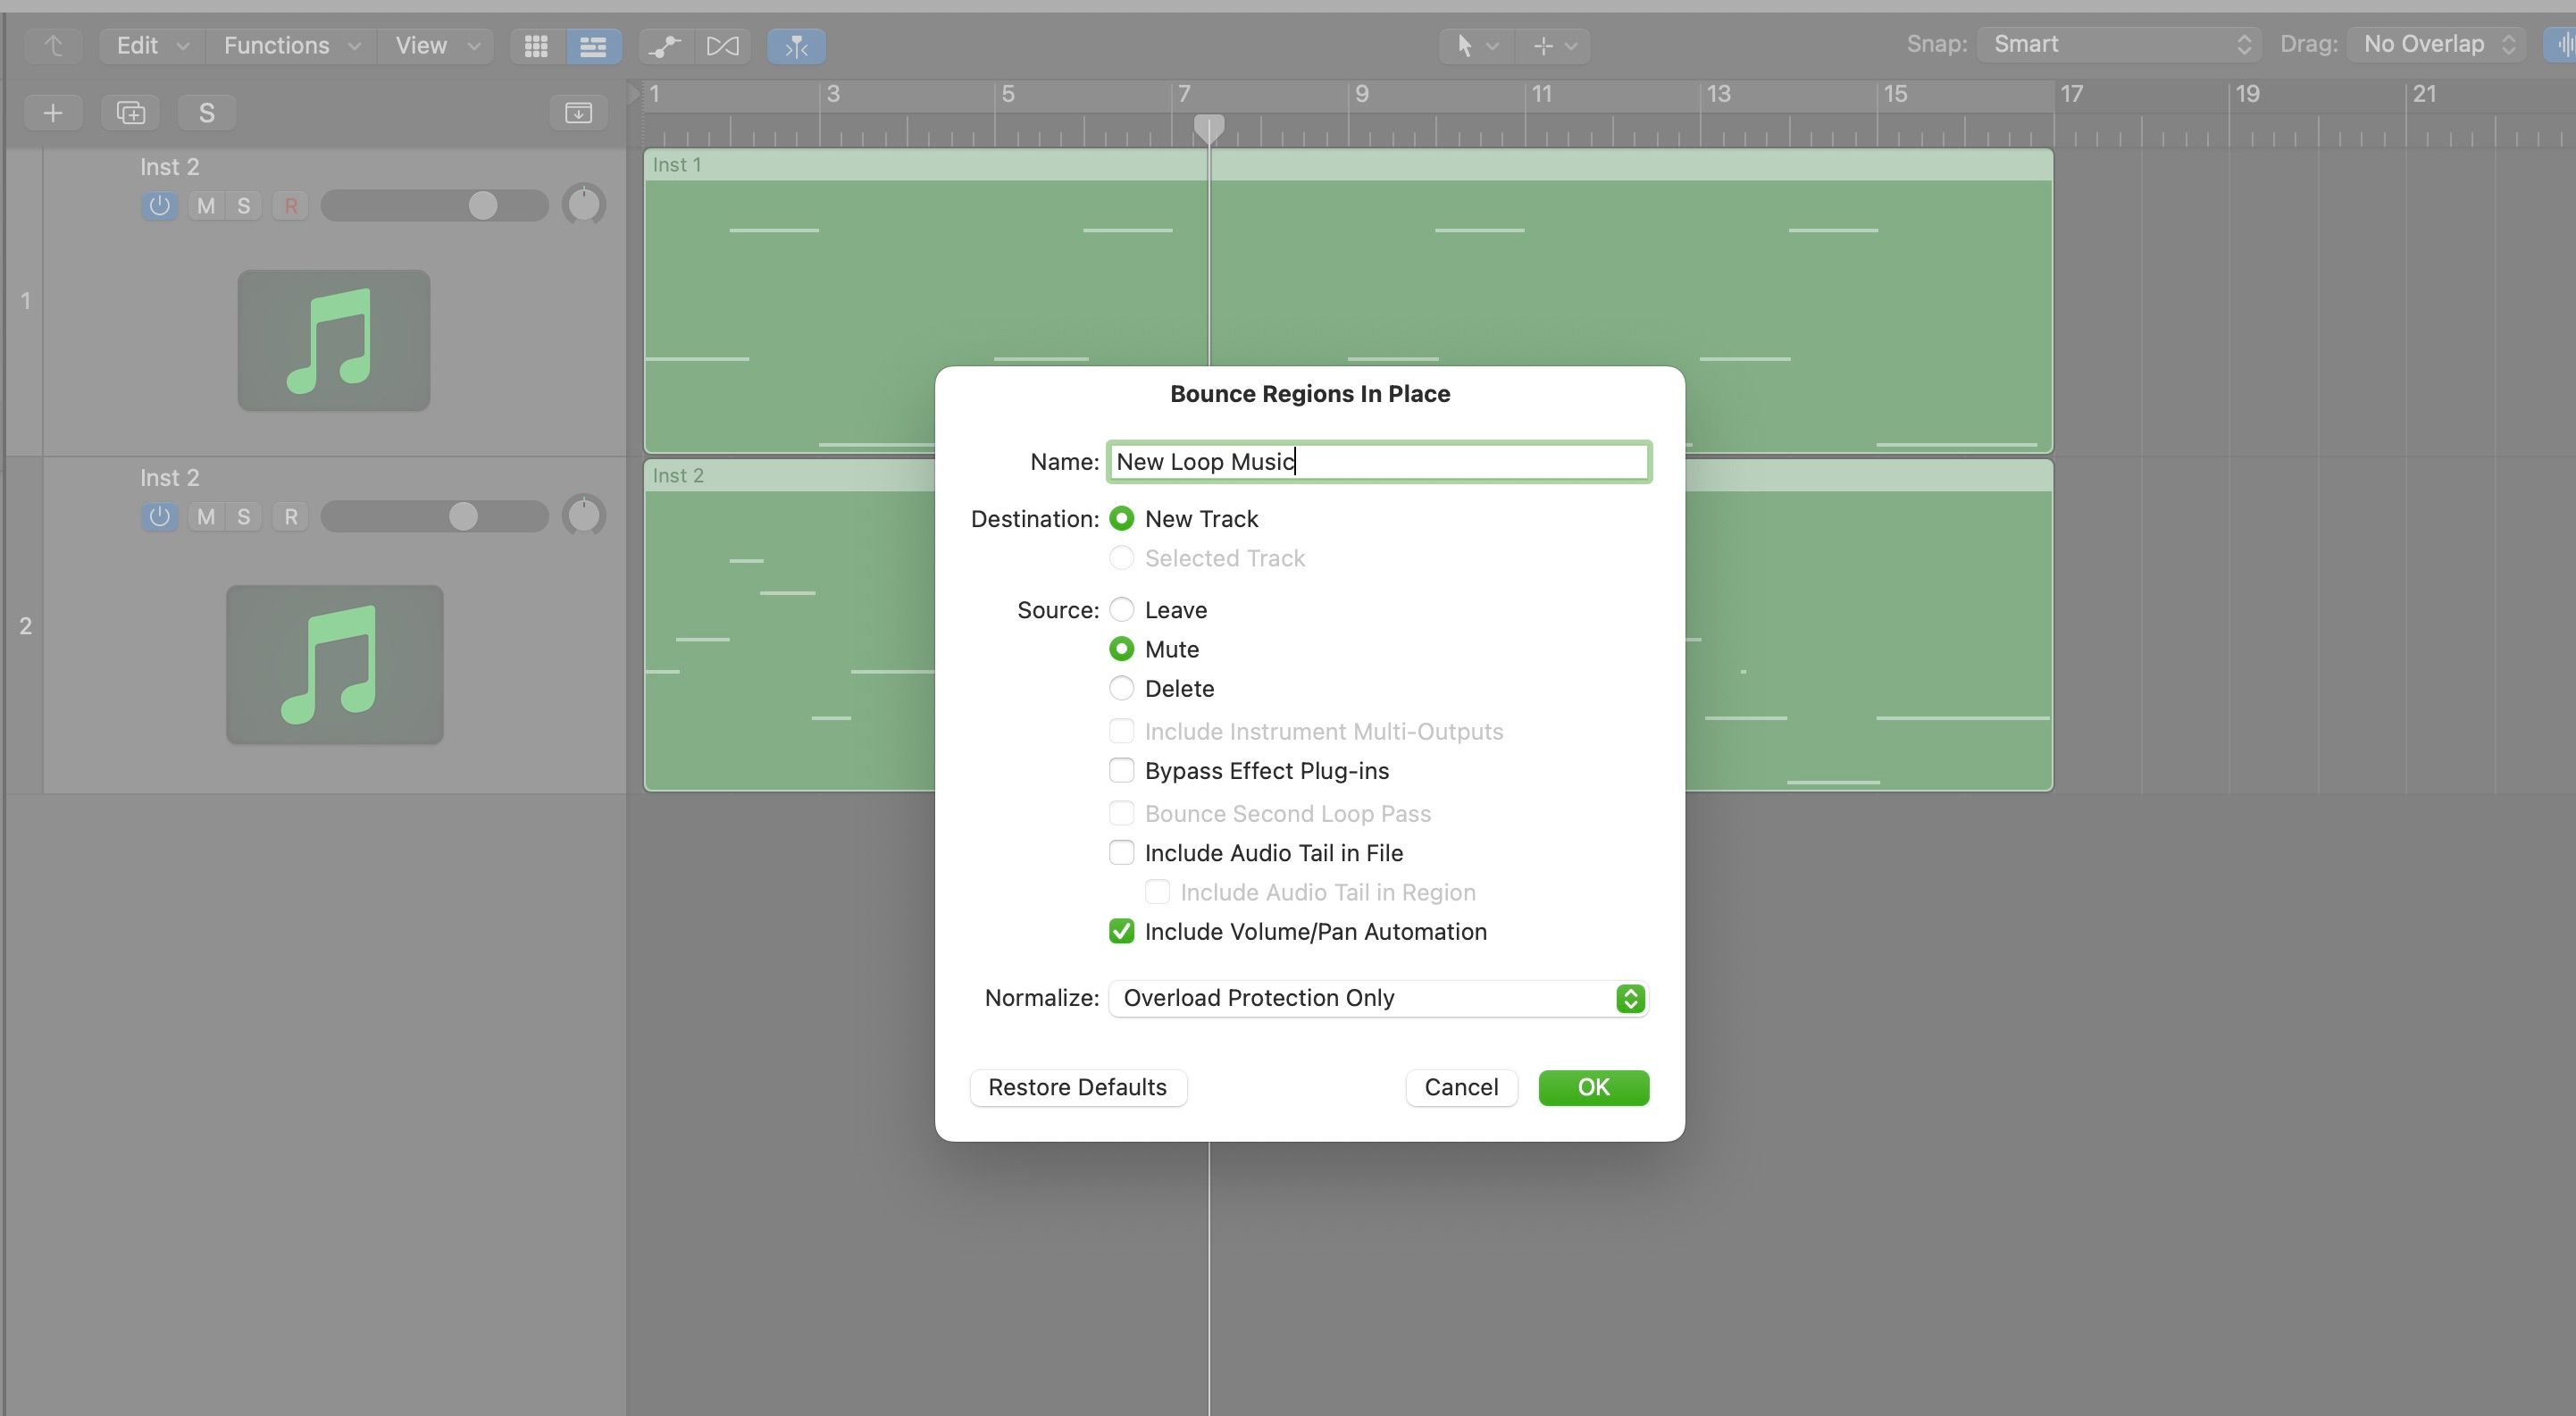
To bounce a MIDI track into audio, right-click on the audio region and select Bounce In Place. In the dialog window that appears, make sure the option to Include Audio Tail in File is not selected. It's important that this option is switched off for this method to work. Select OK when you're ready to create a new audio track.
2. Cut the Last Few Bars
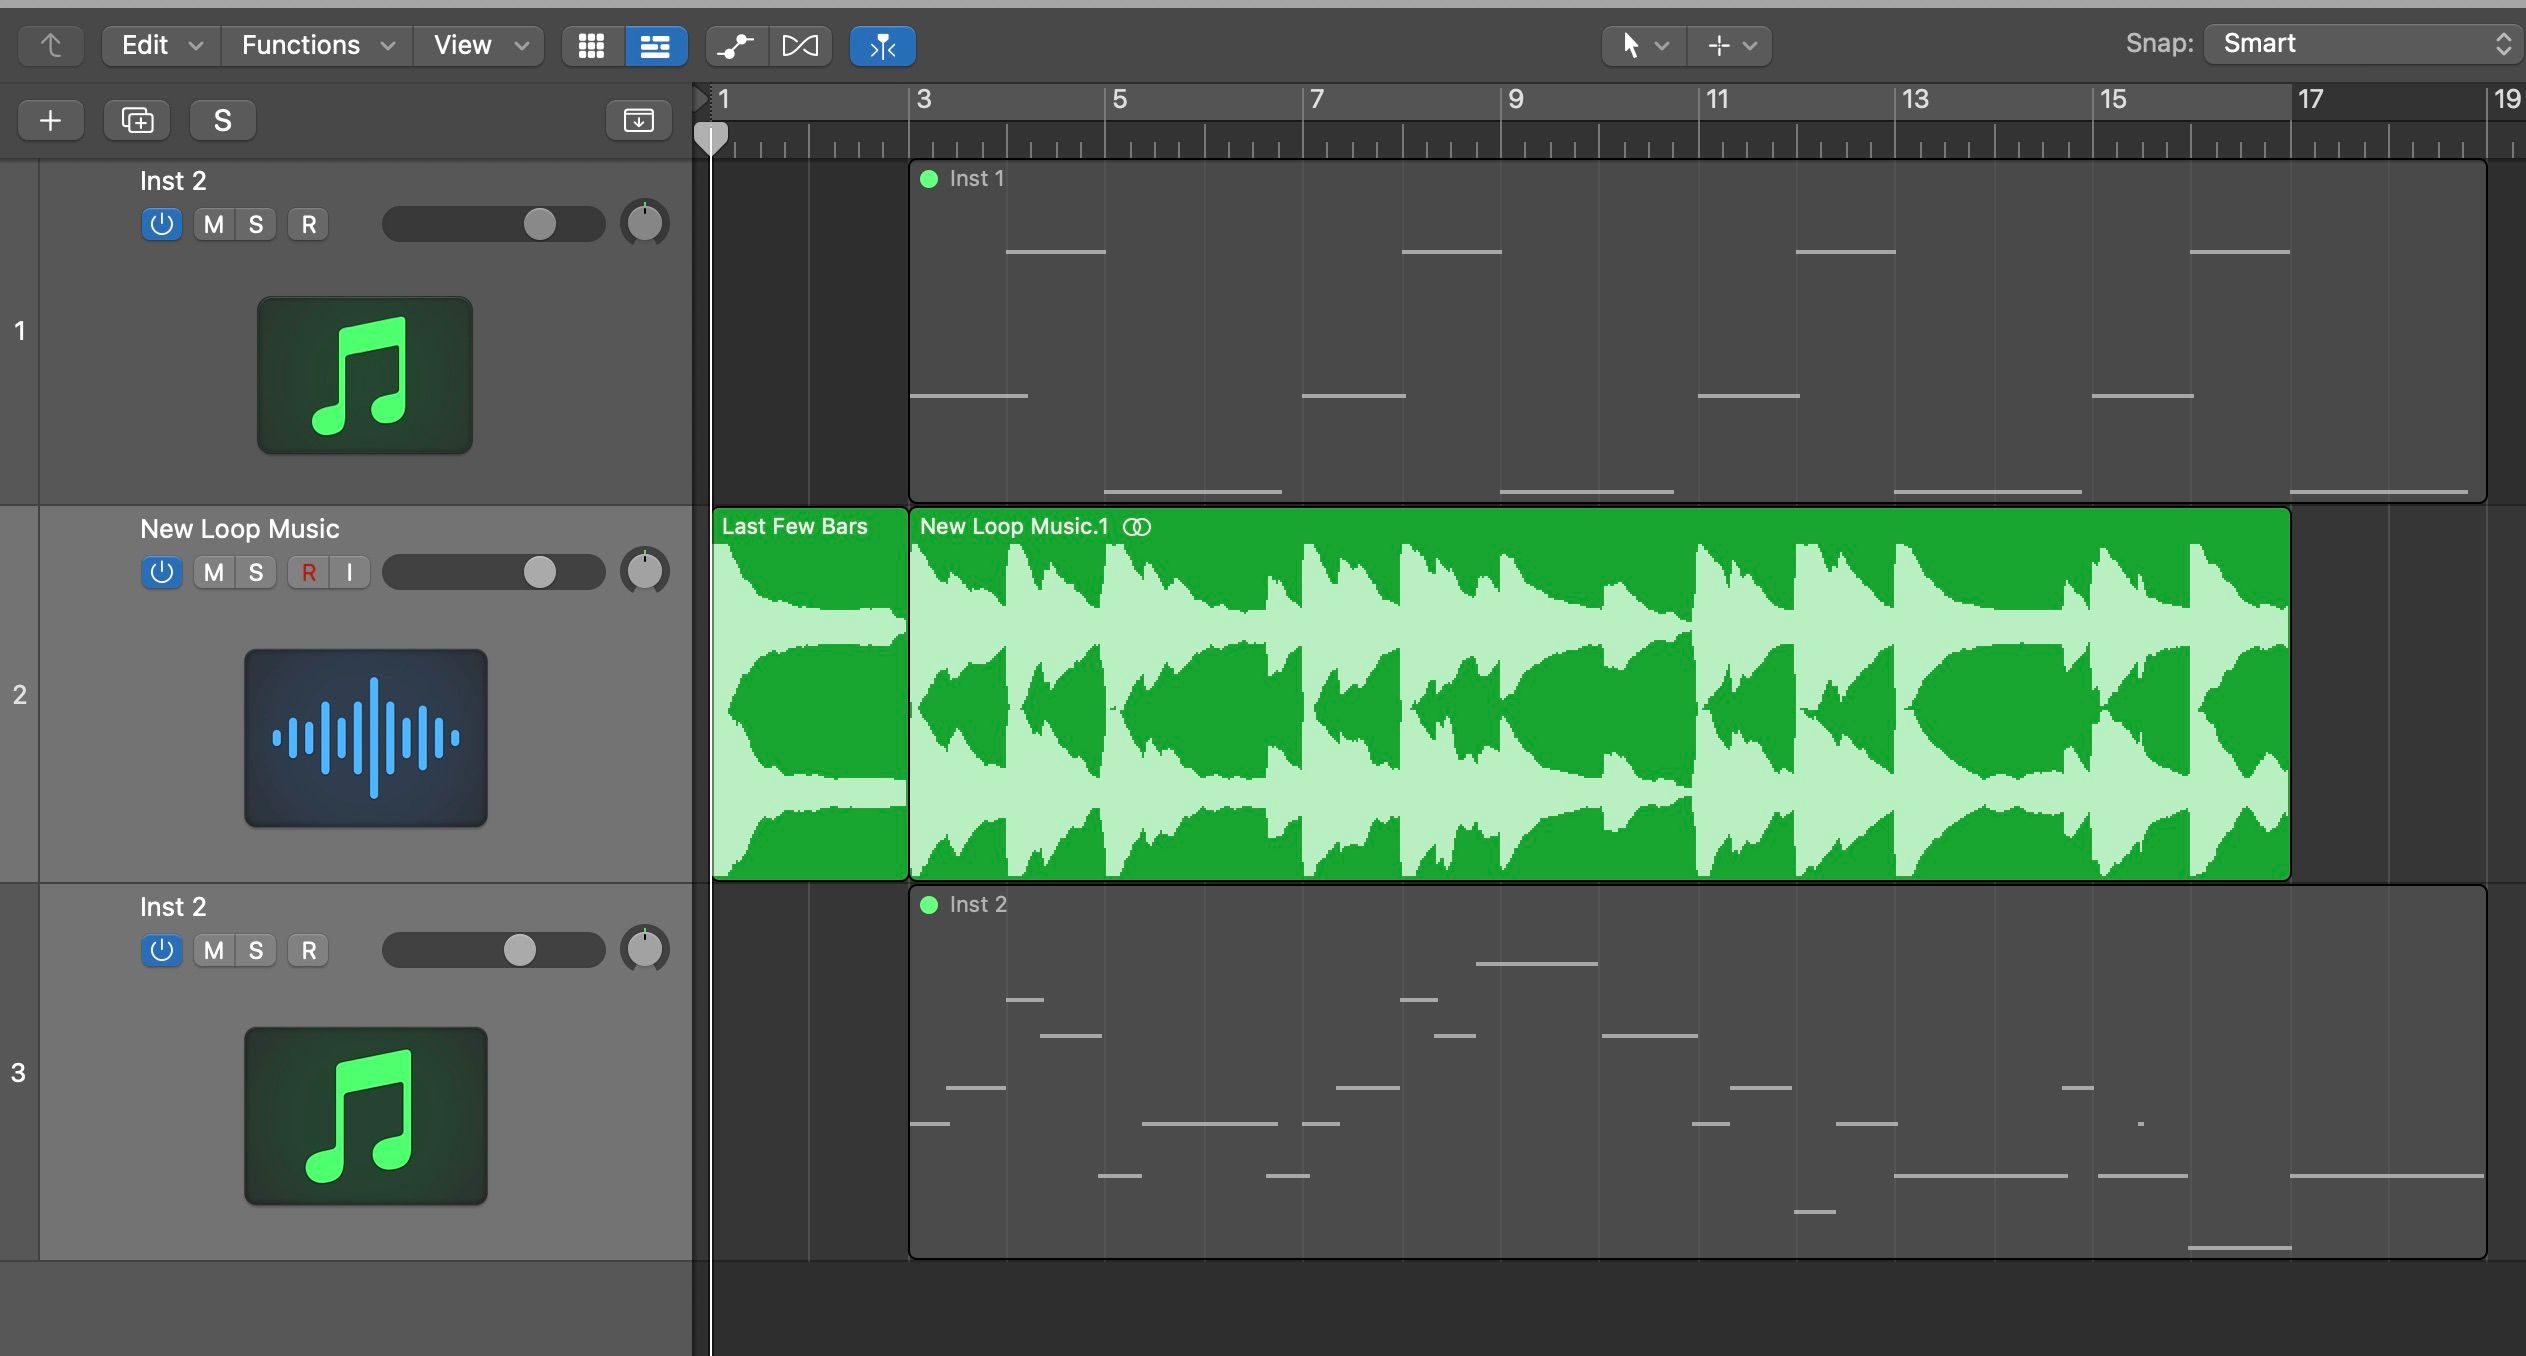
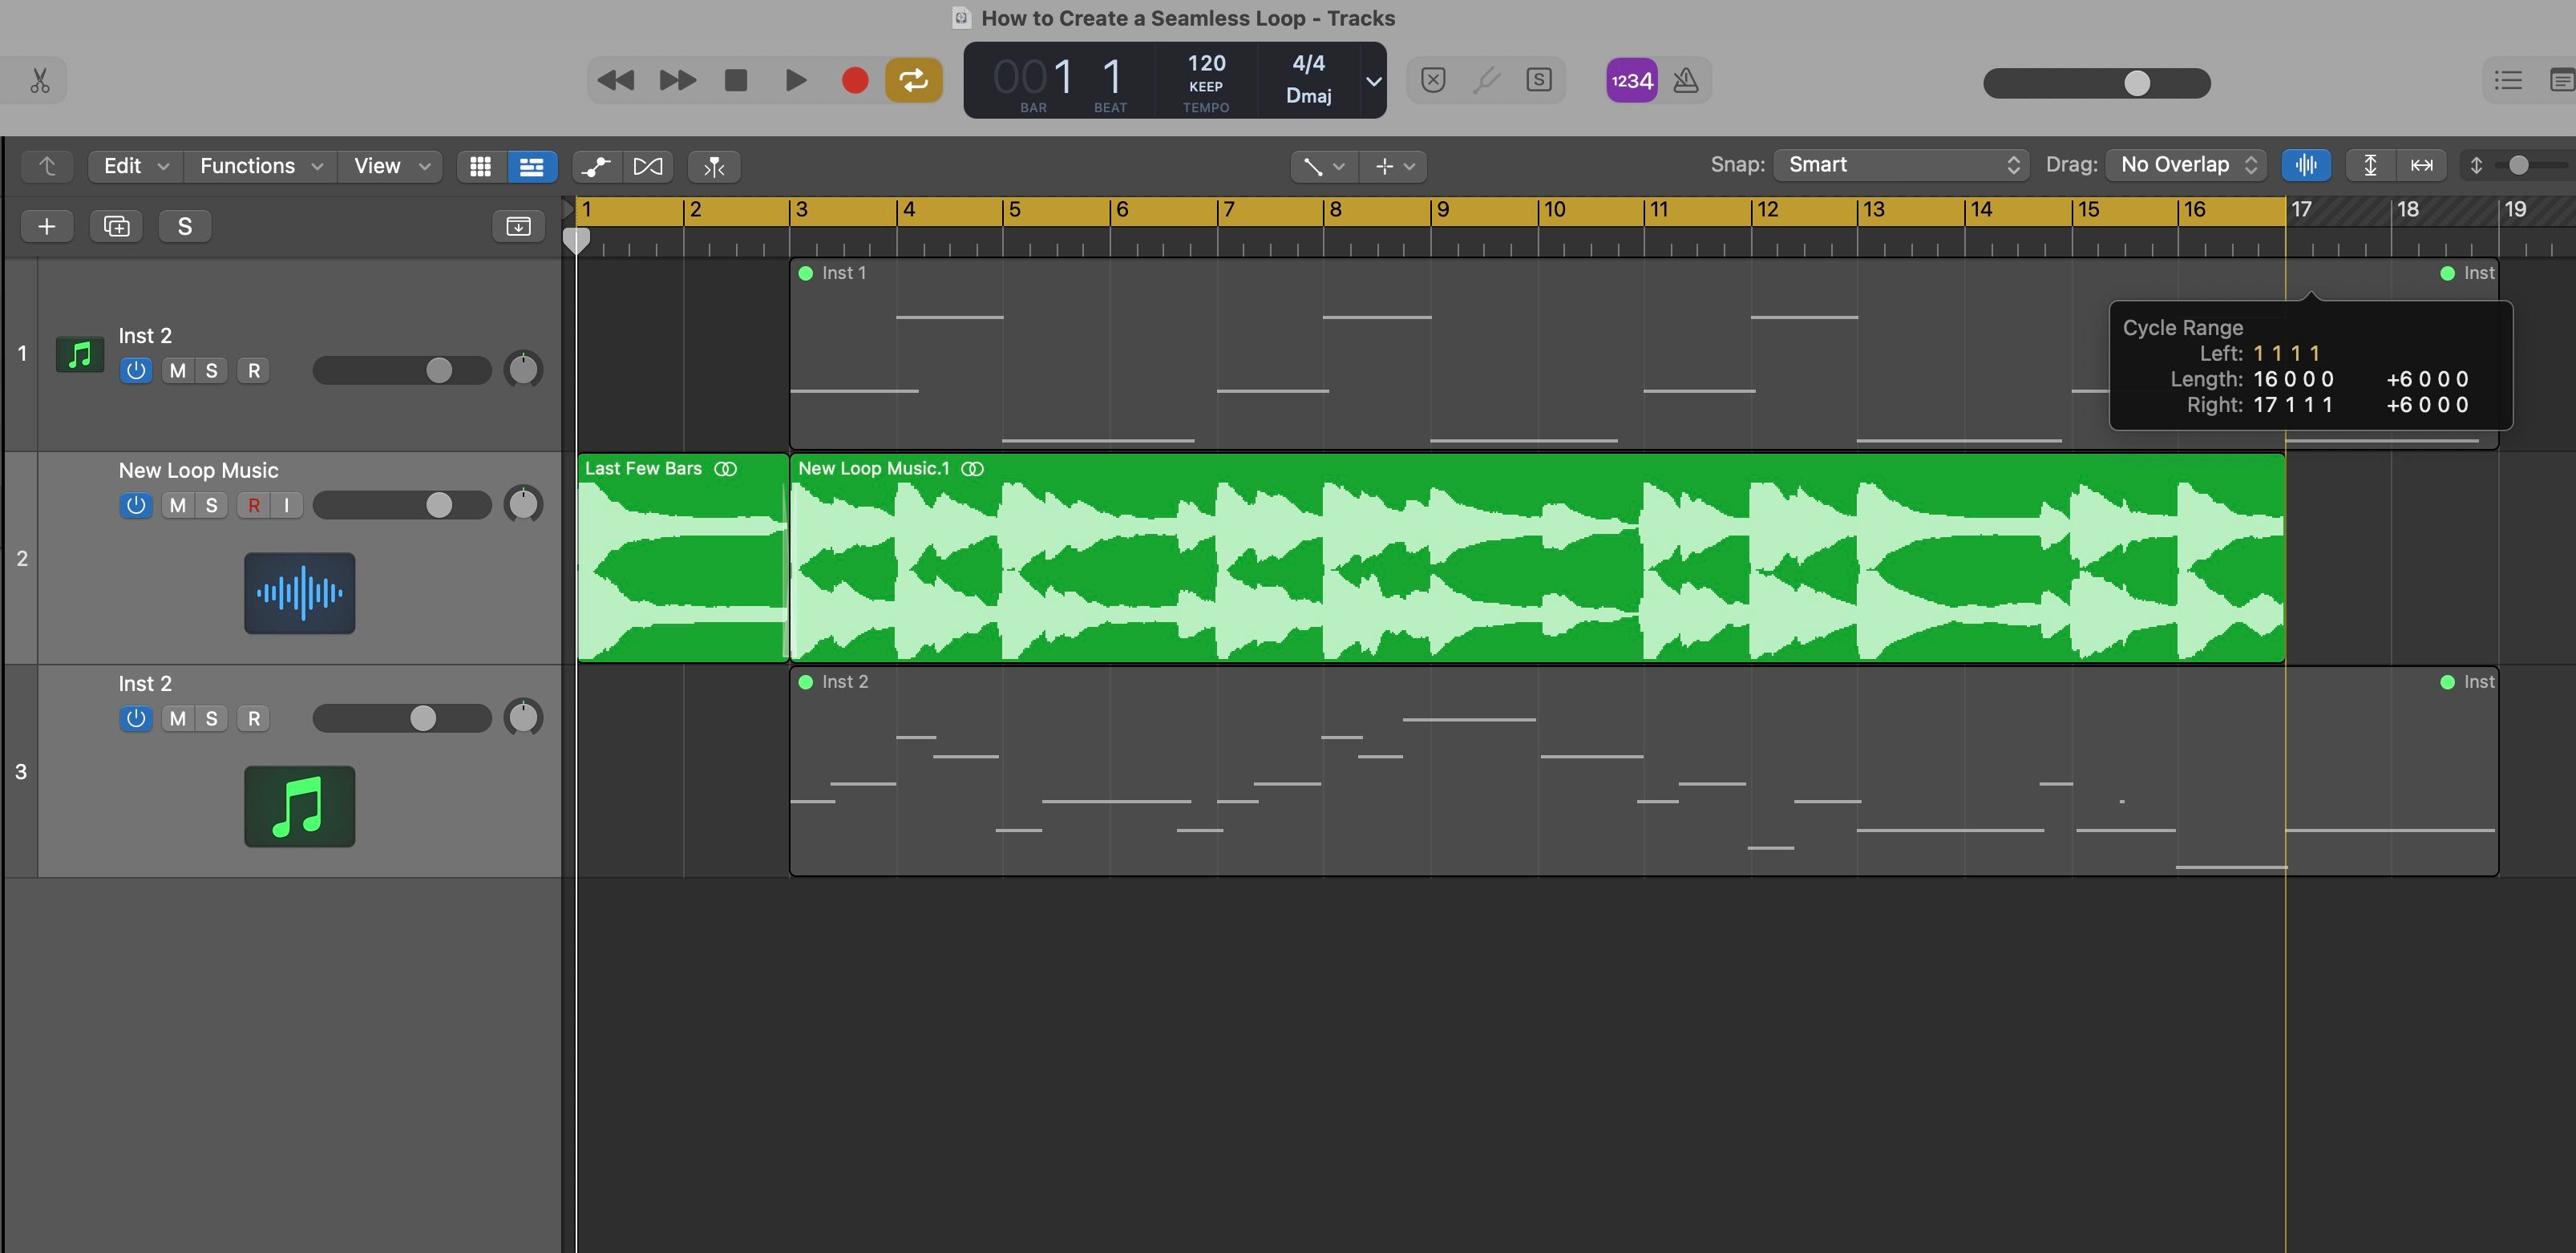
Once you have your audio track, cut the last few bars/seconds of music at the end and move it to the beginning. You may have to shuffle the audio tracks around to make room for it.
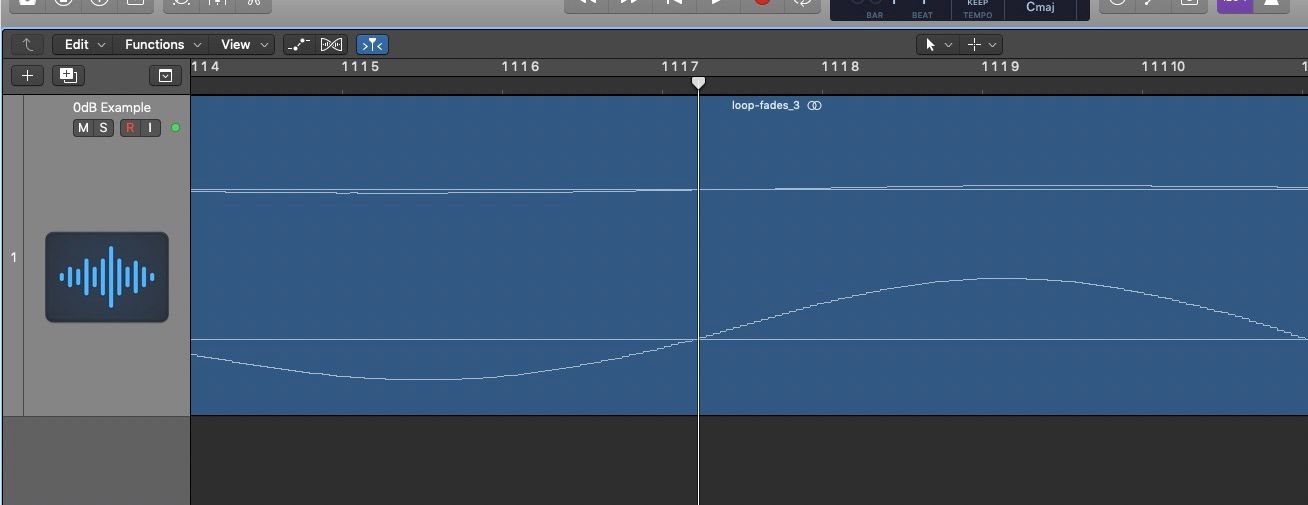
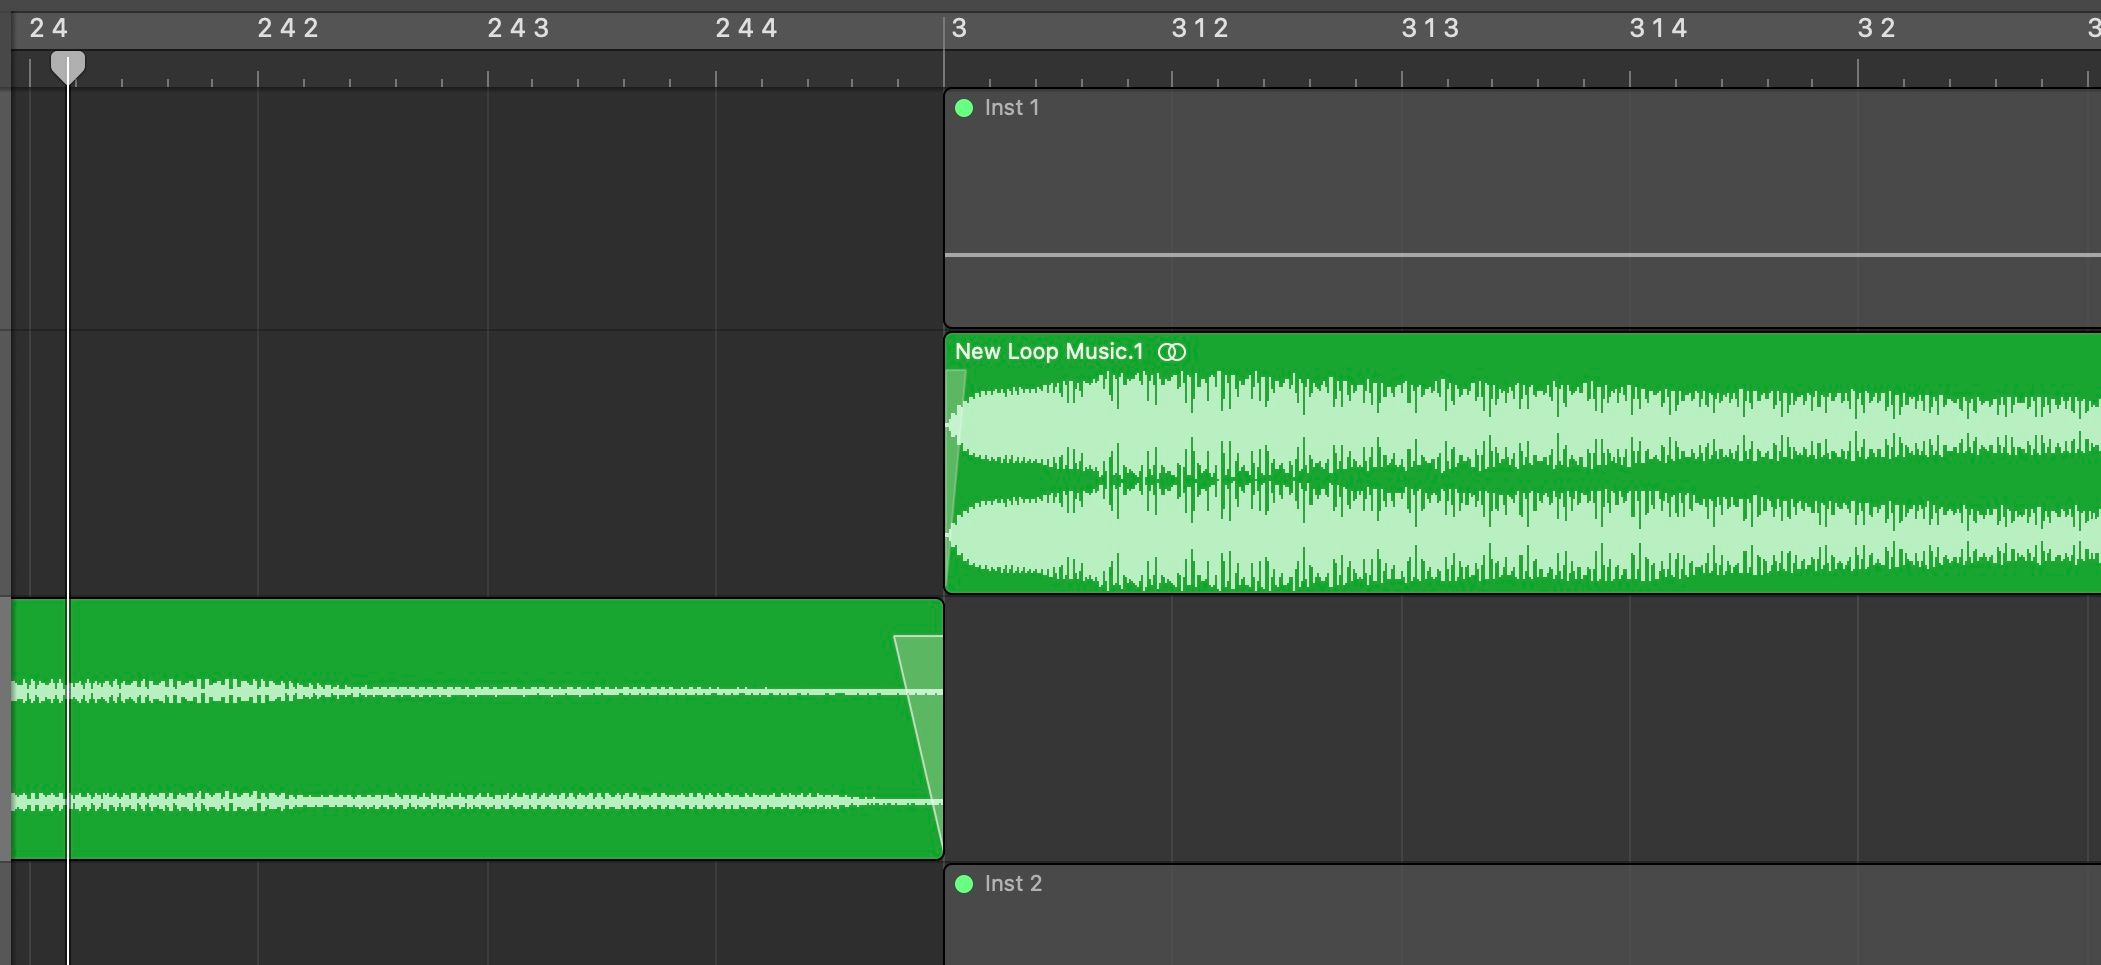
The best advice for figuring out where to cut the music is to look for a point where the sound crosses the 0dB line, also called "zero-crossing" (the horizontal line running through the audio file).
Use the zoom sliders at the top right-hand corner of the editing timeline to enlarge the waveform until it's just a line. Once you do this, the zero-crossing point will be very easy to find. Pressing Command and + will also help make the waveform more visible.
When you've found the best place to cut, move the playhead to that position and press Command + T to split the region. Then grab the new clip and drag it to the beginning of your music.
3. Smooth the Transition Point
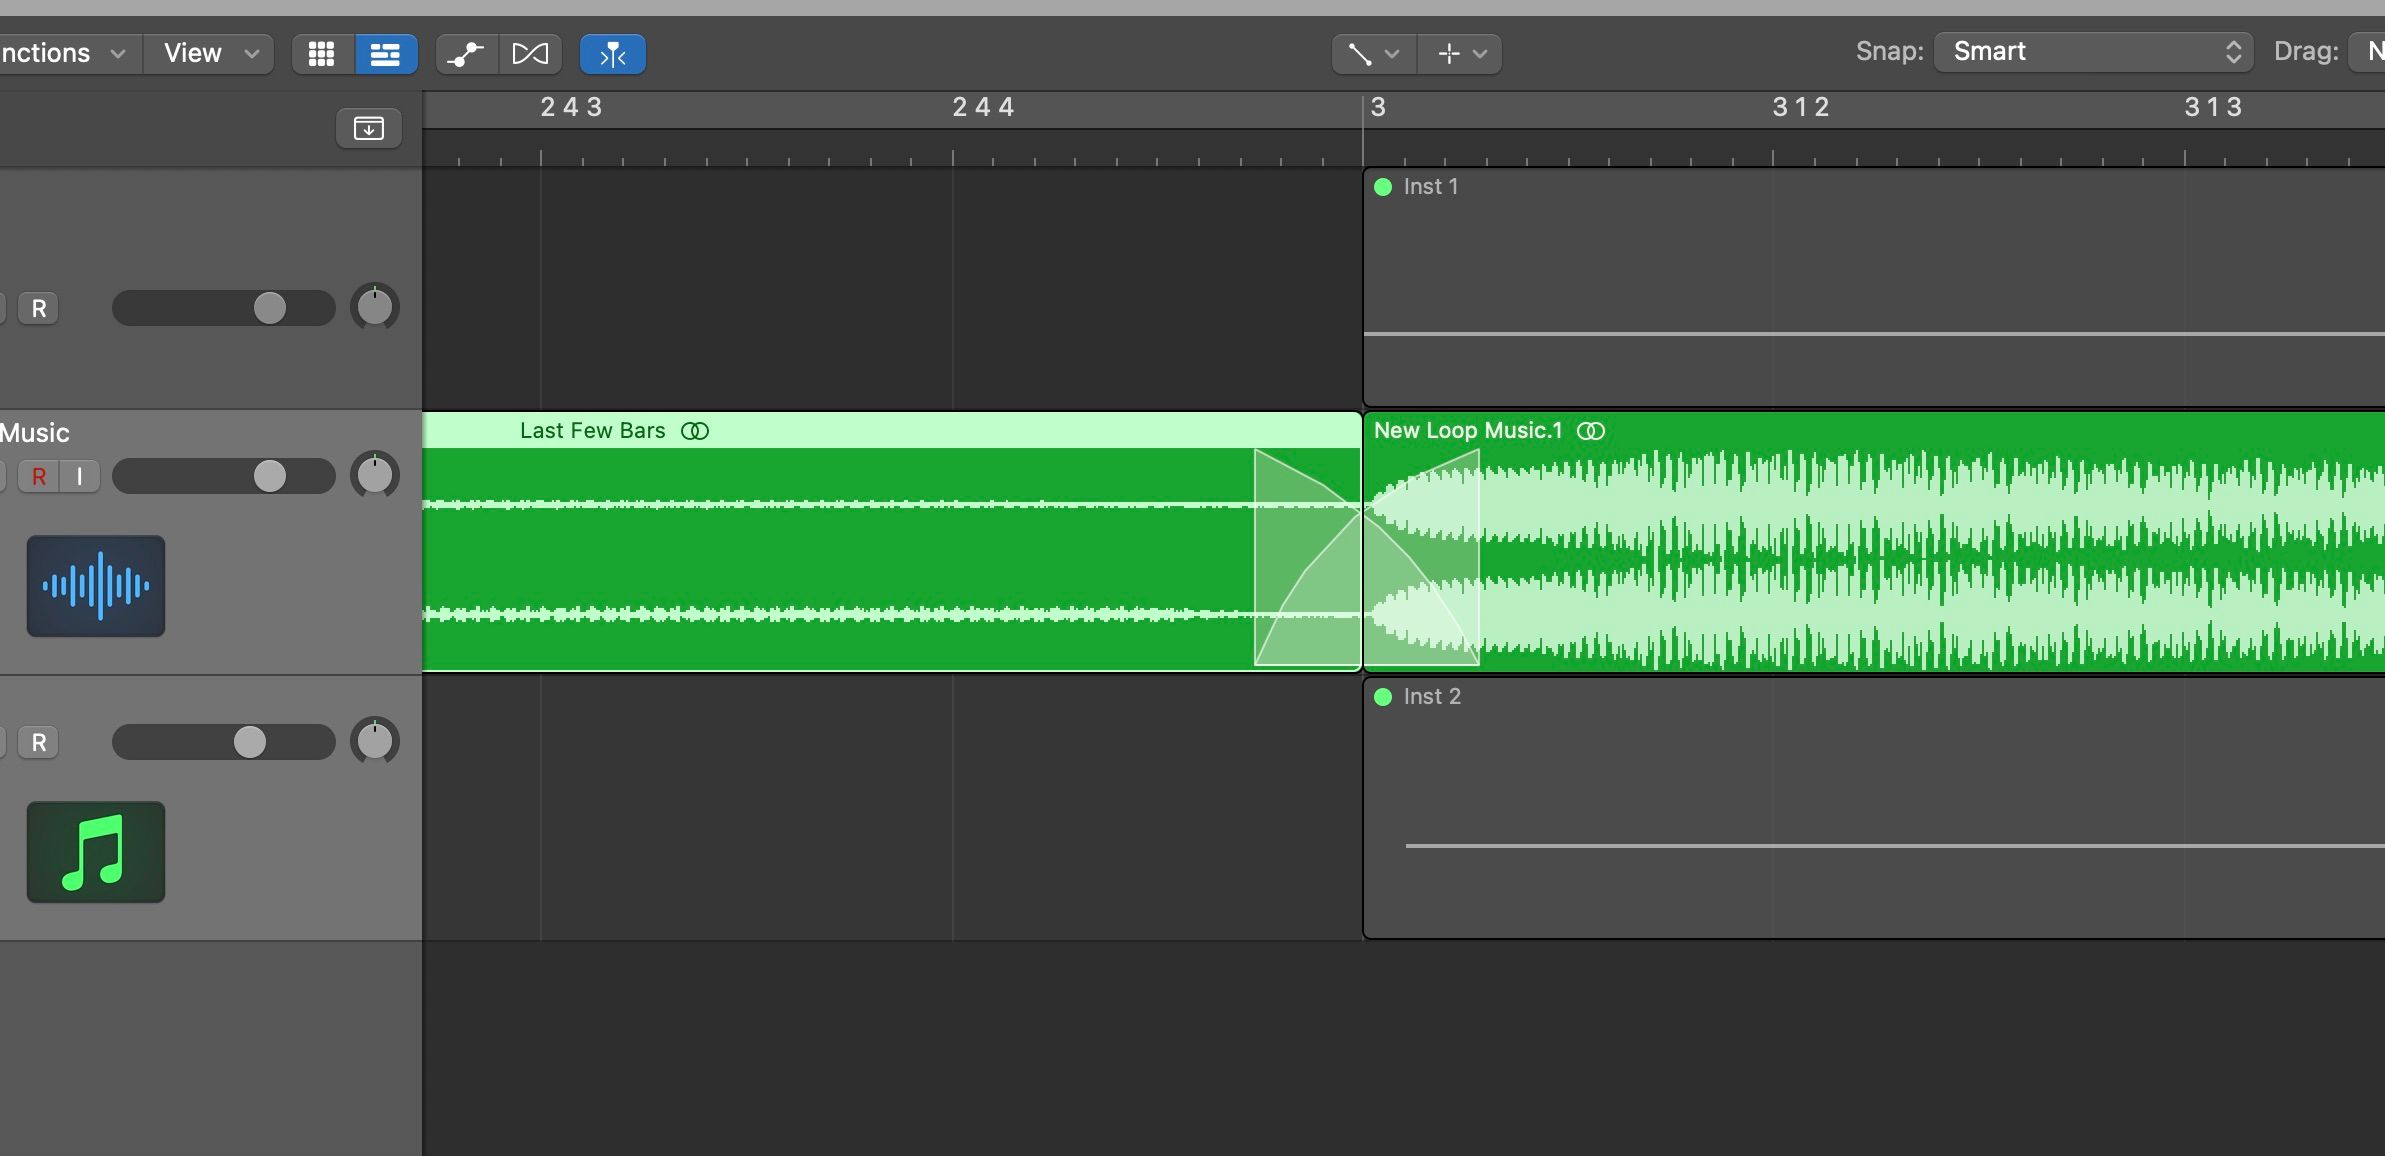
Now it's time to smooth the transition between the new clip at the start of the track and the original start of the music. To do this, you just need to add a crossfade between the two clips.
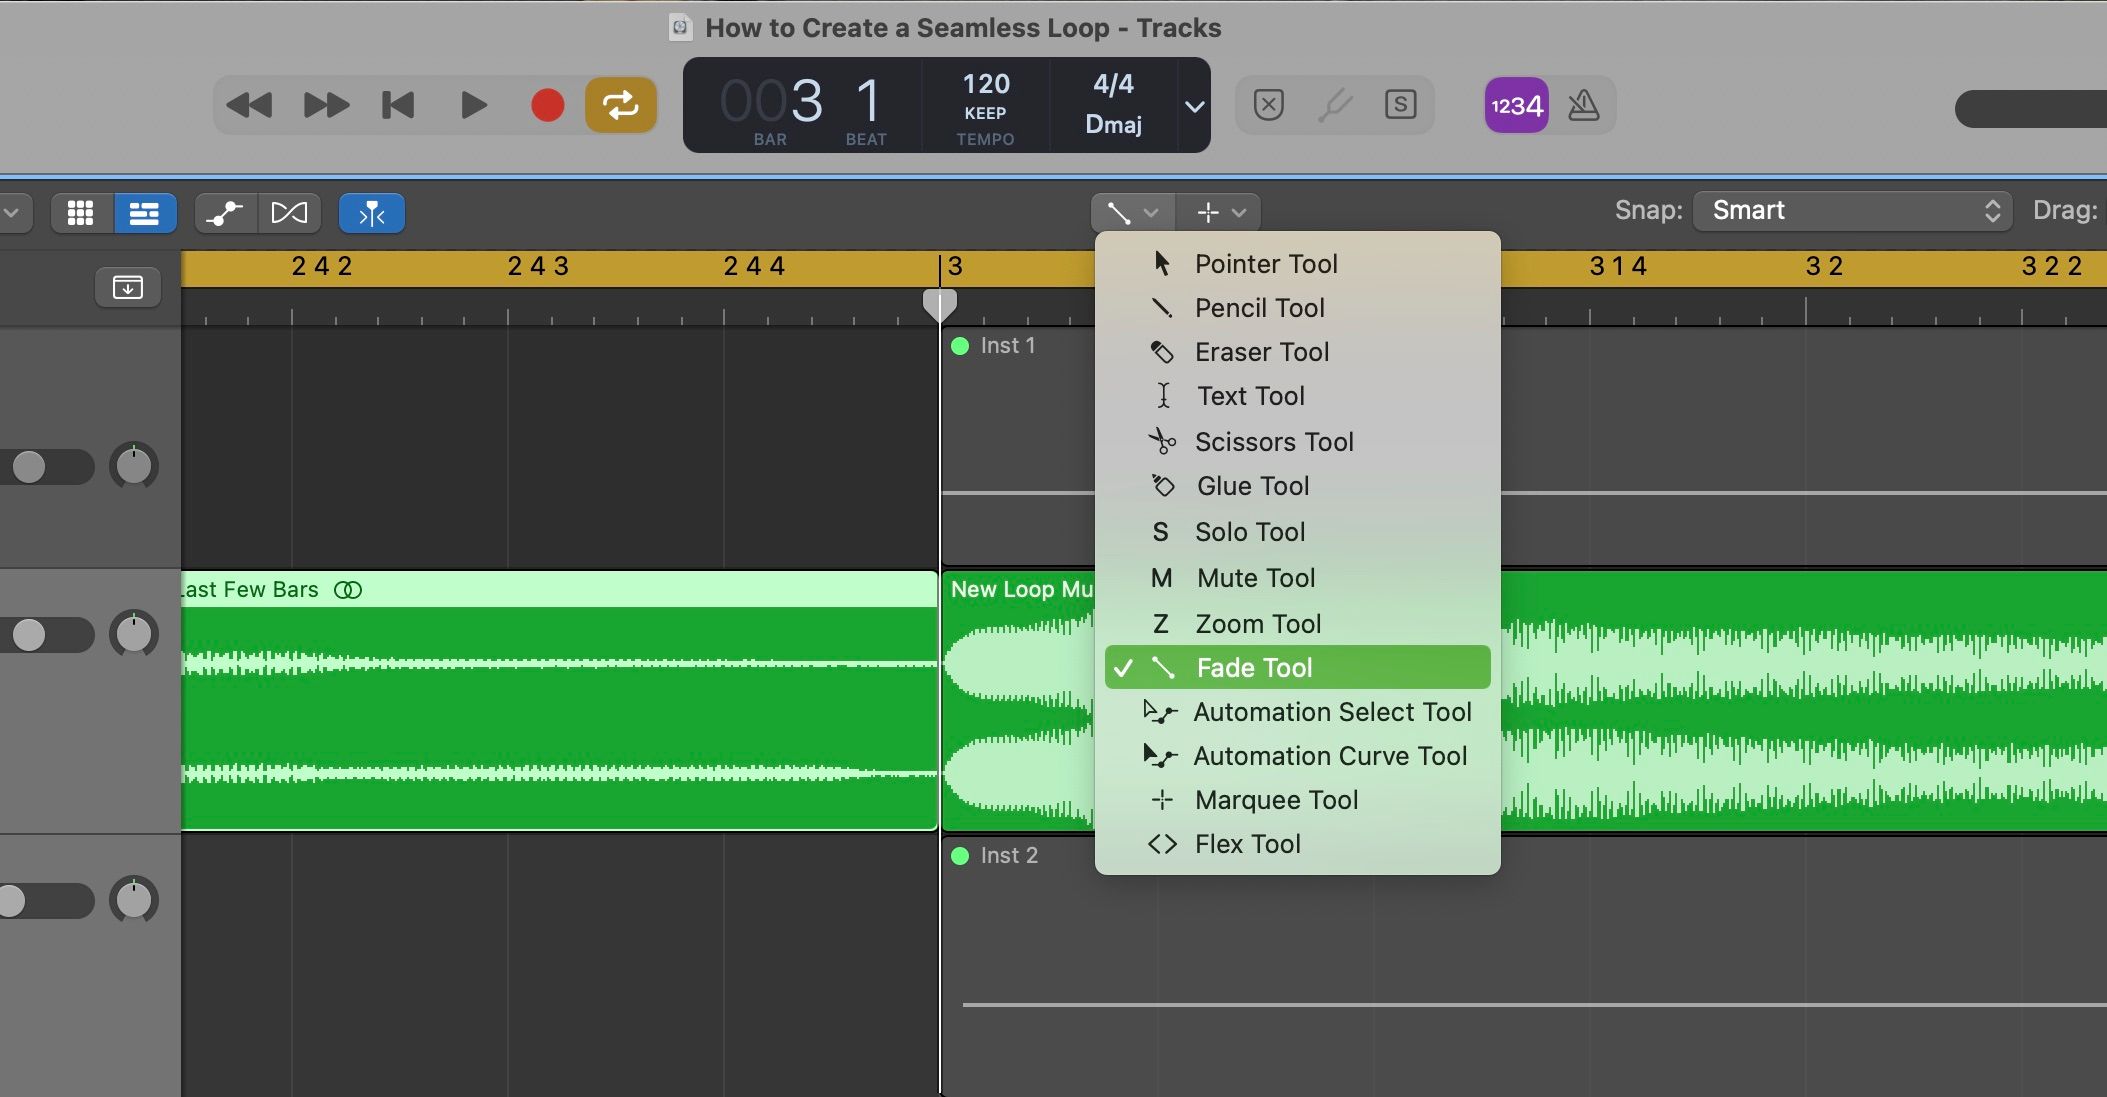
Select the Fade Tool located in the thin strip above the editing timeline. Next, you will want to zoom in on the point where the two clips meet using the Horizontal Zoom slider at the top right of the editing timeline. To create a fade, click and drag across the two clips and adjust the boundaries if needed. Listen to the transition to see if the two clips flow seamlessly.
Finally, add the smallest possible fade to the start and end of the entire track, around 10 samples long.
4. Bounce the Track Again
Because the last few seconds of music were cut and put at the start, the end of the music should now perfectly loop back to the beginning. You can test this by creating a loop region over the entire piece of music and listening to how it sounds.
To create a loop region, click and drag across the thin strip above the editing timeline where the bar numbers are. This will create a yellow highlighted area which you can adjust to cover the whole track. Play the music back to see how the end of the piece loops back to the start—there shouldn't be any pops or clicks.
Now, you have a perfect, seamless loop!
5. Add a Reverb Tail (Optional)
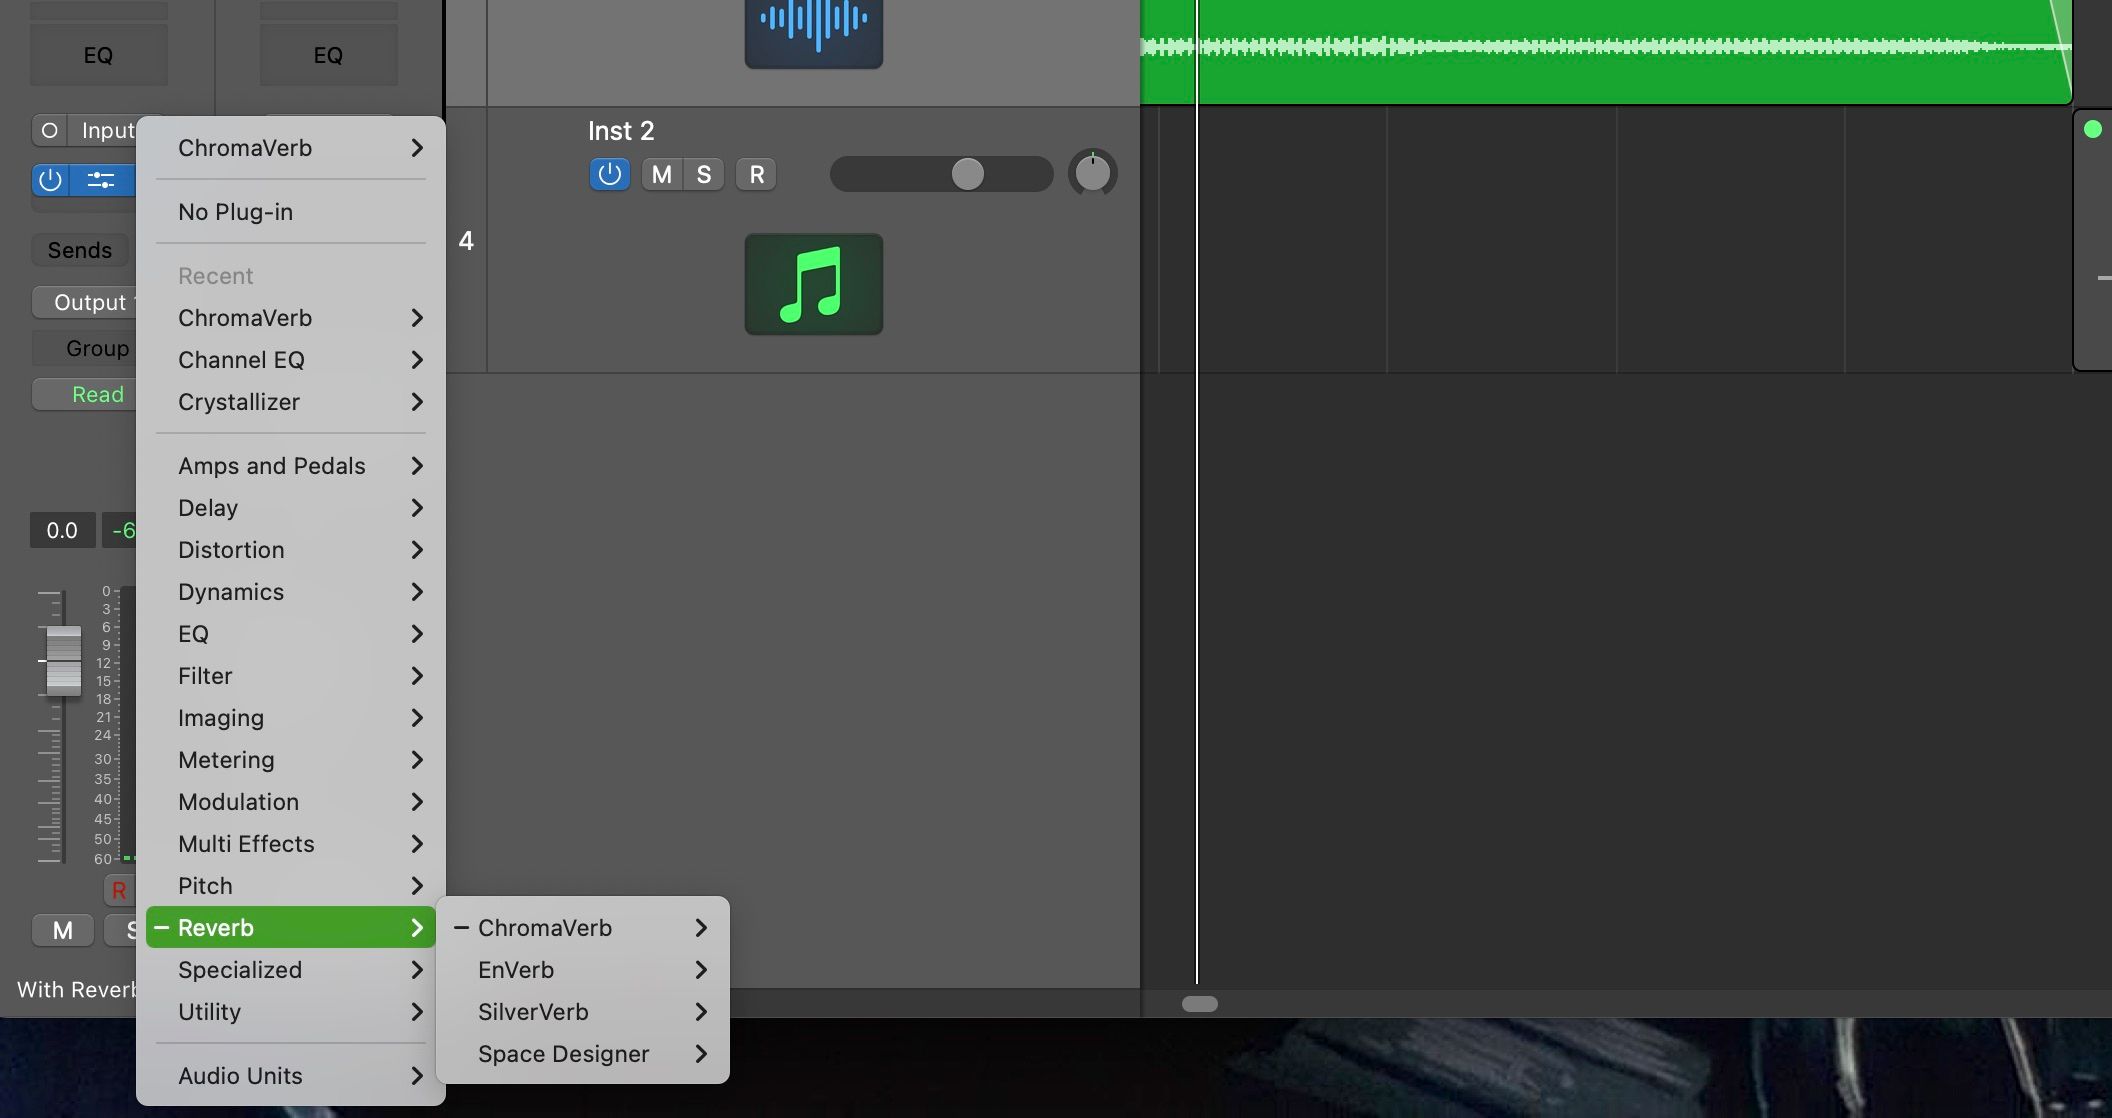
If the transition in the loop still sounds noticeable, you can try adding a reverb tail. To do this, take the few seconds of music from the end and move them to the beginning as you did in step two, but this time, place them on a separate track.
In an empty plugin slot, add a Reverb to this audio snippet and adjust the settings to match the music. Next, add a few tiny fades at the transition point, where the two tracks meet; one at the end of the snippet and one at the beginning of the original audio.
Listen through to see how it sounds, and once you are happy with the results, bounce the whole piece of music out. The added reverb tail over the transition point will help mask any noticeable differences.
Tips and Tricks for Looping Music
Below we've listed a few extra tips and tricks to help you create the perfect loop.
- You can bounce more than one MIDI track at a time by selecting multiple tracks and pressing Bounce In Place.
- If you have trouble locating a good place to cut the track in step two, an alternative option is to compose a couple more bars of music to work as a transition (also called post-roll).
- Another way to check if your loop is seamless is to duplicate your track directly after the first copy. Listen to the transition between the two tracks to check for any pops or clicks.
Looping music is just one component of composing music for video games; read our introduction to making music for games if you want to learn more.
The Almighty Loop
To create the perfect loop, you just need to know a few basic audio editing functions that you can find on almost any DAW. Besides that, there is no other fancy tool required to create a loop for a video game. We've shown you how to do the tail-to-front method in Logic, but try it out on any one of your favorite DAWs.


