
The appeal of sepia imagery has captivated the public since the 19th Century with its warm, brownish hues. Originally intended to preserve photographs, the sepia process has evolved and found a new audience in the digital era.
In this tutorial, we will show you how to create a custom sepia effect in Photoshop. Additionally, we will show you how to create a Photoshop action to make the process quicker, regardless of whether you’re working with a color or black and white image.
The Problem with Many Digital Sepia Filters

The above picture is an example of a poor sepia effect.
Typically, when you run your photo through a smartphone filter or a preset in Photoshop, there are no controls in place to fine-tune the effect apart from a strength or opacity slider. What you end up with may look something like the above image, which is too strong of an effect and not well thought out.
What's missing is a set of controls to hone the sepia effect so that it makes sense in different regions of the same image. For instance, the same sepia strength shouldn’t necessarily be applied evenly throughout this particular image.
Here’s how our fully-customizable sepia action rendered this same image.

Notice how the coppery color cast has been removed entirely? If you look at many traditional and historic sepia photographs, you'll rarely if ever see this coppery look.
Also, each region of the image has the sepia effect distributed in different amounts. It looks like there was some thought put into it, and that's because there was! We didn't leave it up to a filter or preset to make all the important decisions.
How to Create a Fully-Customizable Sepia Effect Action in Photoshop
Now, let's create that sepia effect action for Photoshop. We will then show you how to use the action in the following tutorials.
To create an action, you need to have an image loaded into Photoshop. You can use any of your own to do so, or you can download this one from Pexels to follow along.
-
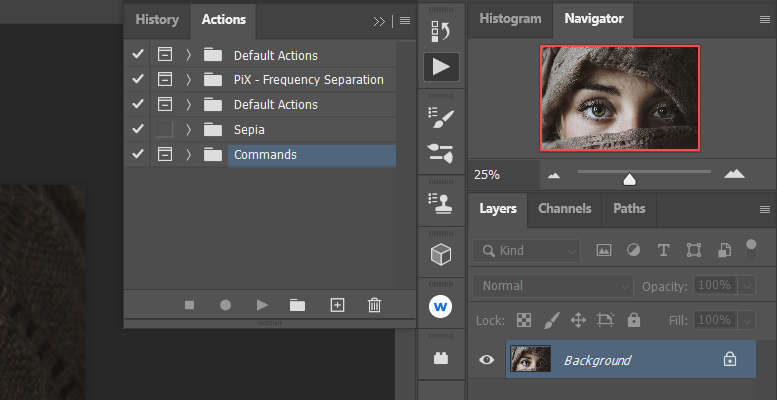
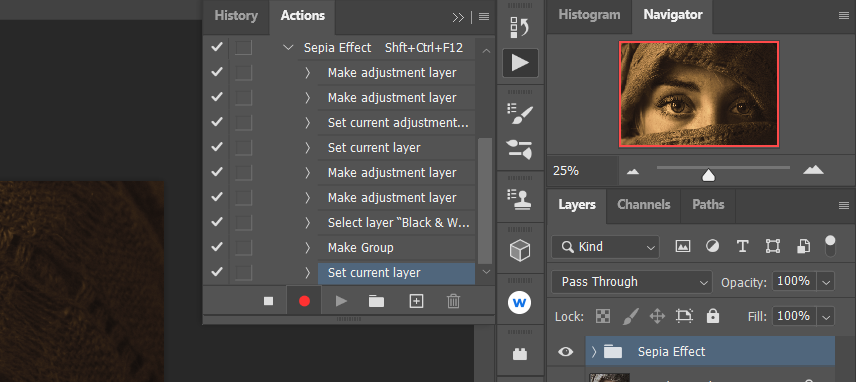
Use the keyboard shortcut Alt + F9 to open the Actions menu.
-
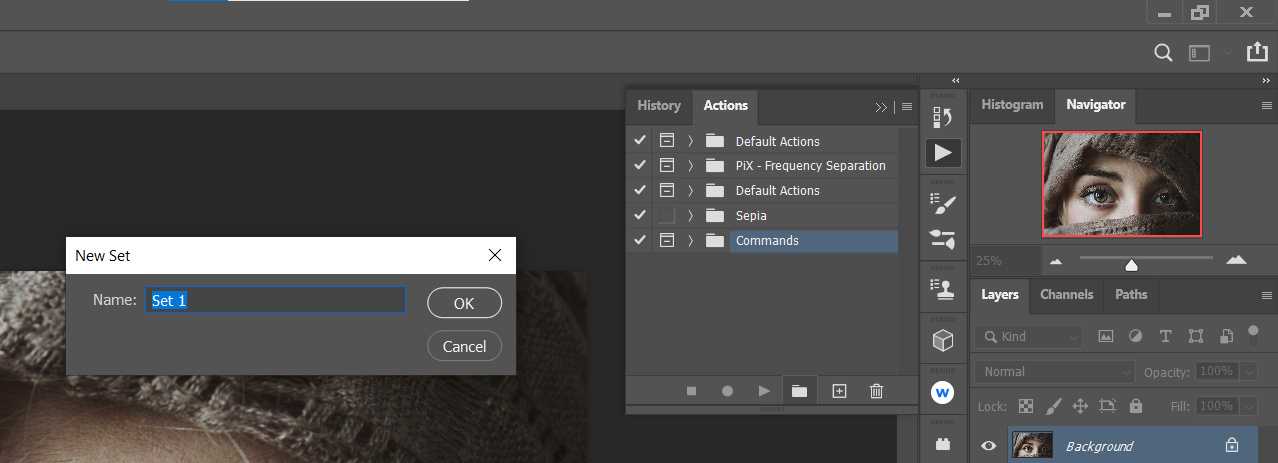
Click on Create New Set folder icon.
-
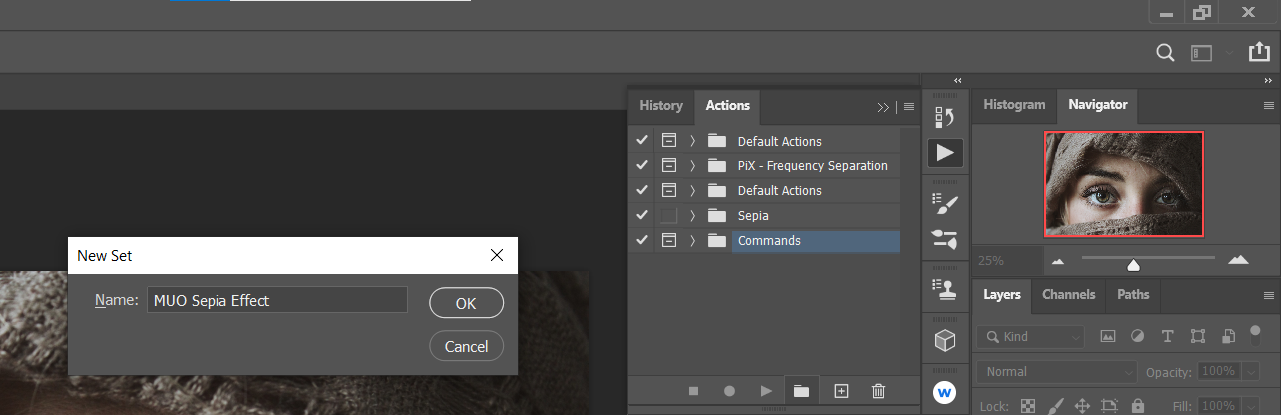
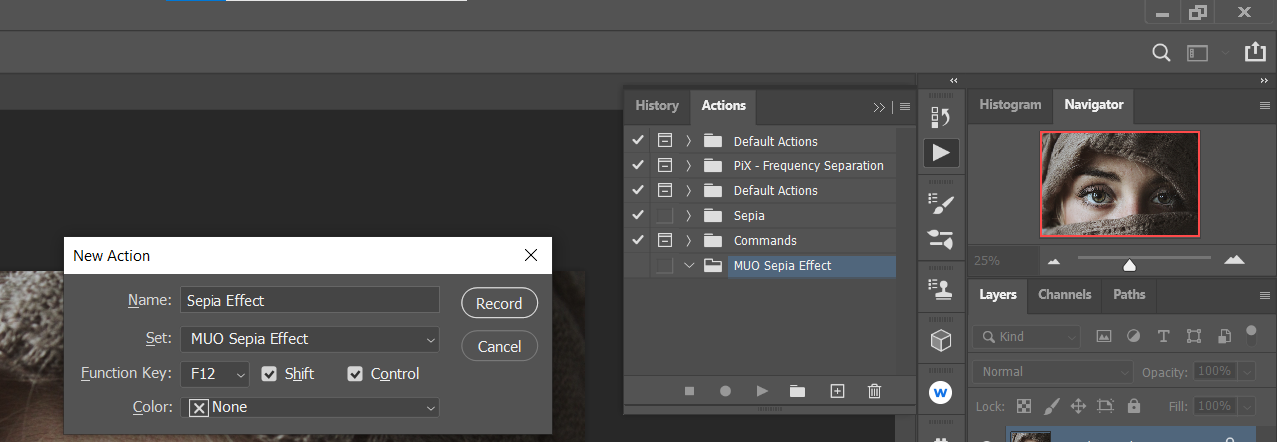
Change the Name field to MUO Sepia Effect. Click OK.
-
With MUO Sepia Effect highlighted, click on the Create New Action + icon.
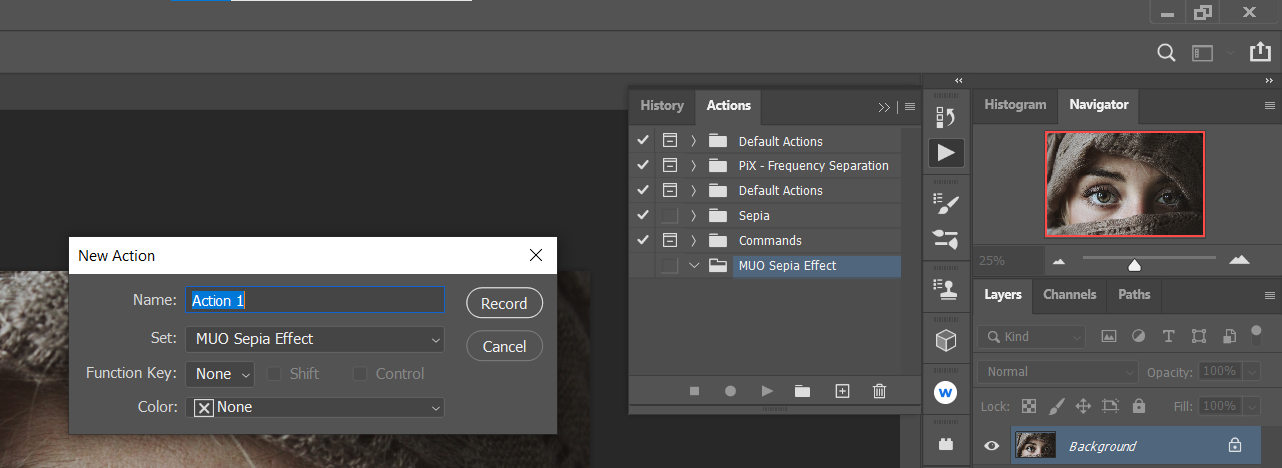
- In the New Action menu, make the following changes to these fields: Name: Sepia Effect, Set: MUO Sepia Effect, Function Key: F12 (you can choose something else).
-
Check Shift or Control, and then click Record.
-
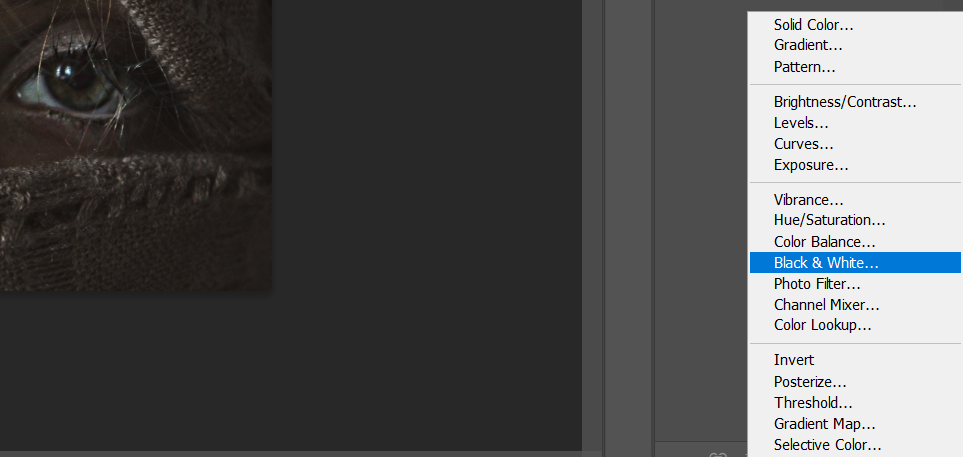
Click on the Create New Fill or Adjustment Layer icon at the bottom right of your Photoshop screen. Select Black & White.
-
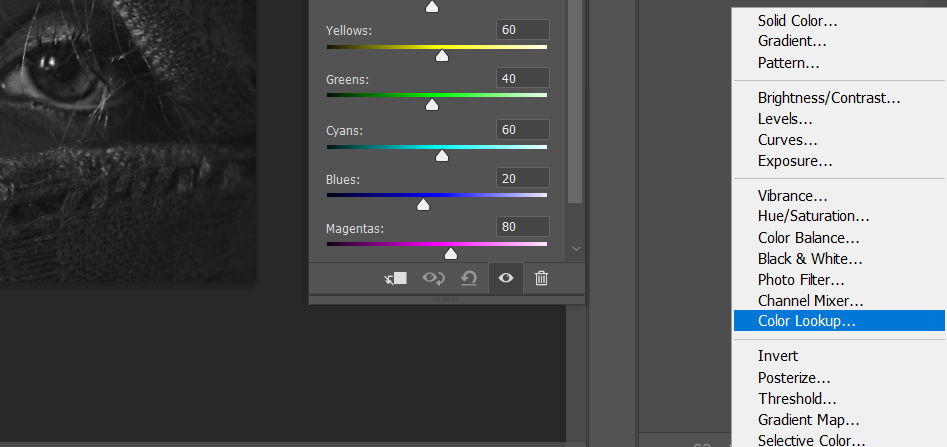
Click on the Create New Fill or Adjustment Layer icon once again. This time, choose Color Lookup.
-
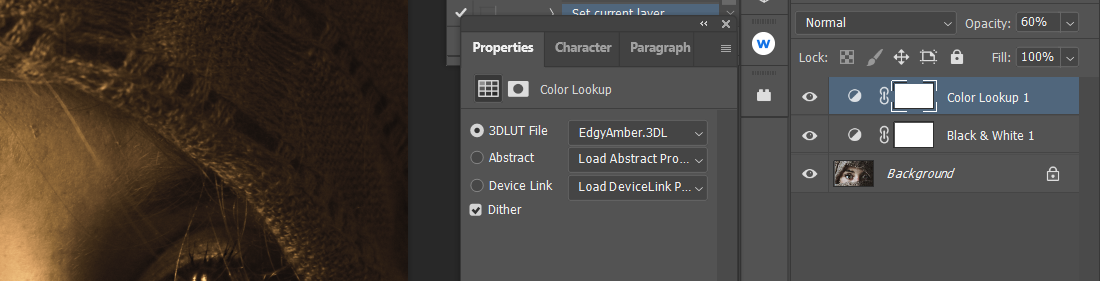
In the Color Lookup menu, find the first dropdown menu, and select EdgyAmber.3DL. Then, change the layer blend mode from Normal to Soft Light.

-
With the Color Lookup 1 layer selected, change the opacity to 60 percent.
-
Click on the Create New Fill or Adjustment Layer icon at the bottom right of your Photoshop screen. Select Color Balance.
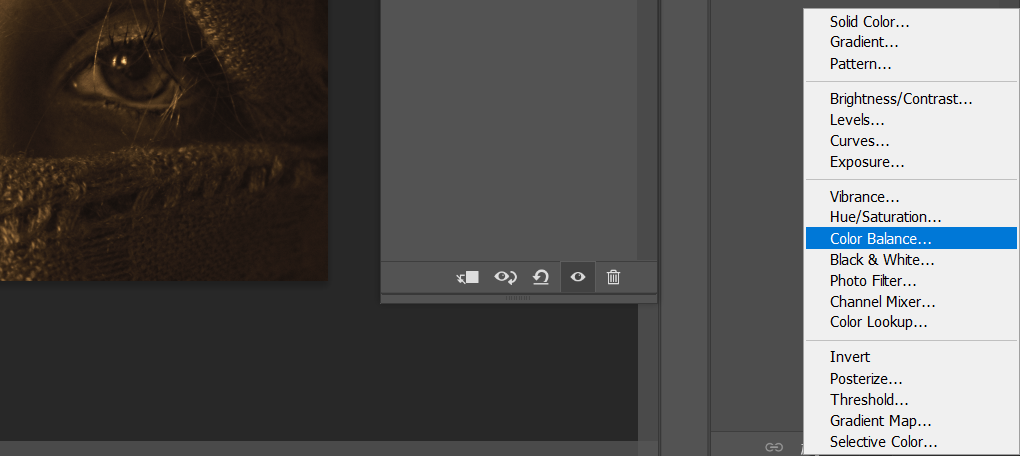
-
Click on the Create New Fill or Adjustment Layer icon at the bottom right of your Photoshop screen. Select Curves.
-
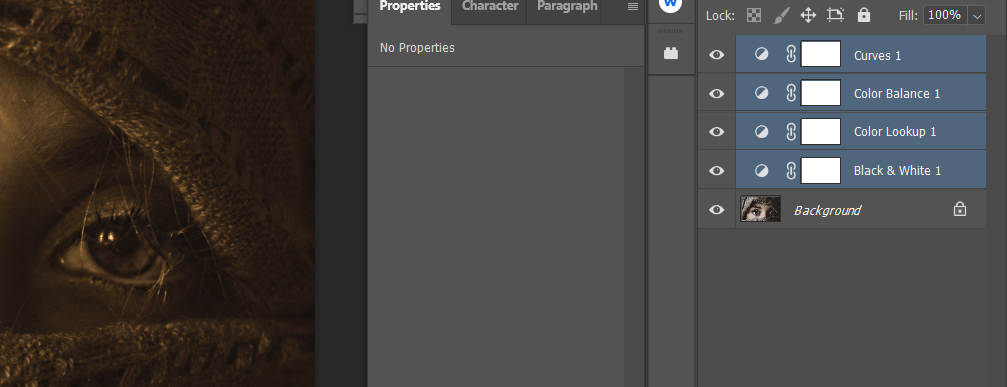
With the Curves layer still selected, press and hold Shift and click on the Black & White layer at the bottom. All the adjustment layers you created should now be highlighted.
-
Click on the Folder icon at the bottom right of your Photoshop screen.
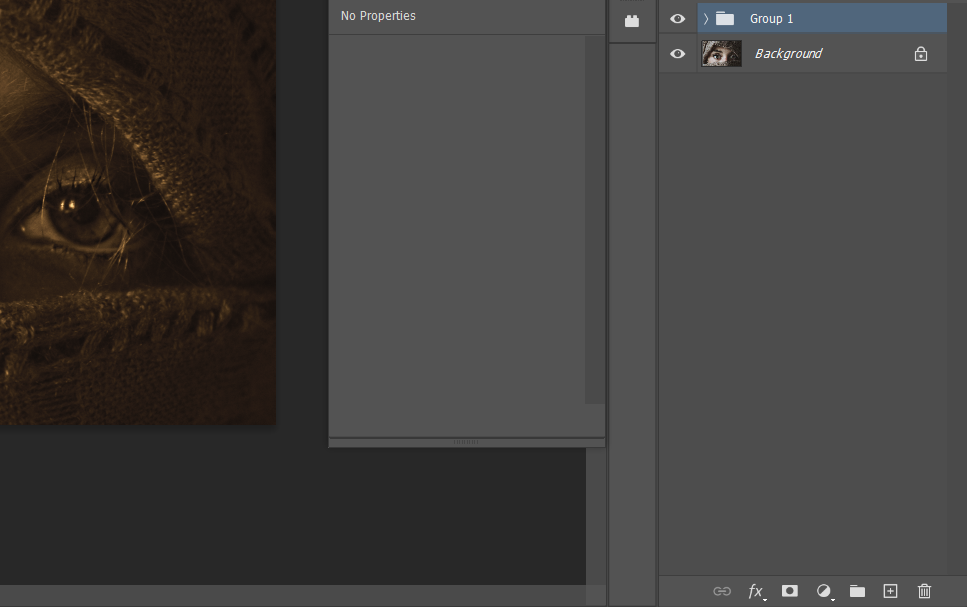
-
Double-click on the text of the folder name, and type in Sepia Effect. Press Enter.

-
Click on the Stop Playing/Recording box icon (left of the red dot) to finish the action.


Now, you should have a Photoshop action folder named "MUO Sepia Effect" displayed in your actions. Depending on your choices in step five and the keyboard shortcut creation, you should be able to press Alt or Shift + F12 to automatically run the sepia action.
Before (original color image):

After (sepia effect default settings):

As you can see, the sepia action does a pretty good job of converting a color image to sepia without having to customize it.
In the below tutorials, we will show you how to use the sepia action to get great custom results.
Converting a Black and White Image to Sepia
Our sepia action can convert any image into sepia, even black and white, and other sepia images. Regardless of what type of image it is, we will always start from the bottom layer and work up to the top to fully customize an image.
With images without color, there's one less step to worry about. Let's see how it works.
You can follow along by downloading this image from Pexels.
-
With your black and white image loaded into Photoshop, press Shift + F12 (or whatever your entries were earlier) to run the sepia action.

-
Click the Arrow on the Sepia Effect folder to show all layers within the folder.
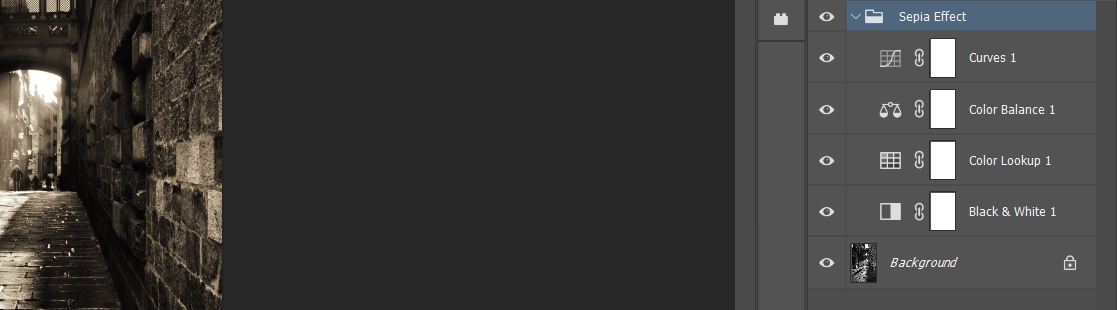
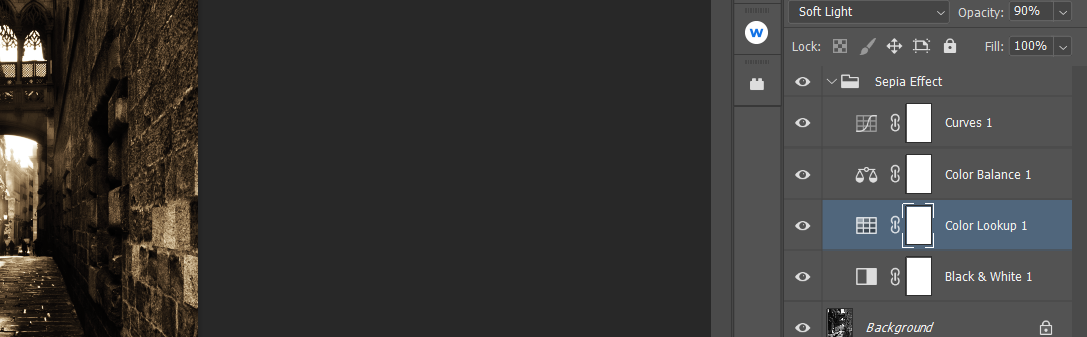
- If this were a color image, we would double-click on the Black & White layer to begin. But since this image is already black and white, we will move up to the next adjustment layer, Color Lookup.
-
Check the layer opacity. The default is set to 60 percent but the image may benefit from increasing or decreasing the amount. In this example, we changed it to 90 percent opacity.
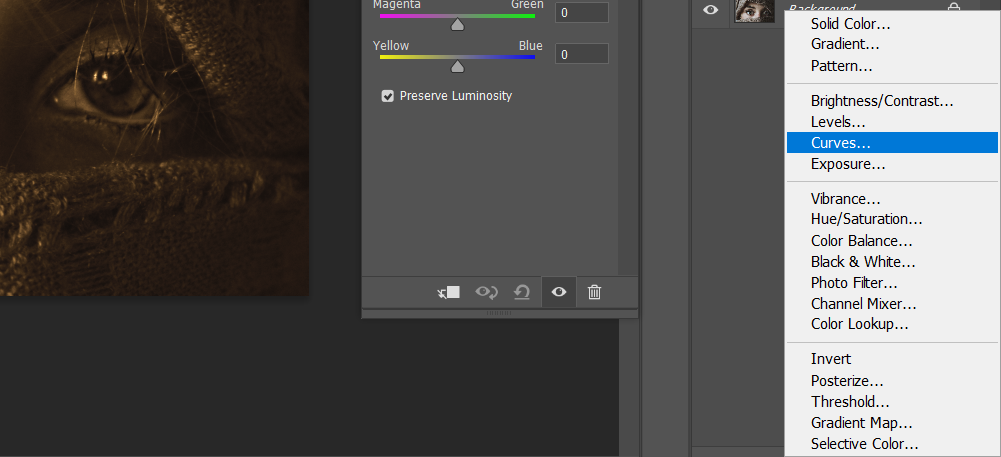
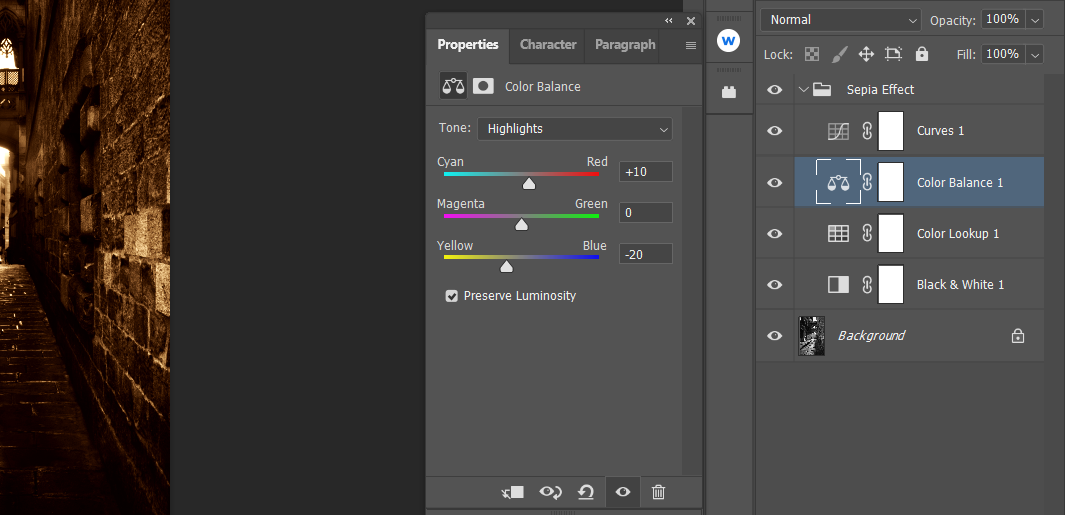
- Double-click on the Color Balance layer icon to open the controls. The Highlights, Midtones, and Shadows sliders are available in the Tone dropdown menu.
- For Midtones, change Cyan-Red to +15.
- In Shadows, change Cyan-Red to +10 and Yellow-Blue to -10.
-
Under Highlights, change Cyan-Red to +10 and Yellow-Blue to -20.
-
Double-click on the Curves layer icon to open the controls.
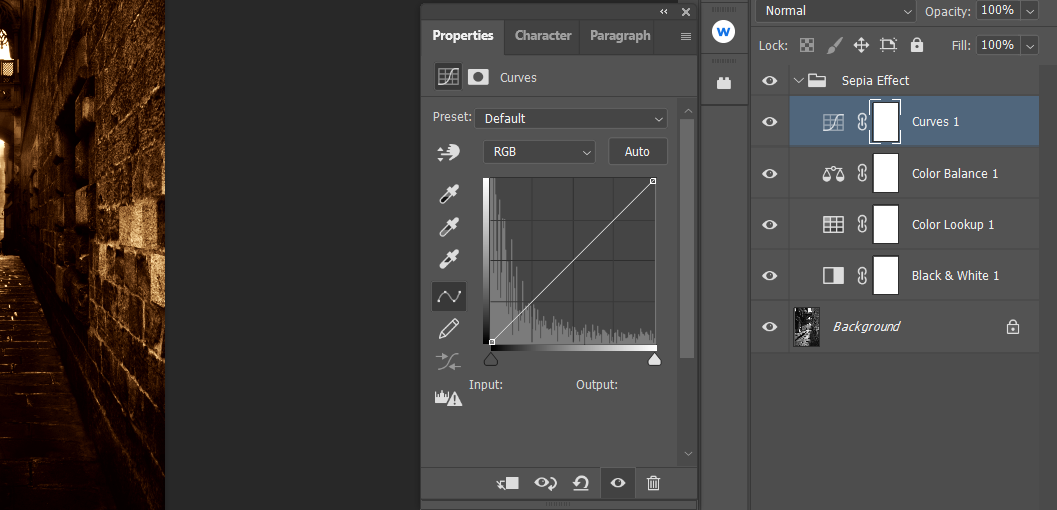
-
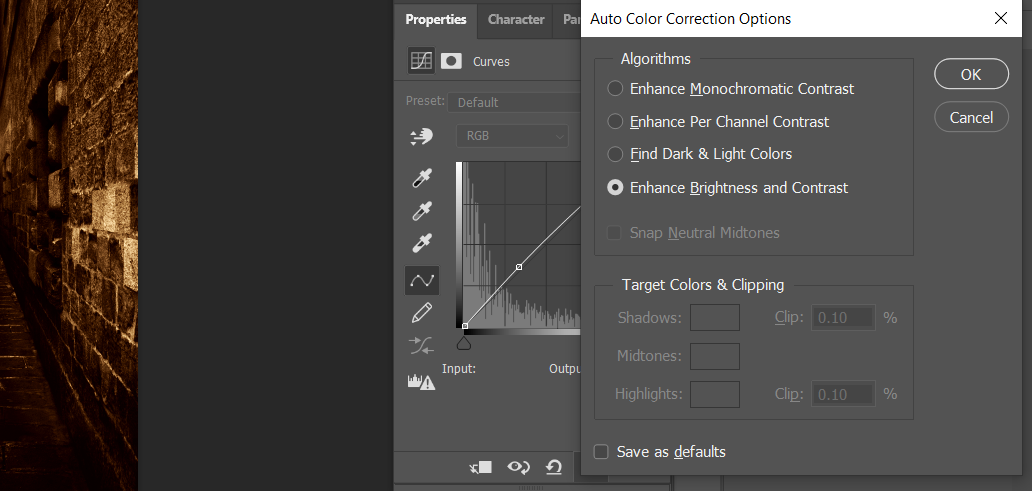
Press and hold the Alt key and click Auto in the Curves Properties panel. This will summon the Auto Color Correction Options menu.
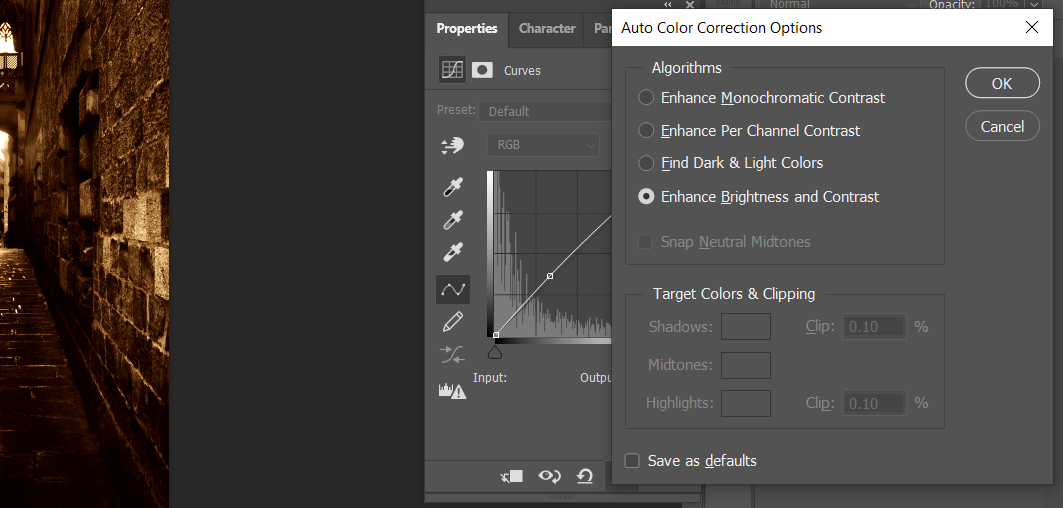
- There are three out of four viable options for any given image. The only option not to ever use is Find Dark & Light Colors, as this will remove any sepia effects you've applied using this action.
-
For this image, we selected the default setting Enhance Brightness and Contrast because it served to brighten the image further in a pleasing manner. Once you select it, click OK.


Note:
The Curves layer, while having all the same editing capabilities of the Color Balance adjustment tool and then some, functions as an exposure check for our sepia action.
By selecting either Enhance Monochromatic Contrast, Enhance Per Channel Contrast, or Enhance Brightness and Contrast, you're given additional looks to choose from which may serve the image better.
Sometimes, there may be little difference between these choices, but sometimes, the differences can be dramatic and there will be one clear choice.
Before (original black and white):

After (applying sepia action and customizations):

To make the process even easier, you might want to consider using a Photoshop plugin to create effects for your images as well.
Converting a Color Image to Sepia
In this tutorial, we will make use of all adjustment layers to demonstrate how to convert a color image to sepia using our Photoshop sepia action.
You can follow along by downloading this image from Pexels.
-
With your image loaded into Photoshop, press Shift + F12 (or whatever your entries were earlier) to run the sepia action.
- Double-click on the Black & White layer icon to open the controls. For most images, we suggest clicking on the Auto button as a starting point.
-
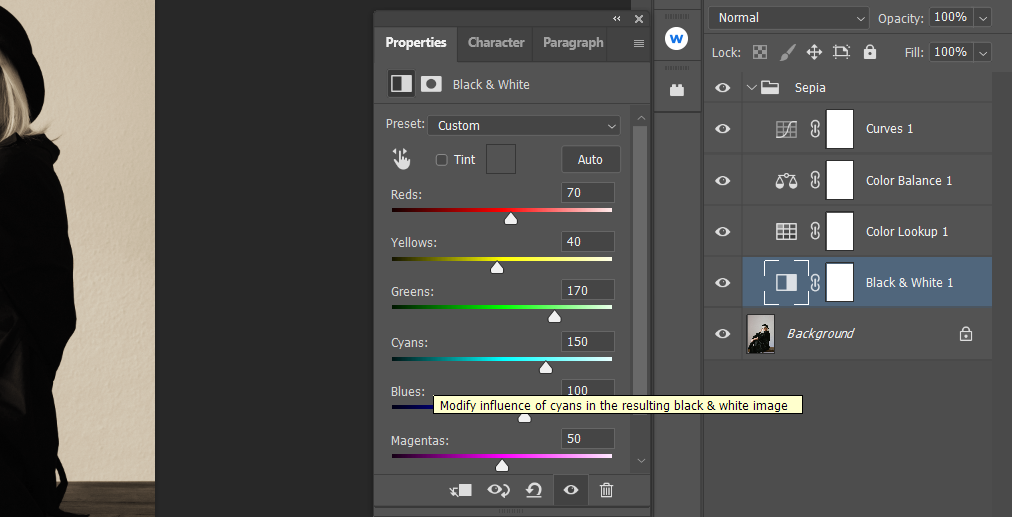
Then, adjust the color sliders to raise or lower brightness values, being careful not to make any particular region too dark or too bright. We entered these values for the sliders: Reds: 70, Yellows: 40, Greens: 170, Cyans: 150, Blues: 100, and Magentas: 50.
-
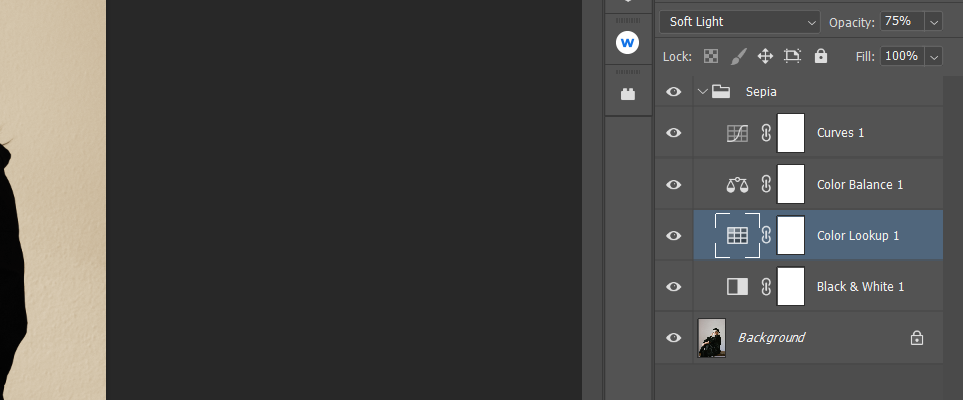
Select the Color Lookup layer. Change the Opacity to 75 percent.
- Double-click on the Color Balance layer icon to open the controls.
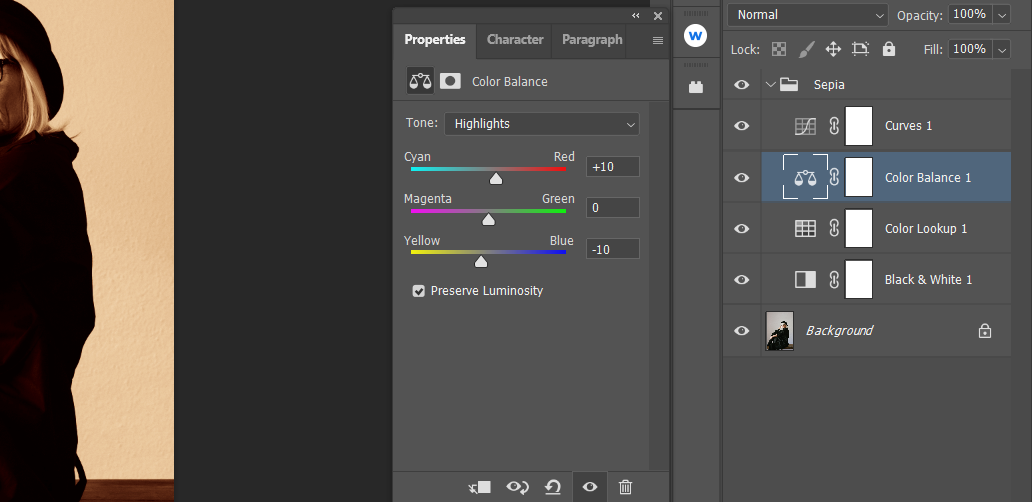
- In Midtones, change Cyan-Red to +25, Magenta-Green to 0, and Yellow-Blue to -10.
- Under Shadows, change Cyan-Red to +20, Magenta-Green to 0, and Yellow-Blue to 0.
-
For Highlights, change Cyan-Red to +10, Magenta-Green to 0, and Yellow-Blue to -10.
-
Double-click on the Black & White layer icon to open the controls.
-
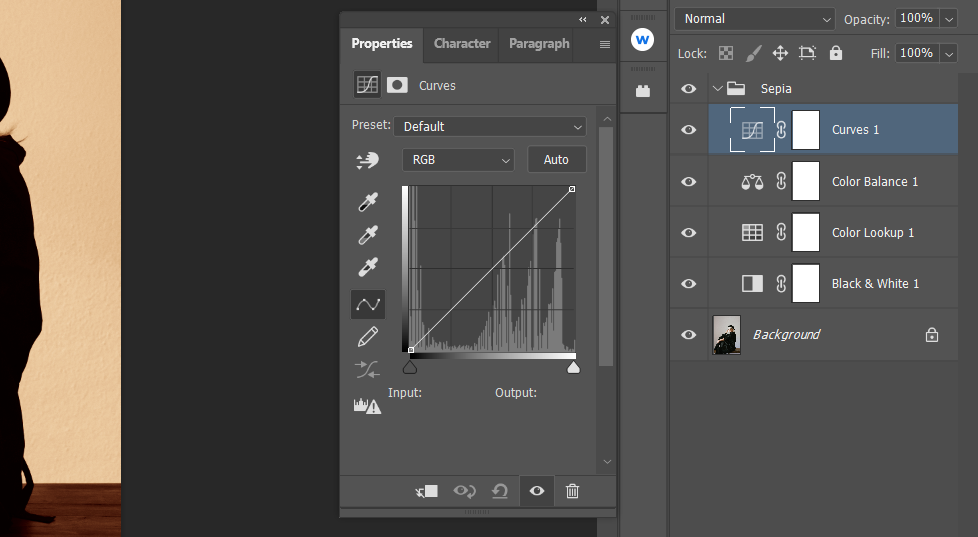
Press and hold the Alt key, and click Auto in the Curves Properties panel. This will once again summon the Auto Color Correction Options menu. Select the default setting, Enhance Brightness and Contrast. Then, press OK.


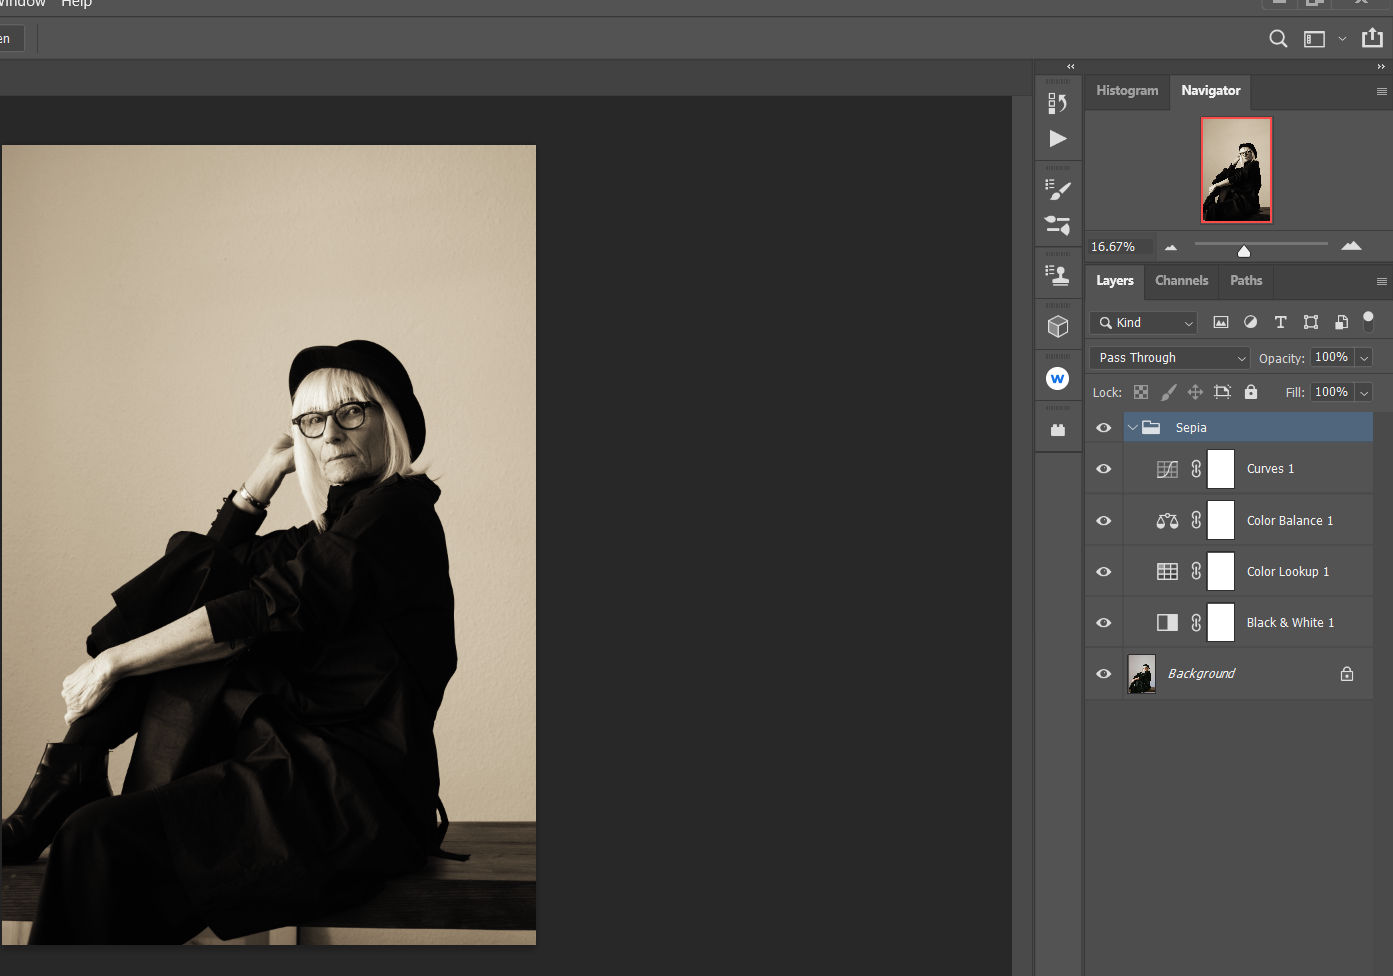
Before (original color image):

After (applying sepia action and customizations):

Note:
One of the great things about this sepia action is that it's accomplished through non-destructive editing. Since we are using adjustment layers on top of our original image, all of these settings can be revisited and re-edited at a later date.
Additionally, even more of a sepia effect can be added by making use of Photoshop's Overlay blend mode.
For example, a blank layer could be added on top of our sepia action layers. The Blend Mode could be changed to Overlay or even Soft Light. Then, using the Color Picker tool, sample a brown part of the image and use a Soft Round Brush to paint in the background.
Photoshop Can Be a Hammer or a Feather for Your Effects Editing

There's absolutely no doubt that Photoshop can be used to apply heavy-handed effects. More often than not, that's what many beginners opt to do for lack of experience and perhaps too out of the sheer joy of changing something so dramatically!
But when it comes to applying effects like sepia, a feather's touch is usually recommended. By controlling the many characteristics of sepia with our Photoshop action, you can set your sepia images apart from those that rely on filters and presets.
Image Credit: Pixabay/Pexels