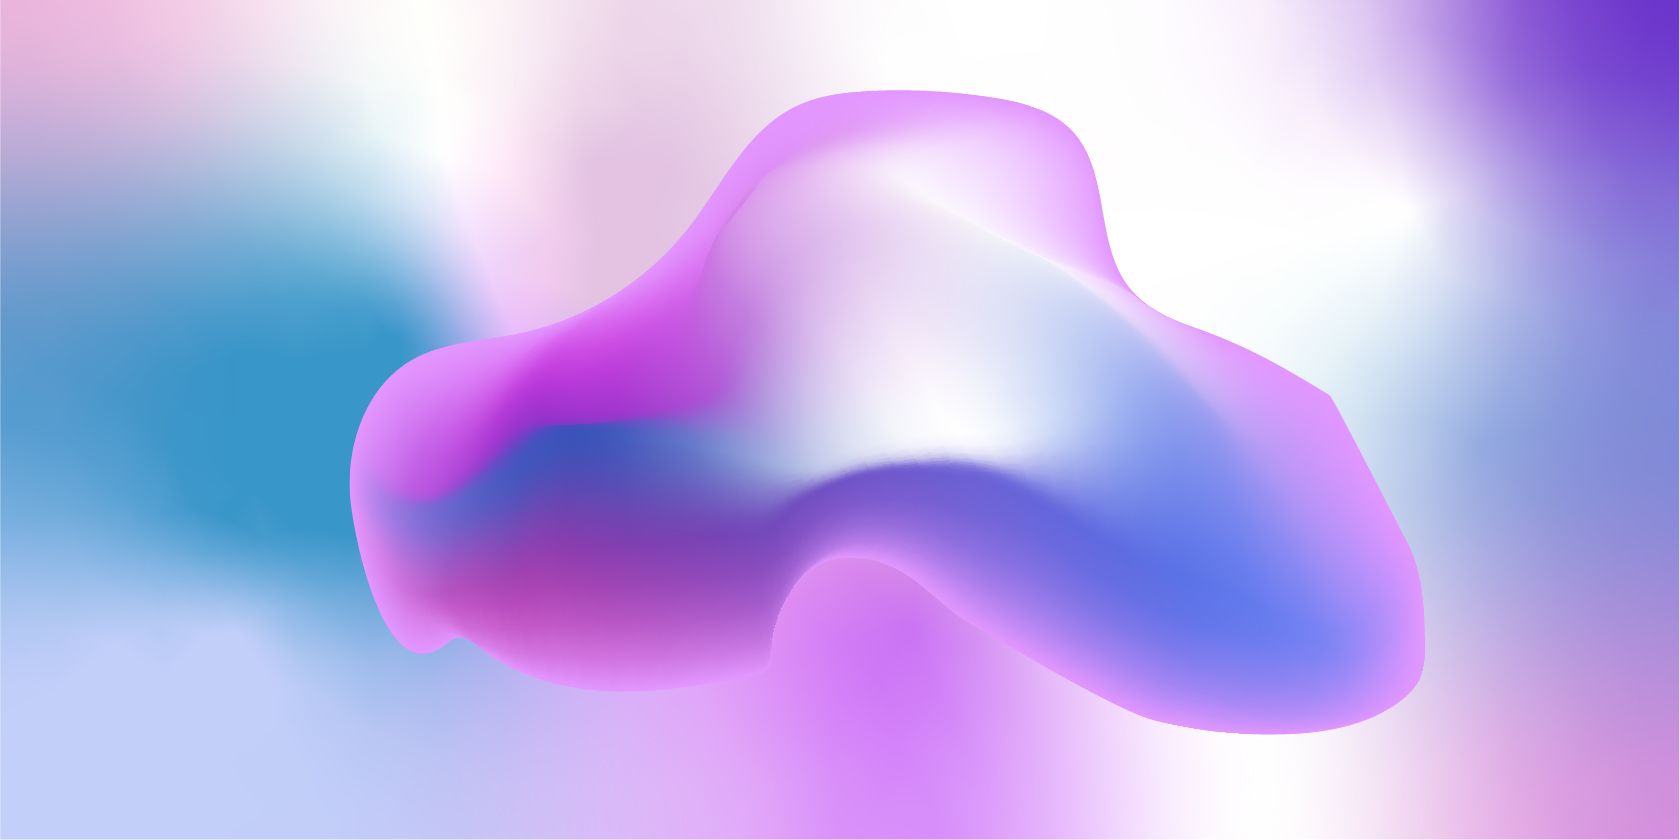
Gradients often give a dated look to designs—think tie-dye. But with Adobe Illustrator’s Gradient Mesh tool and Freeform Gradient option, you can create gradients with a fresh new look. Let’s show you how to do it.
What Is a Gradient?
You’ve probably come across gradients before, but if you haven’t, we’ll give you the rundown. A gradient is a mix of colors, any colors, that merge together in a natural or unnatural way.
You find gradients in nature: the sunrise and sunset, autumn leaves changing their colors, and the aurora borealis. Nature is a great place to find inspiration for your gradient experiments. Gradients are also often found in design, such as the Instagram or Adobe Creative Cloud logo. Gradients bring a bright energy to what is often a corporate look.
While gradients can look quite dated, they seem to be making a comeback into modern design. Gone are the days of using one gradient transitional sweep as a background. With new design tools, color trends, and fun ways to implement gradients, they no longer look out of place.
Why Should You Use a Gradient?
As seen with the Instagram and Creative Cloud logos, a gradient can be used to brighten up a boring background. Typically, gradients are used as background colors rather than the main subject itself, but nothing is stopping you from applying a gradient to the main subject. You can even add gradients in CSS programming.
Gradients don’t always have to be bright and in your face; they can be subtle too. You can even simply add a light touch of gradient rather than filling an entire background with it.
With infinite scrolling webpages gaining popularity, gradients are a subtle way for the design or color to change throughout the website, without too much of a stark color switch. You can even animate the gradient to move, resembling the smooth movements of an 80s lava lamp.
The main reason for using gradients is to incorporate multiple colors into your design without them looking starkly different. You can add a subtle change in your color scheme or choose to make a bold gradient statement.
What Are the Gradient Options in Adobe Illustrator?
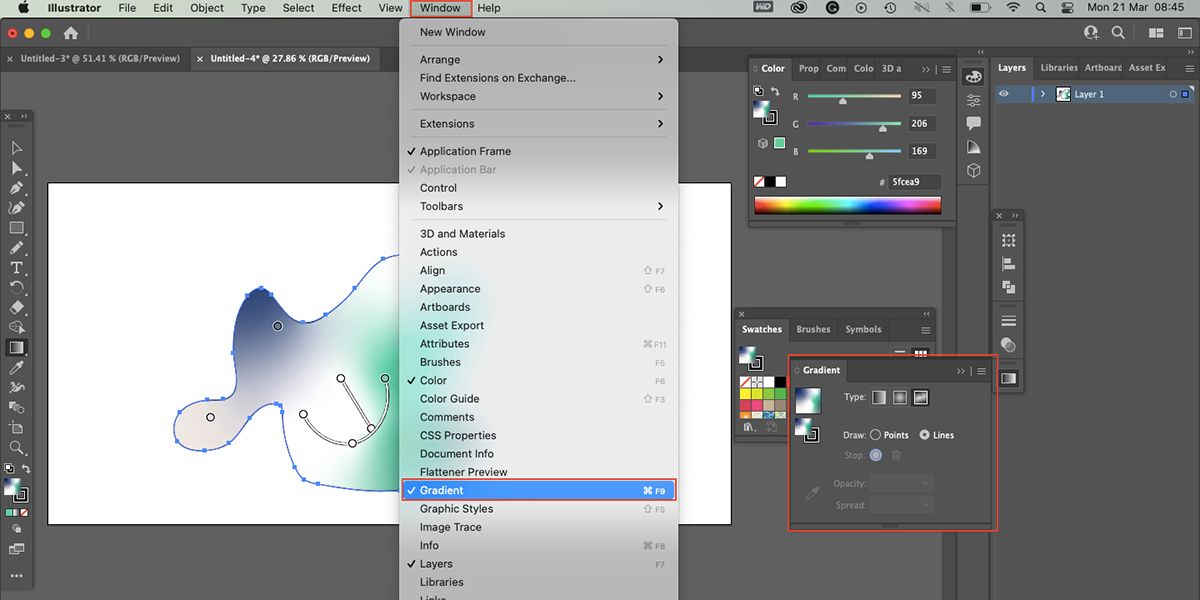
To access any gradients in Illustrator, you need to open the Gradient window. Click Window > Gradient or you can click the Gradient Tool button in the tool panel. This is how you can access the Linear, Radial, and Freeform Gradient tools.
With traditional gradient tools in Illustrator, there are only linear and radial gradient options. These options are pretty basic and don’t allow for much customization other than color choice and direction. Traditional gradient tools are good for a simple background with a gradient sweep.
The Freeform Gradient tool is great for adding a random assortment of colors to your gradient designs. The Freeform tool can be used for less precise gradients; it allows for a more natural, random use of color.
The Gradient Mesh tool in Illustrator is great for bringing illustrations to life. The Mesh tool allows you to place, angle, and move gradient tones in a way they might fall realistically on a 3D object. This takes working with gradients to a whole new level.
Adobe offers many ways to make gradients, including custom gradients in Photoshop.
How to Use Freeform Gradient in Illustrator
Although it is found within the traditional gradient tools, the Freeform Gradient tool in Illustrator works a little differently. Let’s get started.
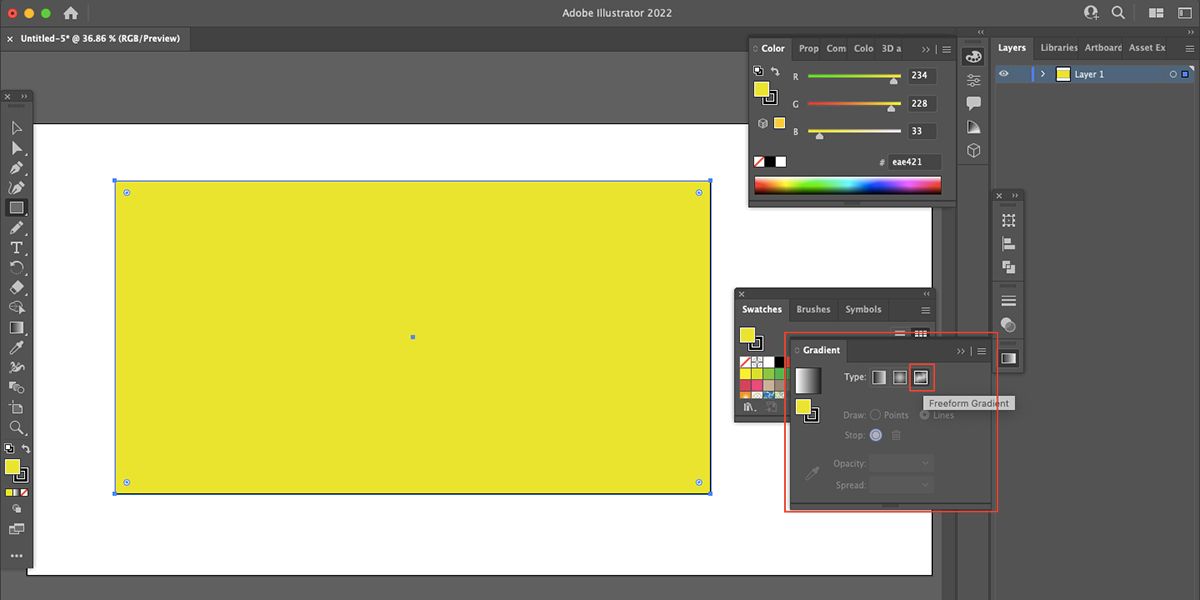
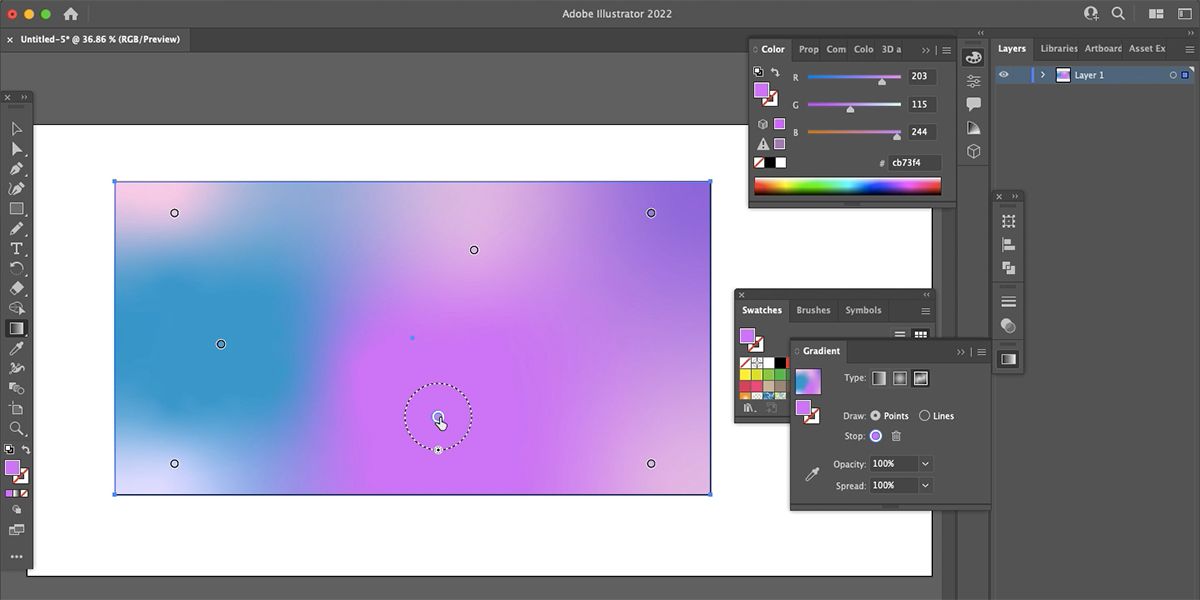
Create a shape with a plain fill color first. Then, with the Gradient window open, click the right-most gradient button to open the Freeform tool.
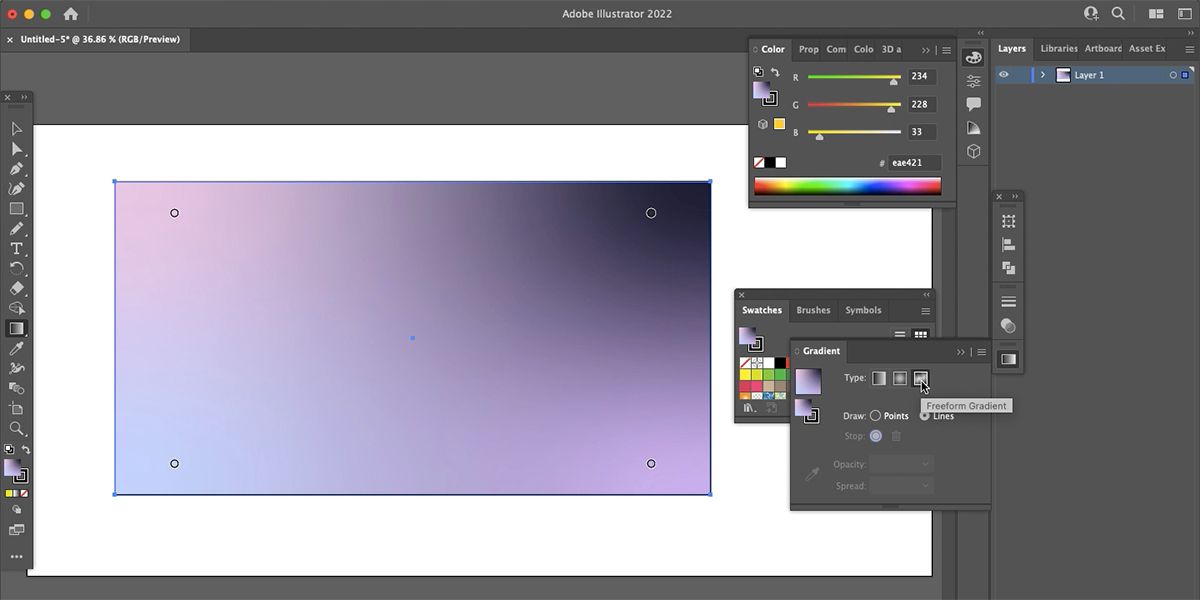
Once you’ve selected the Freeform tool, your previously plain-filled shape will now show a gradient with four stops (or points of color). The four stops will be random colors, and not necessarily consistent with the original fill color. If you click any of the existing stops, you can change the color. To add more stops, click anywhere else in your shape.
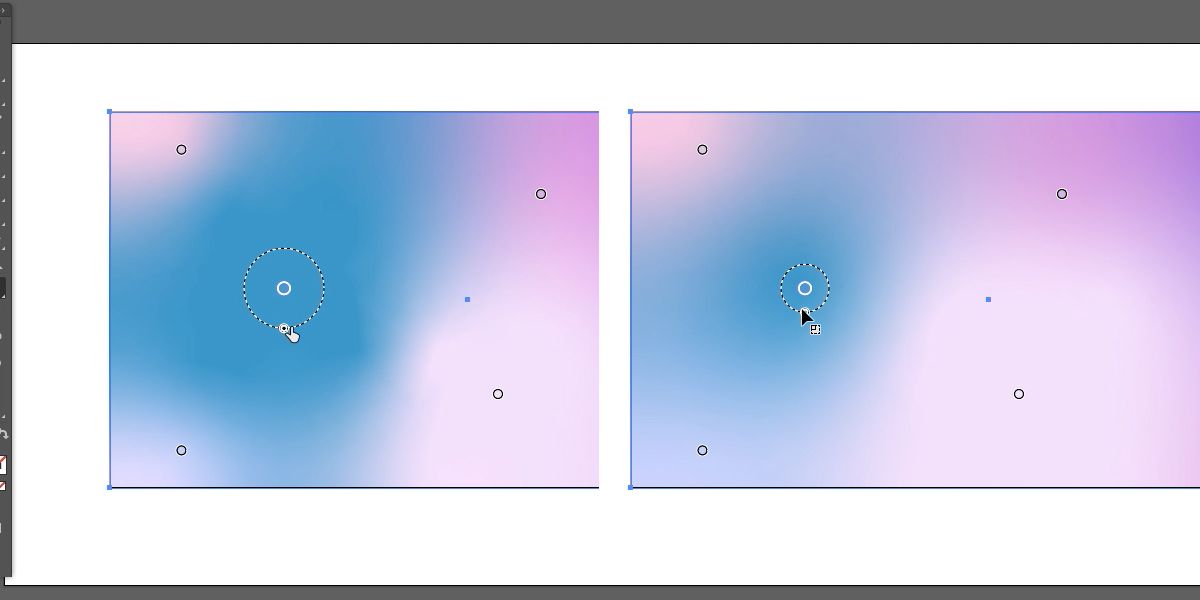
The great thing about Illustrator’s Freeform Gradient tool is that you can easily drag the colors anywhere in your shape. If you decide you want the blue on the left instead of the right, just drag the stop to the left. Or place two pink stops next to each other. Add some white to see how the colors blend. Moving the color stops around changes how they interact with each other.
The freedom of the Freeform tool is that you can add as many colors as you wish and place them anywhere you want. The colors act like individual orbs that lightly blend together at the edges. To delete a color stop, drag it outside your shape.
You can increase or decrease the size and spread of each color stop. Click your chosen stop and move the cursor to the dotted circle that surrounds it. The circle will have an oval on the edge of it. Click and drag the oval to increase or decrease your orb and the spread of color.
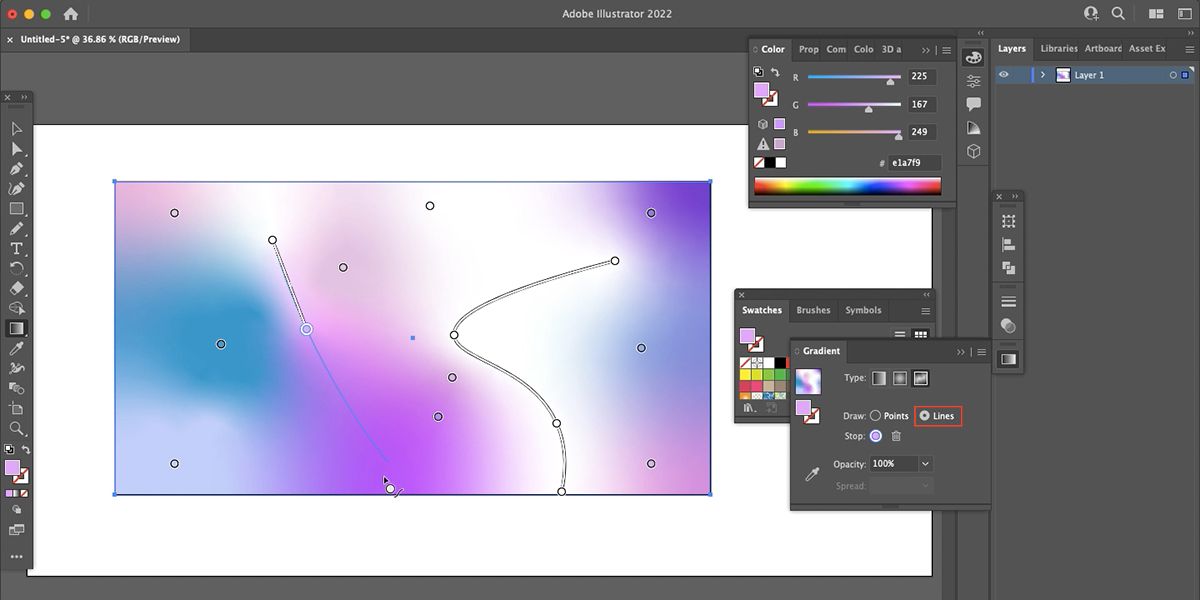
You can even draw lines of gradients by clicking the Lines options in the Gradient toolbar. With Lines selected, you can add a new color stop, and then the next chosen stop will be connected with a line, straight or curved, that groups the gradient colors together. Each stop can still be a different color, or you can use the same color for the entire line with multiple stops included.
How to Use Gradient Mesh in Illustrator
Gradient Mesh also works differently from the other gradient tools. Let’s show you how to use it.
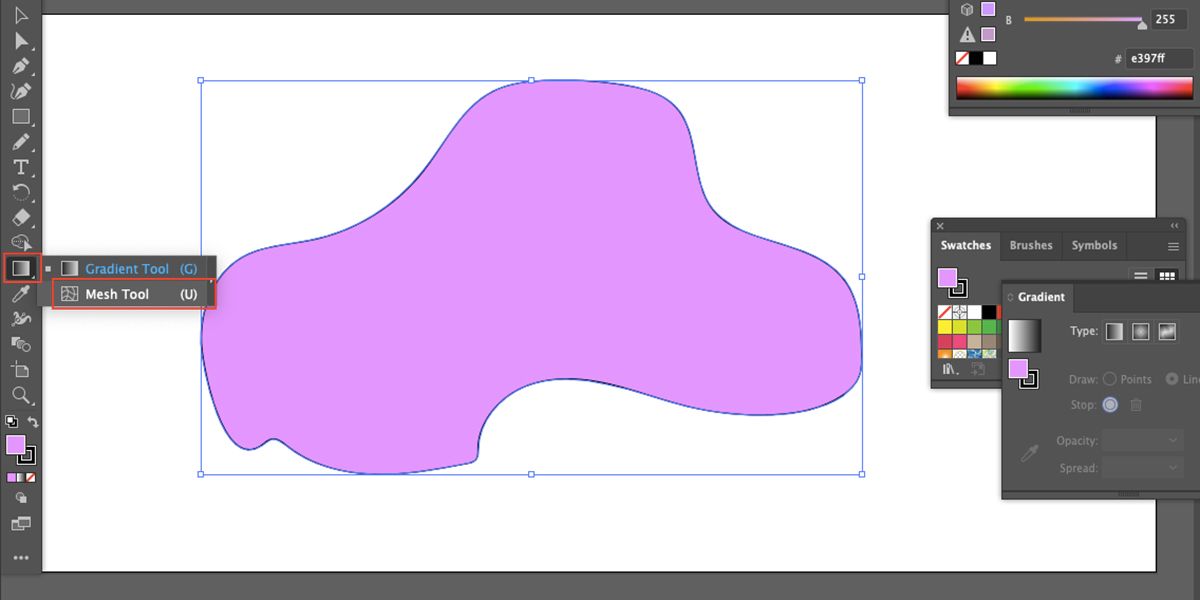
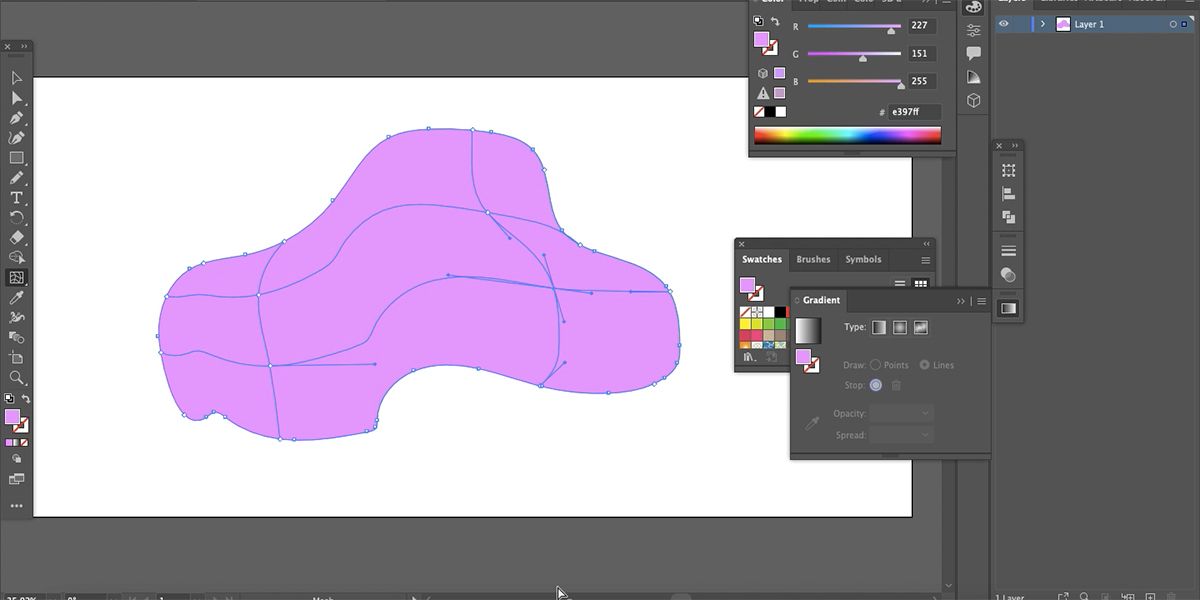
Gradient Mesh can be applied to any shape created with a fill color. Once you have drawn and filled your shape, click the Gradient Mesh tool. If you cannot see the Gradient Mesh button, it may be hidden beneath the Gradient Tool button on the toolbar; click and hold the top button to reveal any hidden buttons under it.
With the Gradient Mesh tool selected, click anywhere in your filled shape to start applying the mesh. Depending on the number of desired colors and the size of your shape, you probably only need two clicks; although, there is no maximum. You can add or delete anchor points at any point in the process. Unlike the Freeform Gradient tool, the starting color of your object works as the base color of your gradient.
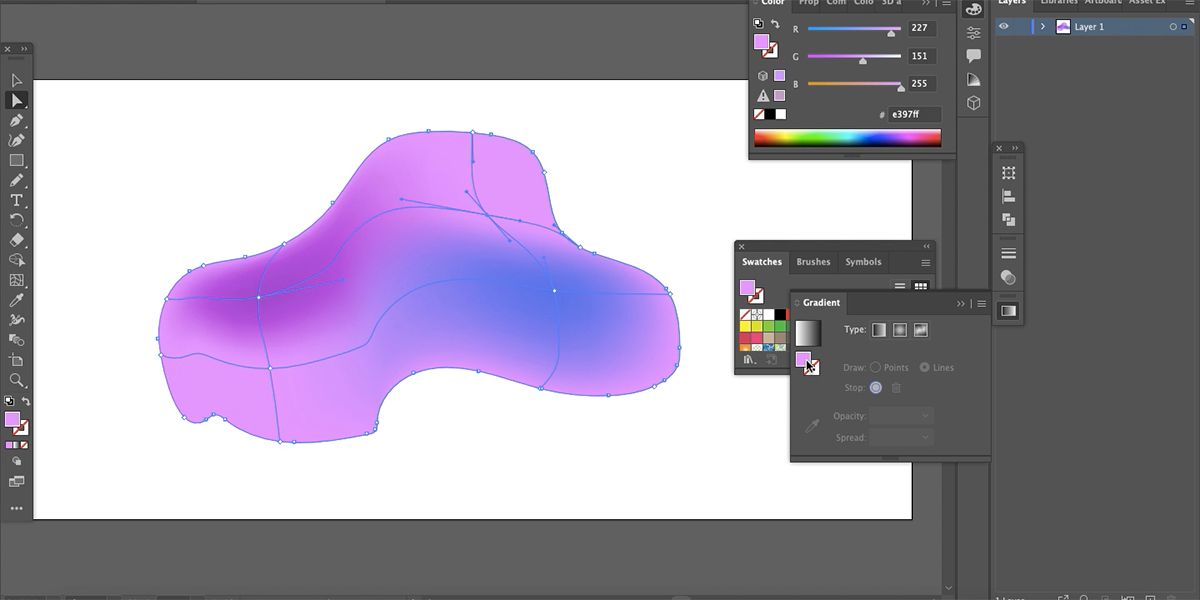
Within your mesh, you can click on any anchor point using the Direct Selection tool (A), and choose a color from the swatch panel. This produces a blur of the selected color surrounding the anchor. Do this for any and all anchors within your shape and experiment with how the colors blend.
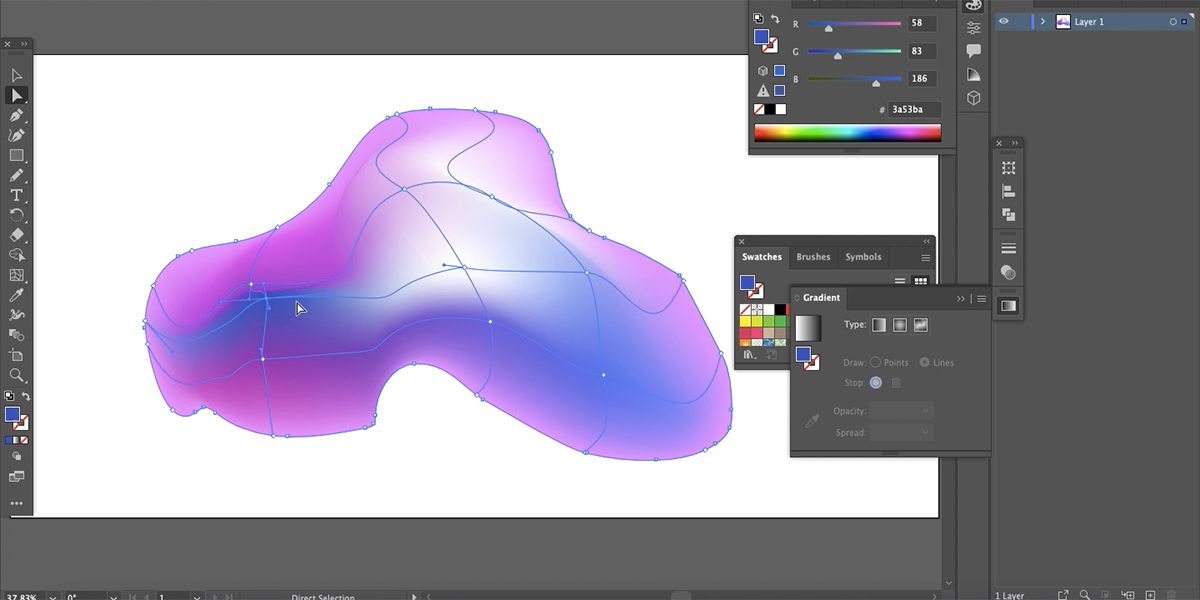
With your chosen colors in your shape, this looks similar to the Freeform tool. So how can you level up with the Gradient Mesh? Move the anchor points and handles to see how the colors move and react with one another.
Not only can you reposition any of the anchor points in your mesh, but using the handles to change the angles also creates great results. In fact, moving anchor points can create harsh lines between the colors. These harsh lines can replicate 3D shapes and produce lighting on your object. Adding lighter or darker colors will add to the 3D effect. You can even create your own 3D shapes instead of having to search for pre-existing 3D shapes online.
A Unique Way to Create Gradients
The Freeform Gradient tool and the Gradient Mesh tool in Illustrator allow you to add gradients to your designs in new and unique ways. There is far more you can do with gradients now than just a gradient color sweep in a linear or radial direction. Experiment with these tools and see what type of funky gradients you can create.

