Smart Albums in the macOS Photos app offer a quick way to filter and view images in your photo library. They're also dynamic, which means that you don't need to spend time sorting newer photos after the initial setup.
If you've never created or used Smart Albums on the Mac before, then let's check out how you can do that below.
What Are Smart Albums in Photos?
Smart Albums are essentially saved searches with one or more conditions attached. Using image metadata, they can group anything, from images captured at a specific time period, to photo types, to the camera model used.
Smart Albums also update automatically. Import or sync a fresh batch of photos and anything that matches the conditions appears within your existing Smart Albums.
If you use iCloud Photos to back up and sync photos, Smart Albums also sync to any other macOS devices you own. The iPhone, however, doesn't support Smart Albums.
How to Create Smart Albums in Photos on a Mac
You can create a Smart Album whenever you want on your Mac. Start by opening the Photos app. Then, open the File menu and select New Smart Album or press Option + Cmd + N. That should bring up the Smart Album creation dialog.
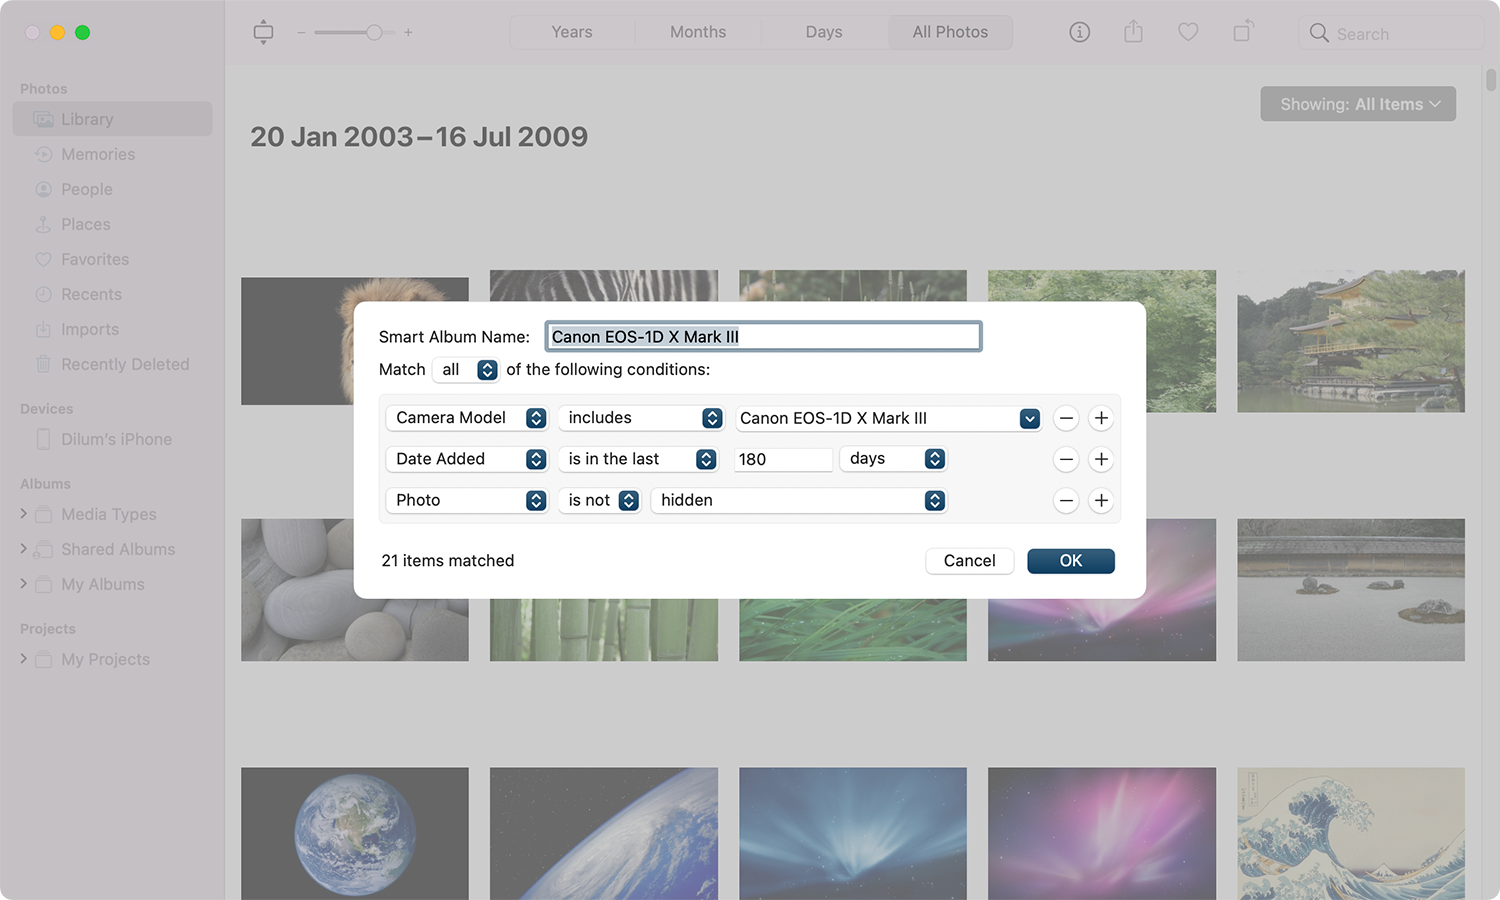
Enter a name into the field next to Smart Album Name and modify the default condition (Photos is favorite) by specifying the category, relationship, and criteria. Here are the options you get:
- The first menu lets you pick the category. For example, Photos, Date Captured, Caption, Camera Model, and so on.
- The second menu lets you define the relationship between the category and the criteria. Available options change depending on the category. If you select Camera Model, for example, you can pick between options such as includes or does not include.
- The third menu lets you define the condition by picking, say, a specific camera model.
To narrow things down, click the Plus (+) icon to insert additional conditions. If you do, pick between all or any using the menu in the top-left. That lets you determine if you want the Smart Album to generate results that match all conditions or not.
If you want to remove a condition, select the Minus (-) icon. Finally, select OK to finish creating the album.
Where to Find Smart Albums in Photos on a Mac
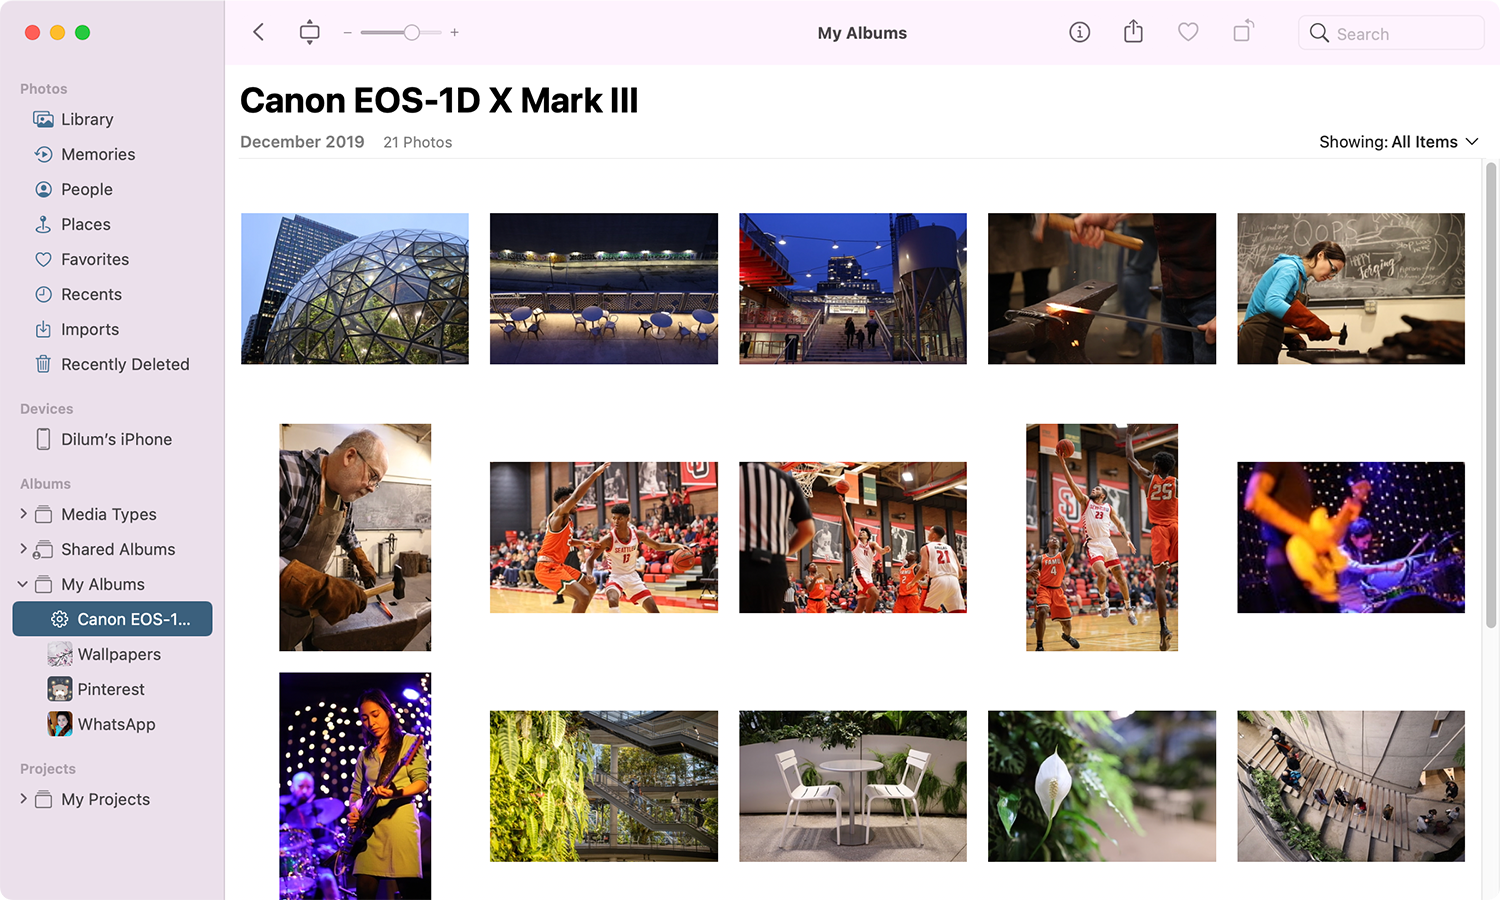
Smart Albums show up within the My Albums section of the Photos sidebar. The only difference is that they sport a gear-shaped icon instead of a key photo. Select a Smart Album to view the images inside. You can then edit the photos, add them to a different album, or delete them.
How to Edit Smart Albums in Photos on a Mac
It's possible to edit a Smart Album on the Mac. To do that, open the Smart Album and select File > Edit Smart Album on the menu bar.
You can then rename the Smart Album, adjust the filtering criteria, add or remove conditions, and so on. Once you've finished making your changes, select OK.
How to Delete Smart Albums in Photos on a Mac
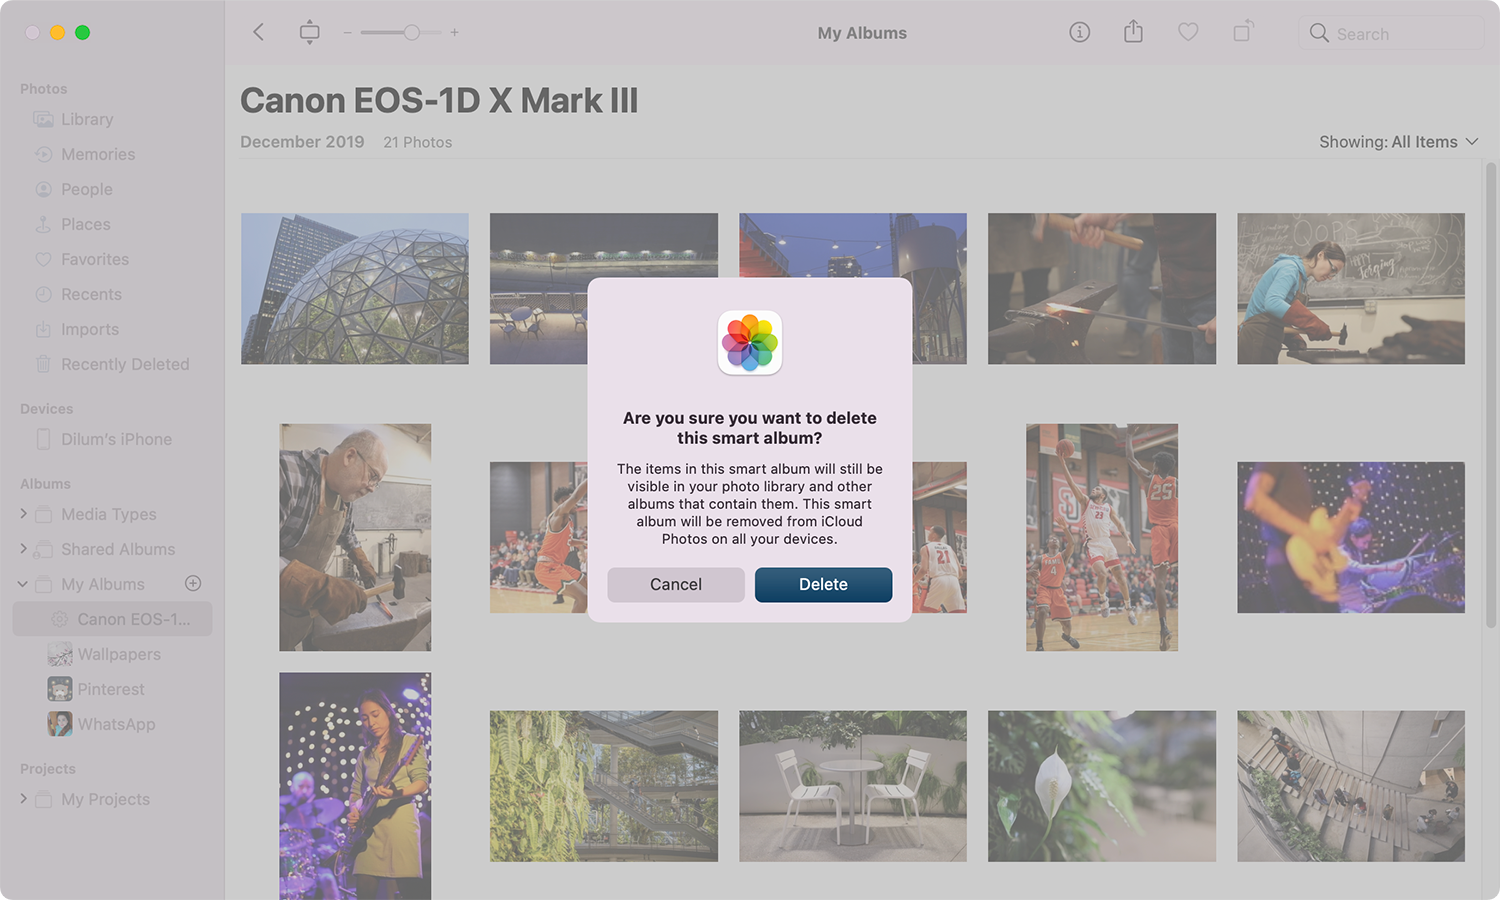
You can delete a Smart Album if you don't want to keep it around. To do that, Control-click the Smart Album in the Photos sidebar and select Delete Album. Then, select Delete to confirm.
However, deleting a Smart Album outright won't delete any photos inside. If you do want to remove them as well, open the Smart Album, press Cmd + A to select all images, then Control-click and select Delete Photos.
Smart Albums Make it Easy to Organize Your Photo Library
You now know how to set up and use Smart Albums on your Mac. You've got multiple ways to filter your photos, so don't forget to experiment. That said, if you found Smart Albums interesting, then you might want to learn about Smart Folders as well.


