The ability to create an ad hoc—or computer-to-computer—network has been a standard feature in macOS for many iterations. In recent times, however, Apple has hidden the relevant menu and removed the option to add security.
Securing your wireless networks is important, so the inability to add a password is problematic. Fortunately, with a simple Terminal command, you can revive this lost feature and add a necessary layer of ad hoc protection. Let’s take a look at computer-to-computer networks and the steps required to secure yours.
Uses of a Computer-to-Computer Network
Ad hoc networks are useful when you don’t have access to a router or another way to connect multiple devices. Situations can arise that require a direct connection between your Mac and another product, and an ad hoc network is a solution.
For example, you may need to do a large file transfer, share data between devices, or connect computers for gaming. Generally, you would perform these tasks over a router-generated Wi-Fi network. If, however, you’re travelling, having connectivity issues, or simply don’t have access to a viable network, you may require another solution. That’s where ad hoc networks come in.
How to Create an Unsecure Ad Hoc Network
If security isn’t a concern—although it should be—you can still create a computer-to-computer network using macOS legacy options. The process goes like this:
- Open System Preferences > Network.
- Select Wi-Fi in the main list.
- Ensure Show Wi-Fi status in menu bar is ticked.
- Click the Advanced button.
- Select the Wi-Fi tab within the preferences window.
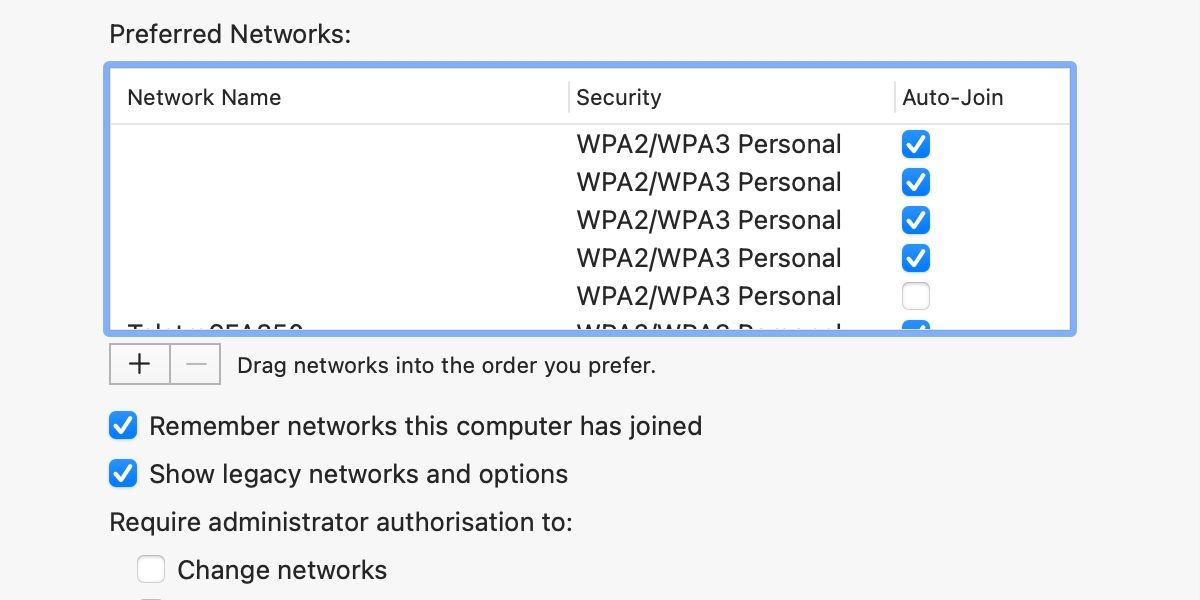
- Tick Show legacy networks and options.
- Click OK and then click Apply.
- Click the Wi-Fi icon in the top menu bar.
- Choose Create Network.
- Enter a Network Name.
- Click Create.
That’s it. You’ve now created an unsecure ad hoc network that other devices can join. While this method may be relevant in some situations, security is important, and generating a password protected version is a simple process.
How to Create a Secure Ad Hoc Network
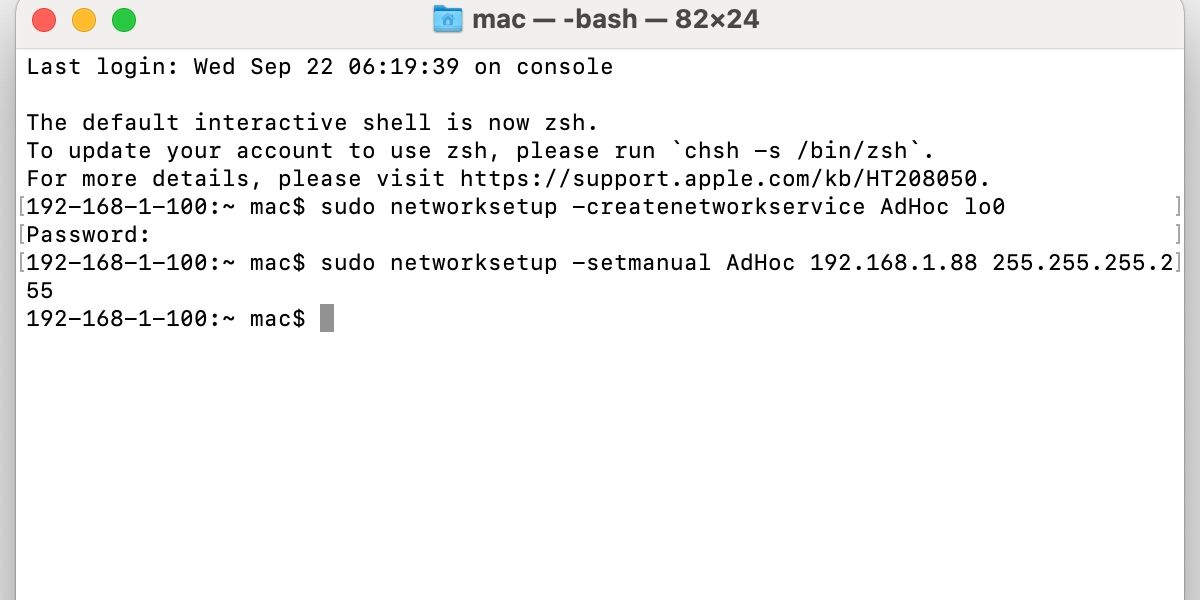
Apple may have removed ad hoc network security from macOS, but, with a nifty work-around, you can replicate this lost feature. First, you should note two Terminal commands:
sudo networksetup -createnetworkservice AdHoc lo0
and
sudo networksetup -setmanual AdHoc 192.168.1.88 255.255.255.255
Next, you’ll need to follow these steps:
- Open Terminal from Applications > Utilities.
- Type or paste the first networksetup command into Terminal and press Enter.
- Enter your admin Password when prompted.
- Type or paste the second networksetup command into Terminal and press Enter.
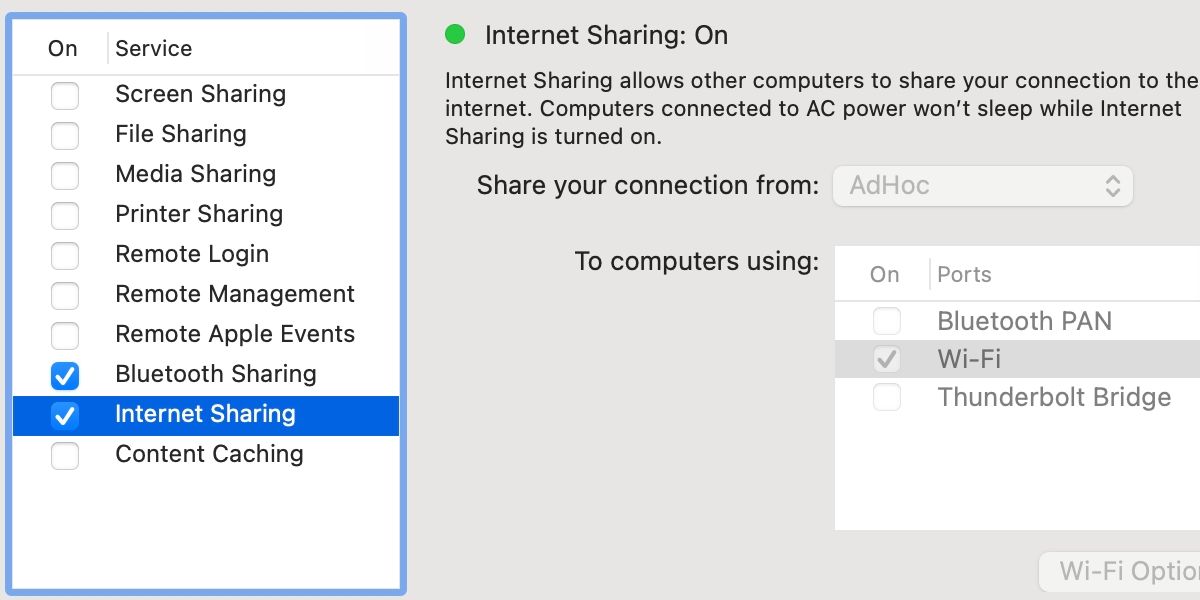
- Open System Preferences > Sharing.
- Select Internet Sharing.
- Click the Share your connection menu and choose AdHoc.
- Tick Wi-Fi to enable sharing.
- Click Wi-Fi Options.
- Enter a Network Name and Password.
- Click OK.
- Tick Internet Sharing.
- Click Start to confirm.
Your Mac will now generate its own Wi-Fi network that other devices can join. When you’re finished, you can untick Internet Sharing, and macOS should switch back to your preferred network.
Securing Your Ad Hoc Network Is Important
You may find yourself in a situation that requires a Wi-Fi network, but there’s no router in sight. In macOS, you do have the option to generate a computer-to-computer network, but the feature lacks security.
To create an unsecure network, you can enable legacy settings in Network preferences and complete the setup process. This method, however, leaves you vulnerable to unauthorized connections.
Luckily, with a quick work-around, you can create an ad hoc network that’s secure and ready to use. The process involves two simple Terminal commands and some changes to Internet Sharing preferences.
Setup is simple, and the added protection is well worth the effort. When in doubt, you should always choose the most secure option.


