You may be wondering what the point of a 360 photo is? Imagine sharing your favorite beach through a regular photo compared to photographing the same beach in a 360-degree panorama. A standard photo is limited to capturing roughly 90 degrees of what you are experiencing being there.
A 360 picture will capture the whole scene and experience, allowing you to look up at the sky, forward towards the ocean, or down to your toes in the sand, all in one seamless image.
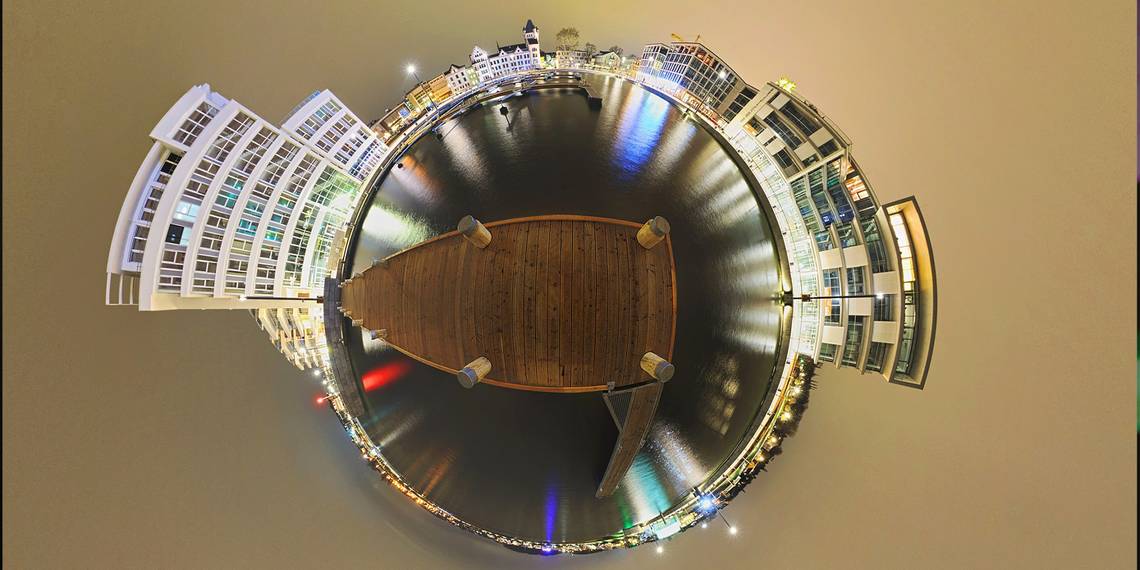
360-degree images give you the opportunity to capture entire rooms, landscapes, and scenes. And they're easy to create and share on your smartphone using Google Street View.
Before You Get Started
There are a few things to keep in mind when selecting what to create a 360 photo of. From the environment around you to how you will place your phone during the shoot.
Your environment will bring different quality results. Shooting nature will make better pictures than shooting architecture. Geometric lines often found in architecture increase the chances of stitching errors. Outdoor scenes, with the sky above, have a better chance of having fewer stitching errors.
Where you place the phone will also make a big difference. If possible, choose a place where the ground is solid on an abstract material such as asphalt, sand, grass, or concrete to eliminate geometric lines.

Keep in mind that 360-degree pictures have a different composition than a standard photo. The biggest difference between a regular and a 360 photo is the angle that the objects will occupy. When setting up your shoot, if you get close to a wall or object, it will occupy almost 180 degrees of your photo.
Movement of objects or people while shooting can also cause issues. Although you may not be able to control the number of people entering and exiting the photo, you should pause and wait when someone is in your shot.
If you do not wait you may end up with half a person in your 360 photo. If you do have some control over the people around, you can just ask them to stand still for a moment or exit the shot.
To create a seamless image, you will want to ensure that your phone is kept at the same height and position throughout the shoot.
Here are some handy tips for you to ensure height and position remain the same during your shoot:
- Find a reference point on the ground or create it if needed (a coin, a piece of paper, etc.) to maintain the phone's position.
- To ensure the phone remains at the same height, you can use a simple tripod (the less gears and leavers the better as they may show up in your photo), or a selfie stick. If you don’t have extra equipment with you grab a stick or object that can help you keep your phone at the correct height as much as possible.
How to Create a 360 Photo With Google Street View
The easiest way to create a 360 photo on your phone is by using Google’s Street View app. Make sure to download the app if you haven't already done so. After that, follow the steps below to get started.
Download: Google Street View for iOS | Android (Free)
1. Ensure Your 360 Photos Get Saved
If you wish to share your 360 photos through another platform, you will want to ensure your photos are saved. You can do this by following the below simple steps:
- Open the Street View app.
- Select the Menu.
- Select Settings.
- Toggle Save to album on your phone to on.
It is also important to ensure that your phone is fully charged and has space to save your photos before you begin. The space needed for each 360 photo will vary based on the resolution and other camera settings on your phone at the time of the shoot. But the more free space you have the better.
2. Take a 360 Photo
Ready to take a 360 photo? Here's how to do it:
- Open the Street View app.
- In the bottom right, select the Camera.
- Select Take photo sphere.
- Take a series of photos.


Ensure you position the phone in a way that the ball gets close to the circle, but not enough to take the picture. If it takes the picture you can go back and undo it, but pay attention, as it allows only one picture undo.
Next, position your phone over the reference point you created. If you are using a selfie stick ensure it is level.
Now position the phone with the ball in the circle. The photo will automatically happen when the ball is positioned correctly. Taking a horizontal line of images first is recommended.
When you finish covering the whole visual sphere the app usually knows it and finishes the shooting process, starting it again for a new picture.
If it does not automatically complete you may want to check and see if there are any missed areas remaining.
You can also finish it at any point, by selecting Done at the bottom. However, if the sphere is missing some shots it won't stitch a complete 360 photo, but it will stitch the image is there are only a few missing shots.
If you don't close a horizontal and a vertical line of pictures it will stitch a partial panorama, in which you will still be able to navigate interactively.
3. Access and Share Your 360 Photo
Your 360 photo is stitched together and saved in the Private tab on your phone in Street View. The photo is also saved on your phone (unless you turned this setting off).
Now that you have your 360 photo, you can choose how you wish to share it with your friends and family. You can simply select to share your photo using Street View privately using the share option on your Private Tab, or you can select to share your photo publicly within Street View.
When you publish a photo in Street View you will want to ensure you set your location as it will attach the image to your selected map location.
How to Make Your 360 Photo Public in Street View
Want to share your 360 picture with the world? Here's how to do it:
- Open the Street View app.
- Under Private, tap Select.
- Choose a photo to publish.
- Select the Menu to edit or add your location.
- Select Upload.
- Select Publish. You'll see your photo under "Profile" for sharing with your friends and family directly.


Sharing 360 Pictures Through Other Platforms
Perhaps you do not wish to attach your 360 images to a map location. After all, there are many other platforms that can host your 360 images. Your 360 images can be uploaded to Facebook, Flickr, or another platform with photo sharing services that support 360 images.
For a more enhanced experience that support the use of 360 goggles you can take advantage of platforms such as VR360 Tours and SketchFab.
However you choose to share your 360 photos, at least you now know how to shoot them on your smartphone using Google Street View.