If you are a 3D printing enthusiast, you have probably seen STL and G-code files. STL files are the most common 3D printer file type, while G-code is the language most 3D printers use to control movement. Read on to discover how to convert STL files to G-code using Cura software.
What Are STL and G-Code, and What Are Their Uses?

STL files are the most common 3D printing file format. STL stands for STereoLithography. G-code, on the other hand, is a programming language that tells a 3D printer and CNC (computer numerical control) machines what to do step by step. 3D printers use G-code to create objects. The printer reads the G-code and creates the object layer by layer according to the instructions in the file.
Benefits of Converting STL to G-Code
Here are seven reasons you might want to convert STL files to G-code.
- G-code is the standard language that 3D printers and CNC machines speak. So, if you have a file that you want to be able to use on your machine, converting it to G-code is the way to go.
- G-code is also more accurate than STL as it has less room for error when the machine reads the file.
- STL files can be huge, making them difficult to work with and transfer. Converting them to G-code can help to reduce their size.
- G-code files typically run faster than STL files. So, if you're looking to save time, this is a good option.
- G-code files are less likely to crash than STL files because they don't have as much information to process.
- STL files can be challenging to edit. If you need to make changes to a file, it can be much simpler if it's in G-code format.
- G-code files are more widely compatible. If you're sending a file to someone else, they're more likely to be able to open it if it's in G-code format.
How to Convert an STL File to G-Code

There are two main ways to generate G-code from an STL file. The first is to use a slicing program, and the second is to use a CAM program. Slicing programs take a three-dimensional model and cut it into layers, which can then be printed one at a time. Slicing software is the most common way to generate G-code, as it is relatively simple and fast. However, it does have some limitations. For example, it can only generate code for straight lines and simple curves. It also cannot handle more complex shapes very well.
CAM programs can, on the other hand, generate G-code for complex shapes, but they are more challenging to use than slicing programs. They are used by people who are already familiar with CNC machining. Her we will use slicing software to convert the STL file to G-code.
There are many 3D printer slicers available, but in this guide, we'll focus on Cura. Cura is an open-source slicer created by Ultimaker, a leading desktop FFF/FDM printer manufacturer. It's a popular program because it's free, relatively easy to use, and produces high-quality results.
Converting an STL File to G-Code in Cura
To convert an STL file to G-code in Cura, follow these steps:
-
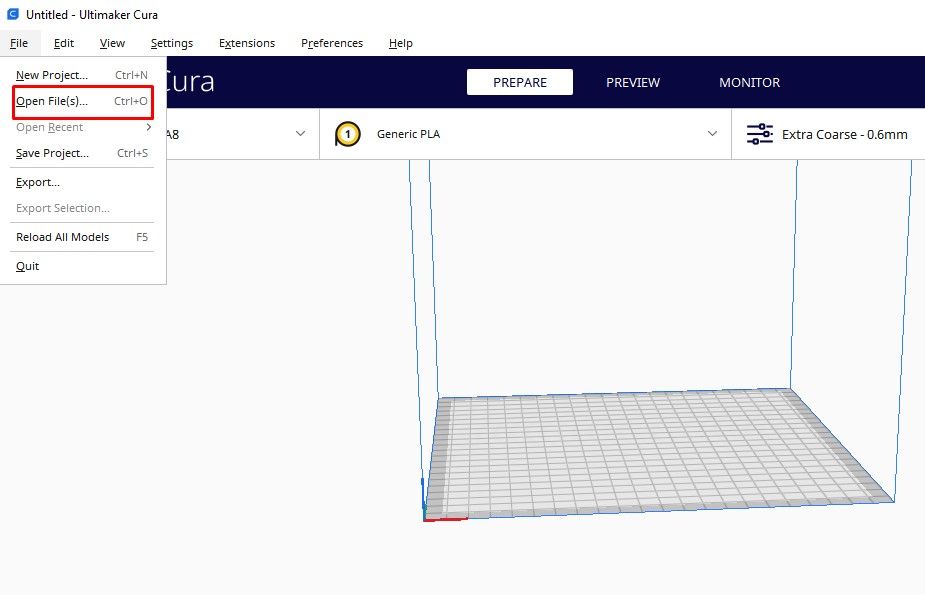
The first thing you need to do is open Cura and load your STL file. You can do this by clicking on the Open File button in the window's top-left corner. Once your file is loaded, you should see it displayed in the center of the screen.
-
With the file loaded, it's time to configure the slicing settings. These settings will tell Cura how to slice your model and generate G-ode. You can experiment with them and see the results.
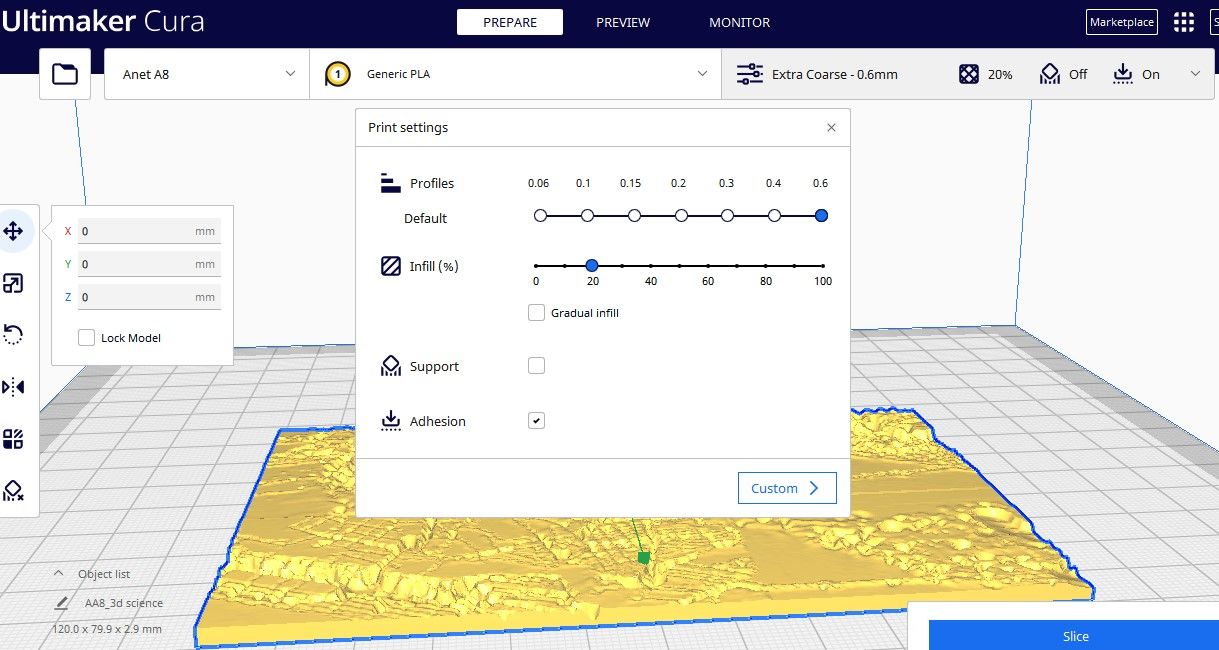
Author screenshot - The basic settings of Cura are:
- Layer height: This setting controls the thickness of each layer. Thinner layers will result in a higher-quality print, but they will also take longer to print. A layer height of 0.15-0.20 mm is a good choice for most applications.
- Infill: This setting controls how much of the interior of your model should be filled in with material. A higher infill percentage will produce a more robust print, but it will also use more material. For most applications, an infill of 20-40% is a good choice.
- Wall thickness: This setting controls the thickness of the outer walls of your model. A wall thickness of 0.80 mm is a good choice for most applications.
-
Once you have configured the slicing settings, you can click on the Slice button in the window's top-right corner to generate the G-code.
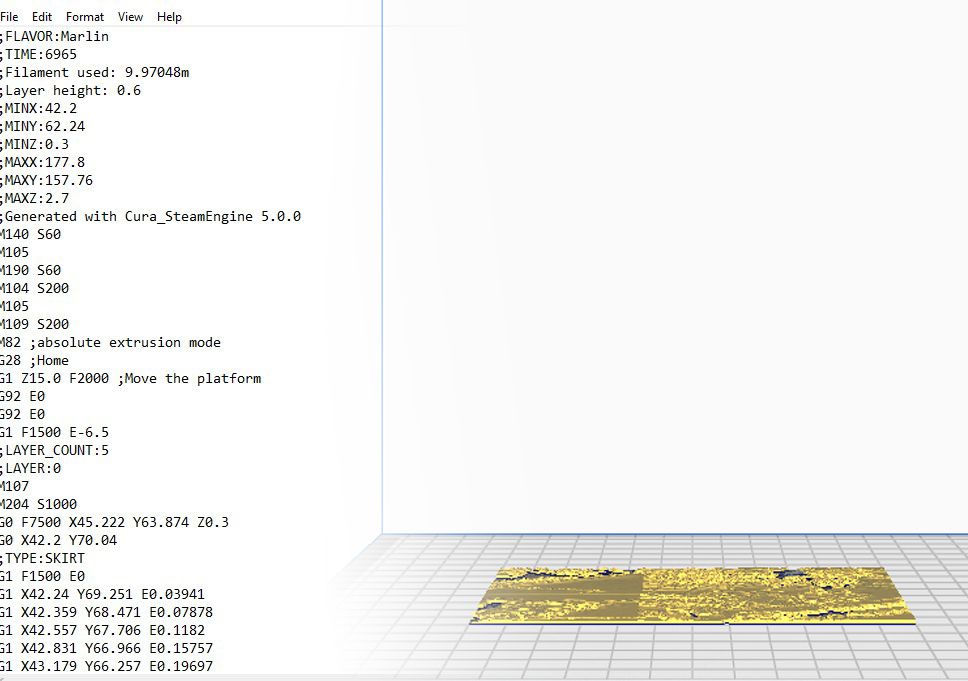


Cura will now output a file with a ".gcode" extension containing all instructions necessary to print your model, and you can save it to your computer. Congratulations, you have successfully converted an STL file to G-code in Cura!
Tips That You Should Know When Converting STL to G-Code in Cura
- To improve the quality of your files and get better results when slicing, try increasing your file's resolution; this will make your model more detailed and accurate.
- When you first open Cura, you'll select your printer from a list of pre-configured 3D printers. If your 3D printer is not listed, you can choose the Custom FFF Printer option. Once you've selected your printer, Cura will automatically load the correct settings.
- Choose the correct infill percentage. This setting determines how much interior of your model will be filled with material. A higher infill percentage will produce a more robust and durable part but will also increase printing time and cost.
- Another essential setting to consider is whether or not you need to use support. Supports are structures that are printed along with your part to prevent it from collapsing during the printing process. They can be beneficial but also add significant time and cost to your project.
Always Check and Review Your G-Code
Now you know how to convert STL files to G-code using slicing software. Before you hit the Print button, however, checking your G-code for errors is a good idea. Many online tools can help you review your G-code for mistakes; it is always worth taking the time to do this before starting a print. In addition, reviewing your G-code can help identify potential problems, such as overheating or clogs. As a result, checking your G-code is essential in ensuring a successful print.