Most modern word processors and image editors provide a PDF conversion option. Whether you use Apple Pages, Microsoft Word, or a less mainstream application on your Mac, you can usually convert a document to a PDF with just a few clicks. Similarly, most image editors, such as Preview, Photoshop, and other common apps, provide a PDF conversion tool.
The trick is to know which menu options to click to export a file in the PDF format. One app may allow you to use the Export menu, while another makes you use the Save As option. To help you out, here are all the most common ways to export a file as a PDF in macOS.
1. Export a PDF From the File Menu
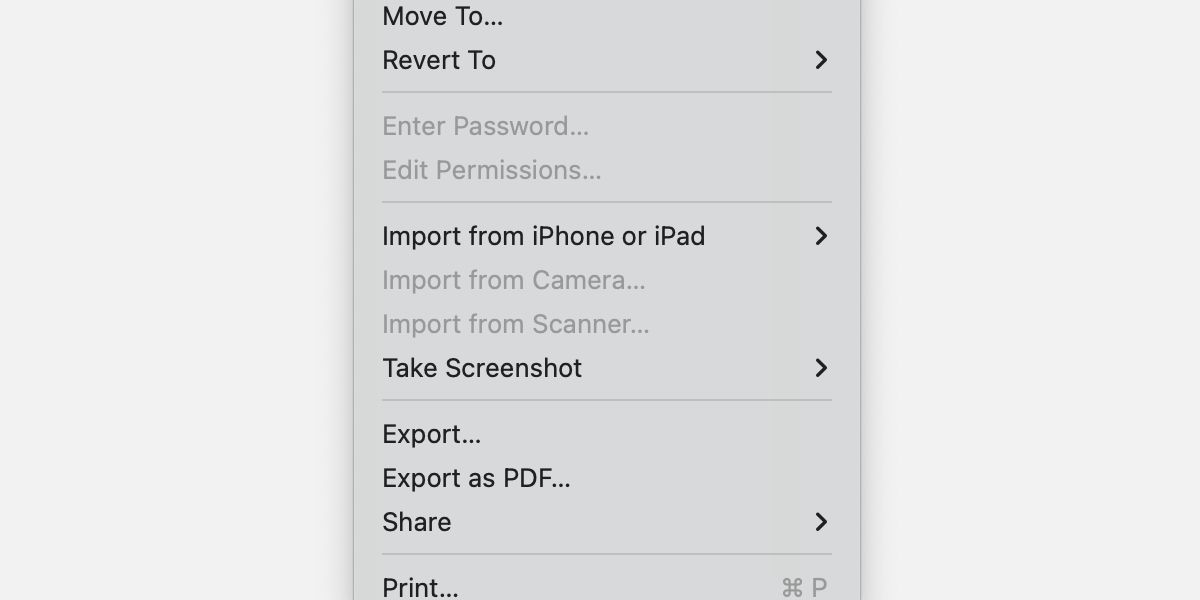
In many cases, simply going to File > Export in the menu bar of the app you’re using will yield favorable results. Variations include: Export to, Export as, and, in Preview’s case, Export as PDF.
Generally, once you click Export—if the menu doesn’t have a direct to PDF option—you’ll be able to select a format before saving the new file.
2. Create a PDF Using the Save As Option
Save As is another common menu item that works similarly to Export. Almost all word processors and image editors have this option, and most should allow you to select PDF as the format before saving. So go to File > Save As then use the Format dropdown box to select PDF.
3. Save a PDF From the Print Window
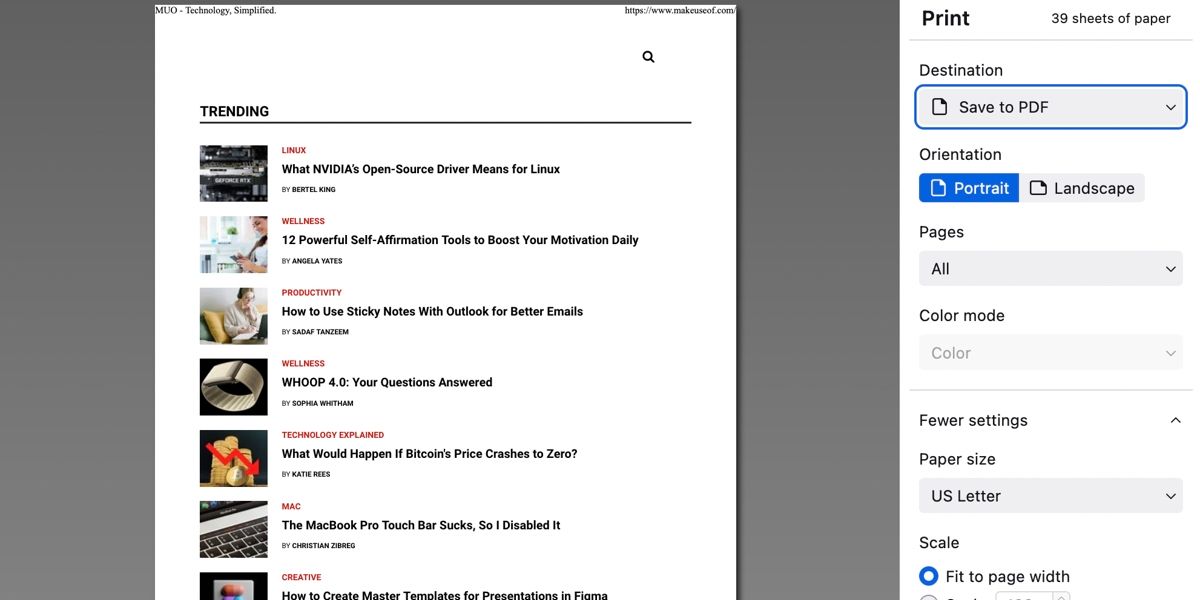
As a somewhat more universal method, using the Print menu to create a PDF should work in almost all instances. This might feel counterintuitive at first, but you don't actually need to print anything to use this method.
The interface differs from app to app, but after selecting File > Print, most print windows will offer a Save as PDF or Save to PDF button. In many cases, you can even use this method to save websites as PDFs in your browser to save pages for offline viewing.
If you’re unable to find a conversion method elsewhere, using Print > Save as PDF may be the best solution.
4. Create a PDF With Quick Actions
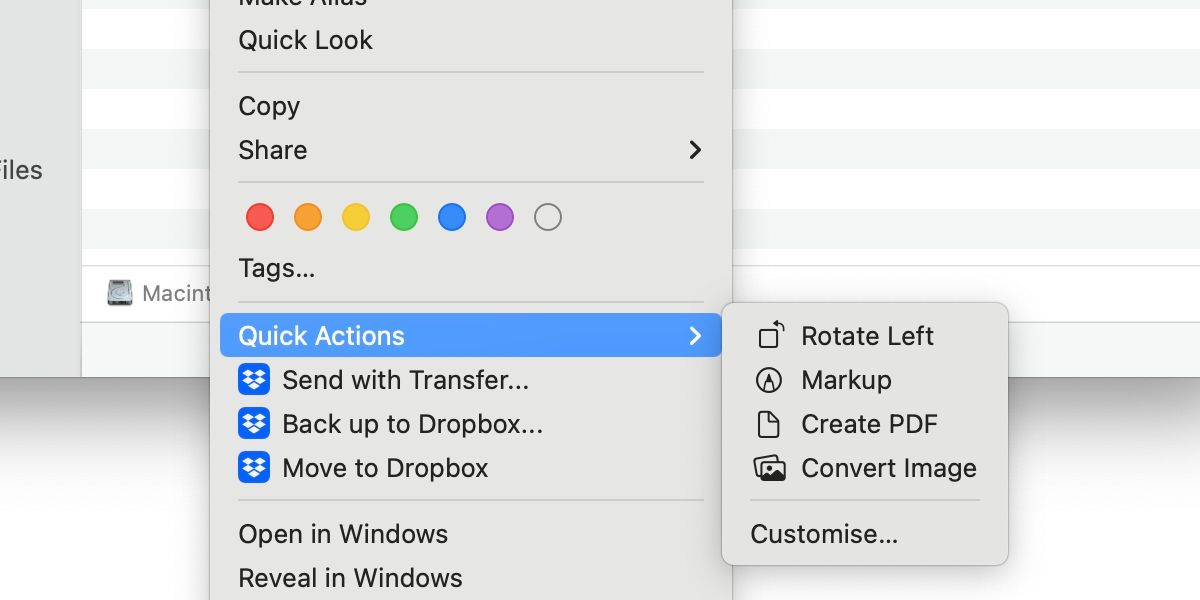
If all else fails and the file you want to convert is an image, you can use Finder’s Quick Actions menu to get the job done. Here’s how to convert an image to PDF using Quick Actions:
- Open Finder and locate the image you want to convert.
- Control-click the file.
- Select Quick Actions > Create PDF.
- Give the new document a name.
Finder automatically creates the PDF in the location of the original file, so you don’t get the option to specify another destination. If certain Quick Actions are missing, you can edit the menu by going to System Preferences > Extensions. From here, you’ll need to select Finder in the side menu and tick the relevant items.
macOS Offers Multiple PDF Conversion Methods
When it comes to converting files to PDF, your app of choice, whether it be a word processor or image editor, should offer a simple solution. In most cases, the answers you seek will be in the File menu. Export is a common choice, and Save as is practically mandatory for any app that allows you to save content.
If your application’s PDF conversion tool isn’t in an obvious place, using Print > Save as PDF will almost certainly solve the problem. And, of course, Finder’s Quick Actions menu can come to the rescue when all else fails. Evidently, converting a file to PDF isn’t difficult. Deciding which method to use is the hard part.


