There are many features Apple has added to macOS to make Macs accessible to all users. One such feature is Voice Control, which, as the name suggests, lets you control your Mac using just your voice. All you need is to enable it and learn a specific set of commands, and you’ll be good to go.
This article will detail how to use the Voice Control feature in Macs. We’ll look at everything about it, from enabling, to adding custom commands, and more.
How to Enable Voice Control and Issue a Command
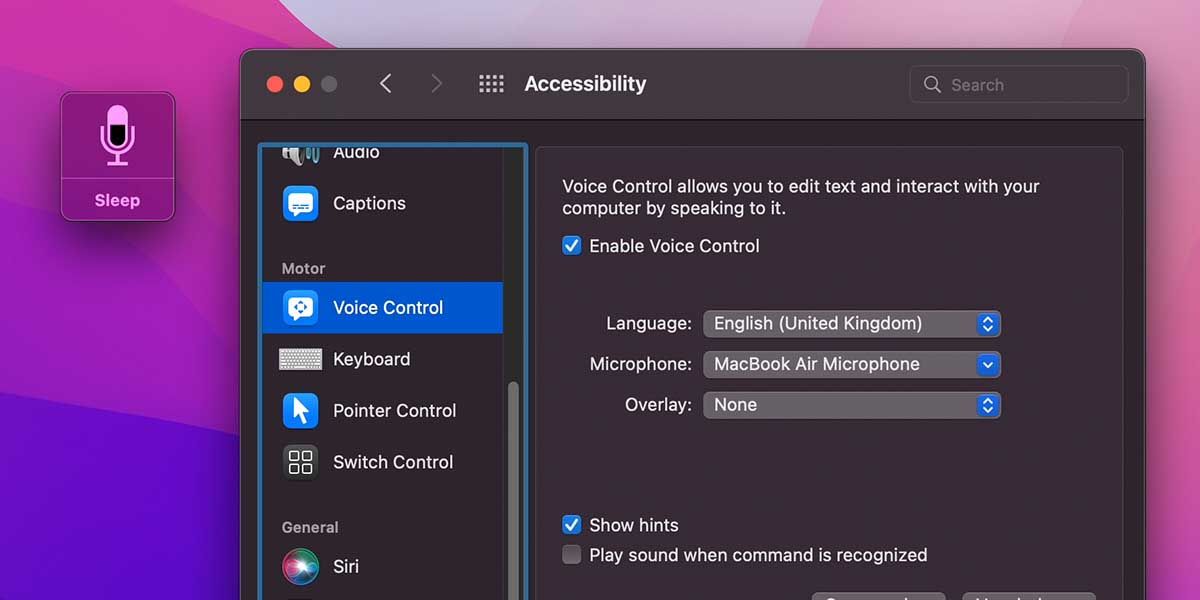
To enable Voice Control, go to System Preferences > Accessibility, and from the panel on the left, scroll down to the Motor section. Click Voice Control, and then toggle the Enable Voice Control button. A small window will pop up, showing a microphone, with a button saying either Sleep or Wake Up.
When the button says Sleep, the feature is active, and you can issue a command. So, if you’re in a text field (an area where you can type something), you can start dictating to test the feature out.
However, once you click the button and it says Wake Up, it means the feature is inactive, and it cannot hear you. You might also see a language button here if you’ve added extra languages (explained below).
All the Different Types of Commands in Voice Control
There’s a long list of commands that you can issue to operate your Mac using Voice Control. You can find these commands from the Commands button at the bottom of the Accessibility > Voice Control window.
Here’s an overview of different things Voice Control can help you do:
- Basic Navigation: These commands are primarily for opening and quitting apps, saving and finding documents, waking your Mac up and putting it to sleep, and so on. You can also scroll up or down, jump to different tabs in a browser, and launch Spotlight.
- Overlays & Mouse: Commands under this section are mostly to replace mouse functions like dragging and dropping files, zooming in and out, and single-, double-, and triple-clicking. Not only do these replace mouse functions, but they also help you control the cursor by moving it around the screen.
- Dictation: You can use these commands in a text field, mainly to insert text.
- Text Selection: Commands for text selection are exhaustive, allowing you to perform almost all possible selections (and selection extensions) that you can perform using the mouse and keyboard. Again, these are mostly for when you’re in a text field (like a document) or a page with text (like a blog).
- Text Navigation: These commands are also comprehensive and help you move around within the text when you’re dictating it to your Mac.
- Text Editing: Important commands, like cutting, pasting, replacing, and inserting text, are under this section. These also let you bold, italicize, or underline the text.
- Text Deletion: Deletion commands help you delete different areas of the text you’re dictating, like the last word or phrase you dictated. It also lets you delete sentences, lines, and paragraphs.
Using Voice Control With VoiceOver
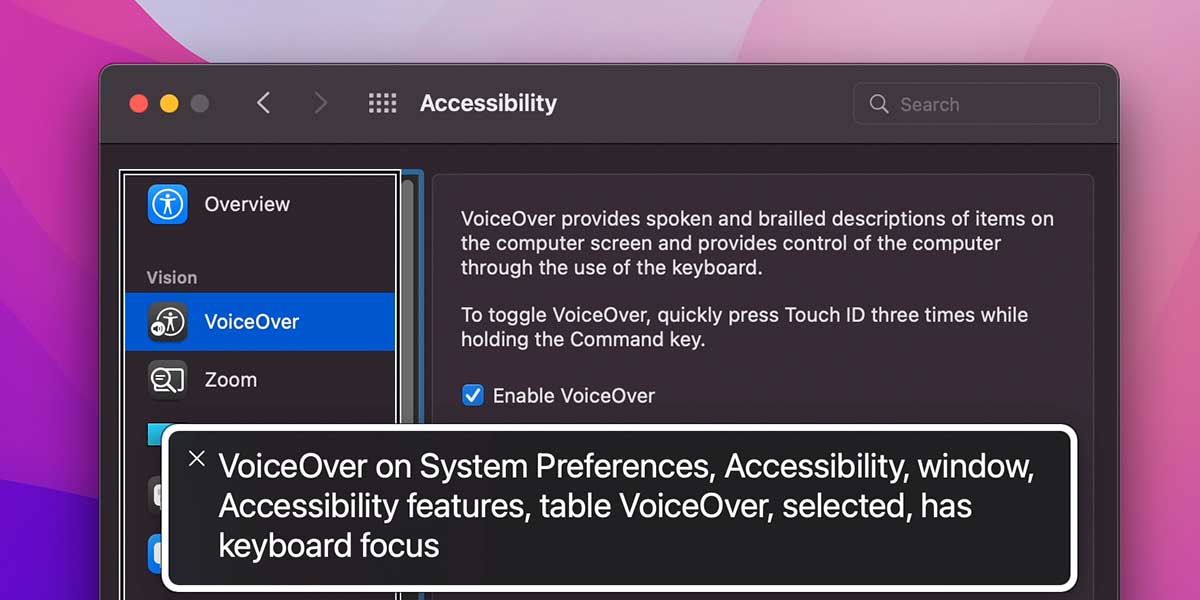
The last set of commands available in Voice Control lets you control another accessibility feature called VoiceOver, which you can find at the top of the left side panel in System Preferences > Accessibility.
Apple’s VoiceOver is a screen reading app that reads aloud whatever appears on your screen. It’s helpful for visually impaired users, as it reads out everything on the screen and aids them in operating their Mac. With Voice Control’s commands for VoiceOver, you can do everything from activating the VoiceOver to asking it to read a specific text.
VoiceOver is a great tool to use in addition to other apps designed to help visually impaired users.
How to Add Custom Voice Control Commands
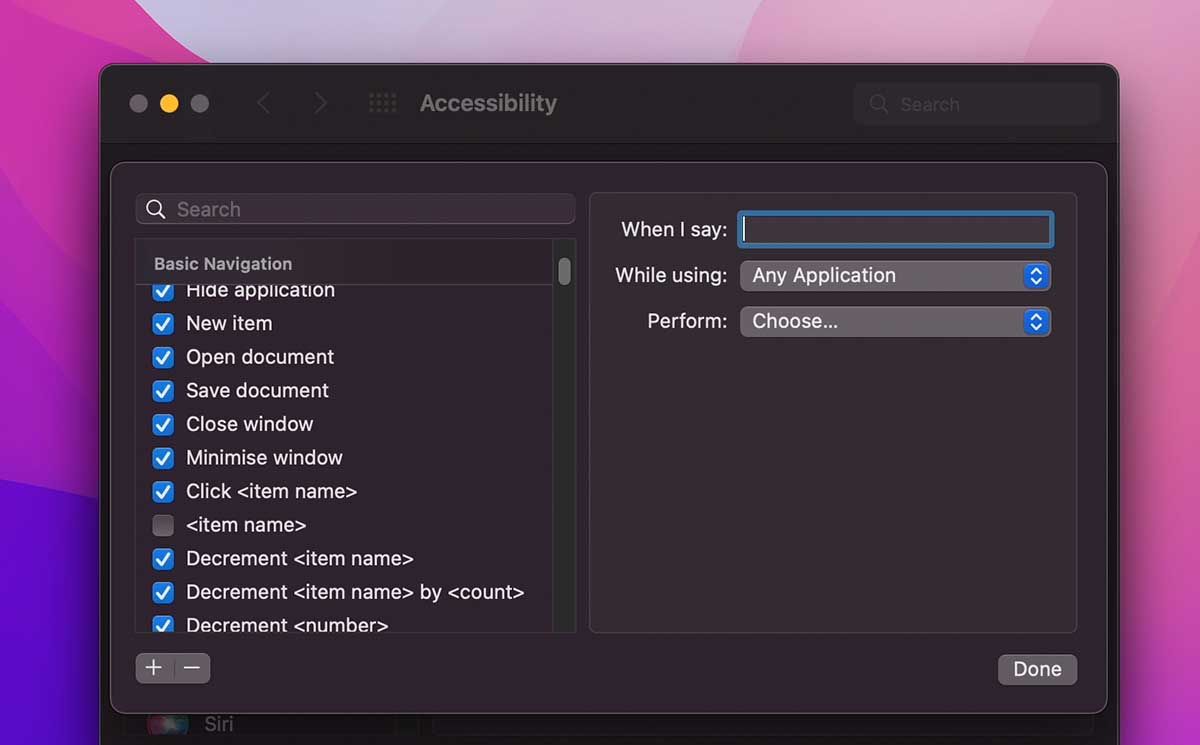
You can also add your custom commands to Voice Control by going to Voice Control > Commands and clicking the add (+) button in the bottom-left corner. To add your custom command, you need to input three things:
- When I say: Here, enter the command you want to say aloud to perform the action.
- While using: This is for the app you want to use the command for.
- Perform: Here, you have to pick the action you want that command to perform.
However, the tool for adding commands is limited in what it can help you with. From the Perform dropdown, you can see that there are only a few actions that you can do, like pasting text, opening a URL, and starting new recordings.
How to Add Your Own Vocabulary
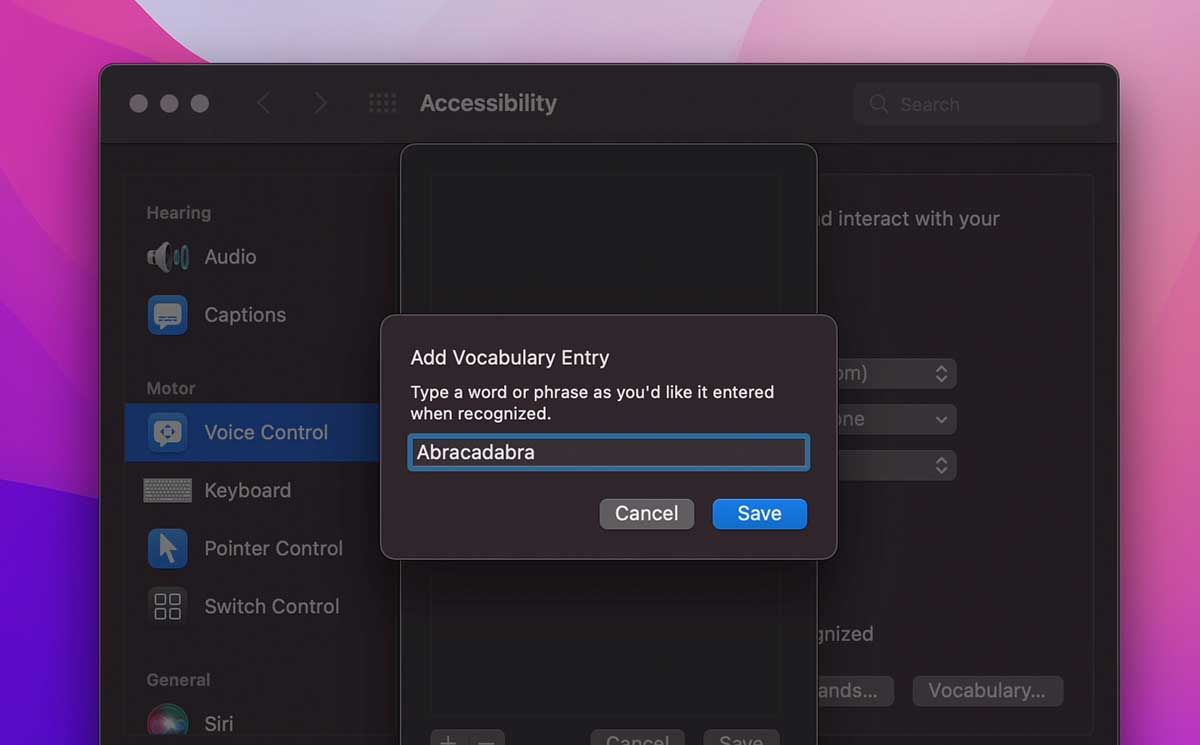
Adding your own vocabulary is an exciting feature. Not only can you add made-up words, but you can also later use those words in custom commands. So, for example, instead of a command that says “Paste item,” you can say “Abracadabra,” and Voice Control will paste your clipboard item for you.
To add your own vocabulary, go to Accessibility > Voice Control, and then click the Vocabulary button towards the right of the Commands button.
Then, click the add (+) button, type in your word, and click Save, to add the word to the list. Finally, click Save to save the list, and you’ve successfully added your word.
How to Add More Languages
You can use Voice Control in many languages. To add another language, go to Accessibility > Voice Control, click the Language dropdown in the center, and then click Add Language.
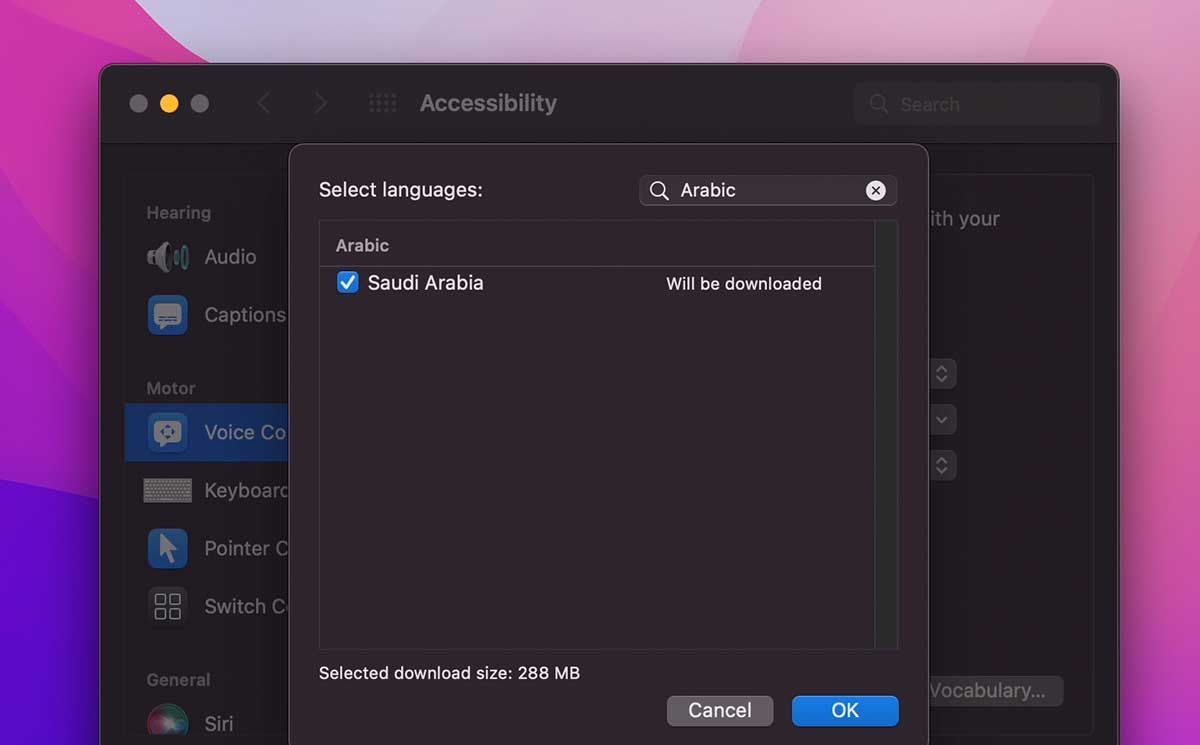
Instead of scrolling the list to check if your language is available, use the search bar at the top. If it is available, toggle the language, and the window will tell you the size of the language you want to add (which will be downloaded). Click OK to download and add the language.
You can switch to other languages using the same dropdown or the shortcut on the Voice Control’s microphone popup.
Using the Overlay Feature
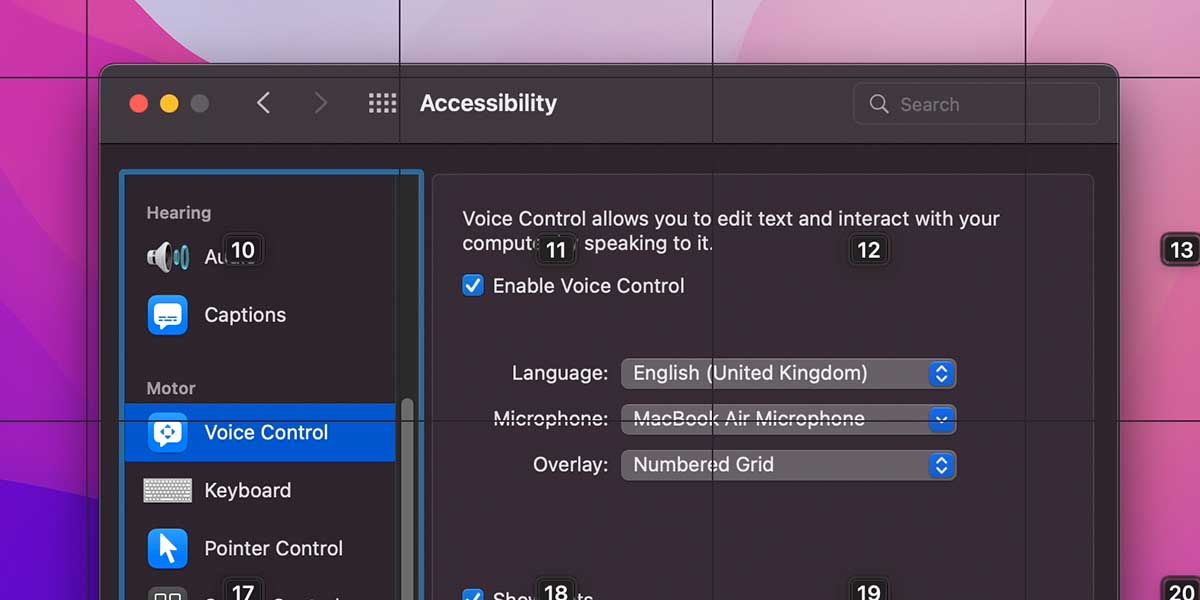
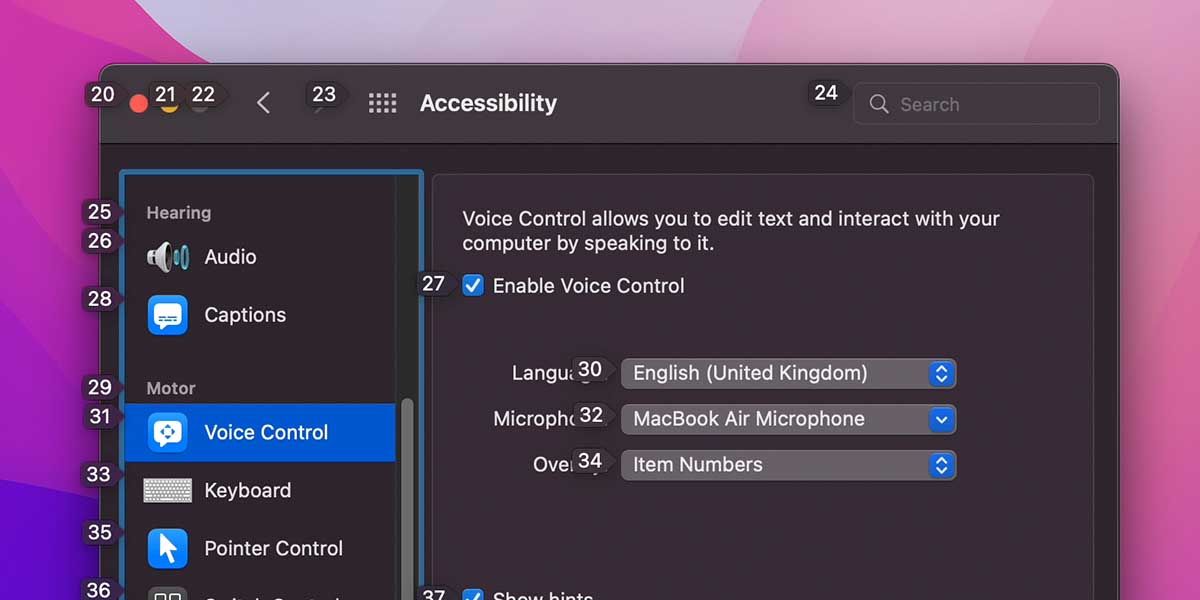
The Overlay feature makes it easier to navigate and execute different commands when using Voice Control by dividing the elements on the screen into different parts.
You can either divide the screen into a grid.
Or, you can number each interactive element.
You can then use the commands under Overlays & Mouse from the commands list to navigate and perform different actions.
Showing the Menu Bar Shortcut for Added Ease
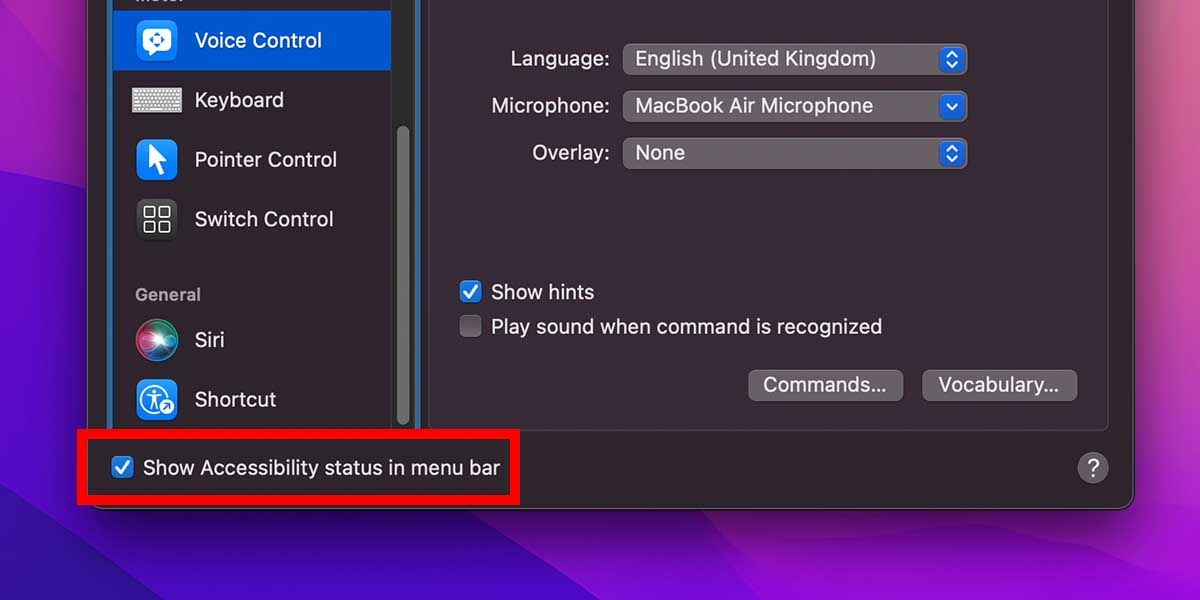
If you don’t want to constantly keep Voice Control (or any other accessibility feature) turned on, you can use the menu bar shortcut to toggle these features as needed.
To do this, check the Show Accessibility status in the menu bar option at the bottom of your System Preferences > Accessibility window. This will add the Accessibility icon to the menu bar, which you can use to interact with different features.
macOS Accessibility Features Are Incredibly Powerful
Apple’s Accessibility features are so powerful and intuitive that anyone can benefit from using them. For example, you can use Voice Control to boost your productivity when you’re multitasking by simply saying actions you want the system to perform aloud while doing something else.
But Voice Control isn’t the only exciting accessibility feature on the list. There are plenty of other macOS Accessibiltiy features to learn about, all of which could transform the way you interact with your Mac.


