Apple's MacBooks are great for working in a variety of places. You can bring them to cafes or to different rooms in your house to keep working.
If you don’t need to be mobile or have an iMac, working off of only one screen can be tricky, particularly if you use many large windows and tabs.
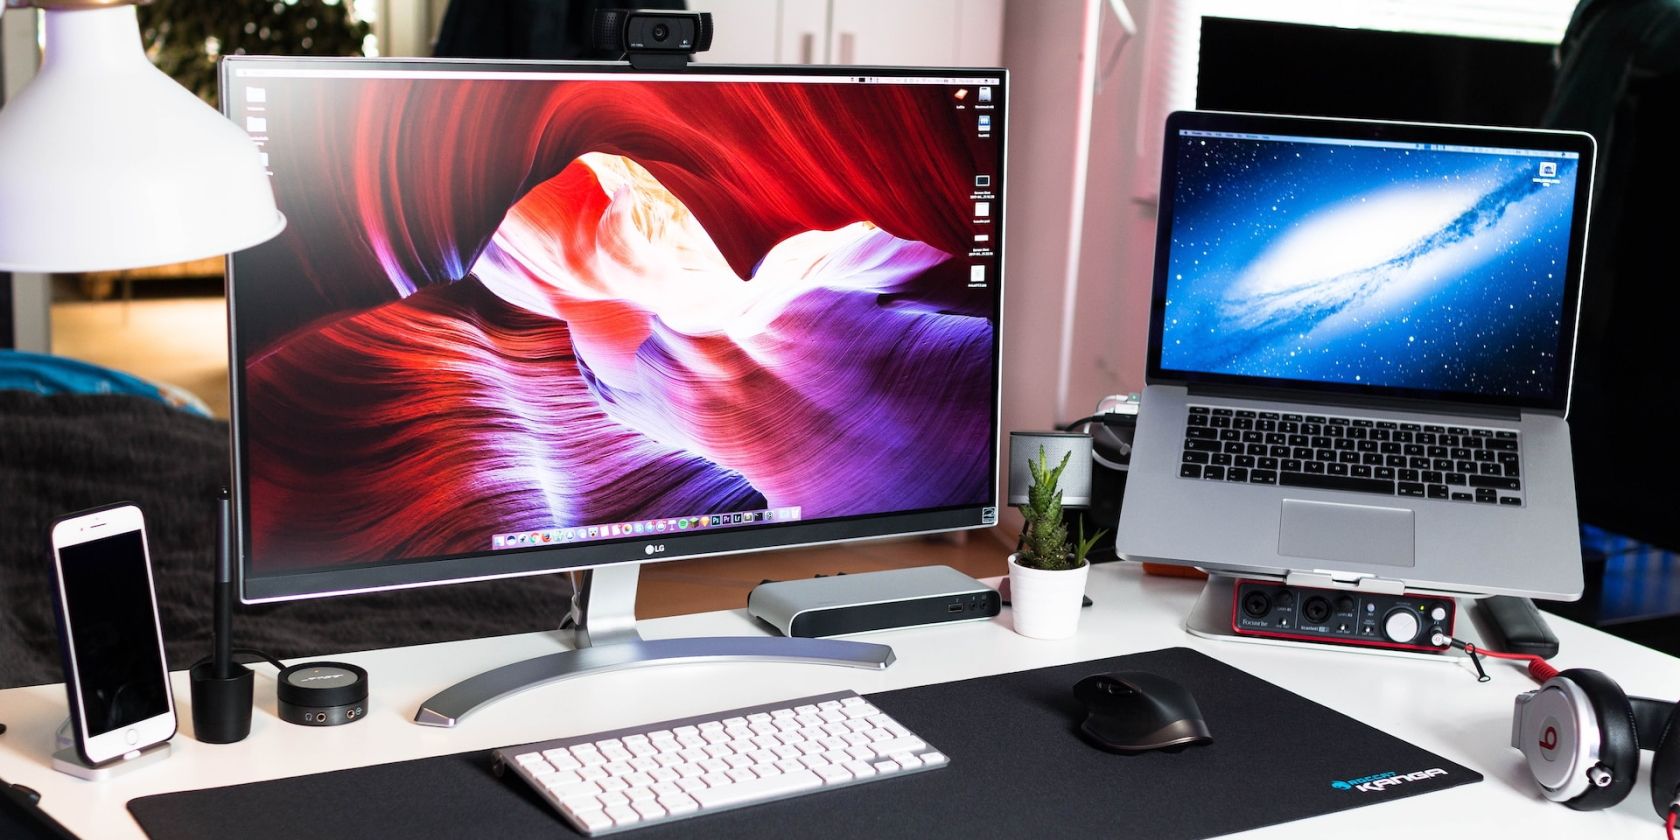
Fortunately, you can connect your Mac to an external monitor and get a second screen. We’re here to tell you how to do that and what to look for if you’re buying a monitor for your Mac.
Check the Ports on Your Monitor and Mac
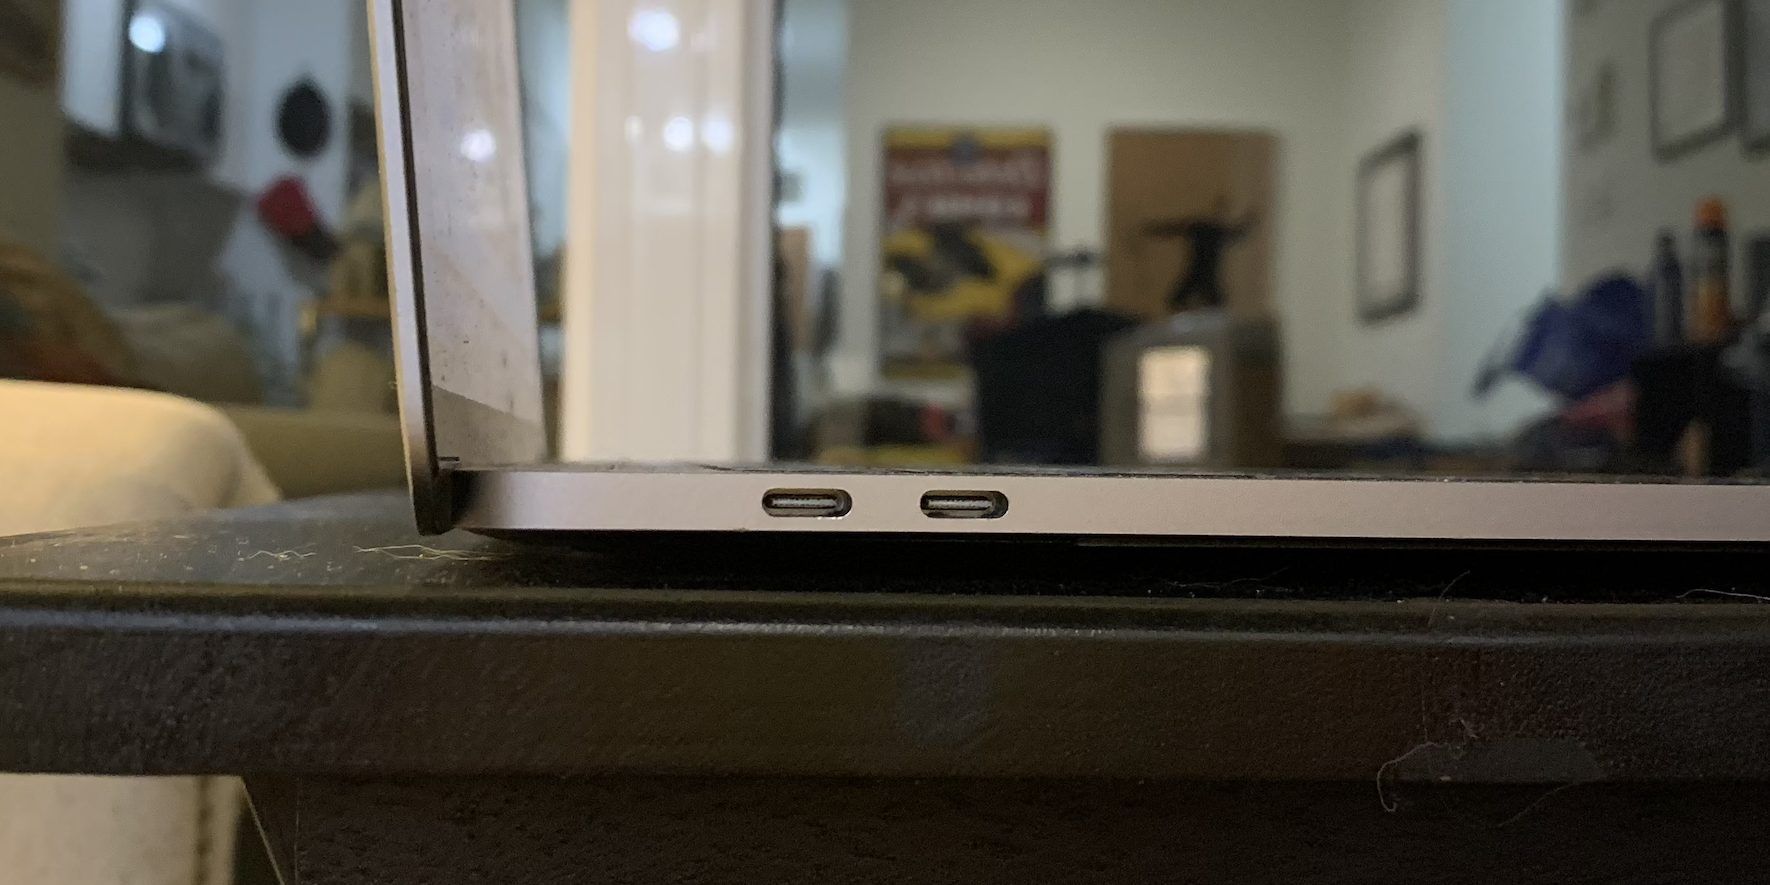
To connect a monitor to your Mac, you need to know what ports you’re working with. Most modern Macs have USB-C ports for connecting accessories and peripherals like a monitor.
Higher-end MacBooks, like the 14-inch and 16-inch MacBook Pro models, and desktop Macs, like the Mac mini, Mac Studio, and Mac Pro, also sport an HDMI port that's worth considering when you're trying to hook up a monitor.
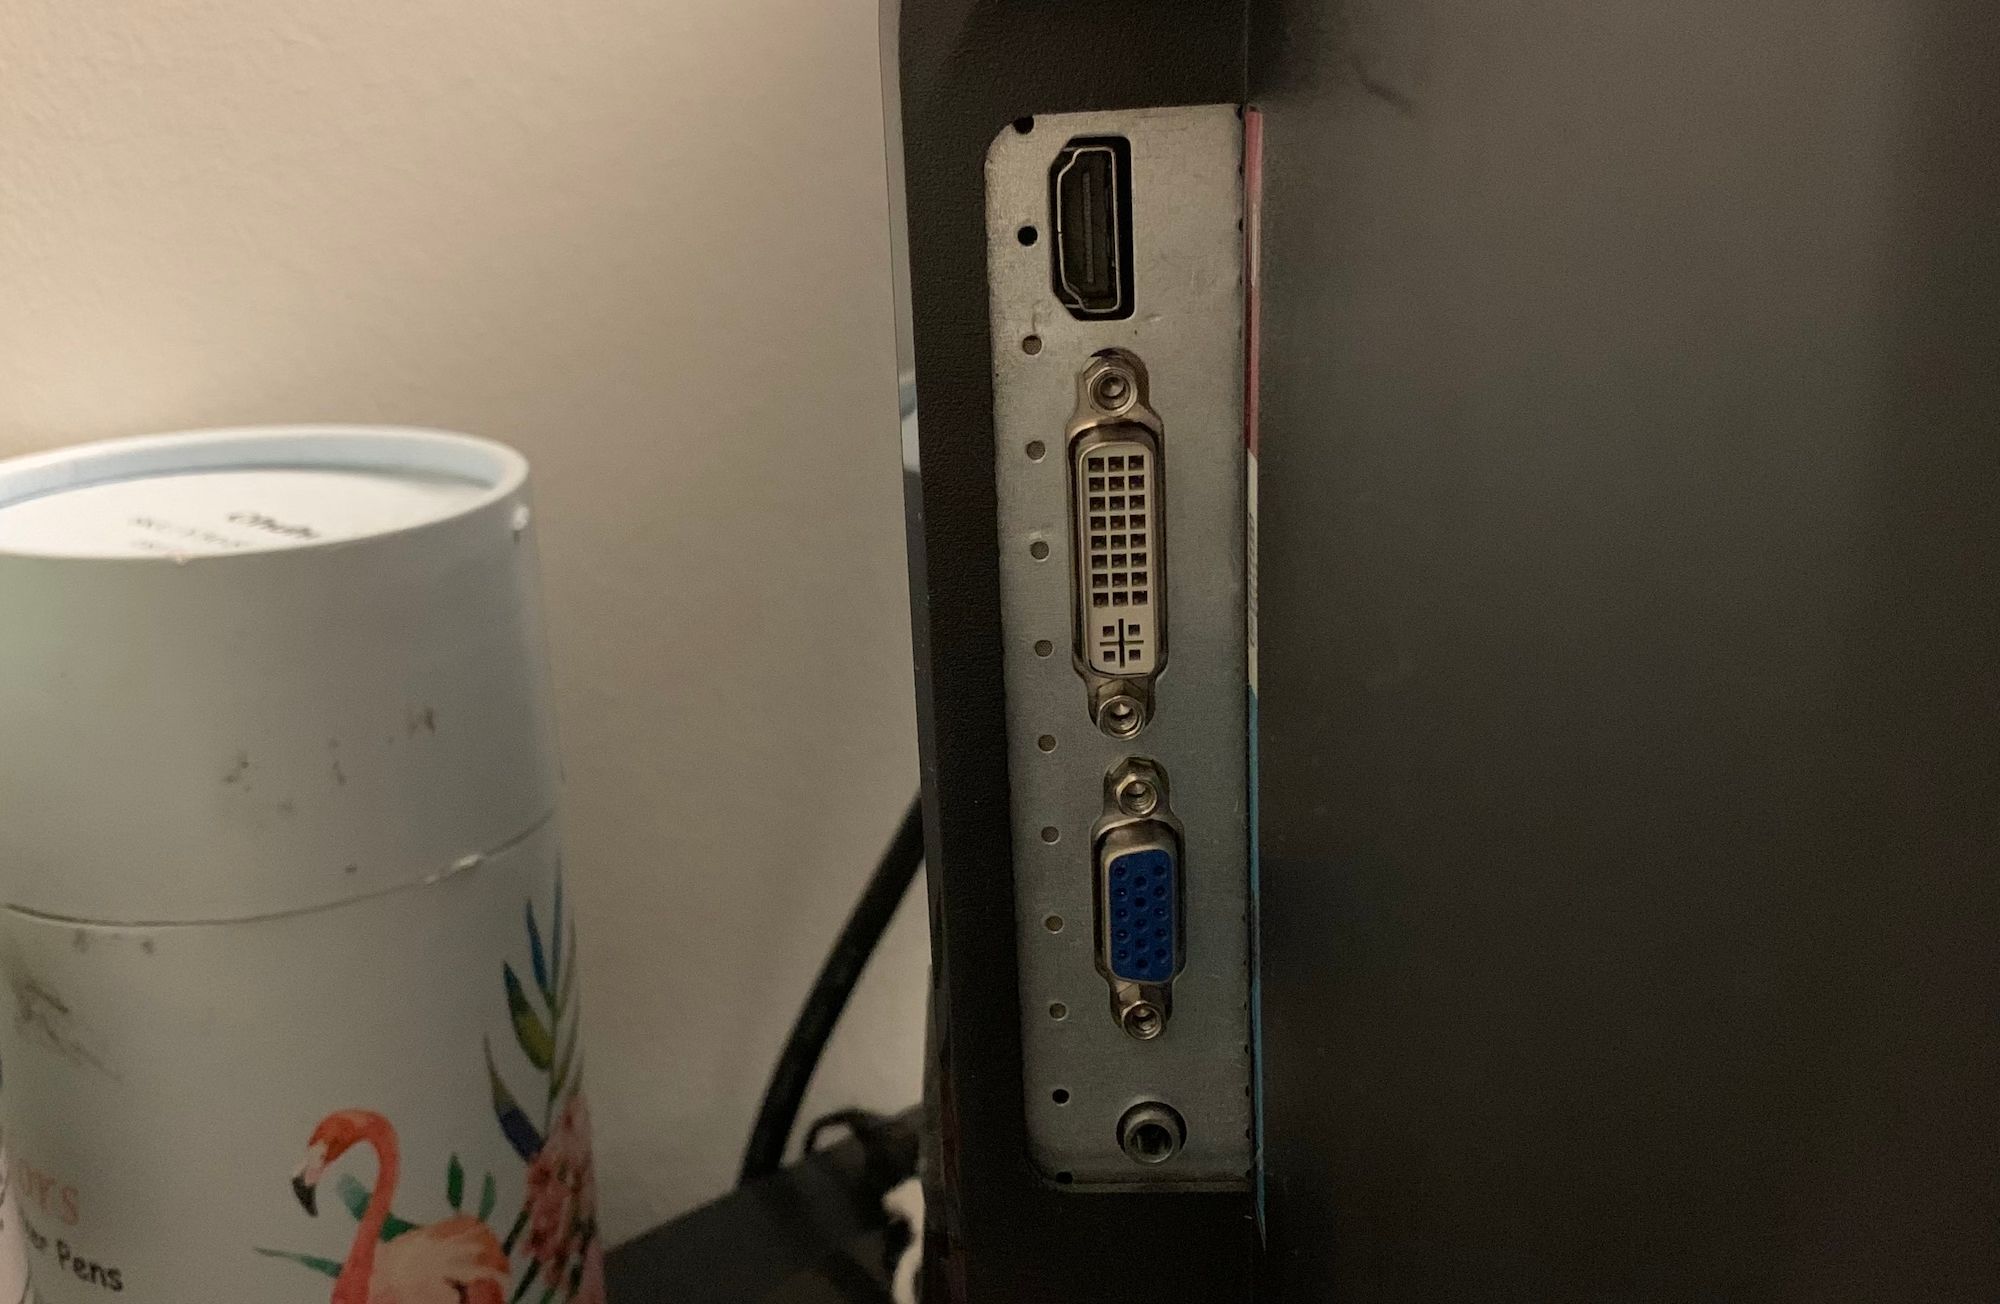
In terms of monitors, most modern ones will likely have HDMI ports for video input. Some monitors may sport DisplayPort along with USB-C ports, but this is less common than HDMI. An older monitor, on the other hand, may use a DVI or VGA port instead.
If you don’t have a monitor yet, we recommend getting one with the same ports as the ones on your Mac, as that really simplifies things this process and reduces how many cables and adapters you need.
Get the Right Cables and Adapters
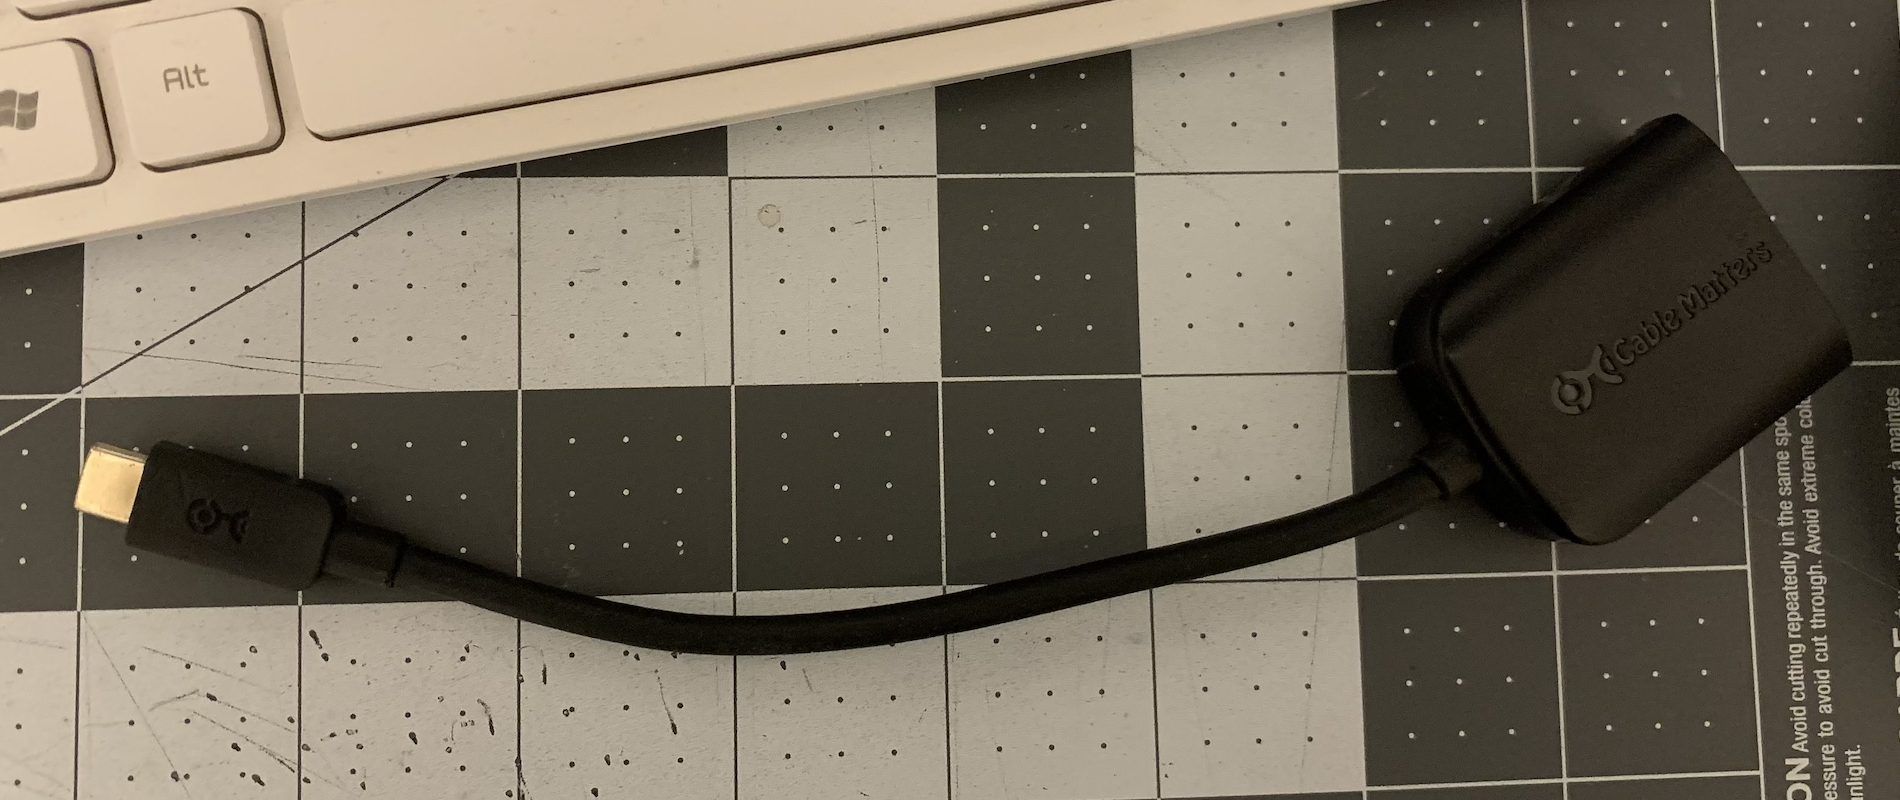
Once you know what ports you’re working with, you just have to buy the right video cables that fit them. In some cases, that’s as easy as just buying one cable. In other cases, you may also have to invest in adapters that allow you to plug one cable into two different ports.
You'll most likely need an adapter if your Mac doesn't have an HDMI port. Thankfully, HDMI to USB-C adapters are fairly common, and you can get them from the Apple Store or third-party retailers.
Make sure you consider the length of your cables before you buy them. Generally, it’s better to get something long, as you’ll be able to move things around a desk or table more easily. You can also rearrange things when you need to.
It’s also much less of a headache to cover up or tuck away long cords than working with cables that are too short to comfortably connect two machines. Shorter cables may pull themselves free; long cables won’t do that!
Plug Everything In and Adjust Your Settings
Once you know your ports and have the appropriate cables ready, the next step is to plug the cables in and start using your monitor with your Mac.
First, make sure your monitor has its power cord plugged in and is turned on. Then, plug the cable you’ll be connecting to your Mac into the monitor.
On a desktop Mac without a built-in display, you shouldn’t have to do more than plug in the cable (or the cable with an adapter). At that point, your screen will blink black for a second, and your monitor screen should turn on.
If it's a MacBook or iMac, you'll see a continuation of your built-in display. Depending on where you’re setting up your monitor relative to your laptop—to the right, left, or even above or below it—you’ll want to adjust how your screens work to mimic what’s happening in real life.
If your MacBook thinks the monitor is to the right when it’s really to the left, you’ll still have to move your cursor all the way to the right to get over to the monitor. This can be disorienting, and it definitely hurts your workflow if you move between the displays a lot.
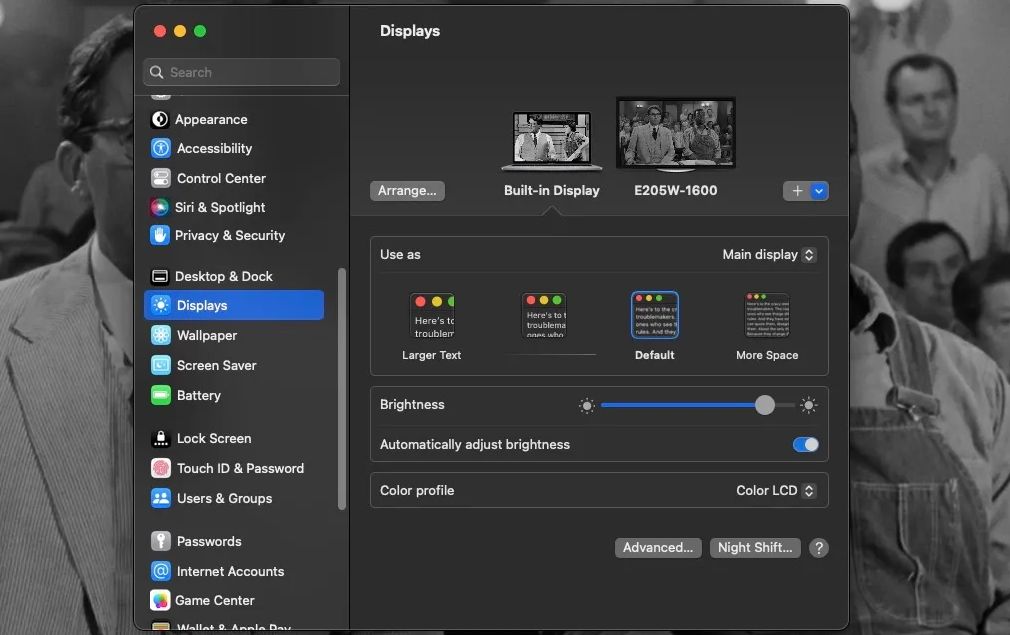
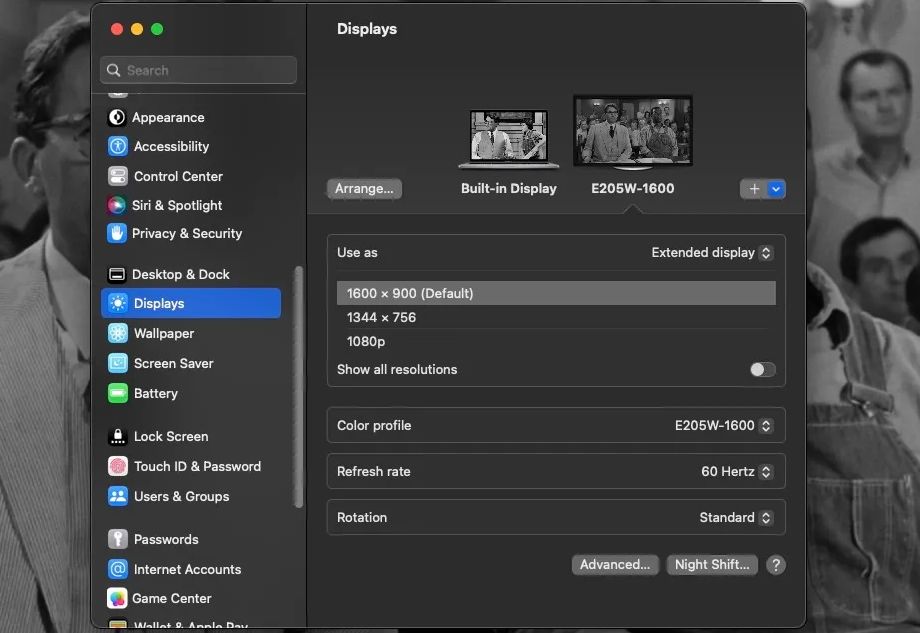
To fix or avoid this, head to System Settings > Displays. You’ll see your Mac's built-in display and the external monitor listed in the window as two tabs. You can click on each of them and adjust their brightness and color profile.
You can also set your external monitor's resolution, rotation, and refresh rate and adjust the overall text size depicted in your built-in display.
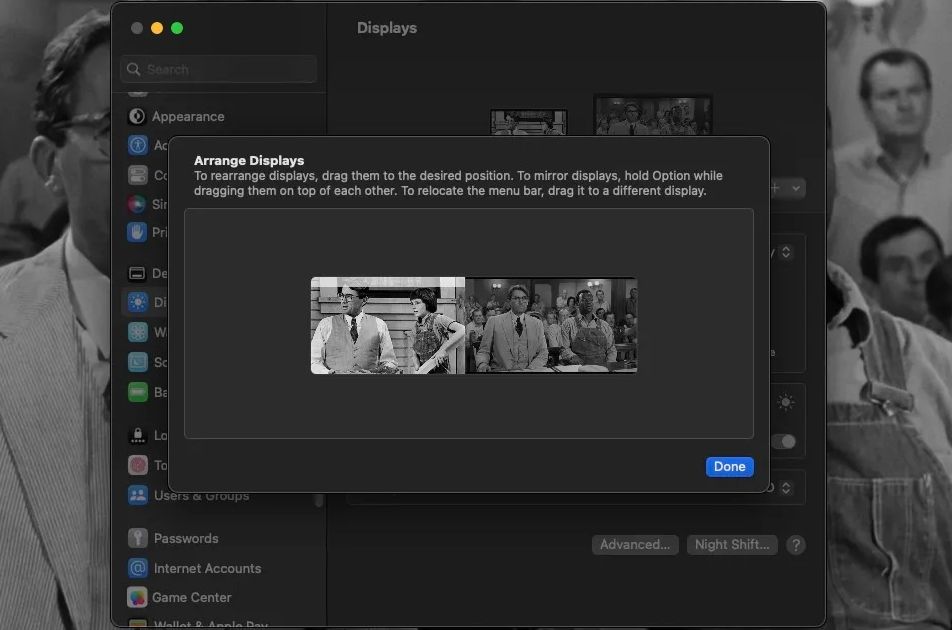
To change the arrangement of your Mac's built-in display and your external monitor, click the Arrange button below the display previews. Then, click and drag the two boxes that represent your Mac's display and the external monitor so that they are positioned to match how they look beside each other in real life.
When the windows are in the correct positions, click Done. While in the Arrange Displays window, you may notice that one screen has a white bar at the top and the other doesn’t. This bar determines which screen is the “main” display, which is the one that displays the Dock and notifications as you use your Mac.
To change which screen is the main display, click and drag the white bar onto whichever display box you’d prefer it to be.
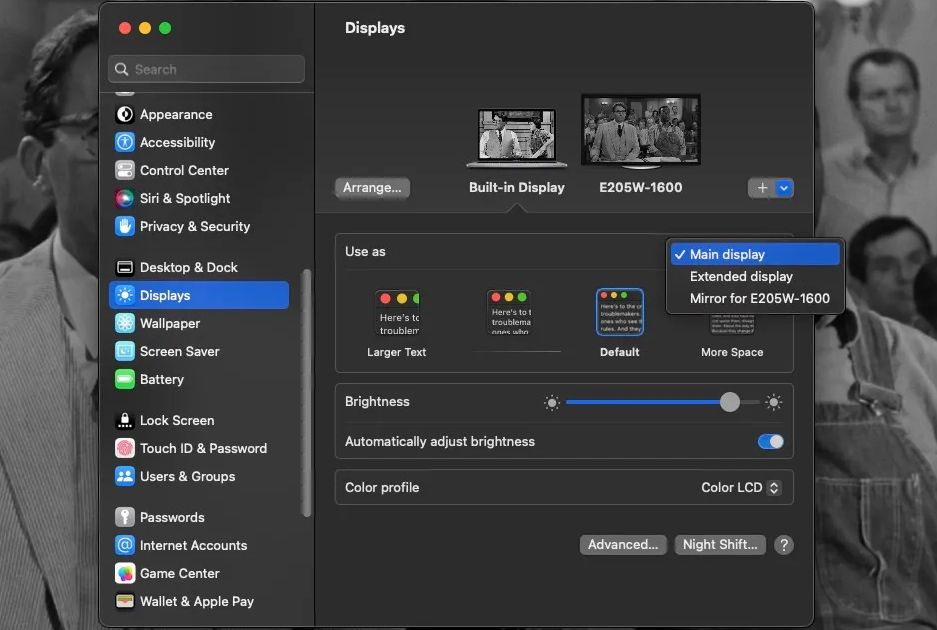
You can also change the main display from the Displays window. Under the Built-in Display tab, click the dropdown next to Use as and select Main display or Extended display.
You can also select Mirror For [External Monitor name] from this dropdown, but this stops your external monitor from acting as a continuation of your Mac's built-in display. Instead, it shows an exact copy of your Mac's screen.
However, mirroring your primary display is perfect if you’re plugging your MacBook into a TV or projector display and giving a presentation. With a computer monitor, though, it’s probably best to select it as your main or extended display and use the larger workspace the monitor creates for you.
Fixing an External Mac Monitor
If your external monitor stays black or says “no connection detected” after being plugged into your Mac, make sure your cables are fully plugged into their ports. If they are, try unplugging them and plugging them back in again. It can be worth plugging cords into other ports if you have a few of the same kind on either device.
Still not connecting? Try using a new cable to connect your Mac to an external monitor. You can also try straightening out your original cable in case the bends in it are causing issues.
If your Mac says you have a monitor connected, but the monitor is still dark, hit the monitor’s power button to see if that’s the issue. Also, try pushing any buttons on it that increase its brightness.
As simple as it is, unplugging the monitor’s power cord and plugging it back in again can also fix issues. And if you can test the monitor with another laptop or a PC to ensure the monitor is functional, that’s good too.
Using a Monitor With a Mac Is Easy
Macs (and monitors) come with different kinds of ports, depending on their model. Once you understand that and have the appropriate cables and adapters, all you have to do is plug them into each other to start using two screens at once.
It doesn’t have to stop there—you can connect to two monitors simultaneously or even more. But even just one extra screen can make work and play so much better, so we hope you get yourself a monitor and use your Mac more than ever.

