If you're using a 3D printer, you know that keeping the bed clean is essential for producing high-quality prints. If the bed isn't clean, your prints will be covered in streaks and smudges, which can ruin the overall look of your project. The steps below will show you how to clean your 3D printer bed quickly and effectively.
What Is a 3D Printer Bed?

A 3D printer bed is a platform where the 3D object is built. It is made of glass, metal, or plastic. Each layer is bonded to the previous layer in the bed during 3D printing. The 3D printer bed must be clean and level for the object to be printed correctly, but if it’s not, you will experience first layer woes, and the object will be printed with distorted layers.
Most 3D printers have an automatic bed-leveling feature that makes it easy to keep the print bed level. Some 3D printers also have heated beds that help prevent filament warping during printing. Having looked at what a 3D printer bed is, let’s now look at what you need to have to clean it.
What You'll Need

Depending on your build plate's material, you need various things to clean your 3D printer bed. Here we will use a metal 3D printer bed to demonstrate how it’s cleaned. Below are the primary materials required:
- Isopropyl alcohol (IPA). Ensure the IPA is at least 99% pure—anything less won't be effective.
- A lint-free cloth—you can also use a pocket tissue or cotton wool.
- You'll also need something to scrape off any stubborn bits of a filament—a putty knife, or credit card works well for this.
- Painter's or masking tape is also necessary. Just use the low-tack variety so it won't damage your print bed.
Once you have all the materials, you can proceed with the cleaning process.
Step 1: Remove Any Debris or Dust on the Bed

You can remove debris or dust from the bed's surface using a brush or vacuum. If the dirt is clinging to the bed in clumps, you can use a brush, but a vacuum is helpful if the debris is spread more evenly across the bed. If debris is stacked below the bed, you can unscrew it completely, remove anything that might be stacked, and return it later.
To remove the bed, use a screwdriver to loosen the four screws on each corner. But remember that you will need to level your build plate after removing it because some materials like PLA can be difficult to stick to the bed if it's not level enough. Also, exercise caution so you don't damage the bed
Step 2: Apply Isopropyl Alcohol to the Cleaner

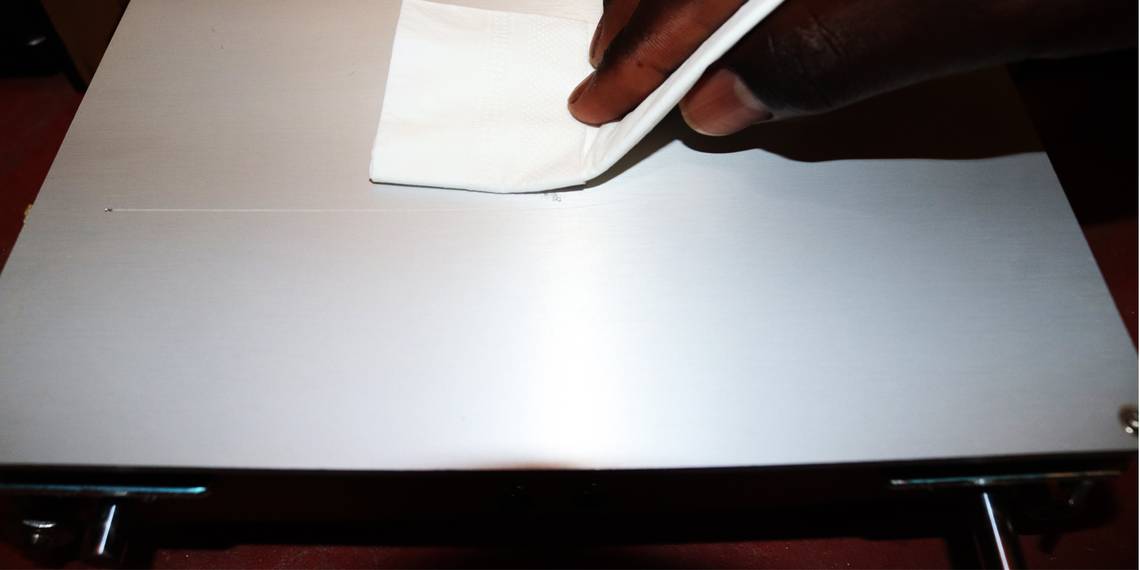
Take a lint-free cloth and dampen it with isopropyl alcohol. You can also use a cotton swab or a pocket tissue to do this job. To start cleaning, gently wipe down the entire surface of the build plate in a circular motion. This will remove residual oils and/or fingerprints and leave the build platform ready for your next print.
Once you're done, remove any residue with a dry, lint-free cloth. It's essential to ensure the build plate is completely dry before using the 3D printer again. Any water or alcohol left on the surface could cause the filament not to stick correctly, resulting in poor print quality.
Step 3: Clean Further With Masking Tape

During the printing process, 3D printers often leave behind a trail of excess material, which can be challenging to remove, especially in the heated build plate that forms the base of the printed object. Even after cleaning using the two steps above, removing the excess materials attached to the 3D printer bed can be a tough job, and that’s where the masking tape comes in now.
The tape will adhere to the build plate and help lift any remaining bits of material. To use the tape, simply apply it to the build plate and then peel it away. With a bit of patience, you should be able to remove all the excess material and leave your build plate clean and ready for the next print job.
Step 4: Wipe the Bed
After you have cleaned your 3D printer bed, it is important to wipe it with a dry cloth. This will help remove any residue left behind from the cleaning process.
Wiping the bed with a dry cloth helps prevent static electricity build-up which can damage sensitive electronic components. It also ensures the surface is adequately prepared for the next printing job.
Tips for Cleaning a 3D Printer Bed
A few more handy hints to help you keep your printer bed clean:
- Use isopropyl alcohol and a lint-free cloth. Avoid using abrasive materials like sandpaper, which can damage the build surface.
- If there is a stubborn residue that won't come off with alcohol and tape, you can try soaking the build plate in acetone overnight. However, be sure to ventilate the area well and take care not to damage any other parts of the printer.
- Rinse the bed off with water and dry thoroughly before printing again.
- Clean the bed regularly. This ensures that your prints are always coming out correctly and that your printer will last longer.
- It's also essential to clean the nozzle regularly. You can do this with a brass wire brush or needle, but be careful not to damage the nozzle opening.
- Use a soft cloth or brush to remove dirt or debris from the bed's surface.
- Once you've cleaned the bed, applying a thin layer of adhesive is vital before printing anything on it. This will help ensure that your prints adhere properly.
Get Quality Prints With a Clean Bed
Cleaning a 3D printer bed is essential for optimal printing results. If the bed is not cleaned, prints may be lower in quality or have imperfections, and the bed itself may become damaged over time if it is not cleaned correctly. Following the above steps will ensure your build plate is clean, and you won’t have a failed print due to a dirty 3D printer bed.