So you're trying to put an image in a strategic position, but Google Docs won't have any of it. By default, it will only let you move the image to specific positions in line with the text.
This is usually the case with Google Docs, but you can change that. All you need to do is to change the text-wrapping settings of the image and change how it behaves when confronted with text.
In Google Docs, all images are set to inline with text in their text wrapping settings by default. This means that the only place you can put your images is in the lines, between the letters. You can change this setting, and place your image in any spot on your document that you want. Read on to find out how!
Image Wrapping in Google Docs: What Are the Options?
Image wrapping settings in Google Docs are similar to those in Microsoft Word. There are five image wrapping settings in Google Docs:
- Inline with text: The default setting. With this setting, your image's position is limited to where the letters are. You can place your image after any letter in the lines.
- Wrap text: This setting allows you to put your image anywhere in the document. However, if you put it in the middle of a paragraph, it will wrap the paragraph to make space for the image. You cannot put the image in front of a text with this setting, as it will wrap the text.
- Break text: You can position your image anywhere in the document with this setting as well. The difference between this setting and Wrap text is that it will break the lines and move them to make space for the image. It won't change the space between the words as Wrap text does.
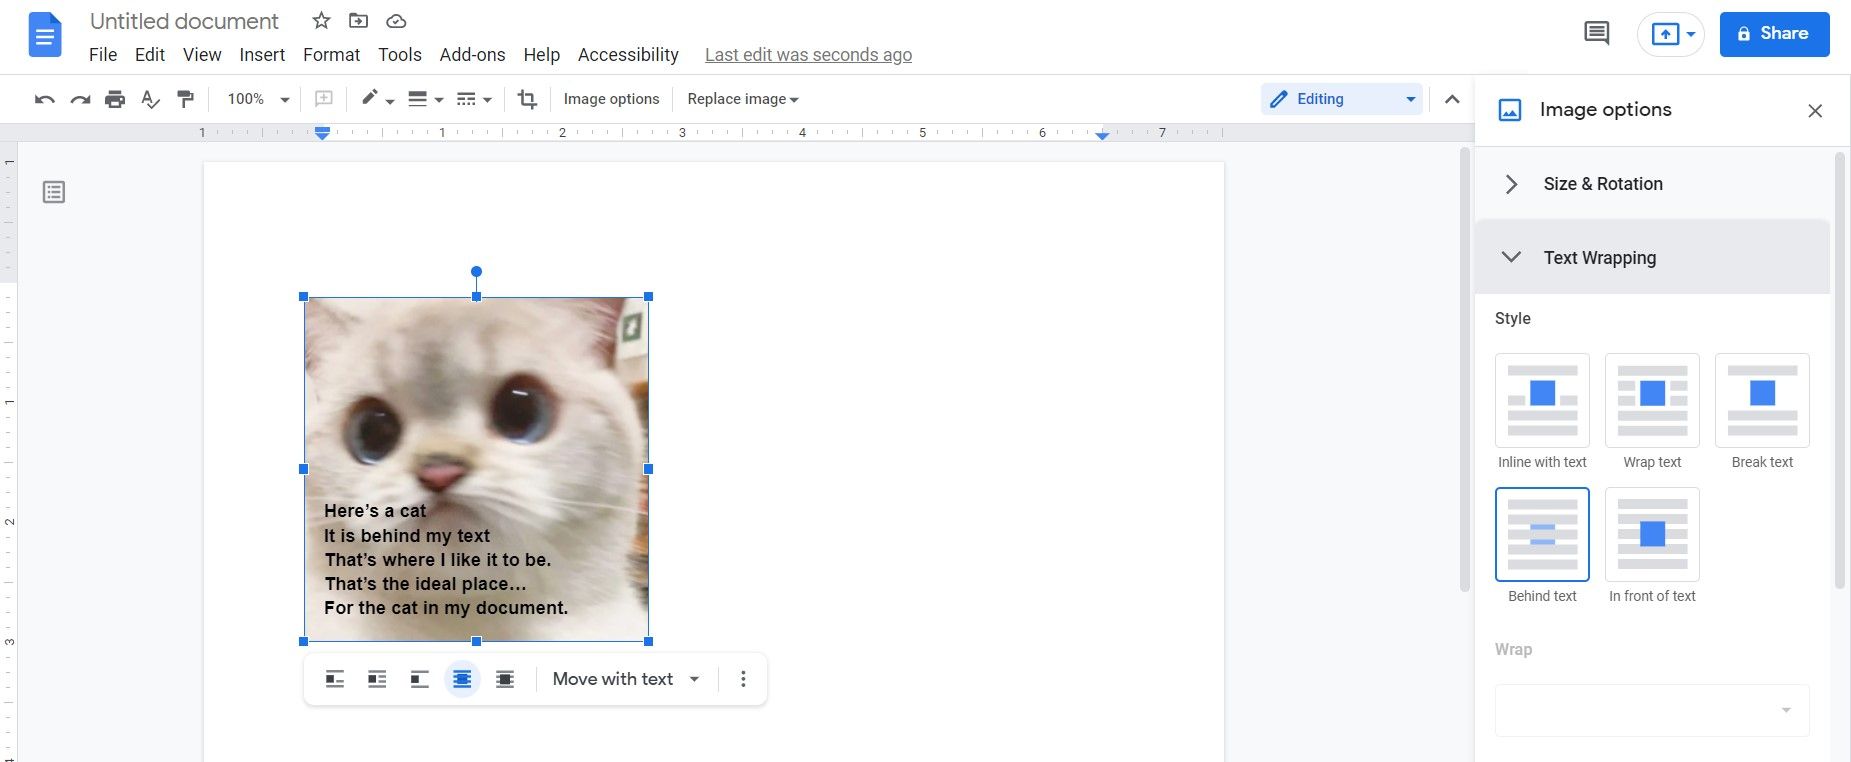
- Behind text: This setting will put the image behind the text. This allows you to place the image anywhere you like, but if there's text in the same spot, the image will go behind the text.
- In front of text: Similar to Behind text, this setting lets you place the image anywhere in the document, even where there is text. If you position the image on a text, the image will go in front of the text.
How to Change the Image Text Wrapping in Google Docs
Suppose you have a text and an image in a Google Docs document, and you want to put the image behind the text. To do this, you need to change the text wrapping to Behind text. Let's see how it's done.
- Select the image.
- Right-click the image and then click Image options. This will bring the Image options menu.
- In Image options, go to the Text Wrapping tab. You can see the different text wrapping settings here.
- Select Behind text.
- Move your image behind the text by grabbing and dropping it where you want. Tada!
You can also access the text wrapping settings by simply clicking the image. The text wrapping settings will appear under the image.
Put Your Image Where You Want in Google Docs
If you're a Google Docs newbie, you might think that positioning your image is a vex, as you're forced to put it in line with your text. But you can easily change that through the text wrapping settings.
Now you know how to put your images wherever you want in your Google Docs documents. There's more you can do with images though, and there's no better time to learn than now.


